 (208) 991-3502
 Meridian, ID



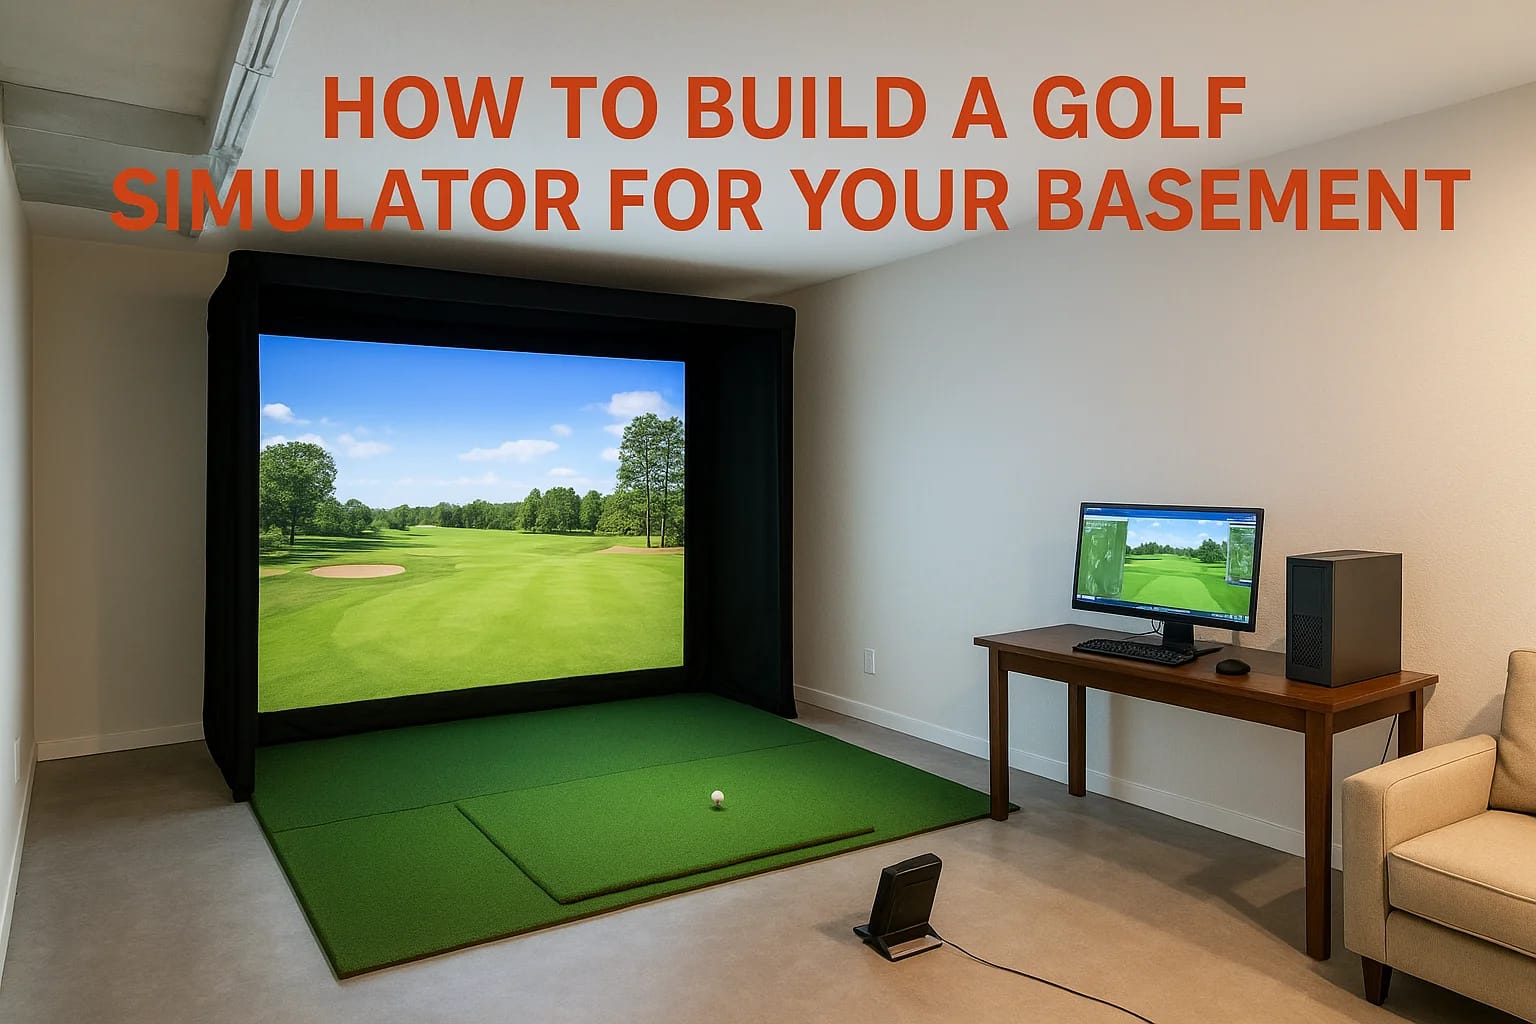

You have got a basement, a set of clubs you barely use in winter, and a nagging idea that a golf simulator for basement installation could actually work. It can, but only if you plan it right. Ceiling...
You have got a basement, a set of clubs you barely use in winter, and a nagging idea that a golf simulator for basement installation could actually work. It can, but only if you plan it right. Ceiling height, screen distance, hitting mat placement, and cable runs all matter more than the flashy launch monitor you saw online.
This guide walks you through exactly what a basement golf simulator build requires, from minimum space dimensions to realistic budget ranges, so you can figure out if your space works before you spend a dollar on equipment. We cover ceiling clearance, enclosure sizing, flooring, lighting, and the technology that actually makes a simulator playable instead of frustrating.
At Treasure Valley Solutions, we design and install custom AV and automation systems for homeowners across Meridian, Boise, and the greater Treasure Valley, and simulator rooms have become one of our most requested projects. We know where basement builds go wrong, from low-hanging ductwork to underpowered projectors, and we will show you how to avoid those mistakes and get a setup you will actually use.exposing you to real examples along the way.
What you need before building a basement golf simulator
Before you order a launch monitor or start measuring for a screen, get honest about four things: space, budget, equipment, and utilities. Skipping this groundwork is the number one reason basement golf simulator builds stall halfway through or end up cramped and unusable. Treat this section as your pre-build checklist, not a shopping list.
Minimum space and ceiling height
Your basement needs to hit certain minimum space dimensions before anything else matters. Most simulator setups need at least 10 feet wide by 15 feet deep, with 9 feet of ceiling height being the safe number for a full swing with a driver. Some golfers get by with 8.5 feet if they play mostly irons or use a low-profile enclosure, but anything under 8 feet forces compromises on swing plane and club selection.
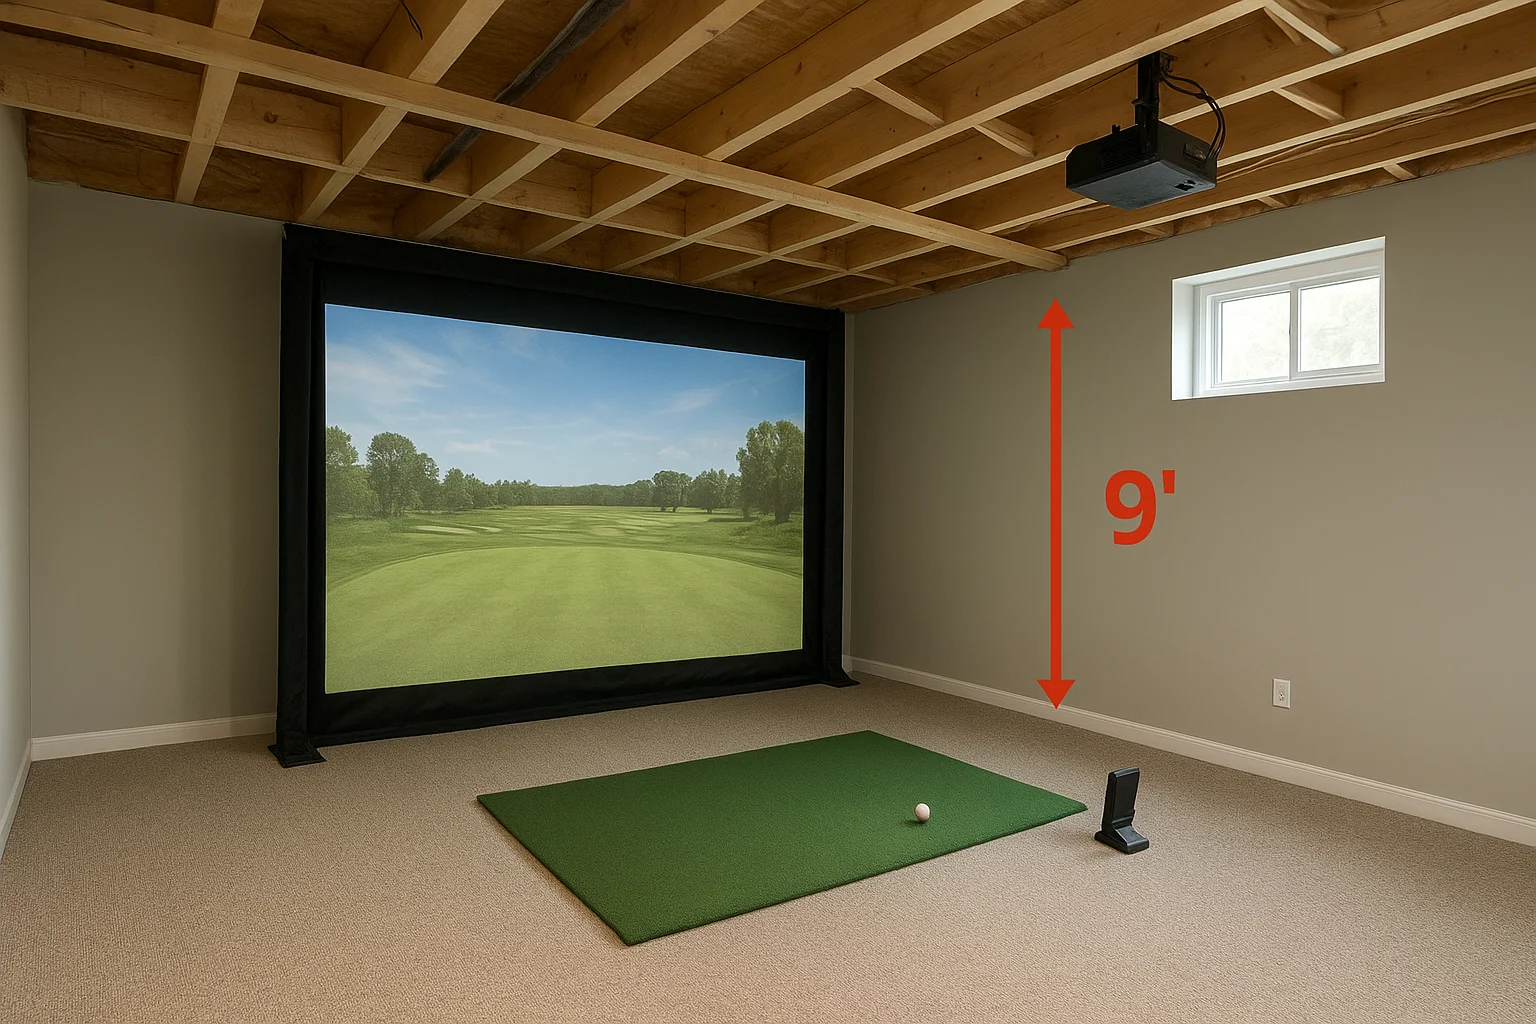
If your ceiling clears 9 feet and your room runs at least 10 by 15, you can build a simulator that plays like the real thing.
| Room element | Minimum | Comfortable | Ideal |
|---|---|---|---|
| Ceiling height | 8'6" | 9'0" | 10'0"+ |
| Room width | 10' | 12' | 14'+ |
| Room depth (mat to screen) | 12' | 14' | 16'+ |
| Distance behind golfer | 3' | 5' | 7'+ |
Budget you should plan for
Costs swing widely depending on how much of the room you finish and how good a launch monitor you want. A bare-bones setup with a used projector, DIY screen, and entry-level monitor can run $3,000 to $5,000. A fully finished room with professional installation, a quality enclosure, and a mid-tier launch monitor typically lands between $10,000 and $20,000. High-end builds with premium monitors like a Trackman or Foresight unit, custom cabinetry, and full acoustic treatment can exceed $30,000. Knowing your ceiling number before you start shopping keeps you from falling in love with equipment your space can't support.
Core equipment checklist
Every simulator, regardless of budget, needs the same core components. Gather quotes and check compatibility before demo day so you're not improvising mid-project.
- Launch monitor or sensor system (camera-based or radar-based)
- Impact screen rated for your ball speed
- Hitting mat with a strike zone that matches your swing type
- Projector with enough lumens for your ambient light levels
- Enclosure or netting to contain errant shots
- PC or laptop capable of running simulation software
- Simulation software license (E6 Connect, GSPro, or similar)
Utilities and access
Finally, check what your basement already has and what it's missing. Electrical outlets near the hitting bay matter, since you'll be powering a projector, PC, monitor, and often a mini fridge or sound system in the same corner. Confirm your internet reaches the room reliably, because most simulation software needs a live connection for updates and course downloads. Look up at your ductwork, sprinkler lines, and support beams too. These low-hanging obstacles are often the real ceiling height problem, not the joists themselves. If you're unsure whether your space clears these hurdles, a quick walkthrough with a local integrator can save you from an expensive redo. At Treasure Valley Solutions, we run this kind of assessment for Treasure Valley homeowners before any equipment gets ordered, and it consistently catches problems a tape measure alone won't.
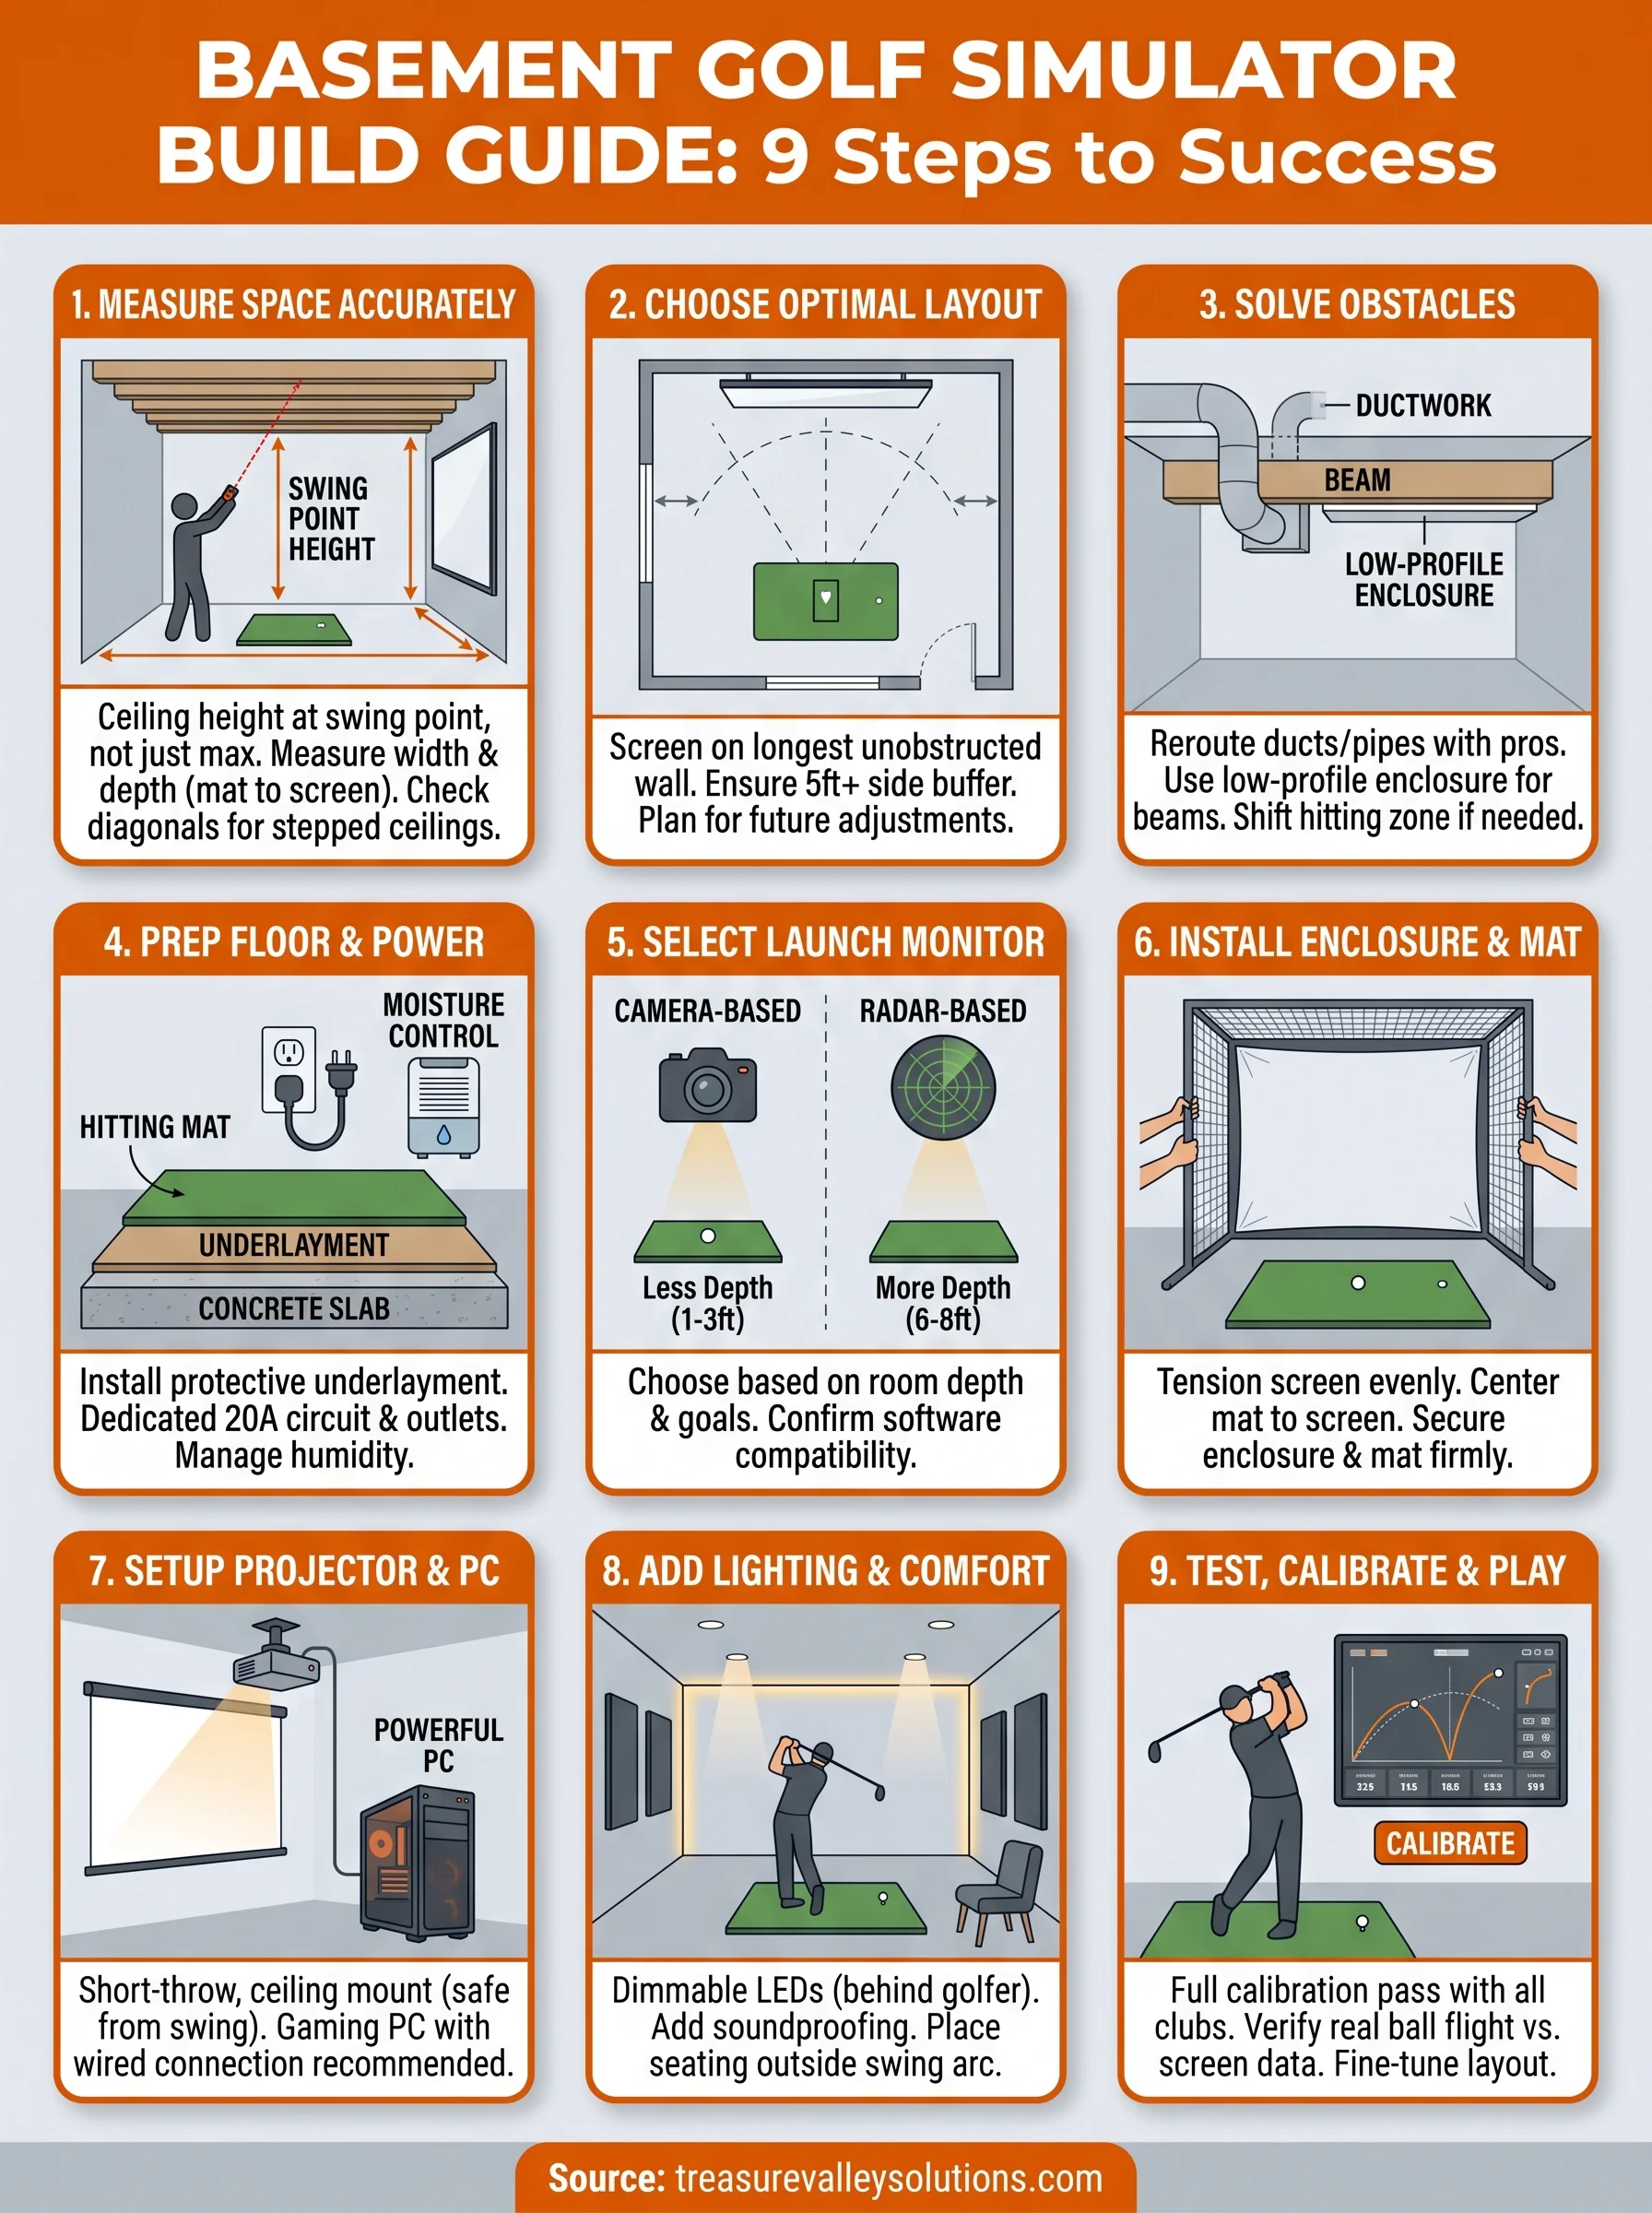
Step 1. Measure your basement and check ceiling height
Grab a tape measure or, better yet, a laser distance measurer, and start with the ceiling. Ceiling height determines everything else in your build, so measure it at the exact spot where you'll take a full swing, not just at the room's tallest point. Basements often have sloped ductwork, sagging joists, or a drop-ceiling grid that steals two to four inches you didn't account for. Stand where your hitting mat will go, hold the tape straight up, and record the lowest point within a three-foot radius of your swing arc.
Next, measure width and depth of the actual usable floor space, not the whole basement. Furnaces, water heaters, and support poles carve out real square footage, so work around them rather than assuming the room's total dimensions apply. Walk the space with painter's tape and mark out a rough 10 by 15 foot rectangle to see how it actually feels once support beams and doorways are in the mix.
A tape measure at the swing zone tells you more about your simulator's future than any spec sheet ever will.
What to measure and why it matters
Before you commit to a layout, run through this checklist and write down every number. You'll need these figures when you talk to an integrator or order a screen and enclosure kit.
- Ceiling height at swing point: measure with clubs in hand, arms extended overhead
- Ceiling height at screen location: projectors often need extra clearance for mounting
- Room width: measure wall to wall, then subtract space for any support poles
- Room depth: measure from where the golfer stands to the back wall behind the screen
- Obstruction locations: mark ductwork, sprinkler heads, and beams on a rough sketch
Don't skip the diagonal check
Many basements have a stepped ceiling where one section runs lower than the rest. Measure diagonally across your planned hitting area, not just straight up and down, since a driver swing travels through an arc that can clip a beam your vertical measurement missed. Recheck this diagonal path for both right-handed and left-handed swings if more than one person will use the simulator regularly. Skipping this step is how golfers end up with a chipped ceiling tile during their first week of play, a fix that costs far less time than replacing a cracked club shaft.
Step 2. Choose the best location and layout
Once you know your basement can support a golf simulator for basement build, pick the exact corner or wall where it will live. Walk your marked-out rectangle again and think about traffic flow, not just square footage. A simulator bay that blocks the path to the laundry room or water heater turns into a source of friction fast, and you'll end up dismantling part of the setup every time someone needs to grab a tool. Choose a spot where the hitting area, screen, and enclosure can stay permanently in place without interfering with the rest of the basement's function.
Orient the screen and hitting zone correctly
Decide which wall the screen goes on before you plan anything else, since that choice drives where the mat, projector, and side netting all land. Face the screen toward the longest unobstructed wall in the room so you get maximum depth between the mat and the impact surface. Avoid pointing the hitting zone toward a wall with a window, exposed pipe, or electrical panel, because even a well-built enclosure won't fully protect fixtures directly behind the screen.
Pick your screen wall first, and the rest of the layout falls into place around it.
Account for side clearance and swing arcs
A basement golf simulator needs more than depth. It needs side room too, especially if more than one golfer will use the space or if anyone in the household swings left-handed. Plan for at least 5 feet of width beyond the club's full extension on both sides of the hitting mat. This buffer keeps a driver swing from clipping a support pole, shelving unit, or stray water heater vent.
- Screen wall: longest unobstructed wall, free of windows or exposed utilities
- Hitting mat position: centered, with equal clearance on both sides for right and left-handed swings
- Side buffer: minimum 5 feet from club extension to nearest wall or obstacle
- Rear clearance: 3 to 5 feet behind the golfer for backswing and stance adjustments
- Walkway: keep at least one clear path to stairs, utilities, and storage that doesn't cross the hitting zone
Think about future adjustments
Layouts rarely stay static once you start actually playing. Golfers tend to shift a mat forward six inches after a few sessions, or realize the projector throw needs adjusting once the screen goes up. Leave a few extra inches of flex room in your layout rather than building right up to the minimum dimensions, since that margin makes small corrections possible without redoing electrical runs or flooring work.
Step 3. Solve for low ceilings and structural obstacles
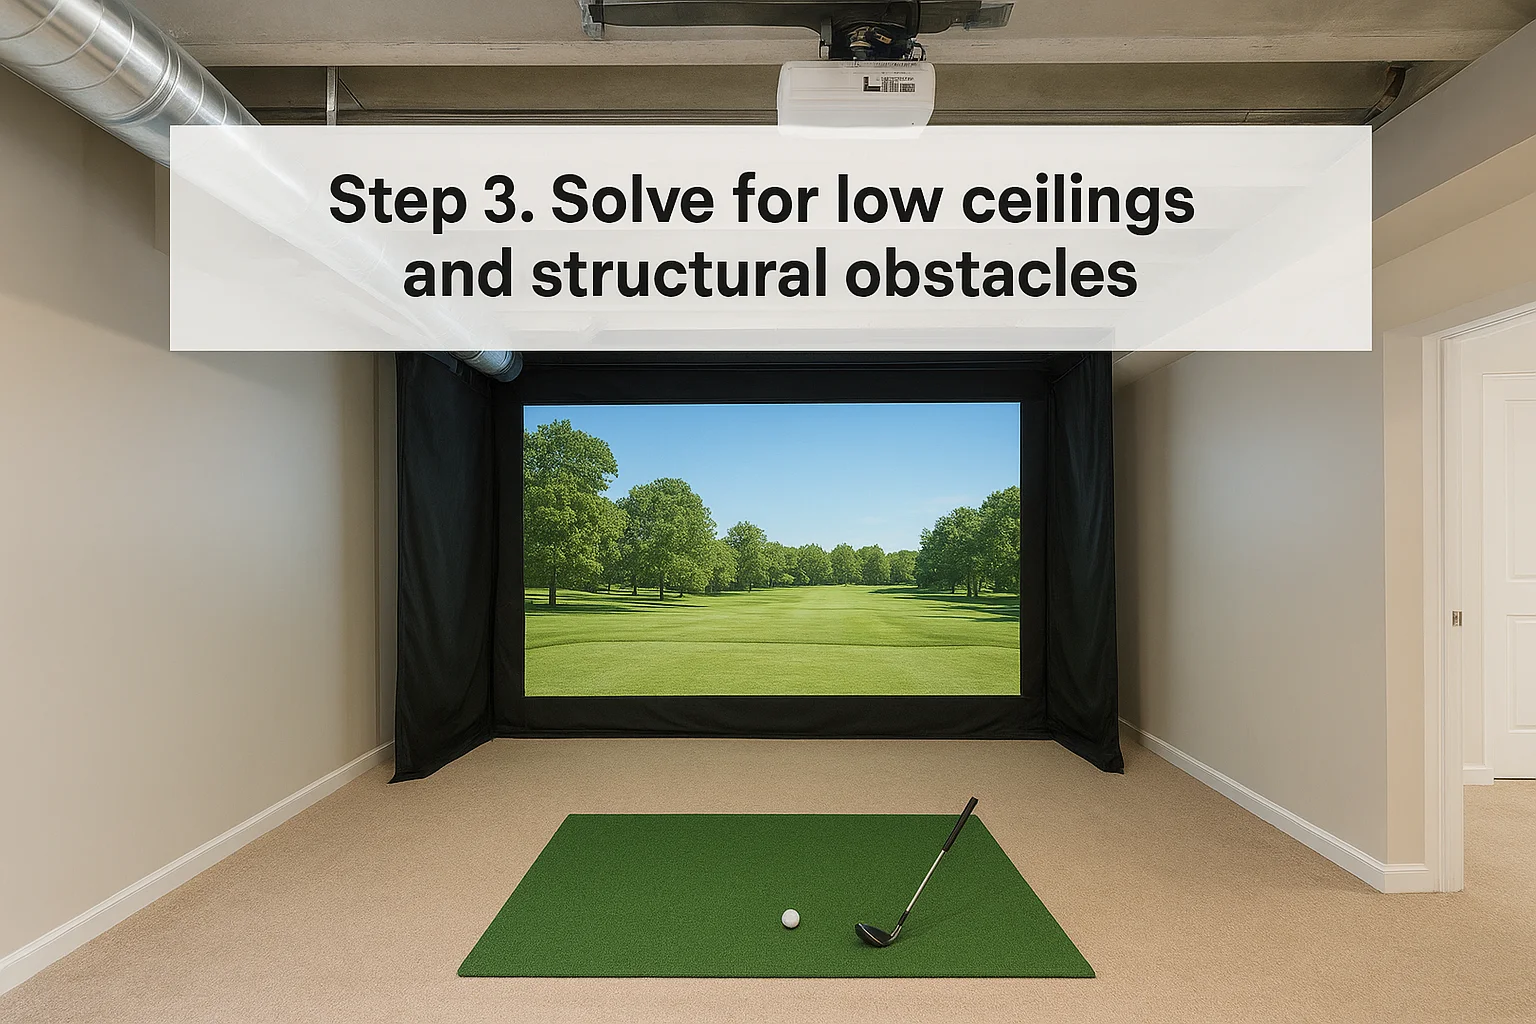
Most basements weren't built with a driver swing in mind, so you'll likely hit at least one obstacle standing between you and a full-height simulator bay. Ductwork, sprinkler pipes, and support beams are the usual culprits, and each one has a different fix depending on how much clearance you're actually short. Before you assume your space is a lost cause, walk through the options below, since a low ceiling golf simulator setup is often more workable than homeowners expect.
Rerouting ductwork and pipes
HVAC trunk lines running through your hitting zone are the most common low-ceiling problem, and they're also the most fixable. A licensed HVAC contractor can often reroute a single trunk line along a side wall or reshape it into a lower-profile duct that regains two to four inches of headroom. Sprinkler lines are trickier since local fire code usually requires a licensed fire protection contractor to relocate them, so budget extra time and cost if your basement has a suppression system running through the planned hitting area.
Working around beams with a low-profile enclosure
When a support beam can't move, the enclosure has to compromise instead. A low-profile impact screen or a stepped enclosure frame can tuck the screen and netting around a beam that sits a few inches below the rest of the ceiling, as long as the beam stays outside the actual swing arc. This works well when the obstruction sits near the screen wall rather than directly over the hitting mat, since impact happens well past the point of contact.
A beam near the screen is a design problem. A beam over the hitting mat is a dealbreaker.
When to shift the swing zone instead
Sometimes the cheapest fix is moving the hitting mat a few feet rather than touching the ceiling at all. Shifting the swing zone even 18 inches can clear a beam entirely, especially in basements with a stepped ceiling where height varies by section. Check these options in order before assuming a full renovation is necessary:
- Shift the mat position a few feet within the marked layout
- Reroute ductwork with an HVAC contractor for a low-profile duct
- Relocate sprinkler lines with a licensed fire protection contractor
- Install a stepped or low-profile enclosure around fixed beams
- Lower the projector mount to compensate for reduced screen height
Understand which of these applies to your basement before you order equipment, since the fix changes your budget and timeline more than any other decision in the build.
Step 4. Prep the room: flooring, moisture, and electrical
Once your layout is confirmed, turn your attention to what's under your feet and behind your walls. Basement moisture and unfinished flooring cause more long-term simulator problems than any piece of equipment, since a launch monitor or projector sitting in a damp room degrades fast. Handle this prep work before the hitting mat or screen ever arrives, because retrofitting flooring around installed equipment costs far more than doing it first.
Flooring that protects your equipment
Concrete alone won't cut it under a hitting mat, since the impact and vibration transfer straight into the slab and up through your joints over time. Install a rubber underlayment or interlocking foam tile system beneath your hitting mat and stance area, then finish the rest of the room with a moisture-resistant option like luxury vinyl plank. Carpet tile works too, but avoid anything with heavy padding that shifts underfoot during a swing.
A dry, cushioned floor protects your knees and your equipment long before it protects your basement's resale value.
Getting ahead of moisture
Run a dehumidifier in the space for at least a week before installation and track the humidity reading, aiming to keep it under 55 percent. Basements near the Boise River or with a history of seasonal dampness need a vapor barrier under any new flooring, not just a rug on top of concrete. According to the EPA, controlling indoor moisture below 60 percent relative humidity significantly reduces mold risk, which matters here since mold near electronics is a fire and health hazard, not just a cosmetic one.
Electrical work to schedule now
A golf simulator for basement installation pulls more power than most homeowners expect once you add a projector, PC, monitor, and sound system to the same circuit. Have a licensed electrician run a dedicated circuit to the hitting bay before drywall or flooring goes in, since opening walls later adds cost and delay.
- Dedicated 20-amp circuit for simulator electronics
- Outlets on the screen wall for projector and speaker power
- Outlets near the hitting mat for the launch monitor and PC
- Surge protection on every major component
- Hardwired ethernet drop if Wi-Fi in the basement is unreliable
Lock in flooring, moisture control, and electrical work in that order, and every step after this becomes installation rather than troubleshooting.
Step 5. Select your launch monitor
Your launch monitor is the single most important purchase in this entire golf simulator for basement build, since it decides whether your swing data feels accurate or frustrating. Two technologies dominate the home market: camera-based systems that track the club and ball through high-speed imaging, and radar-based units that measure ball flight the way a Doppler system tracks weather. Neither is universally better, but each has space and budget tradeoffs worth understanding before you buy.
Camera-based vs. radar-based systems
Camera systems like those built around overhead or side-mounted sensors tend to need less depth behind the ball, which helps in a tighter basement layout. Radar units, by contrast, usually need several feet of clearance behind the hitting position to get an accurate read on ball speed and launch angle, so a low ceiling golf simulator room with limited depth may push you toward a camera-based option by default.
| Feature | Camera-based | Radar-based |
|---|---|---|
| Space behind ball needed | 1-3 feet | 6-8 feet |
| Typical accuracy | High for short game | High for full swing |
| Common price range | $2,000-$6,000 | $500-$2,500 (entry) to $15,000+ (pro) |
| Indoor performance | Consistent | Varies by model |
Measure the space behind your hitting mat before you fall in love with a specific launch monitor brand.
Matching the monitor to your goals
Golfers chasing tour-level data for swing coaching should lean toward premium radar units, while casual players who mostly want to play rounds virtually can get excellent results from a mid-tier camera system. Consider how many people will use the room too, since a monitor that struggles with left-handed setups or requires frequent recalibration becomes a daily annoyance rather than an occasional inconvenience.
Compatibility checklist before you buy
Running through this list before purchase saves you from a launch monitor that looks great on paper but fights your specific room:
- Software compatibility with your preferred simulation platform (E6 Connect, GSPro, or similar)
- Minimum space requirements matched against your measured room depth
- Left and right-handed swing support if multiple golfers will use the bay
- Connectivity type (Wi-Fi, Bluetooth, or wired) matched to your basement's signal strength
- Warranty and local support availability, since shipping a unit back for repairs means weeks without a working simulator
Once you've settled on a monitor that fits your room and your goals, you're ready to build the physical hitting bay around it.
Step 6. Install the screen, enclosure, and hitting mat
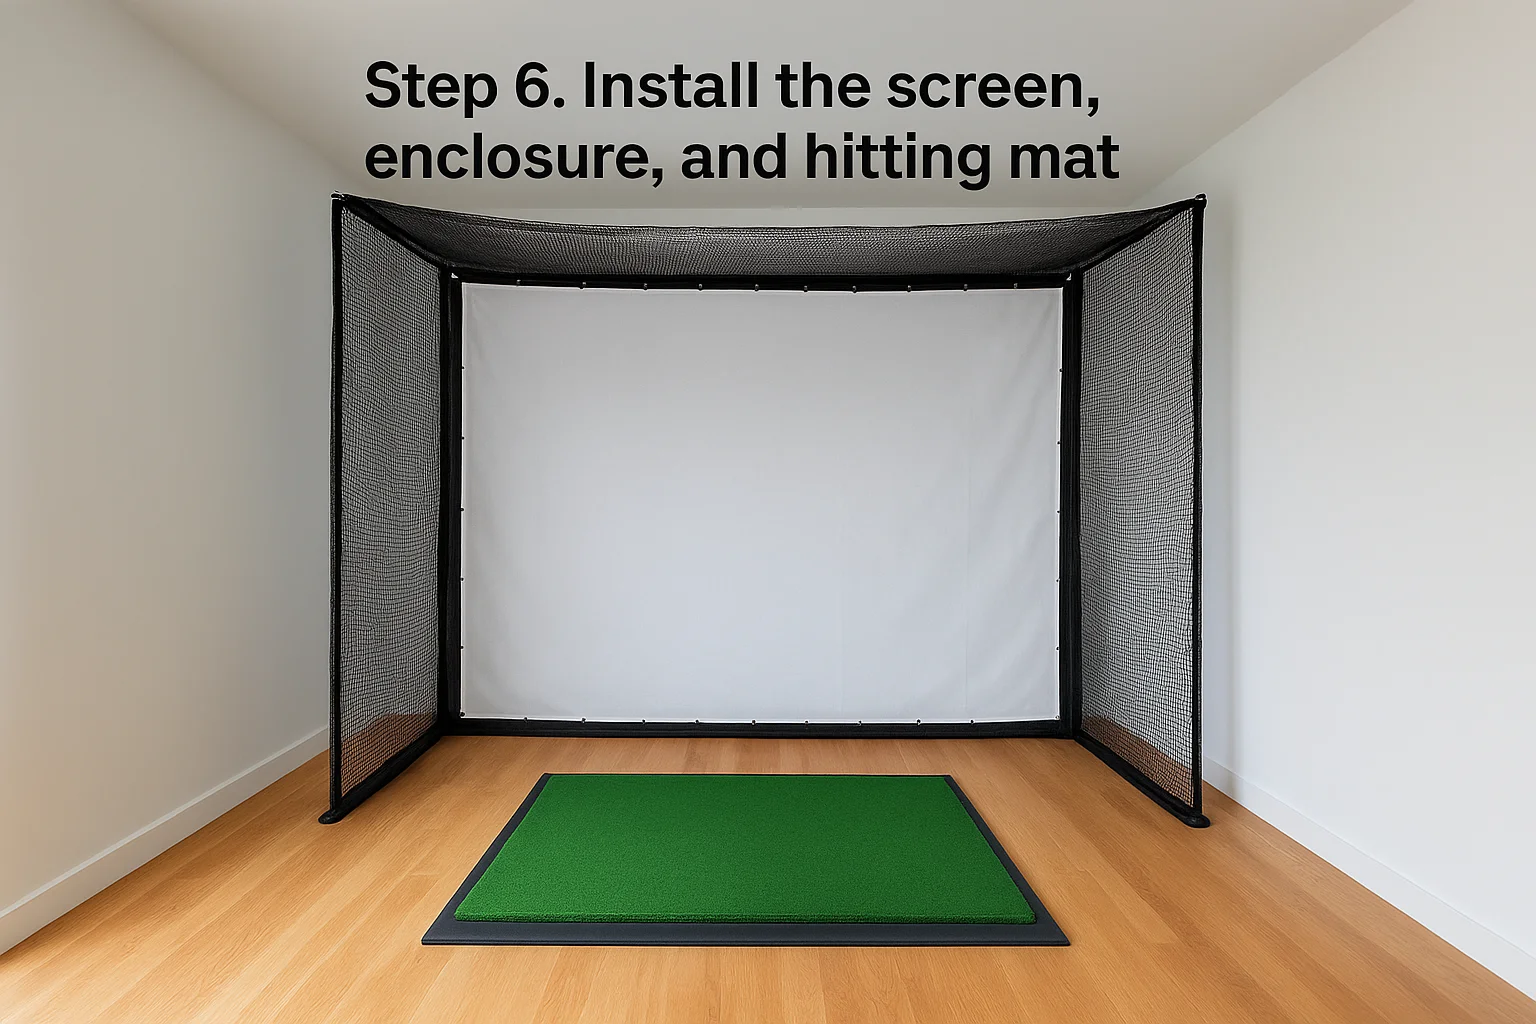
With your launch monitor picked out, it's time to build the physical bay that holds everything together. Screen, enclosure, and hitting mat installation happens as one connected job, since each piece depends on the other's exact placement. Get the screen tensioned wrong and you'll see wrinkles that distort ball flight tracking. Get the mat positioned off-center and your swing arc won't line up with the impact zone you measured back in Step 1.
Mounting the impact screen
Tension matters more than most first-time builders expect. A loose screen absorbs impact unevenly and creates a dull thud instead of the crisp feedback that makes shots feel real, while an overtightened screen can bounce balls back with more force than you want in a finished basement. Most kits use a ratchet-strap or grommet system along a frame, so work your way around the perimeter evenly rather than cranking one side tight before moving to the next. Mount the frame to studs or a ceiling-anchored support rather than drywall alone, since repeated ball strikes will eventually pull screws straight out of plaster.
A screen mounted to studs outlasts a screen mounted to hope.
Building out the enclosure
Your enclosure or netting system contains errant shots on the sides and overhead, and it needs to match the dimensions you locked in during Step 2. Standard enclosure kits come in modular panels, so measure your actual side clearance again before ordering rather than trusting the room's advertised square footage. Leave enough gap between the netting and any nearby shelving or ductwork, since a shanked shot with a driver carries more force sideways than most golfers expect.
Positioning the hitting mat
Center the hitting mat on the swing zone you marked earlier, aligning it with the screen's midpoint rather than the room's midpoint if the two don't match. Use these steps as your installation order:
- Lay the underlayment first, checking it sits flush with no gaps
- Position the mat with the strike zone aligned to the screen center
- Secure the mat with edge trim or adhesive strips to prevent shifting
- Test stance clearance on both sides for right and left-handed swings
- Recheck ceiling clearance now that the mat sits at its final height
That last step matters more than it sounds, since a thick mat with underlayment can add an inch or two of stance height you didn't account for when you first measured the room.
Step 7. Set up your projector, PC, and software
With the physical bay built, you're ready to bring the picture to life. A golf simulator for basement setup lives or dies on projector throw distance, since a mismatched lens ratio leaves you with an image that's too small, too large, or distorted at the edges. Calculate your throw distance before you mount anything permanently, using the projector manufacturer's throw ratio chart against the exact distance from your planned mount point to the screen.
Choosing and mounting the projector
Short-throw projectors work best in most basement bays because they can sit close to the screen without casting a shadow when the golfer stands up to swing. Ceiling-mount the unit rather than placing it on a shelf, since a shelf position almost always lands directly in the golfer's swing path or backswing arc. Look for at least 3,000 lumens if your basement has any ambient light source, and go higher if you're keeping a window or stairwell light nearby instead of blacking out the room entirely.
Mount the projector where your swing can never reach it, not where the wiring happens to be easiest.
Setting up the PC and connections
Your simulation software needs real processing power, not a leftover laptop from a decade ago. Budget for a dedicated gaming-grade PC with a solid graphics card, since course rendering in platforms like GSPro or E6 Connect taxes hardware harder than most golfers expect. Run cables through conduit or along baseboards rather than leaving them exposed across the floor, both for safety and because a stray HDMI cable near the hitting mat becomes a tripping hazard fast.
- PC placement: side table or wall-mounted shelf outside the swing arc
- Cable management: conduit or raceway along walls, never across the floor
- Projector connection: HDMI run through the ceiling to avoid visible cable drops
- Launch monitor pairing: confirm Bluetooth or Wi-Fi connection before finalizing PC placement
- Backup power: consider a surge protector with battery backup for mid-round outages
Installing and calibrating software
Install your simulation software before the first test swing, then run through its calibration wizard using the exact distances you measured for your room. Most platforms ask for screen size, mat-to-screen distance, and launch monitor model during setup, so keep your measurements from Step 1 handy rather than guessing. Confirm your internet connection holds steady through a full course download, since a mid-round dropout while playing a virtual round at Pebble Beach is a frustrating way to discover a weak basement Wi-Fi signal.
Step 8. Add lighting, soundproofing, and seating
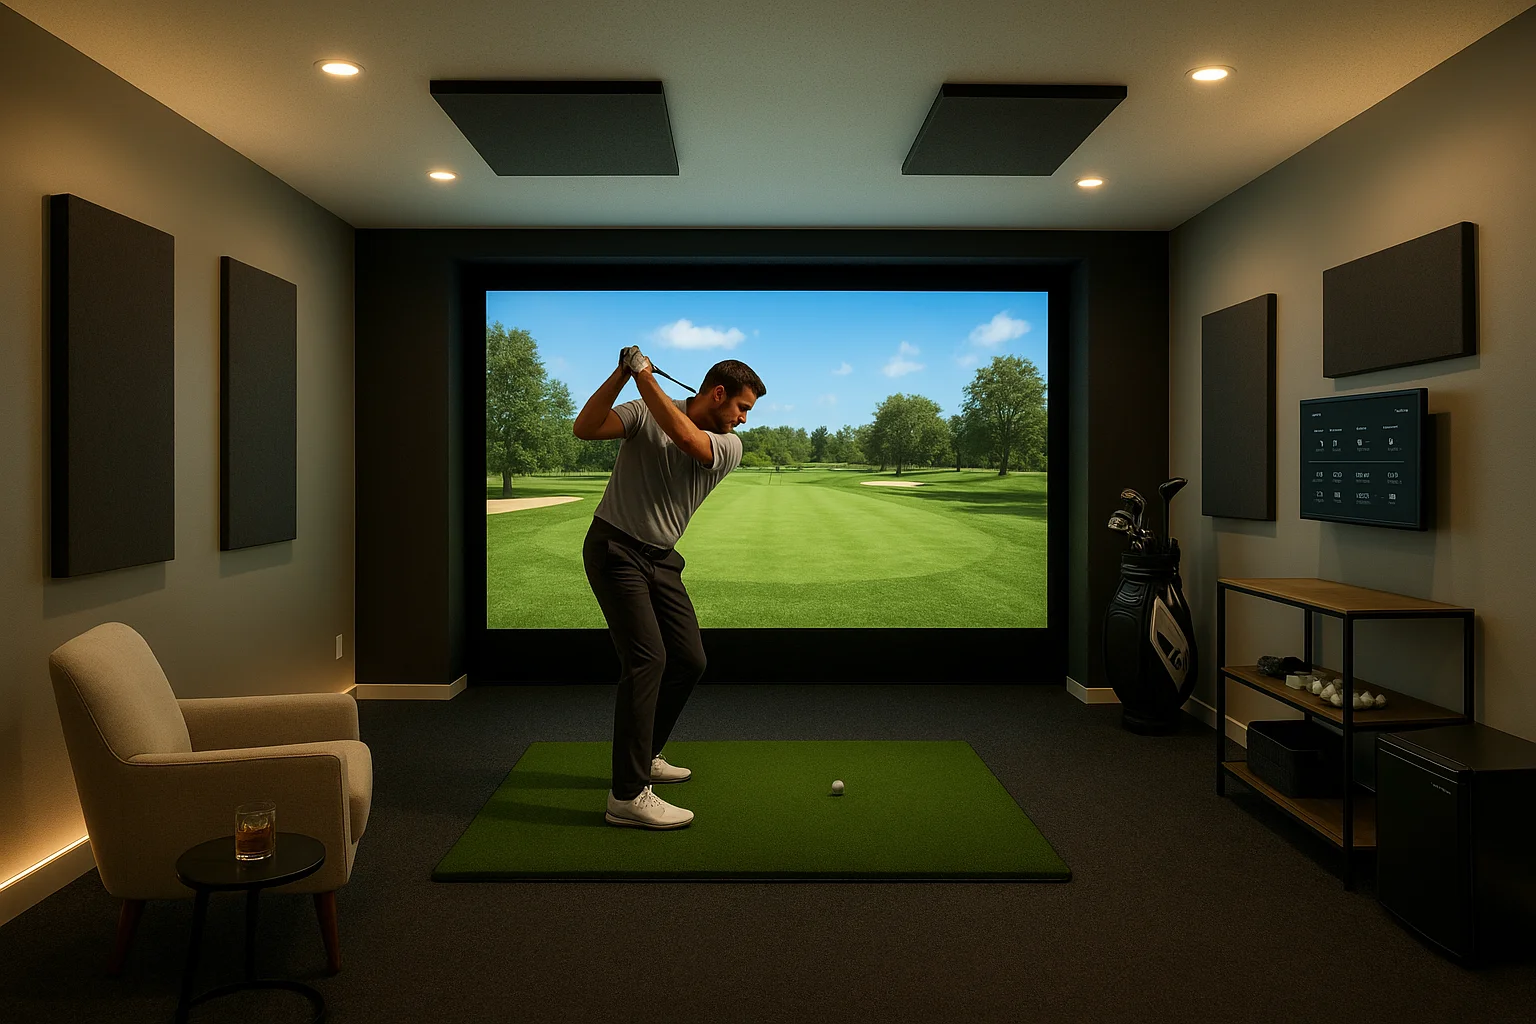
With the technical build finished, shift your attention to the details that turn a functional bay into a room people actually want to spend time in. Lighting placement affects your projector image more than most homeowners expect, and the wrong fixture position washes out screen contrast before you even swing a club. Handle lighting, sound, and seating together, since they all compete for the same wall space and electrical circuits you already ran back in Step 4.
Lighting that doesn't fight your projector
Avoid placing overhead lights directly in front of the screen, since even indirect glare reduces image contrast and makes ball flight harder to track. Install dimmable LED fixtures along the side walls instead, positioned behind the golfer's line of sight so light falls on the mat and stance area without spilling onto the screen. Add a separate switch or smart lighting control for the screen wall so you can drop that zone to near-dark during play while keeping enough ambient light for finding a club or checking a scorecard.
Light the golfer, not the screen, and your projector image stays sharp all night.
Soundproofing for a quiet house
A basement swing bay generates more noise than most homeowners plan for, between club impact, ball strikes on the screen, and whatever sound system you've paired with the simulator. Add acoustic panels or sound-dampening insulation to the walls behind and beside the hitting area, since this cuts down both the impact noise and any echo that makes the room feel harsh. A basement golf simulator built under a bedroom or living space benefits from a resilient underlayment on the ceiling too, which keeps late-night sessions from becoming a household complaint.
Seating and finishing touches
Place seating outside the swing arc but close enough to watch shot data on a side monitor or TV, since golfers rarely play alone once the room is finished. A small bar cart, mini fridge, or shelf for grips and gloves rounds out the space without crowding the hitting zone. Keep these additions along the side walls you measured for clearance in Step 2 rather than squeezing them into leftover corners:
- Seating: outside the 5-foot side buffer, angled toward the screen
- Secondary display: mounted on a side wall for shot tracking without blocking the swing
- Storage: shelving for clubs, balls, and accessories away from the hitting mat
- Acoustic treatment: panels on side and rear walls, resilient layer on the ceiling if needed
Step 9. Test, calibrate, and start playing
Before you invite friends over for a round, spend a full session testing the golf simulator for basement build against real swings, not just the calibration wizard's default settings. Software calibration confirms your measurements are correct on paper, but only actual ball strikes reveal whether your launch monitor reads consistently and your screen tracks flight the way it should. Treat this first session as a diagnostic, not a celebration round.
Running a full calibration pass
Start with your launch monitor's built-in calibration routine, then hit a series of test shots across different clubs, from wedge to driver, since ball speed and spin rates vary enough that a monitor tuned for irons can misread a driver strike. Check that carry distance and ball flight on screen roughly match what you'd expect from that club in real life. If numbers look wildly off, recheck your mat-to-screen distance and screen size settings in the software before assuming the hardware is faulty.
Trust real ball flight over a settings screen. If the numbers feel wrong, they probably are.
Troubleshooting common first-week issues
Most early problems trace back to a handful of repeat offenders. Work through this list before contacting manufacturer support:
- Inconsistent readings: check launch monitor placement and lighting interference near the sensor
- Screen wrinkles or distortion: retension the impact screen evenly around the frame
- Software freezing mid-round: confirm your PC meets minimum specs and update graphics drivers
- Connectivity drops: switch to a wired ethernet connection if Wi-Fi keeps disconnecting
- Mat shifting during swings: add edge trim or adhesive strips you may have skipped in Step 6
Fine-tuning before daily use
Once calibration checks out, invite a few different golfers into the bay, including anyone left-handed, and watch how the room performs under real use rather than a solo test. Adjust seating, lighting, or side clearance based on what actually feels cramped once people are moving around during a round. Small tweaks now, like nudging the mat or adding a dimmer light switch, save you from bigger fixes after the room is in daily rotation. A basement golf simulator rarely needs a full redo at this stage, just the kind of small corrections that only show up once real swings are happening in the space.
Your basement, ready for golf
A basement golf simulator succeeds or fails on the decisions you make before any equipment arrives. Ceiling height, room layout, and electrical prep matter more than which launch monitor you eventually buy, and skipping that groundwork is why so many builds stall out or underperform once the mat goes down. Build in that order, from measurements to calibration, and you end up with a room you'll actually use through the winter instead of a corner full of expensive gear collecting dust.
Getting a golf simulator for basement installation right the first time saves you real money on redone flooring, rerun electrical, and returned equipment that didn't fit the room. If you'd rather skip the trial and error, Treasure Valley Solutions handles the full build for Treasure Valley homeowners, from ceiling assessment to final calibration. Check out examples of our completed simulator installations to see what a properly built room looks like before you start.
Need Expert Help?
Ready to implement these solutions in your own home or business?
Our Services
View All Services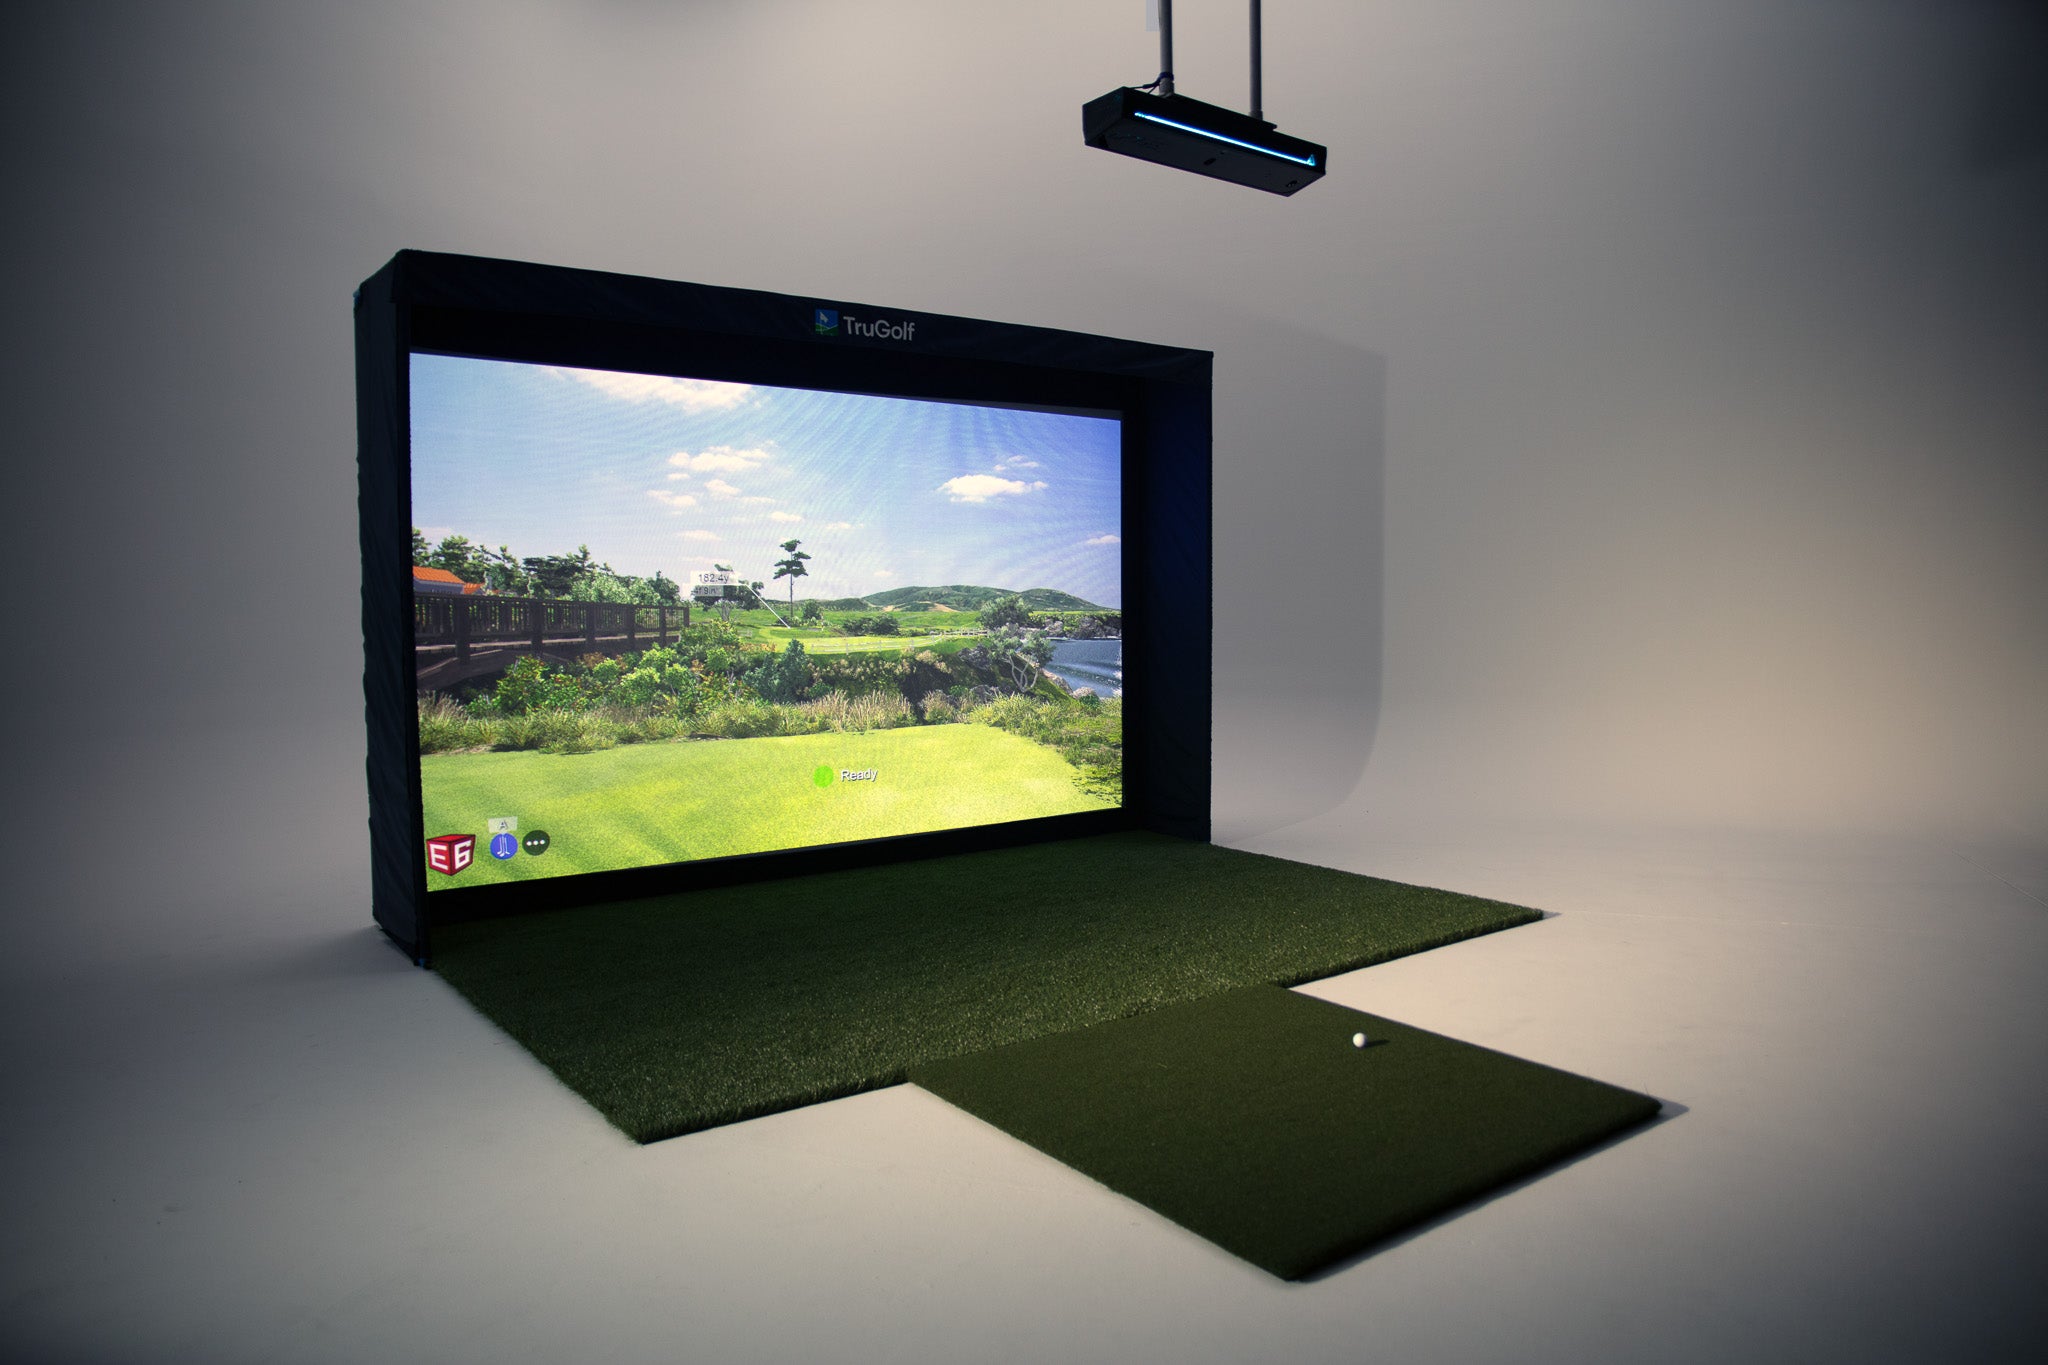
Serving the Treasure Valley
Local installation in your city