Turning your garage into a year-round practice space sounds great, until you start researching. Between launch monitors, impact screens, projectors, and enclosures, a golf simulator for garage setups...
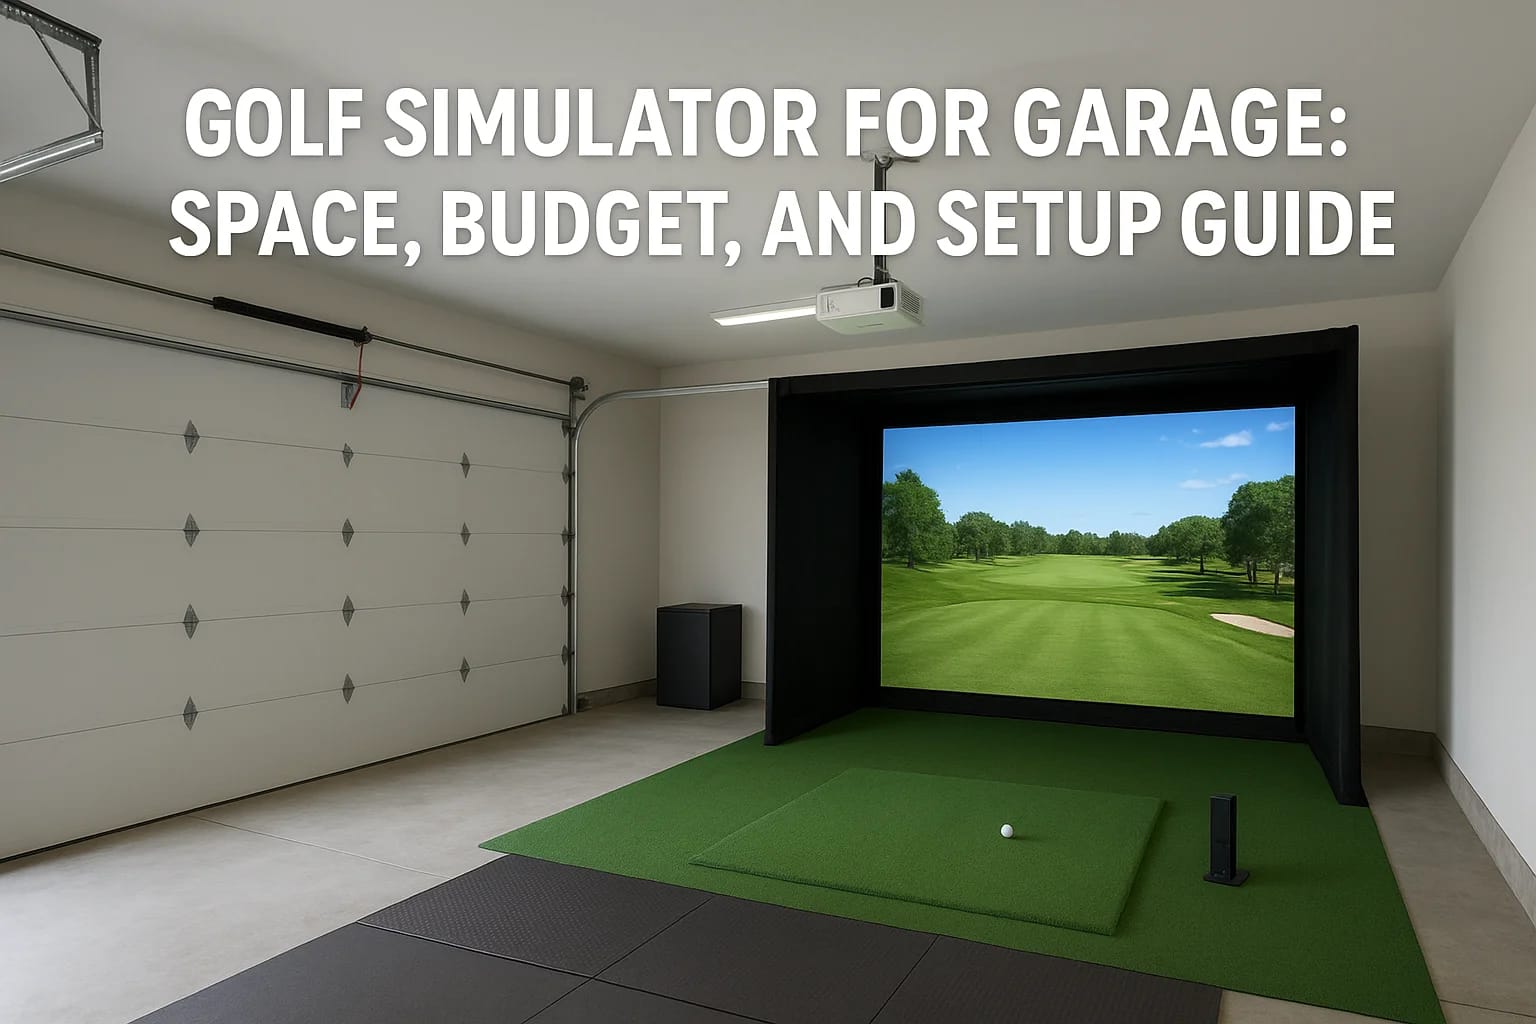
Golf Simulator For Garage: Space, Budget, And Setup Guide
Turning your garage into a year-round practice space sounds great, until you start researching. Between launch monitors, impact screens, projectors, and enclosures, a golf simulator for garage setups can get complicated fast. And if you're working with a standard two-car garage in Boise or Meridian, ceiling height and depth matter more than most product listings let on.
The good news? A garage is actually one of the best rooms in the house for a simulator build. You already have a dedicated space, concrete floors that handle impact, and walls that can support mounted equipment. The challenge is making the right choices upfront, choosing components that fit your space, your swing, and your budget without leaving you with a setup that collects dust after a month.
At Treasure Valley Solutions, we design and install custom AV and smart technology systems across the Treasure Valley, including dedicated entertainment spaces like home theaters and, yes, golf simulator rooms. We've seen firsthand what works in real garages with real dimensions. This guide walks you through the space requirements, budget considerations, and setup decisions you'll need to make, whether you're going DIY, buying an all-in-one package, or hiring a professional to get the installation done right the first time.
What makes a garage simulator different
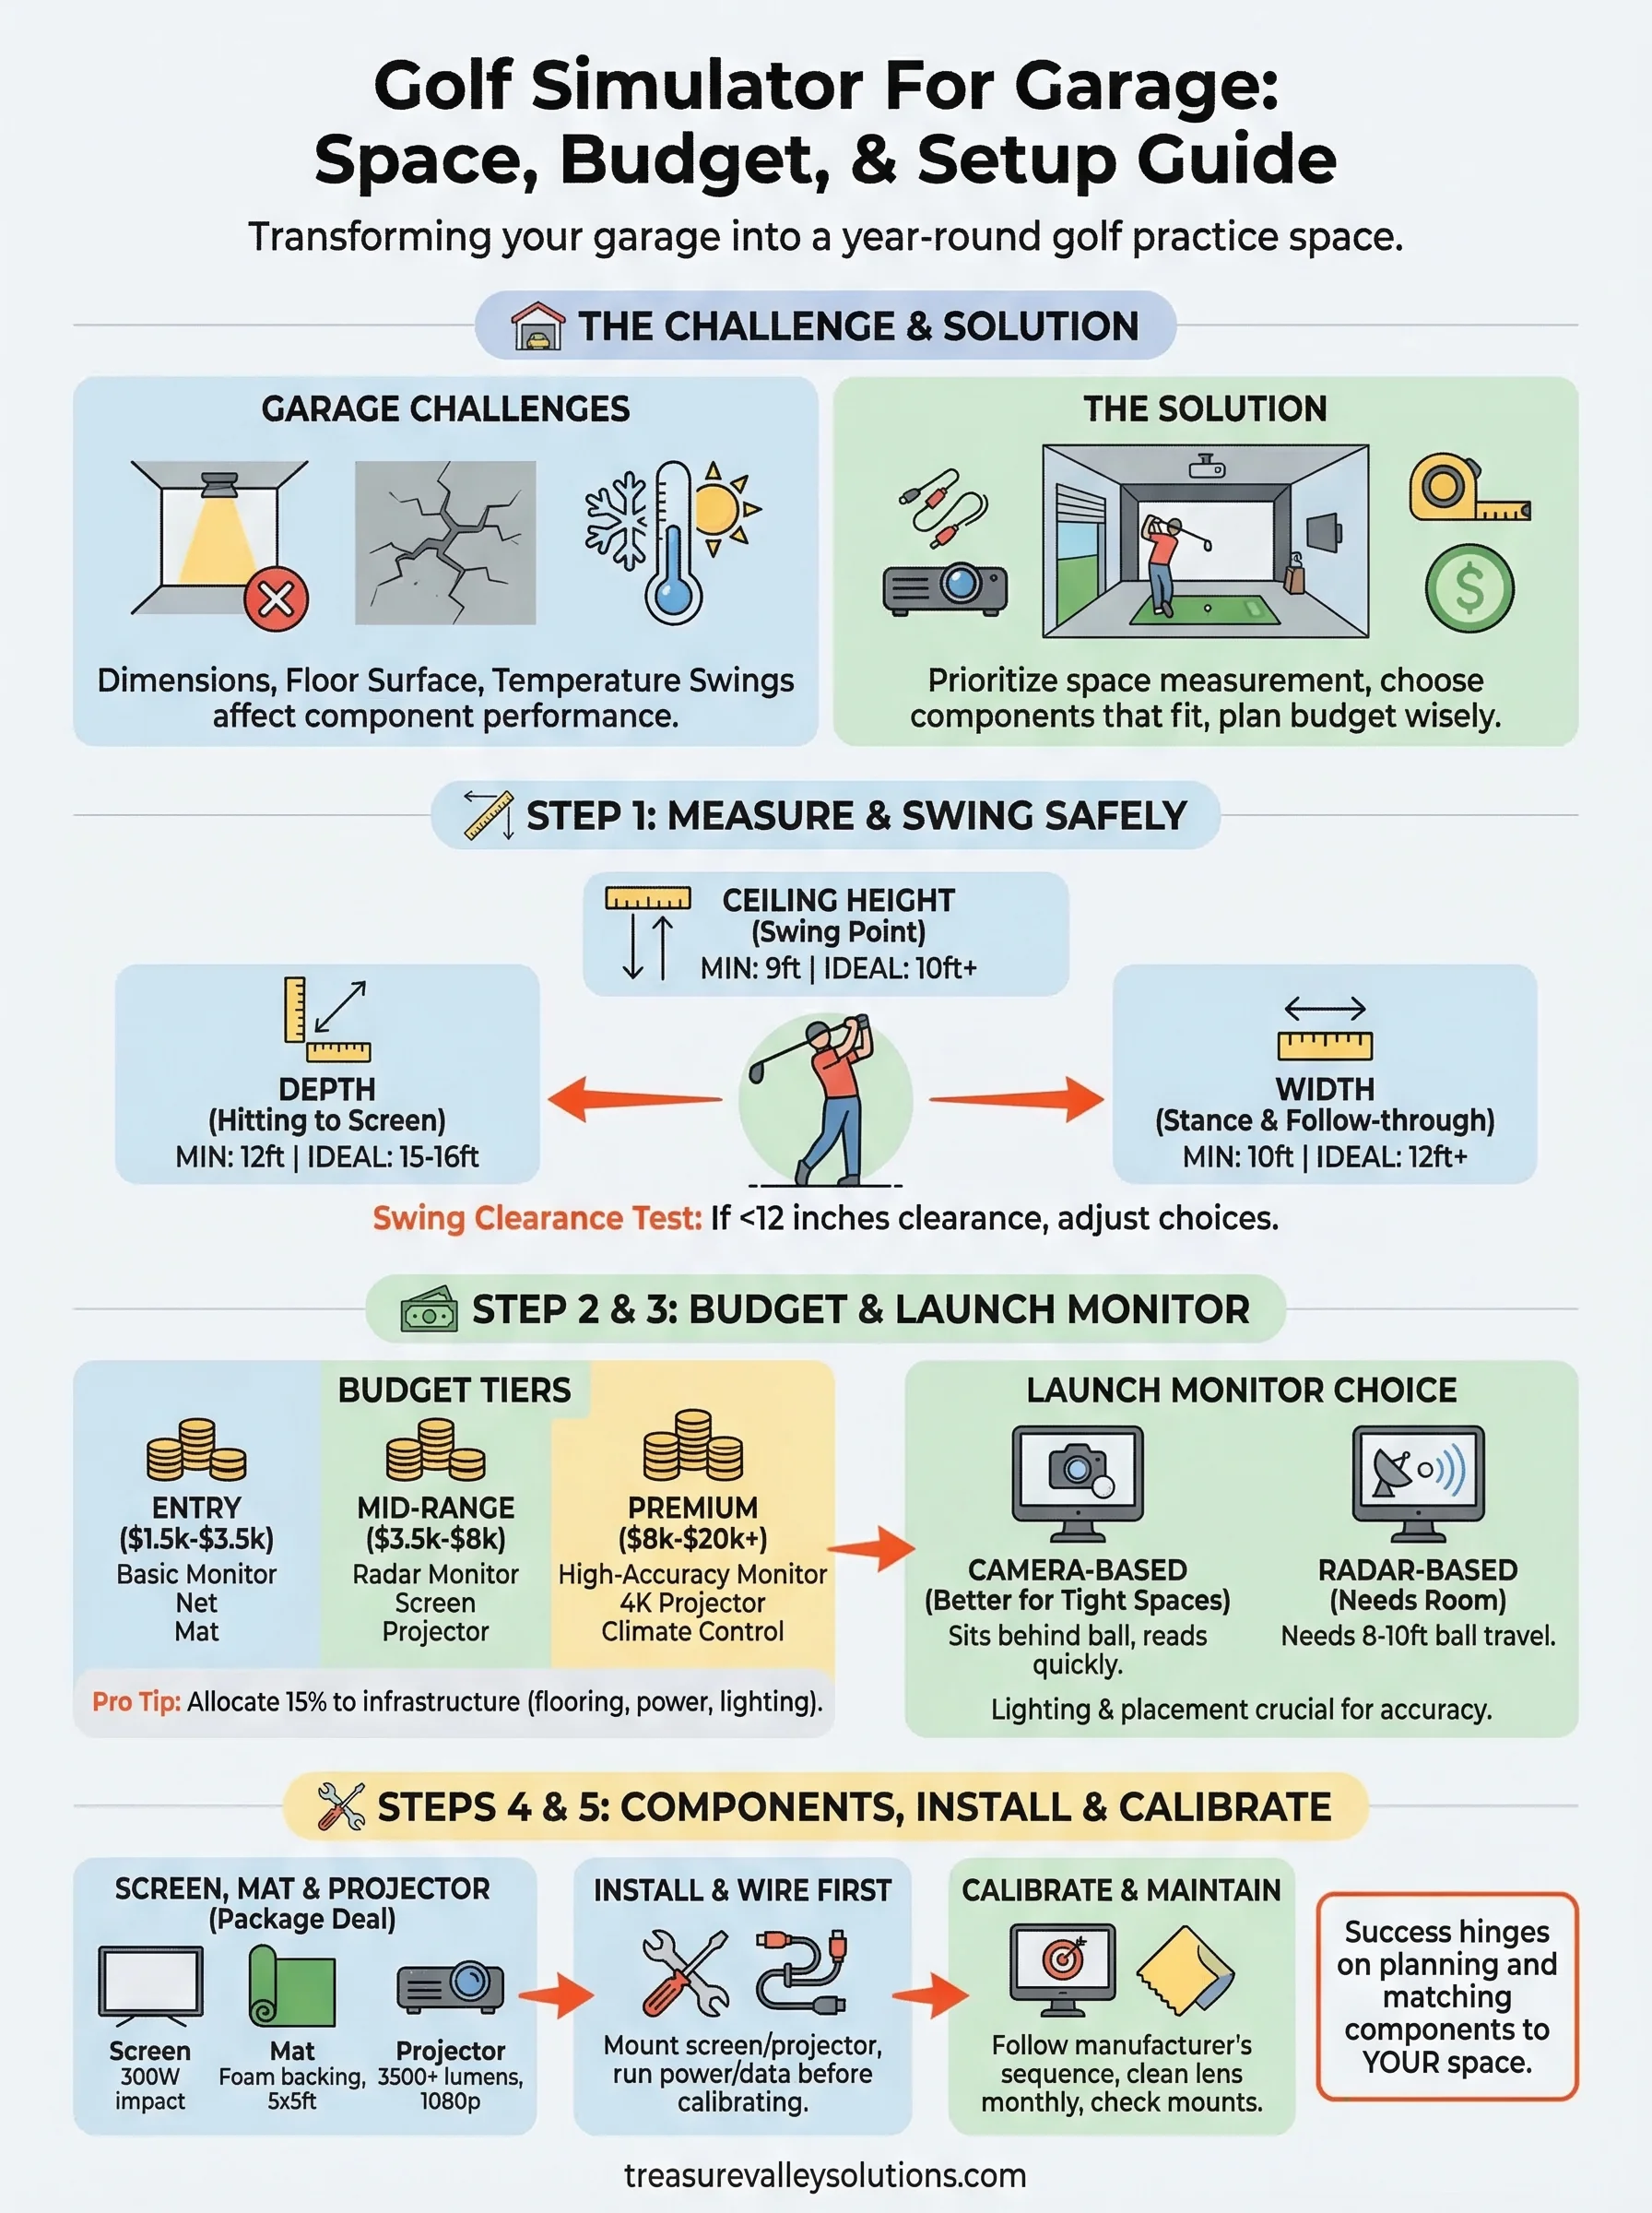
A garage isn't designed for golf, and that gap between the two creates a specific set of challenges you won't face when setting up a living room TV or a basement bar. The dimensions, the floor surface, and the ambient conditions all affect which simulator components will actually work in your space. Understanding these differences before you spend money is what separates a setup you'll use year-round from one you'll regret after the first winter.
Ceiling height and swing clearance
Ceiling height is the single most critical measurement for any golf simulator for garage build. Most attached two-car garages in the Treasure Valley sit at around 8 to 9 feet, which sounds like enough until you factor in a full driver swing at extension. A golfer who stands 6 feet tall often needs at least 10 feet of vertical clearance to avoid catching the ceiling on a backswing with a driver.
If your garage ceiling is 8 feet, you're not out of options, but you will need to limit yourself to shorter irons or partial swings, or look at angled setups where you stand closer to one side wall. Mid-height ceilings also restrict projector placement, since ceiling-mounted short-throw projectors require adequate clearance above the screen to produce a clean, undistorted image.
Measure ceiling height at the exact point where you plan to stand and swing, not just at the center of the garage, because dropped soffits, door tracks, and light fixtures often reduce usable clearance near the walls and the front of the bay.
Floor surface and joint fatigue
Bare concrete floors cause real problems over a long practice session. Unlike carpet or rubber flooring, concrete transfers impact directly to your knees and lower back, and a thin hitting mat sitting flat on concrete amplifies that stress instead of absorbing it. You'll need a mat system with substantial foam or rubber backing, or you'll want to lay interlocking rubber tiles under the mat to create a buffer layer between you and the slab.
Concrete also doesn't forgive mats that shift. A mat that moves mid-swing changes your ball-contact point and introduces errors that have nothing to do with your actual swing mechanics. A stable, padded surface keeps your data clean and your body from paying for it the next morning.
Temperature swings and electronics
Garages in Idaho move from below freezing in January to over 100°F during a parked-car July afternoon. Electronics don't perform reliably at those temperature extremes, and that includes your launch monitor, projector, and any control hardware you install. Projectors are especially vulnerable to heat buildup, and a cold start in winter can cause condensation inside camera-based launch monitors, throwing off your shot data.
Adding a small heating and cooling unit to the space isn't just about comfort; it directly protects your equipment and keeps your sensors reading accurately through the full year. A mini-split system or a wall heater with a programmable thermostat gives you enough climate control without major construction. Think of it as part of the simulator budget, not an optional upgrade, because the alternative is replacing sensitive equipment far sooner than you should have to.
Step 1. Measure the room and swing safely
Before you search for a single product, pull out a tape measure. Getting the dimensions of your space on paper first saves you from ordering equipment that won't fit, and it tells you exactly which simulator configurations are realistic for your garage. A standard two-car garage in the Treasure Valley typically runs 20 to 22 feet deep and 18 to 20 feet wide, but those numbers mean very little without knowing the usable swing zone inside that footprint.
The three measurements that matter most
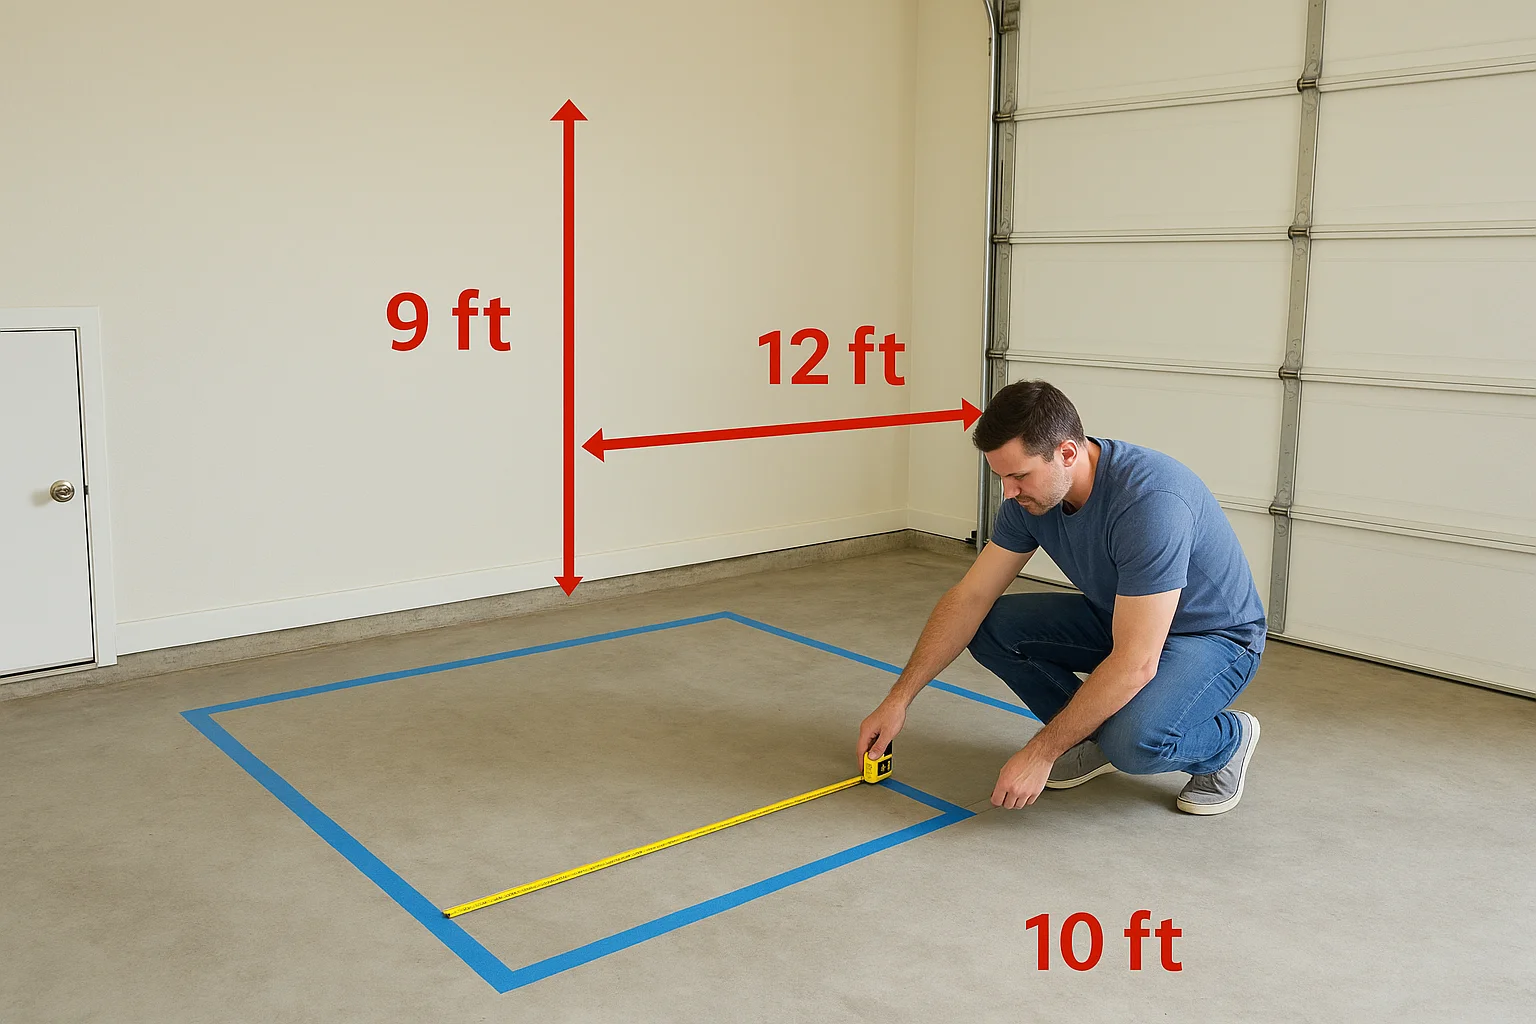
Three numbers define whether your golf simulator for garage build will actually work: ceiling height at the swing point, depth from the hitting position to the screen, and the lateral width available for your stance and follow-through. Write all three down before you do anything else, because every product decision you make afterward connects back to these figures.
| Measurement | Minimum Recommended | Ideal |
|---|---|---|
| Ceiling height at swing point | 9 ft | 10 ft or more |
| Depth (hitting position to screen) | 12 ft | 15-16 ft |
| Width (side to side at hitting zone) | 10 ft | 12 ft or more |
Depth affects both ball tracking accuracy and screen safety because a launch monitor needs enough distance to read the ball flight before impact, and the screen needs room to absorb the shot without tearing. Skimping on depth is one of the most common mistakes in a garage build, and it shows up immediately as unreliable shot data or a damaged screen within the first few months.
How to test swing clearance before you buy
Take your driver into the garage and swing it slowly through a full arc at the exact spot where you plan to stand. Have someone watch from the side to spot how close the club head gets to the ceiling, the side walls, and any overhead obstacles like door tracks or light fixtures.
If your club clears all surfaces by less than 12 inches at any point during the swing, that constraint should drive your equipment choices rather than the product specs you read online.
Mark your hitting position on the floor with tape and record every clearance measurement you find. This reference point becomes the anchor for every other decision in your build, from screen size to projector placement to where you run power.
Step 2. Set your budget and choose a build type
Budget determines everything about your simulator build, including which launch monitor is realistic, whether you buy a packaged system or source components individually, and how much room you leave for the infrastructure costs that most product listings ignore. Setting a real number before you shop keeps you from stacking a $2,000 launch monitor on top of a $1,500 enclosure and then realizing you've got nothing left for the mat, projector, or climate control.
Three budget tiers for a garage simulator
Most golf simulator for garage builds fall into one of three tiers. Each tier reflects a realistic total spend that includes all the components you need to actually hit balls, not just the headline product.
| Tier | Total Budget Range | What You Get |
|---|---|---|
| Entry-level | $1,500 to $3,500 | Basic camera or infrared launch monitor, net or budget screen, simple mat, no projector |
| Mid-range | $3,500 to $8,000 | Radar-based launch monitor, proper impact screen, short-throw projector, enclosure frame |
| Premium | $8,000 to $20,000+ | High-accuracy launch monitor, commercial-grade screen, 4K projector, full enclosure, climate control |
Allocate at least 15 percent of your total budget to infrastructure costs like flooring, power outlets, lighting, and mounting hardware before you finalize your component list.
Choosing between DIY, kit, and full install
A DIY build gives you the most control over each component, but it requires you to source and integrate a launch monitor, projector, screen, enclosure, and simulator software yourself. Errors in compatibility or calibration can cost you more time and money than you saved.
A packaged kit from a single manufacturer bundles the main components together, which reduces compatibility risk but limits your ability to upgrade individual parts later. Kits work well at the entry and mid-range tiers when you want a faster path to a working setup.
A professional installation handles the full scope, from component selection to mounting, wiring, calibration, and testing. This option makes the most sense at the premium tier or when your garage has specific structural, electrical, or climate challenges that add complexity beyond a straightforward assembly job.
Step 3. Pick the right launch monitor for a garage
The launch monitor is the core of your entire simulator setup, and the choice you make here affects everything from data accuracy to how much space the equipment takes up. Not every launch monitor works equally well in a garage environment, and the two primary technologies, camera-based and radar-based, behave very differently once you put them inside a low-ceiling, short-depth space.
Camera-based vs. radar-based monitors
Camera-based launch monitors like the Uneekor QED or Foresight GC3 sit behind the hitting position and read the ball and club through high-speed image capture. They perform well in tight spaces because they don't need the ball to travel far before recording data, which makes them a strong fit for garages with limited depth. The tradeoff is cost, since accurate camera systems start at $3,000 and climb quickly from there.
Radar-based monitors like the Garmin Approach R10 or Bushnell Launch Pro track ball flight using Doppler radar, which requires more room for the signal to work cleanly. Most radar units need at least 8 to 10 feet of ball travel before the screen, and some require a specific placement angle that a narrow or shallow garage can't always accommodate.
If your garage depth is under 14 feet from hitting position to screen, a camera-based system will almost always give you more reliable data than a radar unit.
Placement constraints in a tight garage
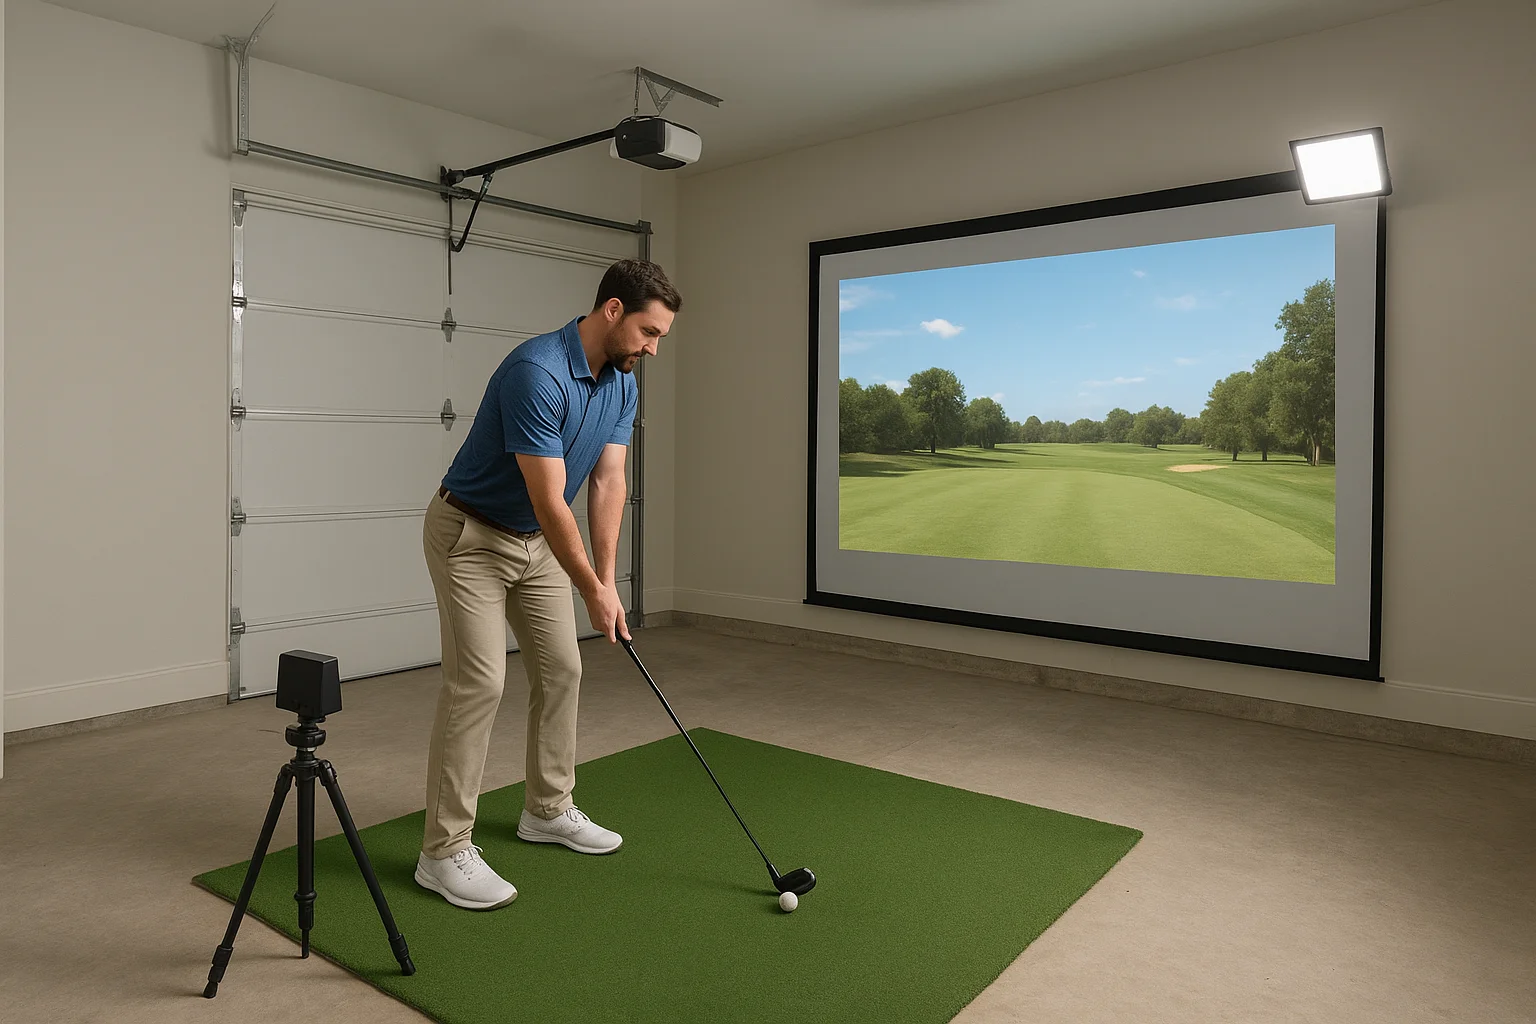
Where you physically put the monitor matters as much as which model you buy. Camera units typically mount on a ceiling track or sit on a tripod behind the ball, while radar units often go on the floor a few feet behind your stance or to the side at a fixed angle. Measure both your ceiling height and the floor space behind your hitting position before you commit to a monitor type, since the wrong placement can throw off shot data even on a high-quality unit.
Lighting also plays a direct role in any golf simulator for garage setup. Camera-based systems need consistent lighting to capture clean images, so flickering fluorescent bulbs or uneven natural light from windows can introduce read errors. Installing LED panels on a dedicated circuit gives you steady, controllable light that keeps your sensor accurate through both day and night sessions.
Step 4. Choose screen, mat, and projector
These three components work as a system, and getting one wrong affects the other two. Your screen determines how far back your projector needs to sit. Your mat determines how reliably your launch monitor reads ball contact. And your projector determines whether you can actually see the image in a space that rarely gets fully dark. Treat them as a package decision, not three separate purchases.
Impact screen selection
Screen size and material both matter when you're picking an impact screen for a garage build. A standard 10-foot-wide by 8-foot-tall screen fits most two-car garages and gives you enough visual field for a realistic simulator experience. Look for screens rated for at least 300 watts of impact resistance, since cheaper screens tear quickly under repeated driver shots and cost you more in replacements than a quality screen would have upfront.
Mount the screen with bungee cord or strap attachment points rather than rigid fasteners, so the material can flex on impact and distribute the force instead of concentrating it at fixed anchor spots.
Hitting mat requirements
A quality mat does two jobs: it gives you a consistent surface for your feet and the ball, and it cushions the impact on your joints over a long session. For a golf simulator for garage build on concrete, you want a mat that runs at least 5 feet by 5 feet with rubber or foam backing that's at least half an inch thick. Avoid thin mats that sit directly on slab without any buffer layer, since they shift under your feet and transmit impact force straight to your knees.
Projector specs that matter in a garage
Lumens determine visibility, and garages rarely go fully dark. A projector rated at 3,500 lumens or higher holds up well in a space with overhead lighting and light seeping under the door. Short-throw projectors work best in tight garages because they produce a large image from a shorter throw distance, which keeps you from needing a ceiling mount deep in the room. Pair your projector with a 1080p minimum resolution to keep the simulator course graphics clear enough to read slope and distance accurately from your hitting position.
Step 5. Install, calibrate, and keep it reliable
Once your components arrive, the order in which you install them matters. Mount your screen and projector first, then position your mat and launch monitor, because the projector image needs to align with the screen before you can verify that your monitor is reading shots in the correct zone. Rushing the calibration step after a hasty install is the most common reason a golf simulator for garage setup produces inaccurate shot data right out of the gate.
Mount and wire before you calibrate
Run your power and data cables before you finalize any mount positions, so you're not repositioning a ceiling-mounted projector because you can't reach the outlet. Use cable management channels along the wall or ceiling to keep the wiring clean and out of the swing path. For the screen frame, confirm that all anchor points hit studs or blocking in the wall, since a screen under repeated driver impact will pull loose from drywall anchors within weeks.
Label every cable at both ends with a printed label or colored tape before you close up any runs, because tracing an unlabeled wire behind a mounted enclosure is far harder than labeling it takes.
Calibrate your launch monitor step by step
Follow the manufacturer's calibration sequence exactly, including any warm-up time the unit requires before recording shots. Most camera-based monitors ask you to set a specific ball position relative to a target marker, while radar units require a precise placement angle. Use the checklist below to work through calibration without skipping steps:
- Set the hitting mat in its final position and mark the ball placement spot
- Power on the launch monitor and allow the full warm-up cycle to complete
- Align the monitor to the manufacturer's specified angle and distance from the ball
- Hit five to ten calibration shots and compare the data output to your known distances
- Adjust placement if the numbers read more than five yards outside your baseline
Keep the system reliable long-term
Schedule a monthly check on all mounting hardware, projector filters, and mat condition to catch wear before it becomes a failure. Clean the launch monitor lens and camera sensors with a dry microfiber cloth every few sessions, since garage dust accumulates faster than it does indoors and directly degrades sensor accuracy over time.
Ready for your first shot
You now have everything you need to build a golf simulator for garage that actually works in your space. Start with your measurements, set a realistic budget, and match your components to the dimensions you have, not the dimensions you wish you had. Every decision in this guide connects back to those three numbers you taped to your garage floor in Step 1.
Most failed simulator builds come down to one thing: skipping the planning stage and buying components that don't fit together. Follow the steps in order, and you'll avoid the most expensive mistakes before you spend a dollar. When the setup feels too complex to tackle on your own, bringing in a professional to handle the mounting, wiring, and calibration saves you weeks of troubleshooting.
If you want help designing a dedicated simulator space that fits your garage and your goals, see what our team has built for clients across the Treasure Valley.