 (208) 991-3502
 Meridian, ID



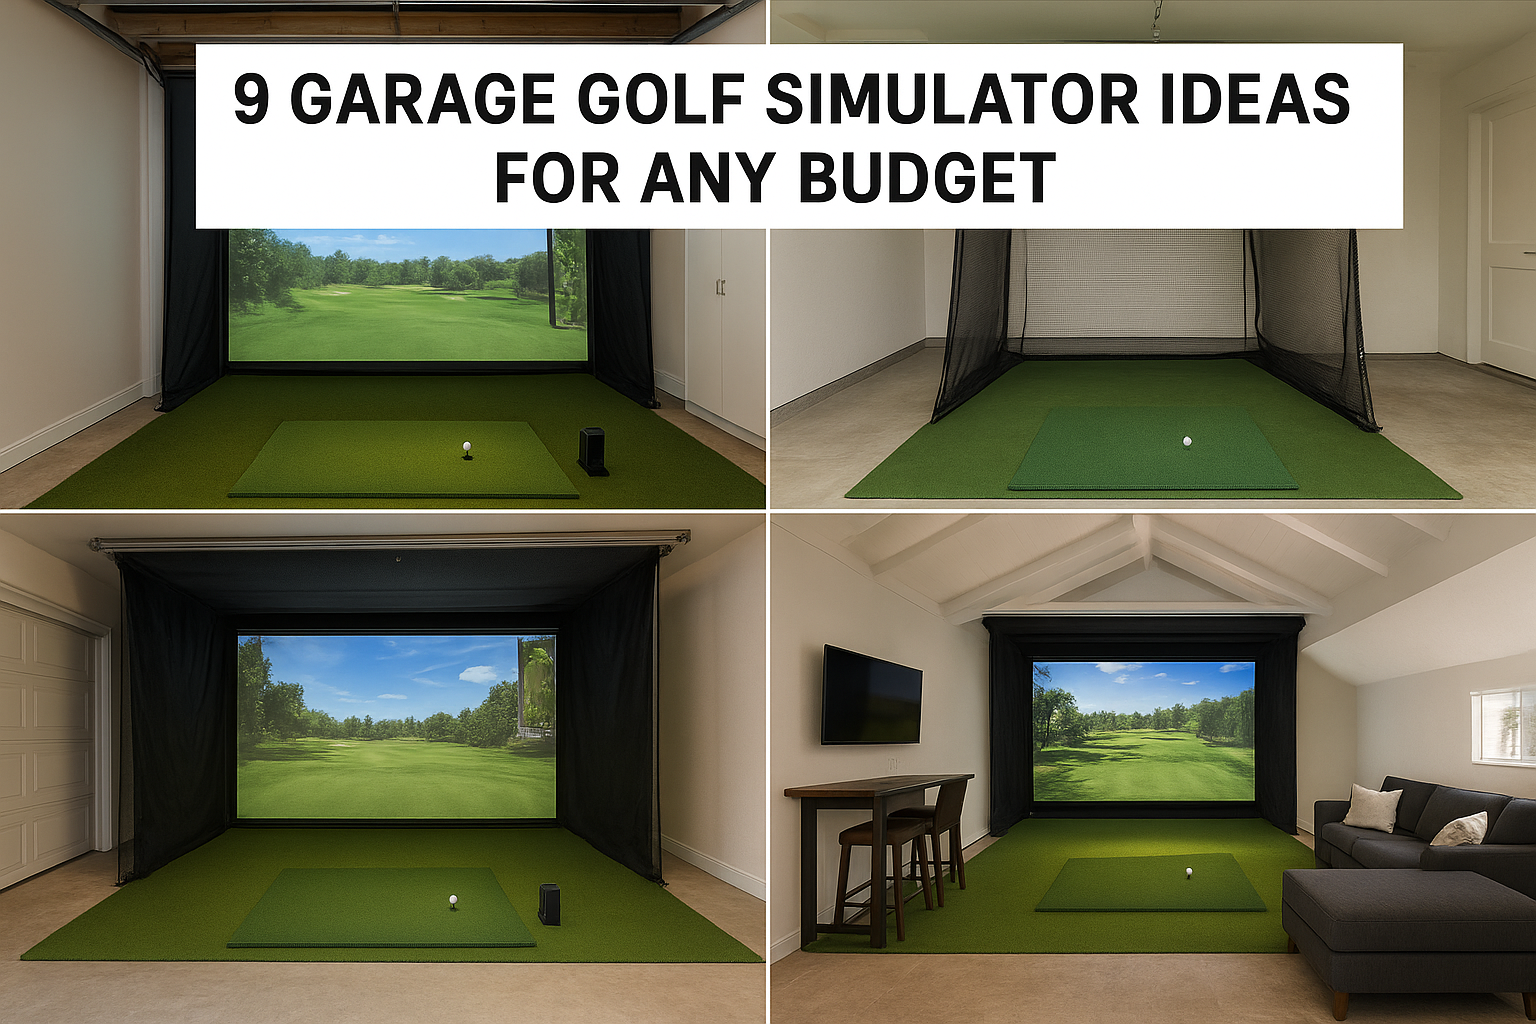

Your garage sits empty for eight months of the year while your golf swing gets rustier every winter. If you have been searching garage golf simulator ideas, you already know the potential is there. Wh...
Your garage sits empty for eight months of the year while your golf swing gets rustier every winter. If you have been searching garage golf simulator ideas, you already know the potential is there. What is missing is a plan that fits your space, your budget, and the way you actually want to play.
This article gives you nine real layouts, from a budget-friendly setup using a bare wall and a laptop screen to a full enclosure system with turf, lighting, and surround sound. You will see space requirements for a single-car versus a two-car garage in this garage golf simulator setup guide, rough cost ranges for each option, and the tradeoffs between a simple net-and-mat setup and a projector-based simulator with launch monitor integration.
We install home theaters, lighting, and audio systems across the Treasure Valley every week, and the same wiring, acoustic, and layout principles that make a great garage theater apply directly to a golf bay. Whether you want a weekend DIY project or a professionally wired setup you never have to think about again, these ideas will help you pick the right direction before you buy a single piece of equipment.
1. Work with a local integrator for a custom garage build
Starting your search for garage golf simulator ideas usually leads to a pile of forum posts about screens, mats, and mounting brackets. A local integrator skips that guesswork. You get a designer who measures your actual garage, accounts for your electrical panel, your ceiling joists, and your HVAC vents, then builds a system around what you have instead of a generic kit that assumes a perfect rectangular room. This is the option most homeowners land on once they realize a real golf simulator room involves more than a screen and a mat.
How it works
A technician from a company like Treasure Valley Solutions handling custom golf simulator design and installation walks your garage, checks ceiling height, outlet placement, and Wi-Fi coverage, then designs a layout around your launch monitor, projector, and impact screen. The team runs dedicated wiring for the projector and audio, mounts the screen and side netting, calibrates the hitting mat to your swing plane, and programs the whole system, including lighting scenes and voice control, so you press one button and you're hitting balls in under a minute.
A properly designed simulator bay feels less like a garage project and more like a room built for one purpose: your golf swing.
Best for
This route suits homeowners who want a system that works flawlessly for years without fiddling with cables or recalibrating software every weekend. It's also the right call if your garage has quirks, a low header over the door, a support post in the wrong spot, or shared use with a workbench, that a boxed kit can't handle. Builders and property managers adding a simulator as a home amenity also benefit, since a professional install adds resale value that a tangle of extension cords never will.
Space and equipment needed
Most custom builds need at least 10 feet wide, 16 feet deep, and 9.5 feet of ceiling height to give a full swing clearance on both sides. Equipment typically includes:
- Launch monitor (radar or camera-based)
- Impact screen and enclosure netting
- Short-throw projector
- Rubber flooring or turf
- Dedicated hitting mat
- Networked audio and lighting controls
Estimated cost
| Component | Typical Range |
|---|---|
| Design and wiring labor | $1,500 to $4,000 |
| Launch monitor | $2,000 to $6,000 |
| Enclosure, screen, projector | $3,000 to $8,000 |
| Flooring and turf | $800 to $2,500 |
| Total project | $8,000 to $20,000+ |
Pricing depends heavily on the launch monitor brand and whether you want 4K projection or a simpler setup, so it helps to know the home golf simulator cost by tier first. A professional quote gives you a firm number before any drilling starts, which beats guessing your way through a DIY budget and running short halfway through.
2. Budget-friendly DIY practice bay
Skip the enclosure and the projector if you just want to keep your swing sharp through the winter. A budget-friendly practice bay built around a net, a mat, and an affordable launch monitor gets you real swing data without touching your electrical panel or hiring anyone. This is the entry point for most garage golf simulator ideas you find online, and it's the fastest way to test whether you'll actually use a simulator before spending thousands on one.
How it works
You hang a golf simulator net from the ceiling joists or a freestanding frame, lay a hitting mat in front of it, and set a portable launch monitor like a Rapsodo or Garmin unit a few feet behind the ball. Pair it to your phone or a laptop, and you get carry distance, ball speed, and spin numbers on every swing, no screen or projector required.
A net and a mat won't show you a virtual fairway, but they'll show you exactly what your clubface is doing, which matters more.
Best for
This setup fits homeowners testing the waters, renters who can't drill into walls, and anyone who wants swing practice more than course simulation.
Space and equipment needed
You need roughly 9 feet wide, 12 feet deep, and 8.5 feet of ceiling clearance. Gear list:
- Golf net or net/frame combo
- Hitting mat
- Portable launch monitor
- Optional side barrier netting
Estimated cost
Expect to spend $400 to $1,500 total. A basic net and mat run $150 to $300, while an entry-level launch monitor adds $300 to $1,200 depending on the data it tracks.
3. Foldaway simulator for a shared garage
Parking your car inside every night doesn't rule out a simulator. A foldaway simulator mounts on a retractable frame or rolls out on casters, so you get full golf practice on weeknights and a clear bay for your vehicle by morning. This is one of the most requested garage golf simulator ideas among homeowners who share the space with a car, a workbench, or seasonal storage.
How it works
You hang the screen and net assembly from a spring-loaded ceiling track or build it onto a wheeled frame you push against the wall. The mat and launch monitor stay portable too, stored in a cabinet or on a shelf between sessions. Setup takes five to ten minutes: pull down the screen, roll the mat into place, and power on the projector or monitor. Breakdown takes about the same, and your garage door clears the car again within minutes.
A garage that does double duty as a golf bay and a parking spot beats one that sits empty half the year.
Best for
This fits shared-use garages where the car, tools, or holiday decorations still need floor space. It's also a smart pick for renters or anyone still weighing a portable versus built-in golf simulator before committing to a permanent build.
Space and equipment needed
Plan for 9 to 10 feet wide, 14 feet deep with the frame extended, and 9 feet of ceiling height to clear the retractable track. You'll need:
- Retractable or rolling screen frame
- Portable hitting mat
- Launch monitor with wireless pairing
- Storage cabinet or wall hooks for cables
Estimated cost
Budget $1,200 to $3,500 total. Retractable frames run $400 to $900, a mid-range launch monitor adds $600 to $2,000, and a basic projector or large monitor tacks on another $200 to $600 if you skip a permanent screen mount.
4. Full enclosure with impact screen and projector
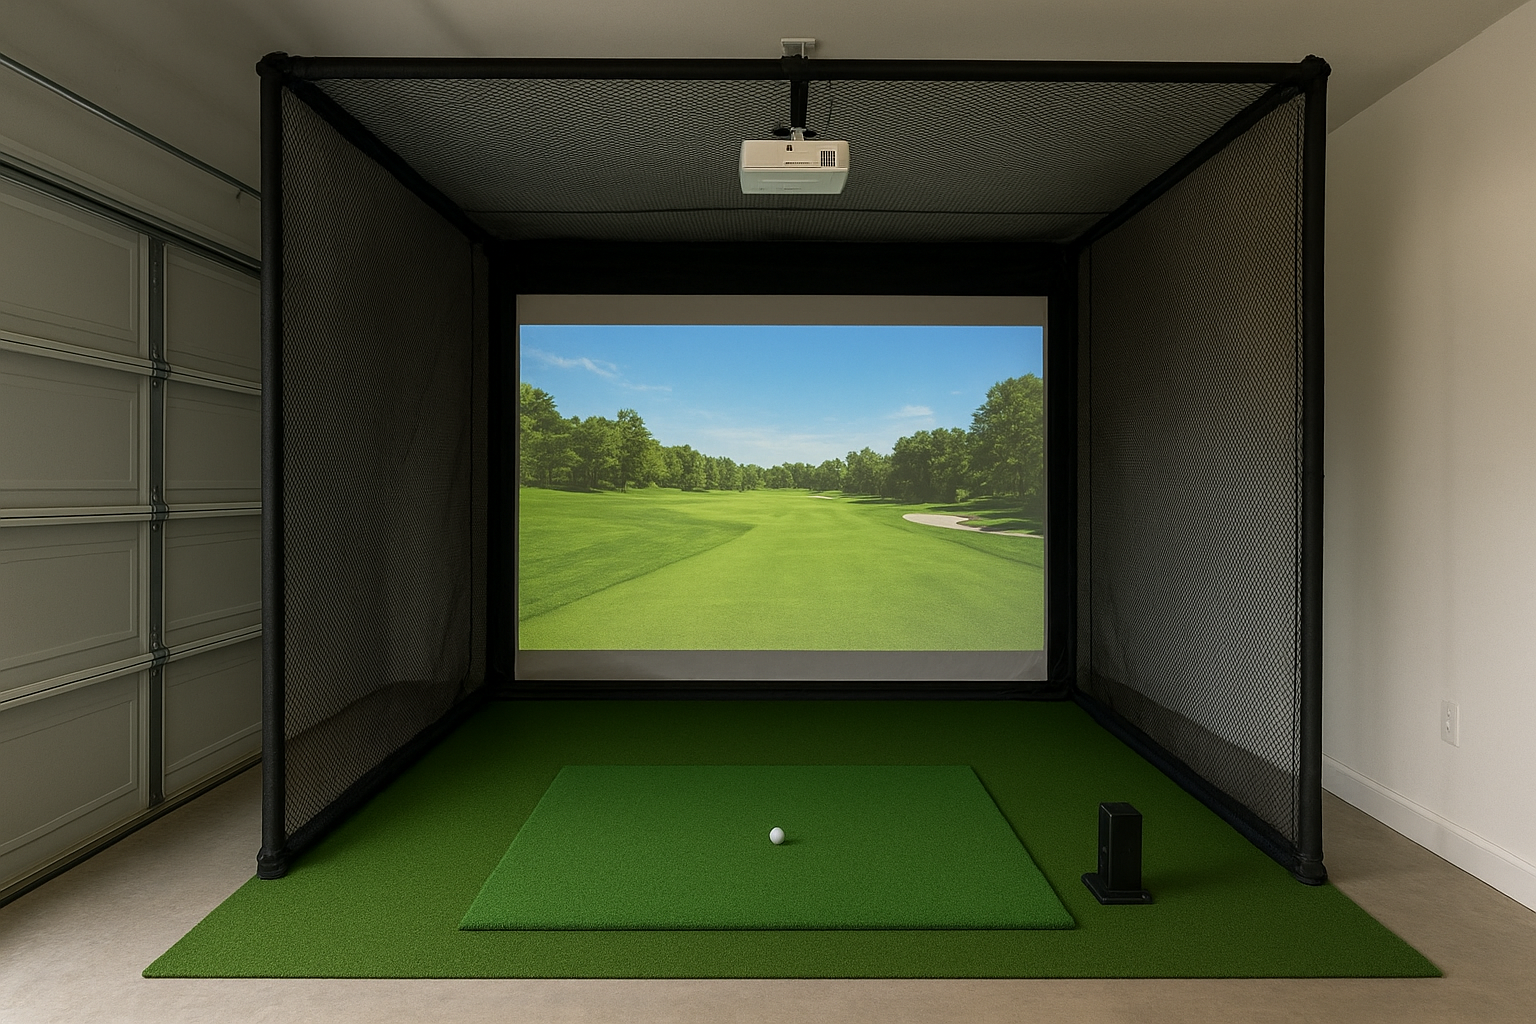
Once you're ready to stop hitting into a bare net and start playing actual courses, a full enclosure setup built from an enclosure kit for garages and spare rooms is the upgrade that changes everything. This is the layout most people picture when they search garage golf simulator ideas, a tensioned impact screen, side and top netting to contain mishits, and a projector throwing a realistic fairway onto the screen in front of you.
How it works
You frame out a permanent enclosure with aluminum or PVC piping, stretch an impact-rated screen across the front, and hang netting on the sides and ceiling to catch stray shots. A short-throw projector mounted overhead beams simulation software onto the screen, while your launch monitor feeds ball data into the game so you see real ball flight, not just numbers on a phone.
A screen and projector turn practice swings into actual rounds of golf, which is what keeps people coming back all winter.
Best for
This setup suits golfers who want simulation software, course play, and a genuine game-day feel rather than pure swing data. It's also a strong fit if you plan to host friends for a round after work, since the visual feedback makes the experience social instead of solitary.
Space and equipment needed
You'll need about 10 feet wide, 15 feet deep, and 9 feet of ceiling height minimum. Core gear includes:
- Impact screen and enclosure frame
- Side and ceiling netting
- Short-throw projector
- Launch monitor with simulation software license
- Hitting mat
Estimated cost
Budget $3,500 to $9,000 for the full package. The enclosure and screen run $600 to $1,800, a projector built for simulator play adds $700 to $2,500, and the launch monitor with software licensing makes up the rest, often the single biggest line item on the list.
5. Vaulted-ceiling setup for low garage ceilings
Many garages top out at 8 feet, short of the golf simulator ceiling height a standard build needs, which kills the project before you even start shopping. A vaulted-ceiling setup works around that limit by digging into the space between your rafters or tapping into an open-truss roofline, giving you the swing clearance a flat 8-foot ceiling can't. If your search for garage golf simulator ideas kept hitting a wall because of low ceilings, this is the fix.
How it works
A technician removes the drywall on your garage ceiling, exposes the rafters or trusses, and either raises the finished ceiling into the roof cavity or leaves it open with painted joists and recessed lighting. This can add 12 to 24 inches of clearance depending on your roof pitch, enough to swing a driver without clipping the net or the frame above you. The screen, projector, and netting install into that reclaimed height exactly like a standard enclosure.
Sometimes the cheapest square footage in your garage is the space above your head, not beside your car.
Best for
This fits homeowners stuck with a builder-grade garage and a ceiling under 8.5 feet who still want a full simulation setup rather than a stripped-down net.
Space and equipment needed
You'll need at least 10 feet wide and 15 feet deep on the floor, plus:
- Exposed or raised rafter framing
- Recessed or track lighting
- Impact screen, projector, and netting
- Launch monitor and hitting mat
Estimated cost
Budget $5,500 to $12,000. Ceiling framing and drywall removal run $1,200 to $3,000, on top of the standard enclosure costs from the full setup above.
6. Two-car garage simulator that still fits your vehicles
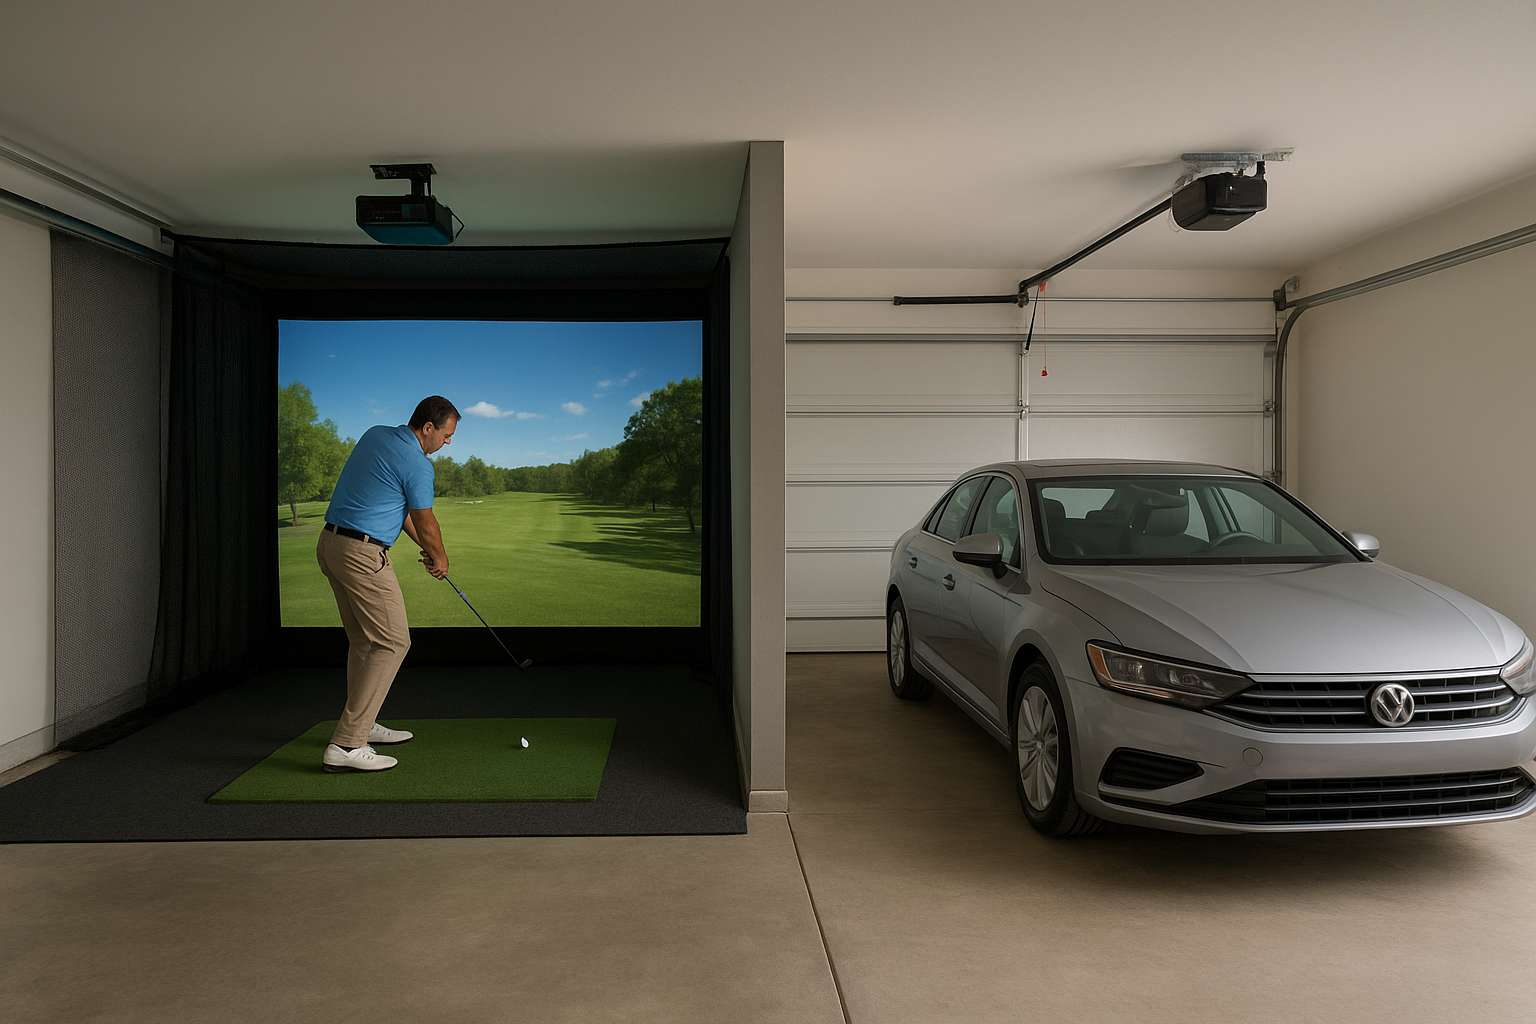
Giving up parking space isn't necessary if you split your two-car garage the right way. One bay stays open for your car, and the other becomes a permanent simulator setup with a floor-to-ceiling divider separating the two zones. This layout answers one of the most common questions behind garage golf simulator ideas searches: how do you fit a simulator without losing your only covered parking?
How it works
You install a floor track or a simple stud-wall divider down the center of the garage, then build the simulator enclosure on one side while leaving the other clear for your vehicle. Netting or a solid partition keeps stray shots from reaching the car, and you run separate lighting circuits so the simulator side gets bright, even illumination while the parking side stays on standard garage lighting.
Splitting the garage down the middle gives you a real golf bay and a real parking spot, not a compromise between the two.
Best for
This fits homeowners with only one garage who refuse to park outside through an Idaho winter, plus families who want the simulator available daily without turning the whole garage into a golf room.
Space and equipment needed
A two-car garage typically runs 20 to 24 feet wide, giving you roughly 10 feet for the simulator bay and 10 to 14 feet for parking, which is where careful golf simulator space planning pays off. You'll need:
- Center divider wall or heavy-duty netting
- Standard enclosure, screen, and projector
- Separate lighting zones
- Launch monitor and hitting mat
Estimated cost
Budget $4,500 to $10,500. The divider adds $500 to $1,500 over a standard full enclosure build, depending on whether you frame a wall or hang a netting partition.
7. Compact setup for small or single-car garages
Not every garage has room for a 15-foot bay, and a small garage simulator doesn't need one to be useful. Single-car garages under 10 feet wide can still fit a shortened simulator setup for tight spaces if you scale back the enclosure and accept a slightly restricted swing arc. This is one of the most searched garage golf simulator ideas because most homeowners aren't working with a three-car showroom, they're working with a tight single bay that also holds a lawnmower and bikes.
How it works
You shrink the footprint by mounting the screen closer to the hitting position and using a compact net enclosure instead of full side netting. A wall-mounted or short throw projector made for golf simulators keeps the image sharp even at reduced distance, and a lower-profile launch monitor sits closer to the mat than a standard install allows.
A tight garage doesn't rule out a simulator, it just rules out a driver swing for anyone over six feet tall.
Best for
This fits golfers working with a single-car garage, condo owners with shared parking structures, and anyone practicing mostly with irons and wedges rather than full driver swings.
Space and equipment needed
Aim for 8 to 9 feet wide, 11 feet deep, and 8.5 feet of ceiling height. Core equipment:
- Compact net or mini enclosure
- Short-throw projector or large monitor
- Low-profile launch monitor
- Slim hitting mat
Estimated cost
Budget $2,000 to $5,500 total. The compact enclosure runs $400 to $900, the projector or monitor adds $300 to $1,200, and the launch monitor makes up the rest depending on whether you choose radar or camera tracking.
8. Premium golf lounge with turf, seating and a bar
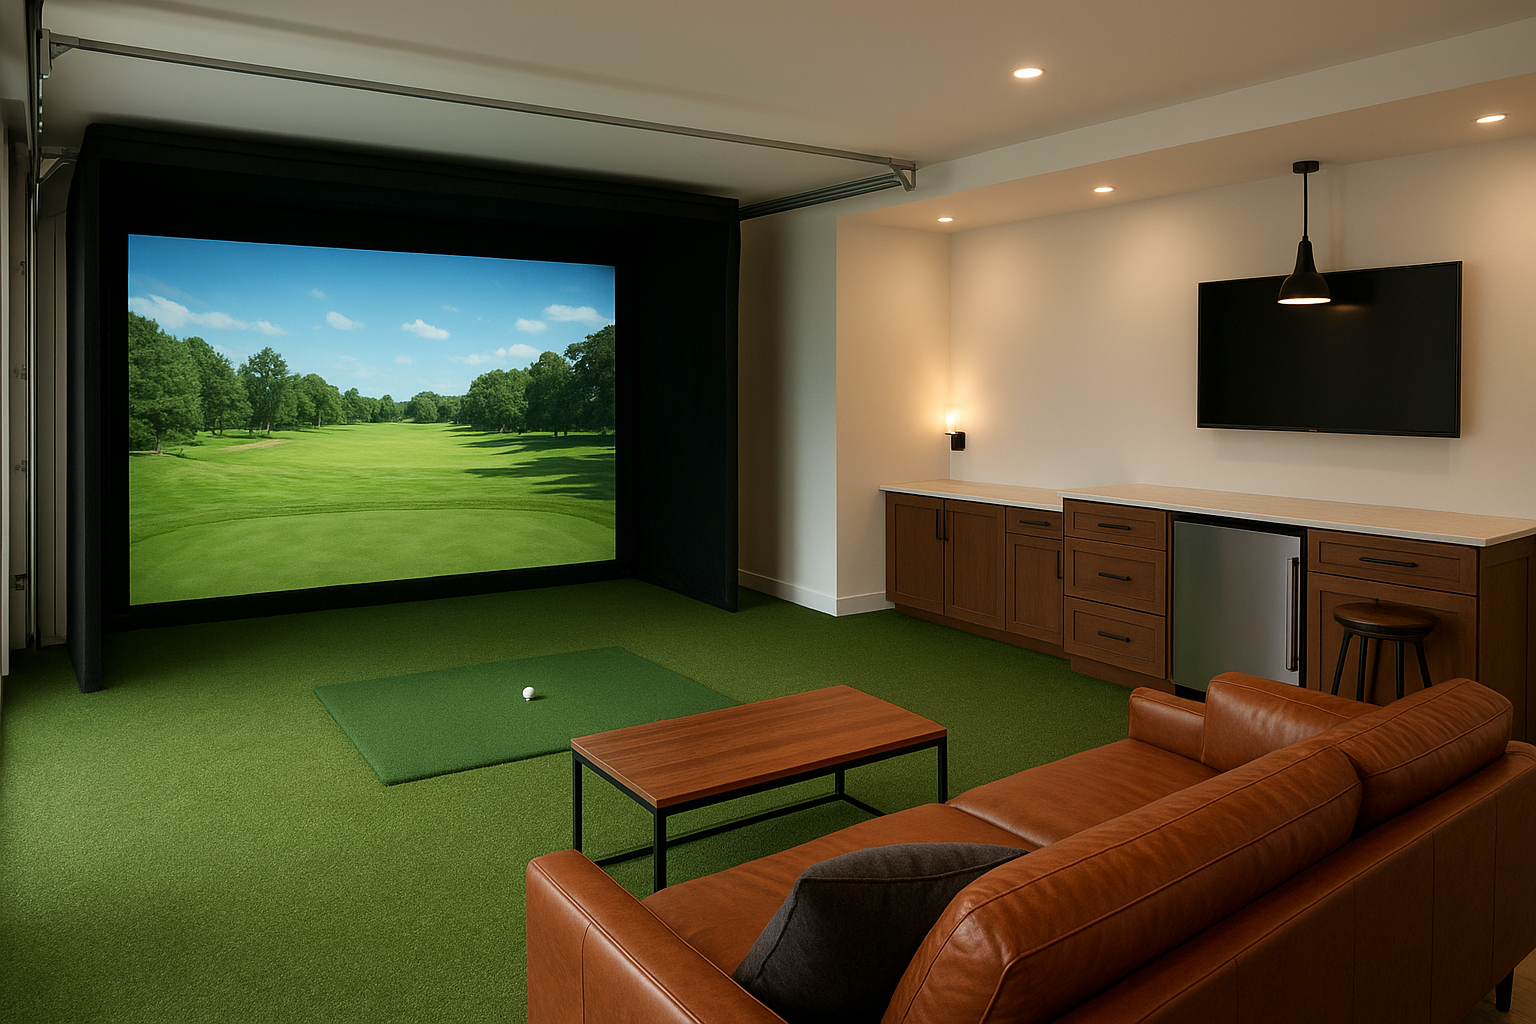
Some garages aren't just about the swing, they're about the hangout, the kind of space behind most golf simulator man cave ideas. A premium golf lounge turns your garage into a destination with turf flooring, real seating, a mini fridge or bar, and a simulator setup built to entertain a crowd, not just log your practice swings. Among garage golf simulator ideas, this is the one that treats the room like an amenity, the kind of space that gets used every weekend instead of every other winter.
How it works
You build the standard enclosure, screen, and projector setup, then extend the design past the hitting area. Artificial turf covers the full floor, not just the swing zone, and a raised platform or lounge seating sits behind the mat so guests can watch without standing in the way. Add a small bar cart, mini fridge, or built-in cabinetry along one wall, plus ambient lighting and a dedicated audio zone, and you have a bar golf simulator setup where the garage stops feeling like a garage.
A lounge-style build turns a golf simulator from a solo practice tool into the room everyone wants to be in on game night.
Best for
This fits homeowners who entertain often, host golf leagues or watch parties, or simply want a finished space that doubles as a den. It's also a strong pick for anyone treating the build as a long-term investment in the home rather than a seasonal project.
Space and equipment needed
Plan for at least 12 feet wide and 18 feet deep to fit both the hitting bay and a seating area. You'll need:
- Full-floor turf installation
- Standard enclosure, screen, and projector
- Seating, bar cabinetry, or mini fridge
- Ambient and accent lighting
- Dedicated audio system
Estimated cost
Budget $9,000 to $18,000. Turf and finishing work run $2,000 to $4,000, seating and bar features add $1,500 to $4,000, and the simulator components carry the remaining cost depending on launch monitor and projector quality.
9. Family-friendly layout for lefties and righties
Mixed-handed households run into a problem most garage golf simulator ideas ignore: a simulator built for a right-handed swing forces a lefty to stand in the wrong spot or skip their turn entirely. A family golf simulator setup solves this by centering the mat and widening the swing zone so both a right-handed parent and a left-handed kid can hit from the same setup without moving equipment between turns.
How it works
Instead of offsetting the hitting mat toward one side of the enclosure, you center it in the bay and widen the net or screen a foot or two beyond a standard install. A swappable or dual-sided mat lets you flip orientation in seconds, and the launch monitor sits on a small rolling stand so it can reposition to either side of the ball without recalibrating the whole system.
A garage built for both swing directions gets used by the whole family, not just the golfer who set it up.
Best for
This fits families with kids learning the game, mixed-handed couples, and anyone who hosts friends where you can't predict who's swinging which way.
Space and equipment needed
Plan for 11 to 12 feet wide, a couple feet beyond a standard single-handed bay, plus 15 feet deep and 9 feet of ceiling height. You'll need:
- Centered, dual-sided hitting mat
- Widened screen and side netting
- Rolling or repositionable launch monitor stand
- Standard projector and enclosure
Estimated cost
Budget $4,500 to $10,000. The extra width and dual-sided mat add roughly $300 to $700 over a standard full enclosure, with the rest tracking the launch monitor and projector choices covered earlier.
Finding the right fit for your garage
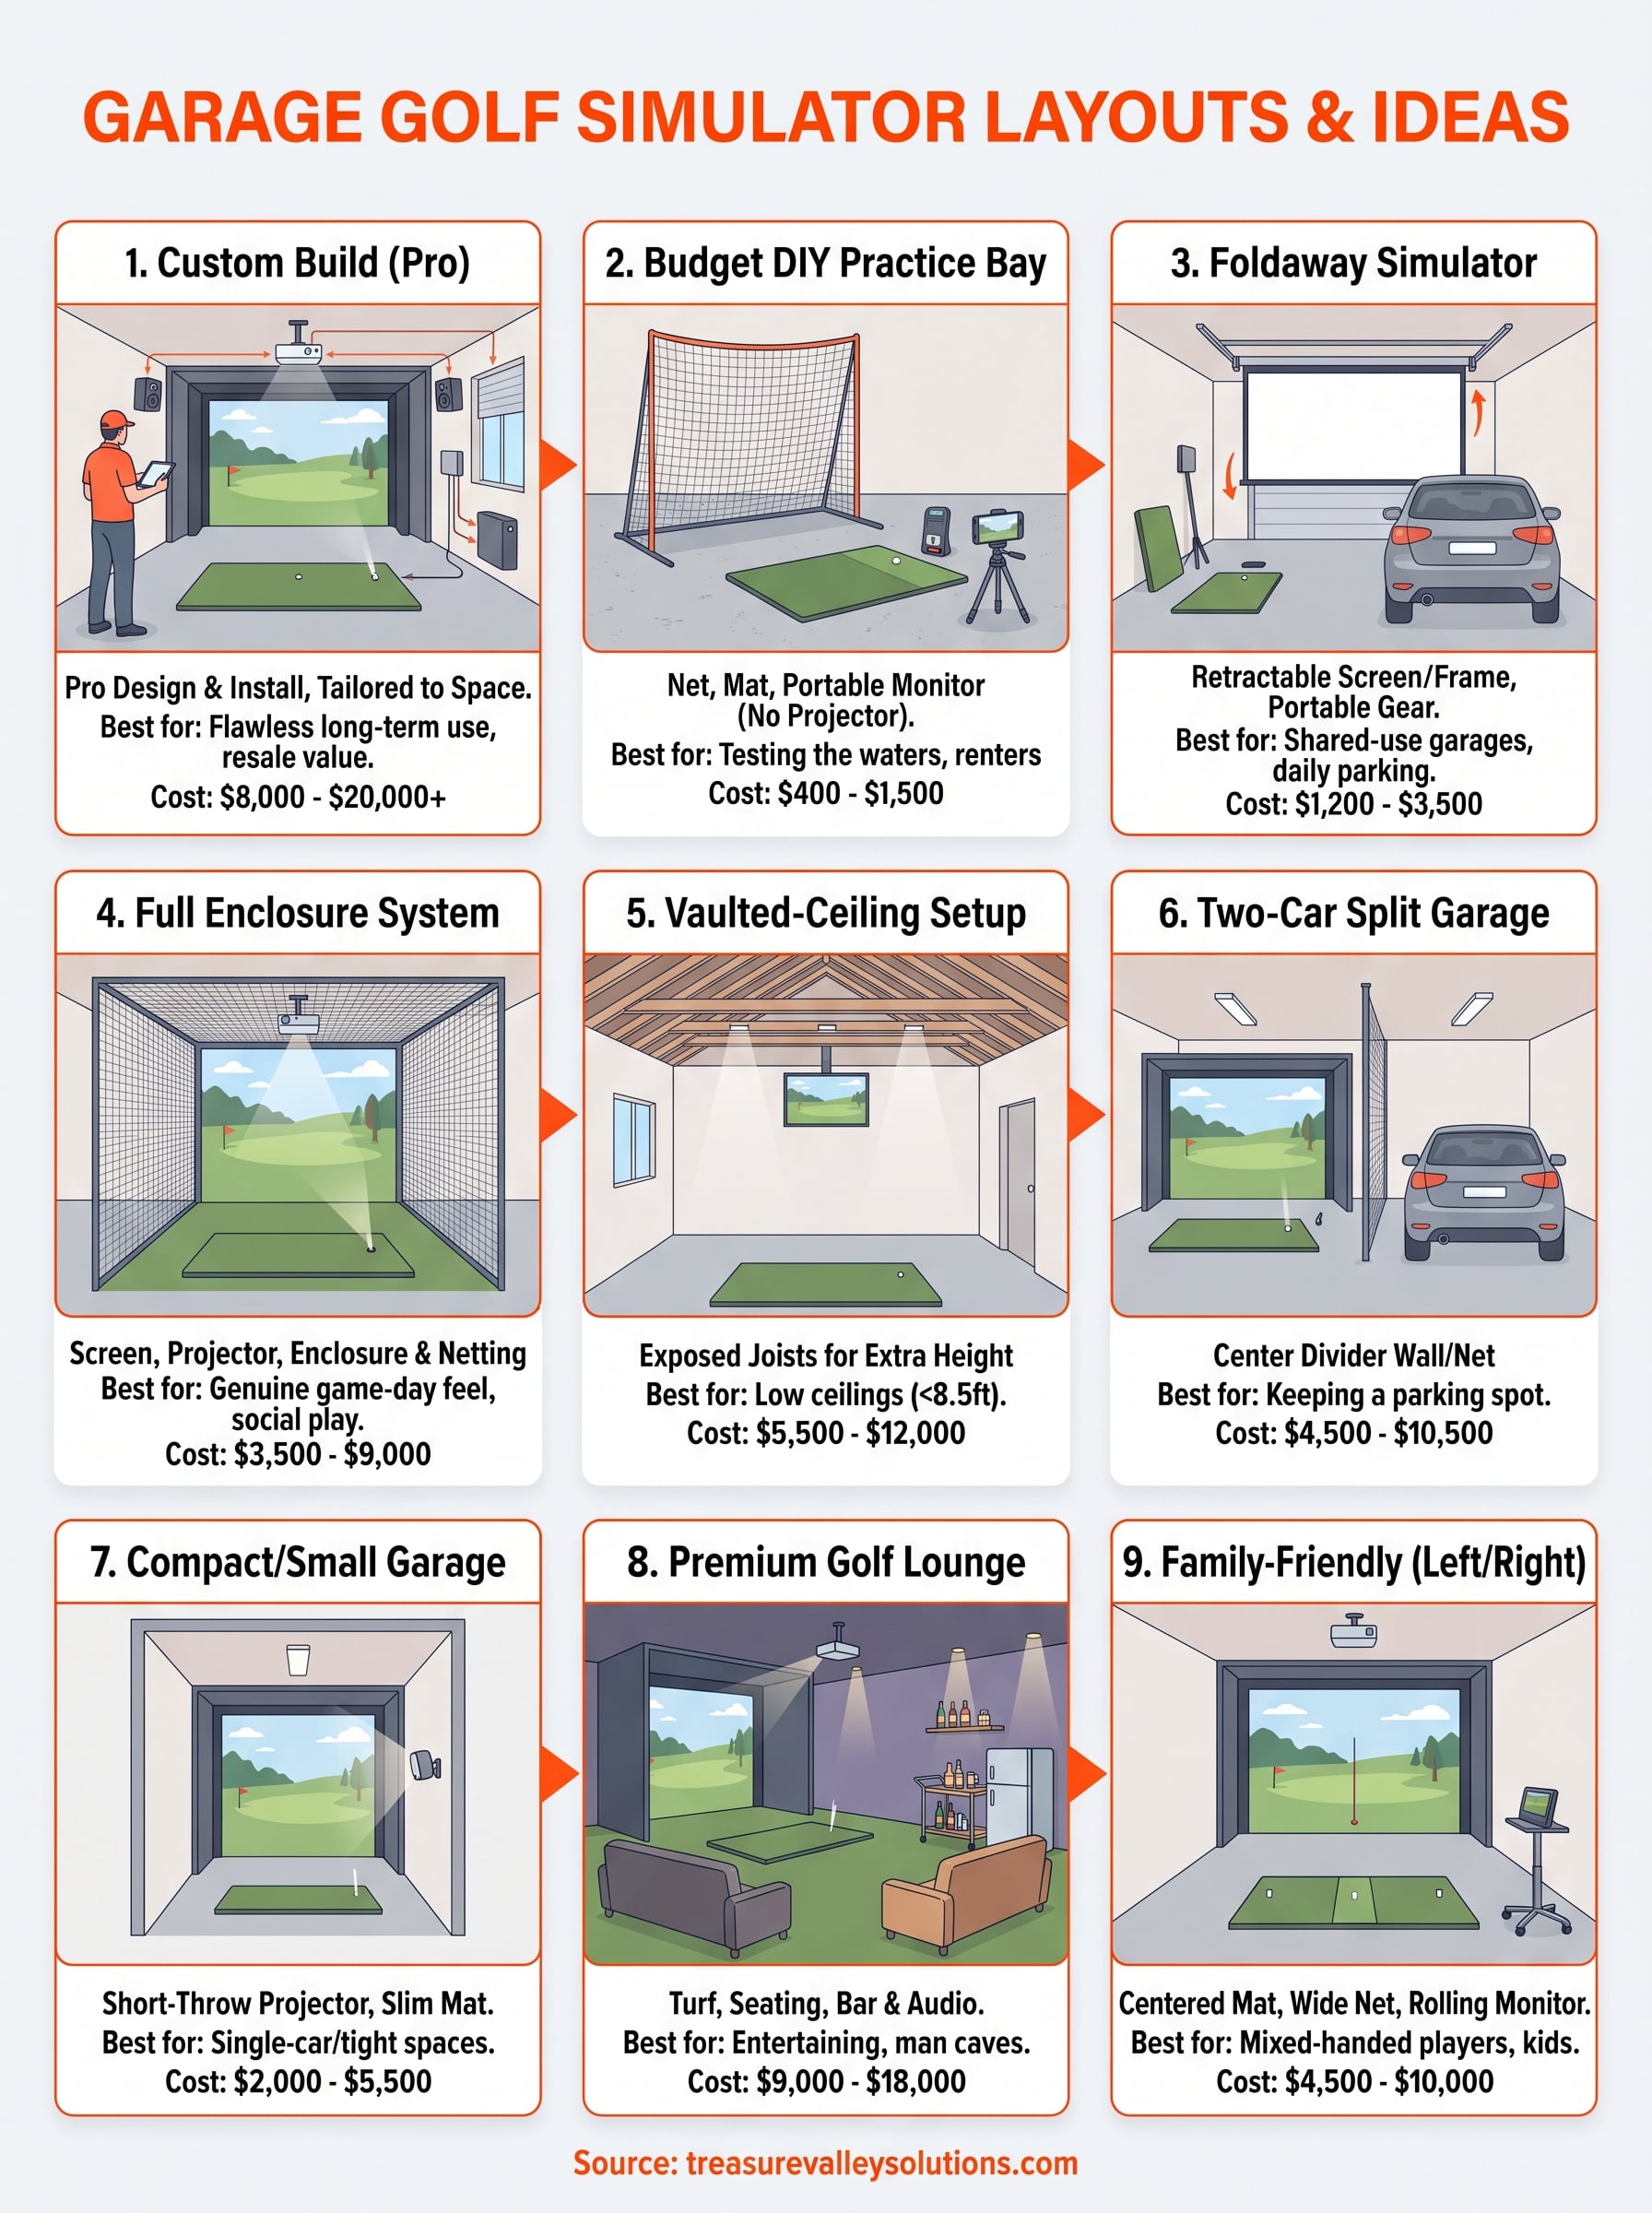
Nine layouts, one common thread: the best garage golf simulator setup matches your actual garage, not a generic kit built for someone else's ceiling height or parking needs. A single-car bay calls for a compact enclosure. A shared two-car garage needs a divider. A low ceiling needs a vaulted fix before you buy a single net. Start with your space, your budget, and how you want to play, then work backward to equipment.
Whichever direction you lean, a walkthrough with someone who's wired dozens of these rooms saves you from guessing at joist spacing, outlet placement, or projector throw distance. We've built garage simulators, theaters, and lighting systems across the Treasure Valley since 2014, and we're happy to look at your space before you spend a dollar on gear. Ask us for a free garage walkthrough and let's talk through what fits your space.