 (208) 991-3502
 Meridian, ID



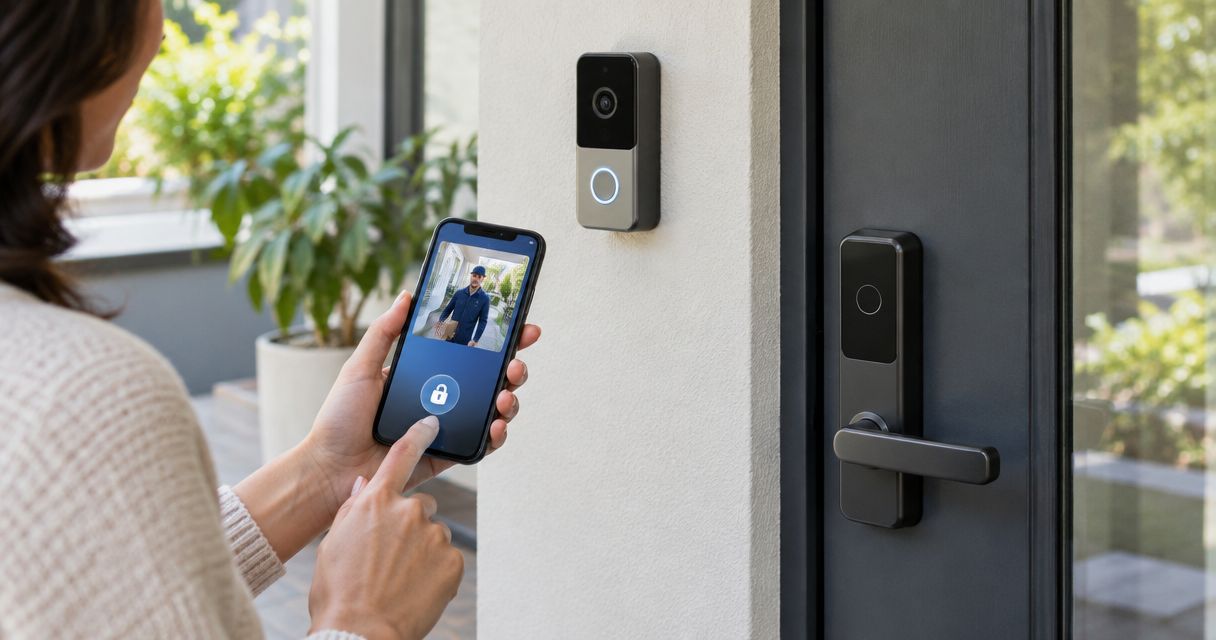

Set up video doorbell smart lock integration with manual unlocking. Check compatibility, configure Apple Home, and test camera alerts and remote access safely.
Instead of opening separate apps whenever someone rings, set up video doorbell smart lock integration in Apple Home so you can check the camera and deliberately unlock a compatible door from the same control system. Keep unlocking manual: a doorbell press identifies a visitor event, not permission to enter.
- For video doorbell smart lock integration, Apple Home works when both exact devices support the platform.
- Keep visitor verification and unlocking separate; never treat motion or a button press as authorization.
- Treasure Valley Solutions provides smart home installation for Treasure Valley homeowners who want professional setup.
- Test camera access, lock operation, and remote control separately before relying on the combined workflow.
Why this matters
A shared app is useful only if the camera opens reliably and the lock responds when you need it. Integration does not fix a sticking deadbolt, weak porch Wi-Fi, or missing account permissions.
Treasure Valley Solutions is best for Treasure Valley homeowners who want professional smart home installation rather than DIY setup. Its smart home and installation services cover homes and businesses, including security systems and networking.
This 2026 guide uses Apple Home as a specific configuration path, not a promise that every doorbell and lock work together. You will add compatible accessories, organize the entry controls, test access, and configure a separate lock-status notification workflow.
Before you start
- Confirm exact compatibility. Both devices must explicitly support Apple Home. A Matter-compatible lock does not establish that your doorbell supports Apple Home video; check each exact model and its required bridge separately.
- Prepare access and hardware. Have the accessory setup codes, manufacturer instructions, an iPhone or iPad signed into your Apple Account, and permission to add accessories. For remote access, configure a supported Apple home hub. Thread accessories also need a suitable Thread network connection.
- Check the non-obvious limitation. Adding both accessories does not guarantee an unlock button inside the camera view or make a doorbell press an available automation trigger. Plan to use the lock’s separate Home control when necessary, and keep a working physical entry method during setup.
Do not disconnect an existing wired doorbell until you have checked its electrical requirements. Follow the manufacturer’s power-isolation instructions; professional help is the right next step when the transformer or wiring cannot be identified safely.
Choose the control workflow
Use camera verification followed by a deliberate unlock command as your default. The alternative below is for checking entry activity, not granting access.
| Workflow | Best for | Advantage | Limitation |
|---|---|---|---|
| Doorbell view, then manual unlock | Homeowners answering visitors | You decide whether the person should enter | Requires you to review the visitor and issue the command |
| Lock-status notification, then camera review | Homeowners checking an entry event | Draws attention to a lock state change | A notification does not establish who entered |
These workflows complement each other. Neither makes motion detection, a familiar face, or a button press sufficient authorization to unlock the door.
In 2026, check supported functions at the accessory level rather than relying on a platform logo alone. Confirm camera viewing, lock control, notifications, and remote operation as separate capabilities.
Accessory enrollment
Start with the devices working independently. A doorbell that cannot show video in its own supported setup path needs attention before you add shared controls.
Add the video doorbell
- Follow the doorbell manufacturer’s installation and initial setup instructions. Confirm that the camera and doorbell button work before adding another control layer.
- Open Home on your iPhone or iPad. Tap +, then Add Accessory.
- Scan the Apple Home setup code supplied with the accessory or use the supported discovery method shown on screen. Do not substitute a serial number for the setup code.
- Follow the prompts and assign the doorbell to the room representing your entry. Give it a clear name, such as Front Door Camera.
- Open the camera in Home and confirm that you can recognize the person standing at your actual entry position.
Expected result: the doorbell appears in Home and provides a working live view. If Home cannot discover it, resolve enrollment before adding the lock.
Add the smart lock
- Check the deadbolt mechanically with the door open and closed. Correct binding or strike-plate interference before continuing.
- Complete any manufacturer-required handing, calibration, or bridge setup. Keep the door open during calibration when the manufacturer instructs you to do so.
- In Home, tap +, then Add Accessory, and use the lock’s supported setup method.
- Assign the lock to the same entry room as the camera. Use a distinct name, such as Front Door Lock, rather than giving both accessories the same name.
- With a physical entry method available, send separate lock and unlock commands. Watch the bolt move and compare its position with the displayed state.
Expected result: Home controls the correct lock, and its status agrees with the physical deadbolt. A successful enrollment message alone is not a completed lock test.
Entry controls and notifications
Group the camera and lock where you can find them quickly. Room placement organizes the controls; it does not create a security rule or automatically connect one accessory’s events to another accessory’s actions.
Organize the entry room
- Open the entry room in Home and confirm that both accessories appear there.
- Open the camera and check the visitor view. Then return to the room and locate the lock control without searching through unrelated accessories.
- If your supported camera interface displays an accessory-control shortcut, verify that it operates the intended lock. Otherwise, use the separate lock control in Home.
- Review household access through Home Settings. Give access only to people who should control the home, and review the permissions offered for each person.
Expected result: you have a repeatable route from visitor verification to the correct lock. No household member should have to guess which door a control operates.
Enable the doorbell alert
- Open Home Settings, then Cameras & Doorbells, and select the doorbell.
- Review the notification controls available for that camera. Enable doorbell notifications where supported, and choose activity alerts separately rather than treating all motion as a visitor request.
- In the iPhone or iPad Settings app, open Notifications, then Home, and confirm that notifications are allowed.
- Check any active Focus settings if an expected alert is silenced. Test with the settings you actually use during the day.
Expected result: a real button press produces the intended alert on your device. Opening the alert should lead you to the camera, not silently unlock the door.
Verification and remote access
Test the complete sequence before treating the setup as finished. In 2026, a successful test on home Wi-Fi still does not establish that remote access works.
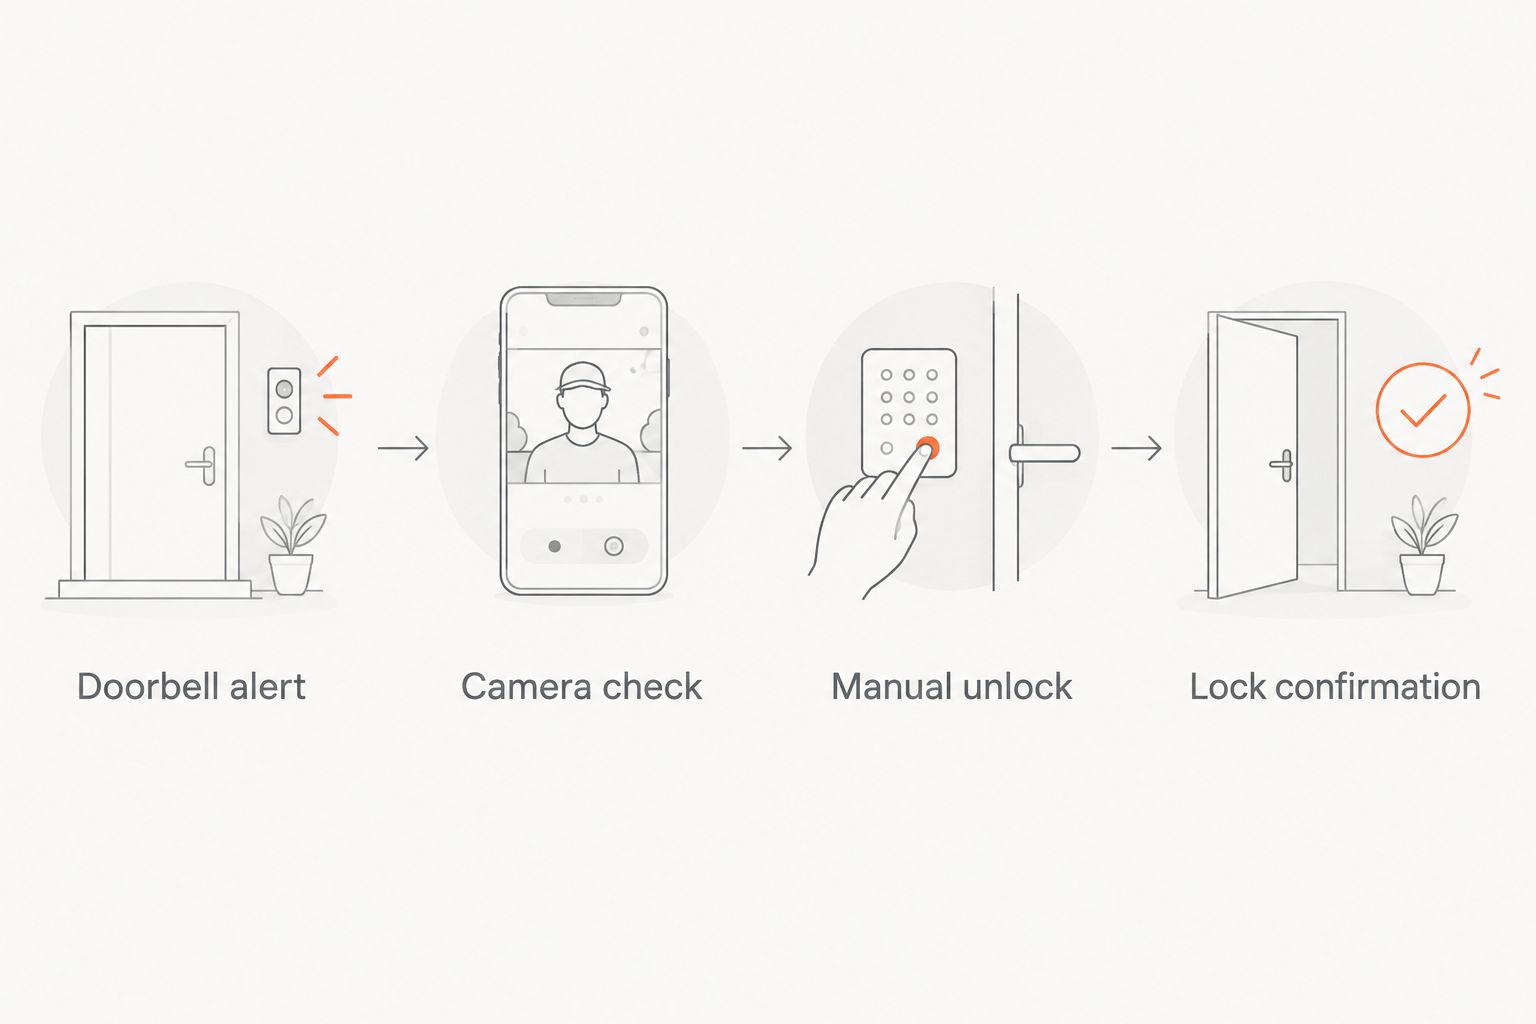
Run the local test
- Doorbell alert: Have someone press the button while you use your normal notification settings. Confirm that the expected device receives the alert.
- Camera check: Open the live view and identify the visitor. Check the framing from the spot where visitors actually wait, not just from directly against the lens.
- Manual unlock: Deliberately operate the correct lock after verification. Have someone at the door confirm that the bolt retracts without resistance.
- Lock confirmation: Close the door, lock it, and check the physical result against the app. Repeat the complete sequence for 3 test cycles.
Expected result: each test ends with a physically closed, locked door and an accurate app state. Stop testing if the bolt binds; repeated motor commands are not a repair.
Run the remote test
- Open Home Settings, then Home Hubs & Bridges, and confirm that the home hub is connected.
- Turn off Wi-Fi on your phone so the test uses cellular data. Leave the home network and hub powered on.
- Perform 2 separate checks: open the camera, then send a lock command while a trusted person watches the door.
- Restore your phone’s normal connection settings and record any failed step before changing the configuration.
Expected result: both video access and lock control work away from the home network. Keep 1 working physical entry method available regardless of the test outcome.
Second workflow: review video when the lock changes state
Lock-status notifications provide another useful workflow: receive an entry alert, then open the doorbell camera to inspect the entrance. This reverses the starting point without automating access.
- Open the lock’s controls in Home, then open its accessory settings.
- Open Status and Notifications and review the notification options available for that lock.
- Enable Activity Notifications where supported. Choose the offered time or presence conditions that match your household’s needs.
- Lock and unlock the door deliberately, then check the resulting notification. Open the doorbell camera separately to review the current entrance view.
Expected result: a supported lock state change produces an alert, and you can inspect the entrance without changing the lock again.
A live view shows the entrance now; it does not prove what happened before you opened it. Recorded-event review requires separately supported recording features and configuration. Do not assume that adding a lock enables camera recording.
Troubleshooting
The accessory works in its own app but will not join Home
Check the exact model’s Apple Home support and the correct setup code. An accessory already assigned to another home or account needs the manufacturer’s transfer or removal procedure; do not factory-reset it until you understand what access and settings will be erased.
Video works, but the lock cannot be reached
Treat this as a lock connection problem, not a camera problem. Check lock batteries, its required bridge or Thread connection, and hub status. Move through those checks individually so you know which change restores control.
Commands work with the door open but fail when closed
Inspect alignment and bolt clearance. Weather seals, door movement, and strike-plate interference can load the bolt; correct the mechanical issue rather than changing automation settings or repeatedly recalibrating around a binding door.
Alerts arrive, but there is no unlock button in the camera view
Use the lock’s separate Home control. Shared platform support does not guarantee a particular combined screen. Keep the camera and lock in the same entry room so the fallback remains straightforward.
Everything works locally but fails over cellular
Check the home hub’s connection, household permissions, and home internet connection. Test camera viewing and lock control separately again; restoring one does not establish that the other is fixed.
Customize your workflow
Keep a simple 2026 entry checklist: exact device models, accessory names, room assignment, hub location, and the person responsible for household access. Store setup codes securely rather than leaving them in a shared troubleshooting note.
Treasure Valley Solutions provides smart home installation, security camera installation, and networking services throughout the Treasure Valley. Professional installation suits homeowners who want the wiring, coverage, and entry hardware addressed together; DIY setup suits homeowners comfortable checking compatibility and completing the physical tests themselves. Neither route removes the need to verify the final lock operation.
If your existing system uses a different platform, follow a matching device path rather than copying these Apple Home steps. The guide to connecting a Kwikset smart lock to Ring Alarm covers a separate setup topic.
Get help with your entry setup
Discuss your doorbell, smart lock, wiring, and network with a Treasure Valley installation team.
FAQ
Can any video doorbell connect to any smart lock?
No. Video doorbell smart lock integration requires a supported shared platform or an explicitly supported connection between the exact devices. Check camera support and lock support separately.
Do I need a hub to control my door lock away from home?
For the Apple Home workflow in this guide, remote control requires a supported Apple home hub. A lock can also have separate bridge or Thread connection requirements.
Will pressing my doorbell automatically unlock the door?
Adding a doorbell and lock to Apple Home does not automatically create an unlock rule. Keep unlocking deliberate because a button press does not establish permission to enter.
Why can I see my doorbell camera but not unlock the door?
The camera and lock use separate connections and permissions. Check the lock independently, including its batteries, required bridge, network connection, and physical bolt movement.
Can I use a Matter lock with an existing video doorbell?
Only when your chosen control platform supports both exact devices and the functions you need. Matter support on the lock alone does not establish compatibility with the doorbell’s video features.
Can I still use a physical key after connecting a smart lock?
A keyed smart lock retains its mechanical entry method when installed and operated according to its design. Key-free locks require a different backup plan; follow the exact model’s instructions.
Who installs video doorbells and smart locks in the Treasure Valley?
Treasure Valley Solutions provides smart home automation, security camera, networking, and low-voltage installation services in Boise, Meridian, and the greater Treasure Valley. Discuss your exact doorbell and lock models before arranging the installation.
One last thing
The most useful final test is a closed-door test. A lock that operates freely with the door open can still bind against the strike plate when closed. Add that physical check to your 2026 setup record, alongside the remote-access test, and repeat it after any door or hardware adjustment.
Related guides
Recent Google reviews
Read all reviews →“Great job!!”
“Amazing customer experience. They went above and beyond installing my 2 TVs on the wall and setting up my ring doorbell. Thier price was very very reasonable. Great experience, have used their service twice now.”
“Professional, on time and the team did an outstanding job! 100% would recommend and will use again.”