 (208) 991-3502
 Meridian, ID



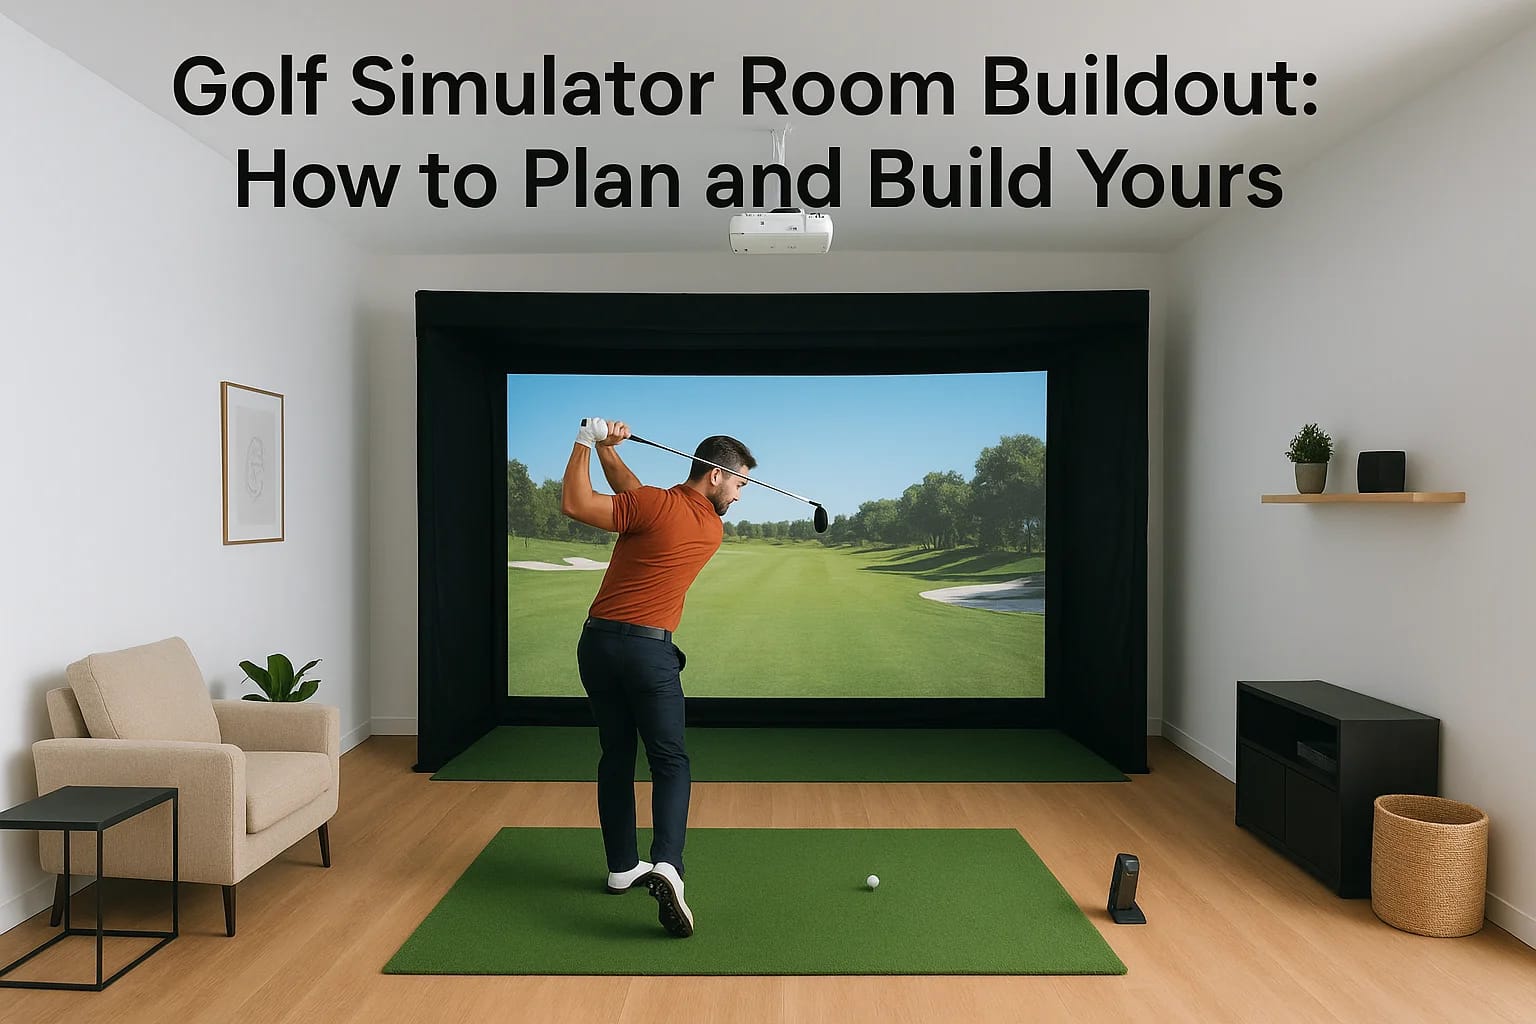

You have got a spare room, a garage bay, or a basement corner you want to turn into a place to practice golf year round, and you are staring at it wondering where to even start. A golf simulator room...
You have got a spare room, a garage bay, or a basement corner you want to turn into a place to practice golf year round, and you are staring at it wondering where to even start. A golf simulator room buildout is not just about buying a projector and a net and hoping for the best. Get the ceiling height wrong, skip the impact screen tensioning, or ignore your flooring choice, and you will end up with a room that looks unfinished and plays worse than the range you were trying to replace.
This guide walks you through the real planning decisions: minimum room dimensions for your swing and camera setup, the materials that hold up to repeated club strikes, and how to weigh a turnkey package against a custom build. You will know exactly what to measure and what to buy before you cut a single piece of enclosure frame.
We build custom AV and home theater spaces across the Treasure Valley every week, and simulator rooms use a lot of the same skills: projector alignment, acoustic treatment, clean wiring, and lighting that does not wash out your screen. Whether you are doing this yourself or want a professional installation to handle the tricky parts, this article gives you the plan to build a simulator room you will actually use for years.
What to plan before your golf simulator buildout
Before you buy a single stud or screen, sit down and answer four questions: how much vertical and horizontal space you actually have, how much you want to spend, whether you want a turnkey package or a fully custom build, and which features matter most to your household or business. Skipping this planning stage is the number one reason simulator rooms end up cramped, loud, or half-finished. Golf simulator room buildout projects go sideways when someone buys a launch monitor before confirming the ceiling will clear a driver swing, or picks a projector before measuring throw distance. Lock these decisions first and the rest of the build moves fast.
Confirm your ceiling height and swing clearance
Ceiling height kills more simulator plans than any other single factor. You need at least 9 feet of clear height for a comfortable driver swing, and taller players or anyone using a longer driver should aim for 10 feet or more. Measure from the finished floor to the lowest point in the room, including any ductwork, light fixtures, or sloped sections, not just the highest point. Garages with exposed rafters or basements with mechanical runs often look taller than they actually clear once you account for obstructions.
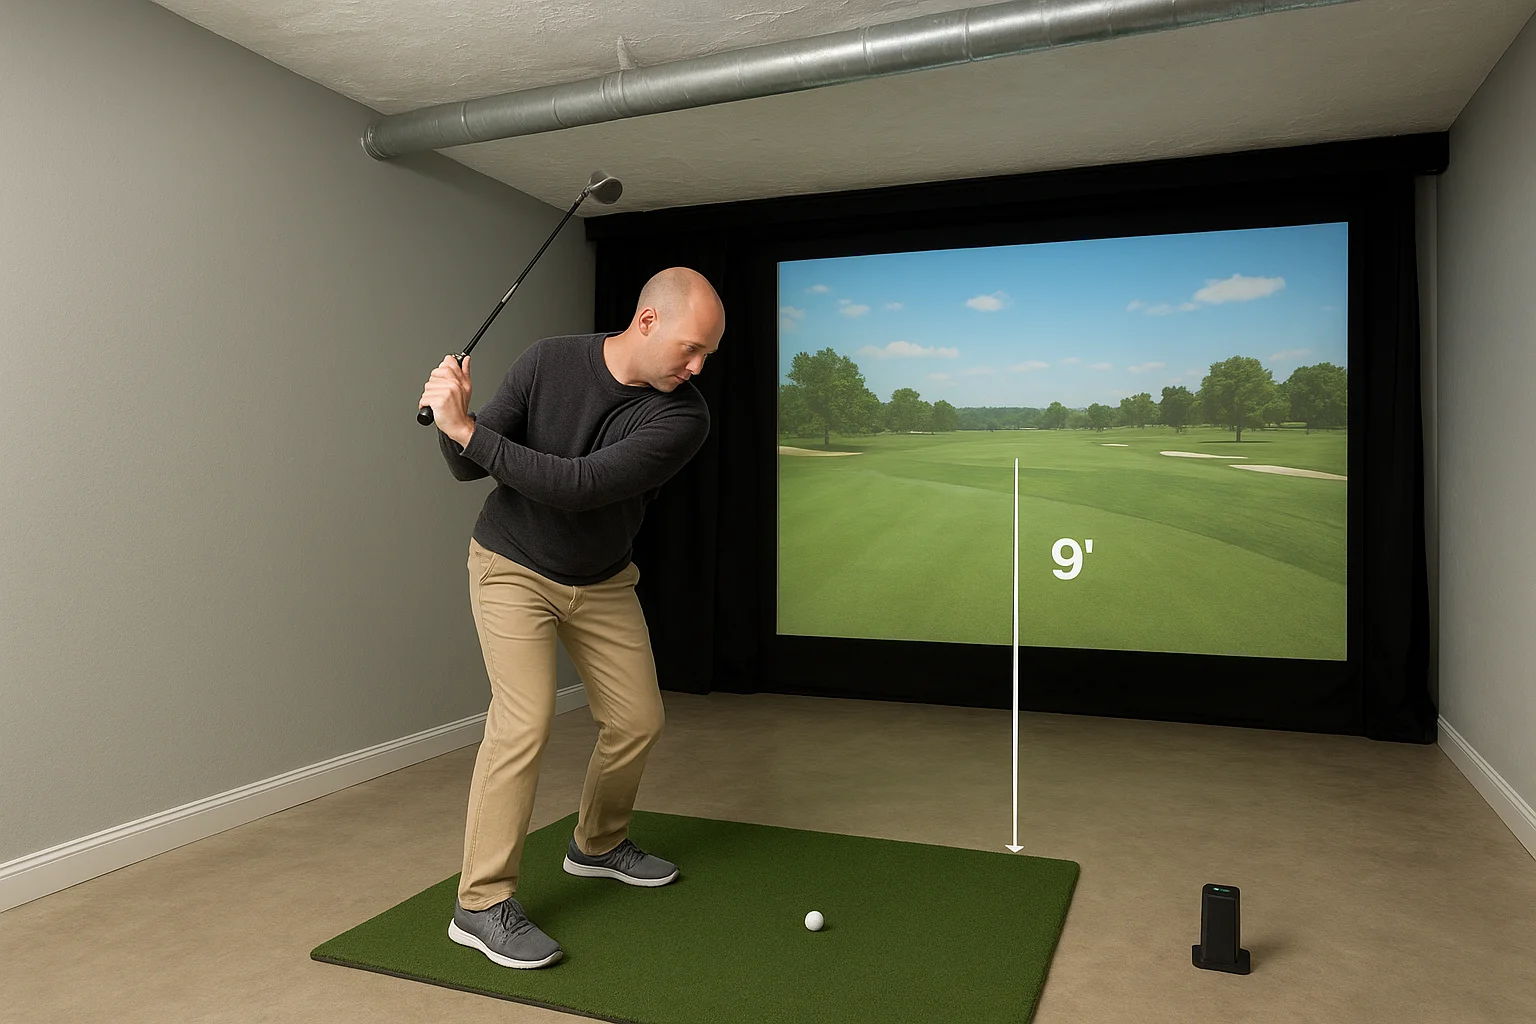
A room that looks spacious but has a 8-foot ceiling with a duct running through it will never fit a real golf swing.
Walk the space with a golf club in hand before you commit. Stand where the hitting mat will go and take a few practice swings, checking for clearance on your backswing side too, since a slice into a side wall is common when players are still adjusting to indoor distances.
Decide between a turnkey package and a custom build
Turnkey simulator packages bundle a screen, enclosure, projector mount, and sometimes the launch monitor into one purchase, which simplifies decision-making but limits how well the system fits an oddly shaped room. A custom build costs more time upfront but lets you match every component to your actual space, your flooring, and your acoustic needs. Most homeowners land somewhere in between: a packaged enclosure and screen, paired with a custom-selected launch monitor and separately sourced AV gear.
| Approach | Best for | Typical drawback |
|---|---|---|
| Turnkey package | Standard rectangular rooms, fastest setup | Limited fit for low ceilings or narrow spaces |
| Custom build | Irregular rooms, integrated home theater or audio | Requires more planning and coordination |
| Hybrid | Most residential garages and bonus rooms | Still needs a clear equipment priority list |
Map out your must-have features list
Once you know your space and your general approach, write down what you actually want the room to do. A single-player practice bay has very different priorities than a room meant to host friends, stream shot data, or double as a media space. This list drives every decision from here forward, including wiring runs and lighting placement.
- Primary use: solo practice, entertaining, or lessons
- Data priority: club and ball metrics versus simple ball flight tracking
- Audio and video: simple speaker setup versus full surround sound
- Multi-use needs: movie nights, gaming, or corporate presentations
- Accessibility: seating, storage for clubs, and walk-in clearance
Write this list down before you shop. Equipment priorities shift once you see real pricing, but a clear list keeps you from overspending on features you will not use or underspending on the launch monitor accuracy that actually improves your game.
Step 1. Measure and choose your space
Grab a tape measure and walk every candidate room before you fall in love with any single spot. Golf simulator room buildout success starts with three numbers: length, width, and ceiling height, and you need all three to work together, not just one impressive dimension. A garage that is 22 feet deep but only 8 feet tall will not work any better than a tall bonus room that is too narrow for your stance and follow-through.
Measure length and depth for your setup style
Length matters because it determines how far back you can place the launch monitor and how much room you have for a comfortable stance behind the ball. Plan for at least 15 feet from the hitting position to the impact screen, and add another 6 to 8 feet behind the golfer for the launch monitor, a chair, or a walk-up path. Depth becomes especially important with camera-based launch monitors like those that sit behind or beside the ball, since they need a clear sightline without interference from side walls or storage shelving.
Get the depth right and everything else in the room falls into place; get it wrong and no amount of gear fixes a cramped swing.
Check width for full swing clearance
Width protects your swing path and your walls. Aim for a minimum of 10 feet of usable width, with 12 to 15 feet giving left-handed and right-handed players room to alternate without repositioning the whole setup. Narrower rooms work if only one person plays regularly and you position the mat off-center toward the open side.
Match your space type to the right dimensions
Different spaces come with different built-in constraints, so match your expectations to the room type before you start framing anything.
| Space type | Typical ceiling height | Best fit for |
|---|---|---|
| Two-car garage | 8 to 10 feet | Compact turnkey enclosures, single-player use |
| Basement bonus room | 8 to 9 feet | Finished builds with acoustic treatment |
| Detached shop or barn | 10 to 14 feet | Larger enclosures, multi-hitter setups |
| Converted bedroom | 8 feet | Short-iron practice, limited driver swings |
Once you settle on square footage, sketch the room on paper with the hitting zone, screen wall, and any support columns marked. Support columns and low ductwork show up in nearly every garage and basement conversion, and catching them on paper now saves you from reframing an enclosure later. This sketch becomes your reference for every remaining step, from screen sizing to where you run power and network cabling.
Step 2. Set your budget and equipment priorities
Money decisions come before shopping, not after you fall for a launch monitor with a feature set you cannot afford. A realistic golf simulator room buildout runs anywhere from $3,000 for a basic enclosure and entry-level monitor to $25,000 or more for a fully finished room with premium data tracking and integrated AV. Set a number you are comfortable spending, then break it into categories so you know where the real cost lives before you commit to any single brand.
The launch monitor and enclosure eat most of your budget, so decide those two purchases before spending a dollar on finishes.
Break your budget into categories
Split your total budget across the major components instead of buying whatever looks impressive first. Most rooms break down roughly like this:
| Category | Typical share of budget |
|---|---|
| Launch monitor | 35 to 50 percent |
| Enclosure, screen, and impact wall | 20 to 30 percent |
| Projector and mount | 10 to 15 percent |
| Flooring and hitting mat | 10 to 15 percent |
| Lighting, AV, and finishing touches | 10 to 15 percent |
Adjust these percentages based on your must-have list from earlier. A player chasing tour-level swing data should push more toward the launch monitor. Someone building a room to entertain friends should shift budget toward audio, lighting, and comfortable finishes.
Rank features by what actually improves your game
Before requesting quotes, rank your equipment priorities from must-have to nice-to-have. This keeps salespeople and package deals from pulling you toward add-ons you do not need.
- Accurate ball speed and spin data
- Club path and face angle tracking
- Realistic course graphics and playable rounds
- Multi-sport compatibility (baseball, soccer, etc.)
- Voice control or app-based system management
- Premium finishes like turf borders or LED trim
Anything below the top three on your list can wait for a future upgrade. Feature ranking matters more than most buyers expect, because simulator technology changes fast, and the room you build today should let you swap a launch monitor or projector in three years without tearing out walls.
Leave room in the budget for professional help
Even a DIY-minded homeowner benefits from setting aside 10 to 15 percent of the total budget for professional installation, whether that means running dedicated electrical circuits, mounting a projector at the correct throw distance, or calibrating a launch monitor's camera angle. Skimping here often costs more later in return shipping, drywall repair, or a screen that never tensions correctly.
Step 3. Choose your launch monitor and software
Your launch monitor is the single piece of gear that decides whether your golf simulator room buildout feels like real golf or a glorified video game. Two technologies dominate the market: photometric (camera-based) and radar-based (Doppler) systems. Photometric units sit in front of or beside the ball and read clubface and ball data at impact, while radar units sit behind the ball and track the entire flight path. Neither is universally better, but they fit different room shapes and swing habits.
Buy the launch monitor that matches your room's depth and lighting, not the one with the flashiest marketing video.
Match monitor type to your room layout
Camera-based monitors need consistent lighting and a clear zone in front of the ball, which works well in shorter rooms where a radar unit's distance requirement would not fit. Radar units need at least 8 feet behind the ball to read the shot accurately, so a shallow room can rule out that option entirely. Check the manufacturer's placement specs against the sketch you made in Step 1 before you buy anything.
| Monitor type | Placement | Room depth needed | Best for |
|---|---|---|---|
| Camera-based | Front or side of ball | 10 to 12 feet total | Shorter rooms, consistent lighting |
| Radar-based | Behind the ball | 15 to 18 feet total | Longer rooms, full flight tracking |
Compare data accuracy against your goals
Not every golfer needs tour-level spin and launch data. If you are practicing short game feel or hosting casual rounds with friends, a mid-range monitor with reliable ball speed and carry distance covers most needs. If you are a serious player chasing swing changes, prioritize a unit with verified club data accuracy, including face angle and path, since that data drives real improvement, not just entertainment value.
Pick software that fits how you will use the room
Software determines whether your room feels like a practice bay or a full golf experience. Look for platforms offering:
- Realistic course libraries with regular updates
- Practice range modes with shot shape feedback
- Multiplayer or online league support
- Compatibility with your chosen launch monitor's data feed
- Regular firmware and software updates from the manufacturer
Check compatibility lists carefully. Some launch monitors lock you into one software ecosystem, while others work across multiple platforms. This decision affects your screen resolution needs too, since course graphics at higher settings demand a sharper projector than a simple ball-flight overlay does. Confirm your projector choice can handle the software's minimum graphics requirements before you move to building the enclosure.
Step 4. Build the enclosure, screen, and impact walls
Once your launch monitor and software are settled, it's time to build the frame that everything else hangs on. Golf simulator room buildout work gets real here: you're framing an enclosure, tensioning an impact screen, and protecting the walls around it from mishit shots that will happen no matter how good you get. Skip corners on this step and you'll be patching drywall and replacing a sagging screen within a year.
Frame the enclosure to fit your ceiling
Most enclosure kits use aluminum or PVC frame poles that bolt together into a box roughly 10 to 16 feet wide and 9 to 10 feet tall. Order a kit sized at least six inches shorter than your measured ceiling clearance from Step 1, since screen fabric and top rails add height once assembled. If your room has sloped ceilings or ductwork intrusions, look for a modular frame that lets you adjust individual pole lengths rather than a fixed-size box.
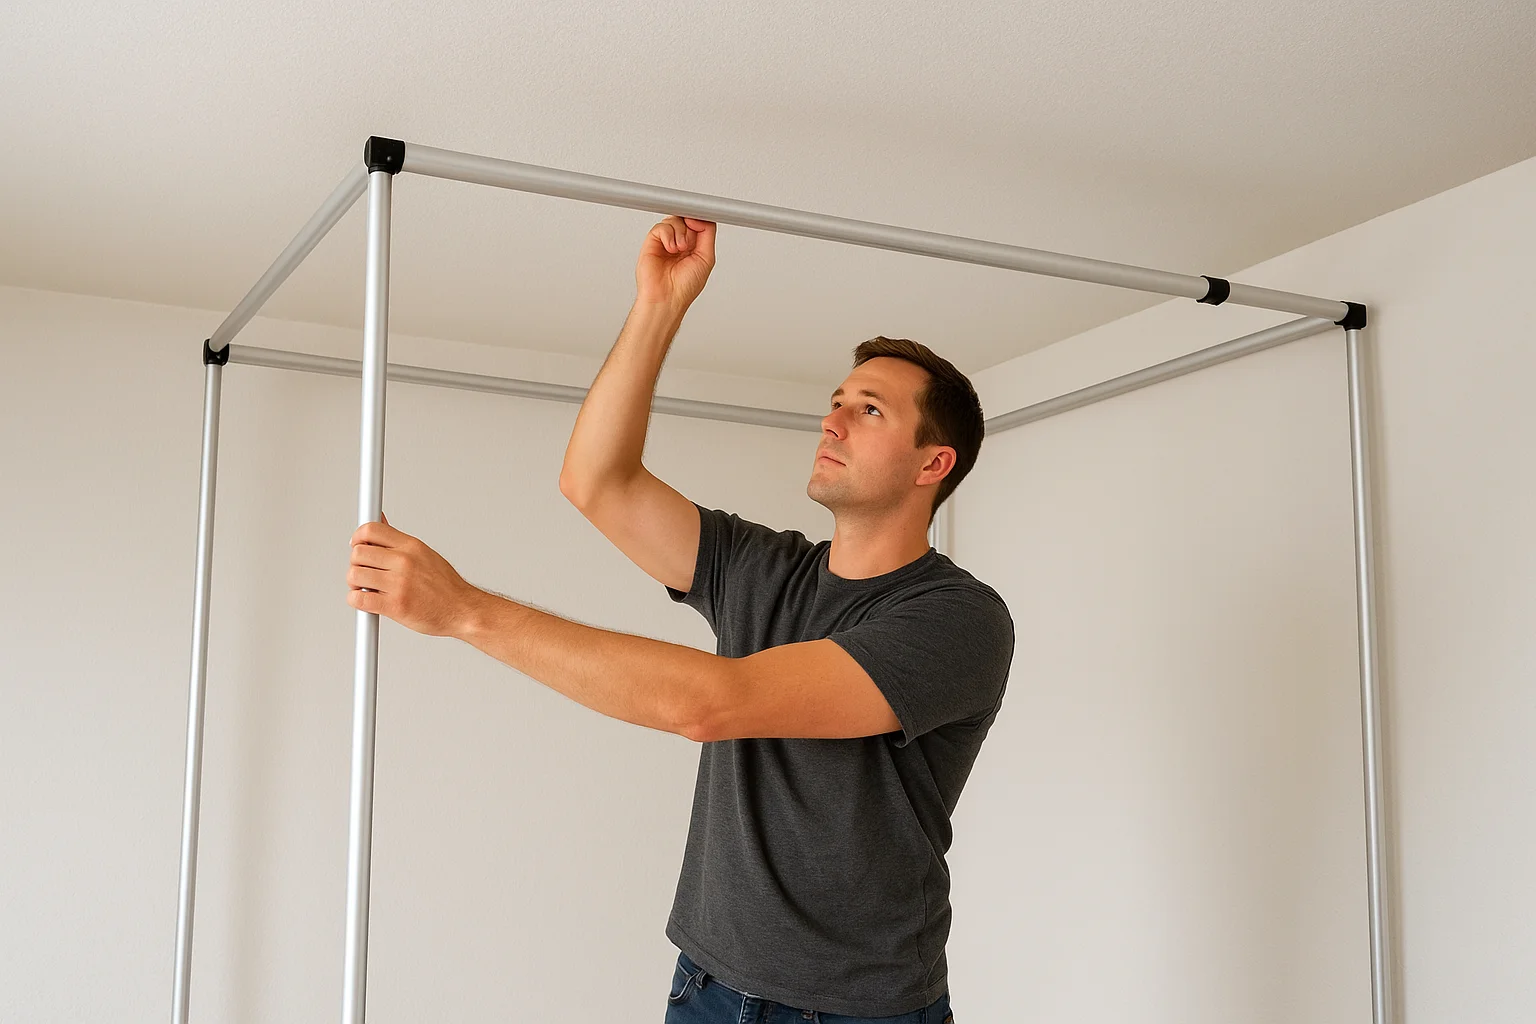
The enclosure frame only works if it's sized to your actual clearance, not the advertised dimensions on the box.
Choose and tension your impact screen
The screen does double duty: it displays your course graphics and absorbs the impact of a golf ball traveling well over 100 mph. Buy a screen rated specifically for golf impact, not a general projection screen, since the weave and backing differ significantly.
- Stretch the screen taut across the frame with grommets or a bungee-cord perimeter
- Check for wrinkles or sag before your first session; loose screens deaden the ball sound and distort graphics
- Re-tension every few months as material stretches with repeated impacts
- Replace the screen every 1 to 3 years depending on usage frequency
Protect side and back walls with impact-rated barriers
Even with a well-placed hitting mat, mishits happen, especially on the backswing side. Cover any wall within range of a stray shot with impact-rated barrier netting or foam panels rated for golf use, not general sports netting. Side walls closest to the swing path take the most abuse, so double up protection there.
| Wall zone | Recommended protection |
|---|---|
| Front (screen wall) | Golf-rated impact screen |
| Side walls near swing | Netting plus foam panel backing |
| Back wall behind golfer | Light netting or drywall protection |
Once the enclosure, screen, and walls are secured, step back and check for gaps where a ball could escape the hitting bay. This is also the point to confirm your projector mount location lines up with the screen's center before you move on to flooring.
Step 5. Install flooring and a hitting mat
With the enclosure and screen secured, turn your attention to what's under your feet. Flooring in a golf simulator room buildout does two jobs: it protects the subfloor from divots and moisture, and it gives your hitting mat a stable, level base to sit on. Skip this step or lay a mat straight on bare concrete, and you'll feel every mis-hit in your joints within a few sessions.
Choose a subfloor that handles impact and moisture
Garages and basements almost always need a moisture barrier before anything else goes down, since concrete slabs wick ground moisture that will warp foam tiles or rot carpet padding over time. Interlocking foam tiles or rubber gym flooring both work well over a vapor barrier, giving you a forgiving surface that absorbs some shock from your swing and reduces noise transfer to rooms below.
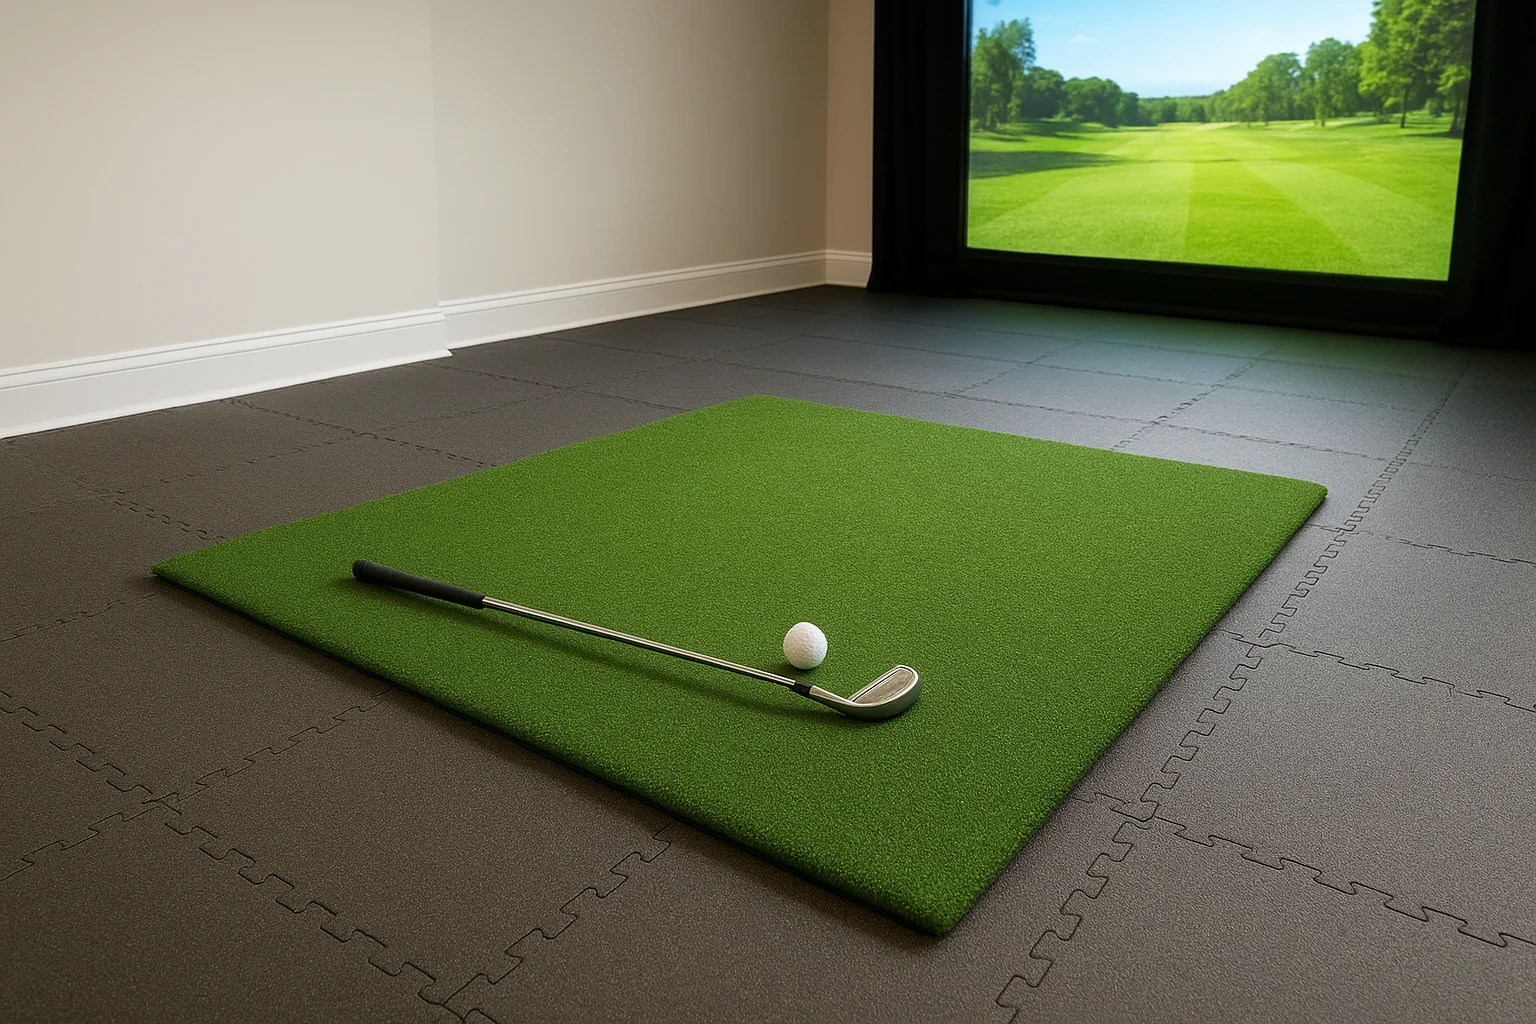
| Subfloor option | Best for | Watch out for |
|---|---|---|
| Interlocking foam tiles | Basements, converted bedrooms | Can compress under heavy foot traffic over years |
| Rubber gym flooring | Garages, high-use rooms | Heavier to install, higher upfront cost |
| Artificial turf over foam | Rooms wanting a golf-course look | Needs a firm foam base underneath to feel right |
A hitting mat is only as good as the subfloor underneath it, so don't skip the moisture barrier just to save a weekend.
Size and place your hitting mat correctly
Your hitting mat needs enough surface area for a full stance plus a fairway-style landing zone in front for divot practice with irons. Most simulator mats run 5 by 5 feet minimum, though serious practicers often upgrade to a combination mat with a turf surround and a swappable insert for realistic divot interaction. Center the mat on your screen and launch monitor placement from Step 1's sketch, not on the room's geometric center, since off-center alignment throws off ball flight tracking.
- Confirm mat thickness matches your launch monitor's minimum clearance for sensors
- Leave at least 2 feet of turf or flooring around the mat for footing during your swing
- Anchor the mat if it's near a garage door track or high-traffic walkway
- Test your stance and full swing on the mat before finalizing screen and enclosure alignment
Once your flooring and mat placement feel solid underfoot, you're ready to move into the wiring phase, where power and networking decisions depend on exactly where your equipment now sits.
Step 6. Wire power, networking, and AV components
With your mat and screen positioned, map out every cable run before you drill a single hole. A golf simulator room buildout depends on clean power and reliable networking just as much as it depends on the launch monitor itself. Poor wiring shows up as dropped Wi-Fi during a round, a projector that flickers, or an extension cord snaking across the floor waiting to trip someone mid-swing.
Plan dedicated circuits for your equipment
Projectors, launch monitors, PCs, and audio gear all draw power at once, so a single overloaded outlet is asking for trouble. Run at least one dedicated 15-amp circuit for your simulator electronics, separate from any garage door opener, refrigerator, or shop equipment already on that line. If you're finishing a basement or garage from scratch, this is the point to call an electrician rather than guess at load capacity.
A dedicated circuit costs less than replacing a fried launch monitor after a power surge.
Run network cable instead of relying on Wi-Fi
Wireless connections drop frames, add lag to course graphics, and frustrate everyone waiting to hit. Run a hardwired Ethernet line from your router to the simulator PC whenever the room layout allows it, since network stability matters more here than in almost any other home tech setup. If running cable through walls isn't practical, a mesh Wi-Fi extender placed close to the enclosure is the next-best option.
Position and connect your AV components
Decide where your projector, PC, speakers, and any receiver will physically sit before running cable, since moving equipment after the fact means fishing new wires through finished walls.
- Mount the projector at the manufacturer's recommended throw distance from the screen, confirmed against your Step 4 enclosure dimensions
- Route HDMI and power cables through conduit or in-wall raceways to keep the enclosure clear of trip hazards
- Place speakers outside the ball's swing path but close enough for clear course audio
- Keep the PC or gaming console in a ventilated cabinet, not sealed inside the enclosure frame where heat builds up
Label and test everything before closing up walls
Label each cable at both ends before you button up any wall panels or trim. Six months from now, when you're troubleshooting a dead HDMI port, you'll be glad you did. Test power draw, network speed, and every AV connection with the actual launch monitor software running, not just a basic signal check, since some monitors need consistent bandwidth to sync shot data in real time. Once everything checks out, you're ready to move into lighting and climate control, where small adjustments make a bigger difference than most builders expect.
Step 7. Dial in lighting, climate, and soundproofing
Lighting, climate, and sound don't get the same attention as a launch monitor purchase, but a poorly lit or noisy room ruins the experience just as fast as bad data. Golf simulator room buildout projects often nail the equipment and skimp here, then wonder why the screen looks washed out or why every mishit echoes through the house.
Control light spill on the screen
Ambient light is the enemy of a bright, accurate image. Position any windows behind the golfer, never facing the screen, and add blackout shades or curtains if natural light hits the projection surface at any point in the day. Overhead fixtures should sit outside the projector's beam path, and dimmable LED cans work better than fixed brightness bulbs since you'll want full light for setup and low light for play.
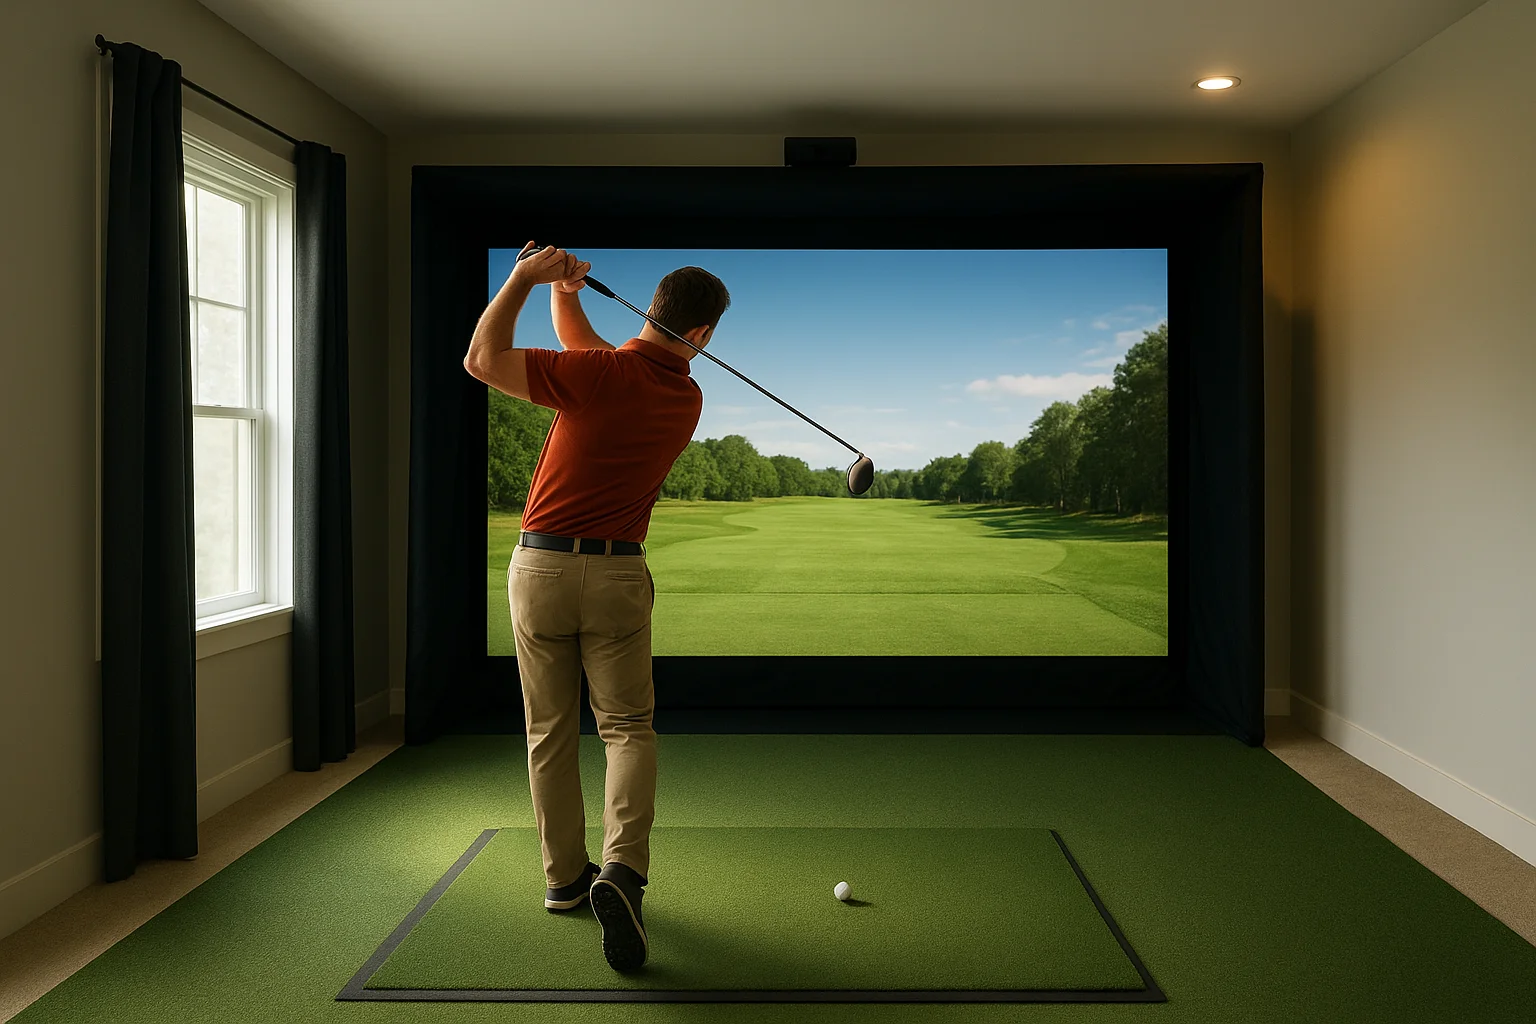
A bright, glare-free screen matters more to your experience than a few extra pixels of resolution.
Keep the room comfortable year-round
Garages and basements swing hard in temperature between seasons, and a stuffy or freezing room kills motivation to practice. If your existing HVAC doesn't reach the space, add a ductless mini-split or a portable unit sized to the square footage rather than running a space heater near electronics. Climate control also protects your equipment, since projectors and PCs run hotter in an enclosed, poorly ventilated bay than most builders expect.
| Climate fix | Best for | Watch out for |
|---|---|---|
| Ductless mini-split | Garages, detached shops | Higher upfront install cost |
| Portable AC/heater unit | Basements with existing airflow | Limited capacity in larger rooms |
| Extended HVAC ductwork | Rooms near existing systems | Requires opening walls or ceilings |
Treat the room for sound and impact noise
Golf shots are loud, and the sound bounces hard off bare drywall or concrete. Add acoustic panels to side and back walls, layer a rug or turf over hard flooring, and weatherstrip the door if the room shares a wall with living space. This isn't just about comfort. Local building codes in shared-wall situations, like multifamily properties, may require sound mitigation, so check with your local building department, similar to guidance available through HUD's multifamily housing resources, before finishing walls permanently.
Once lighting, temperature, and sound feel right during a real practice session, not just a quick walkthrough, you're ready to add the finishing touches that turn a functional bay into a room you actually want to spend time in.
Step 8. Finish the room with design and comfort details
Every system in your room now works, so the last step turns a functional bay into a space people actually want to hang out in. Golf simulator room buildout projects that skip this stage end up with a garage that plays golf well but looks like a construction site, and that matters if you're using the room to entertain guests or clients. Design details also protect the equipment you just installed, since good finishes reduce dust, glare, and wear over years of use.
Choose wall and trim finishes that hold up
Standard drywall works fine outside impact zones, but consider slatwall panels or acoustic wood slats along visible walls for a finished look that also helps with sound. Trim finishes should match the rest of your home if the room connects to living space, since a mismatched garage-style buildout feels disconnected from the house. Add baseboard trim around the enclosure base to hide cable runs and give the room a cleaner edge where flooring meets frame.
Add seating and a viewing area
Behind the hitting mat, leave room for a small seating area, whether that's a couple of bar stools, a bench, or a full lounge setup if space allows. Position seating outside the swing radius but within clear sightline of the screen so spectators can watch shots and course play without craning their necks. A side table or shelf near the seating area gives players a spot for a scorecard, phone, or drink without cluttering the hitting zone.
Comfortable seating turns a practice bay into a room people actually want to spend an evening in.
Bring in storage and personal touches
Golf clubs, balls, and accessories need a home that isn't the middle of the floor. A wall-mounted club rack or a cabinet near the entrance keeps gear organized and out of the swing path.
- Club rack or slotted storage for multiple sets
- Small refrigerator or bar cart for drinks during long sessions
- Branded signage, scorecards, or golf memorabilia on non-impact walls
- A rug or artificial turf border to soften hard flooring transitions
These finishing touches cost far less than the launch monitor or enclosure but shape how the room actually feels day to day. Once the design details are in place, you've got a complete picture of what a finished build looks like, which makes it easier to compare against real cost ranges and layouts for different budgets.
Golf simulator room costs and layouts by budget
Every golf simulator room buildout falls into one of three rough tiers, and knowing which tier fits your goals before you shop keeps you from mixing a budget enclosure with a premium launch monitor, or the reverse. The numbers below assume a two-car garage or similarly sized room, since square footage drives cost almost as much as equipment choice.
Entry-level builds ($3,000 to $7,000)
Basic builds pair a camera-based launch monitor with a simple net or economy screen, a foam-tile subfloor, and a portable projector on a shelf mount instead of a ceiling mount. Skip permanent enclosure framing at this tier and use a freestanding frame kit you can disassemble if you move or need the garage back. This range works well for solo practice and casual use, but expect to upgrade the screen or mat within two to three years of regular play.
Mid-range builds ($8,000 to $15,000)
Most Treasure Valley homeowners land here. A mid-range build adds a permanent aluminum enclosure, a golf-rated impact screen, dedicated electrical circuits, and a mid-tier launch monitor with reliable club and ball data. Layouts at this budget typically run 12 by 16 feet with a 10-foot ceiling, giving room for a small seating area behind the mat without crowding the swing zone.
The mid-range tier is where most builds land, because it's the first budget that supports both good data and a room people actually enjoy using.
Premium builds ($16,000 and up)
Premium rooms add tour-level launch monitors, full acoustic treatment, climate control, and finished trim that matches the rest of the house. Layouts often expand to 14 by 20 feet or larger, with dedicated lounge seating, a bar area, and lighting zones controlled through a smart home system rather than basic switches.
| Budget tier | Typical layout | What you get |
|---|---|---|
| Entry ($3,000 to $7,000) | 10 by 15 feet, 9-foot ceiling | Basic screen, foam flooring, portable projector |
| Mid-range ($8,000 to $15,000) | 12 by 16 feet, 10-foot ceiling | Permanent enclosure, dedicated circuit, reliable data |
| Premium ($16,000+) | 14 by 20 feet or larger | Tour-level monitor, full acoustic and climate control |
Whichever tier fits your budget, match the layout to the room type you settled on back in Step 1. A garage bay rarely supports a premium lounge footprint, and forcing it usually means cutting corners on swing clearance instead.
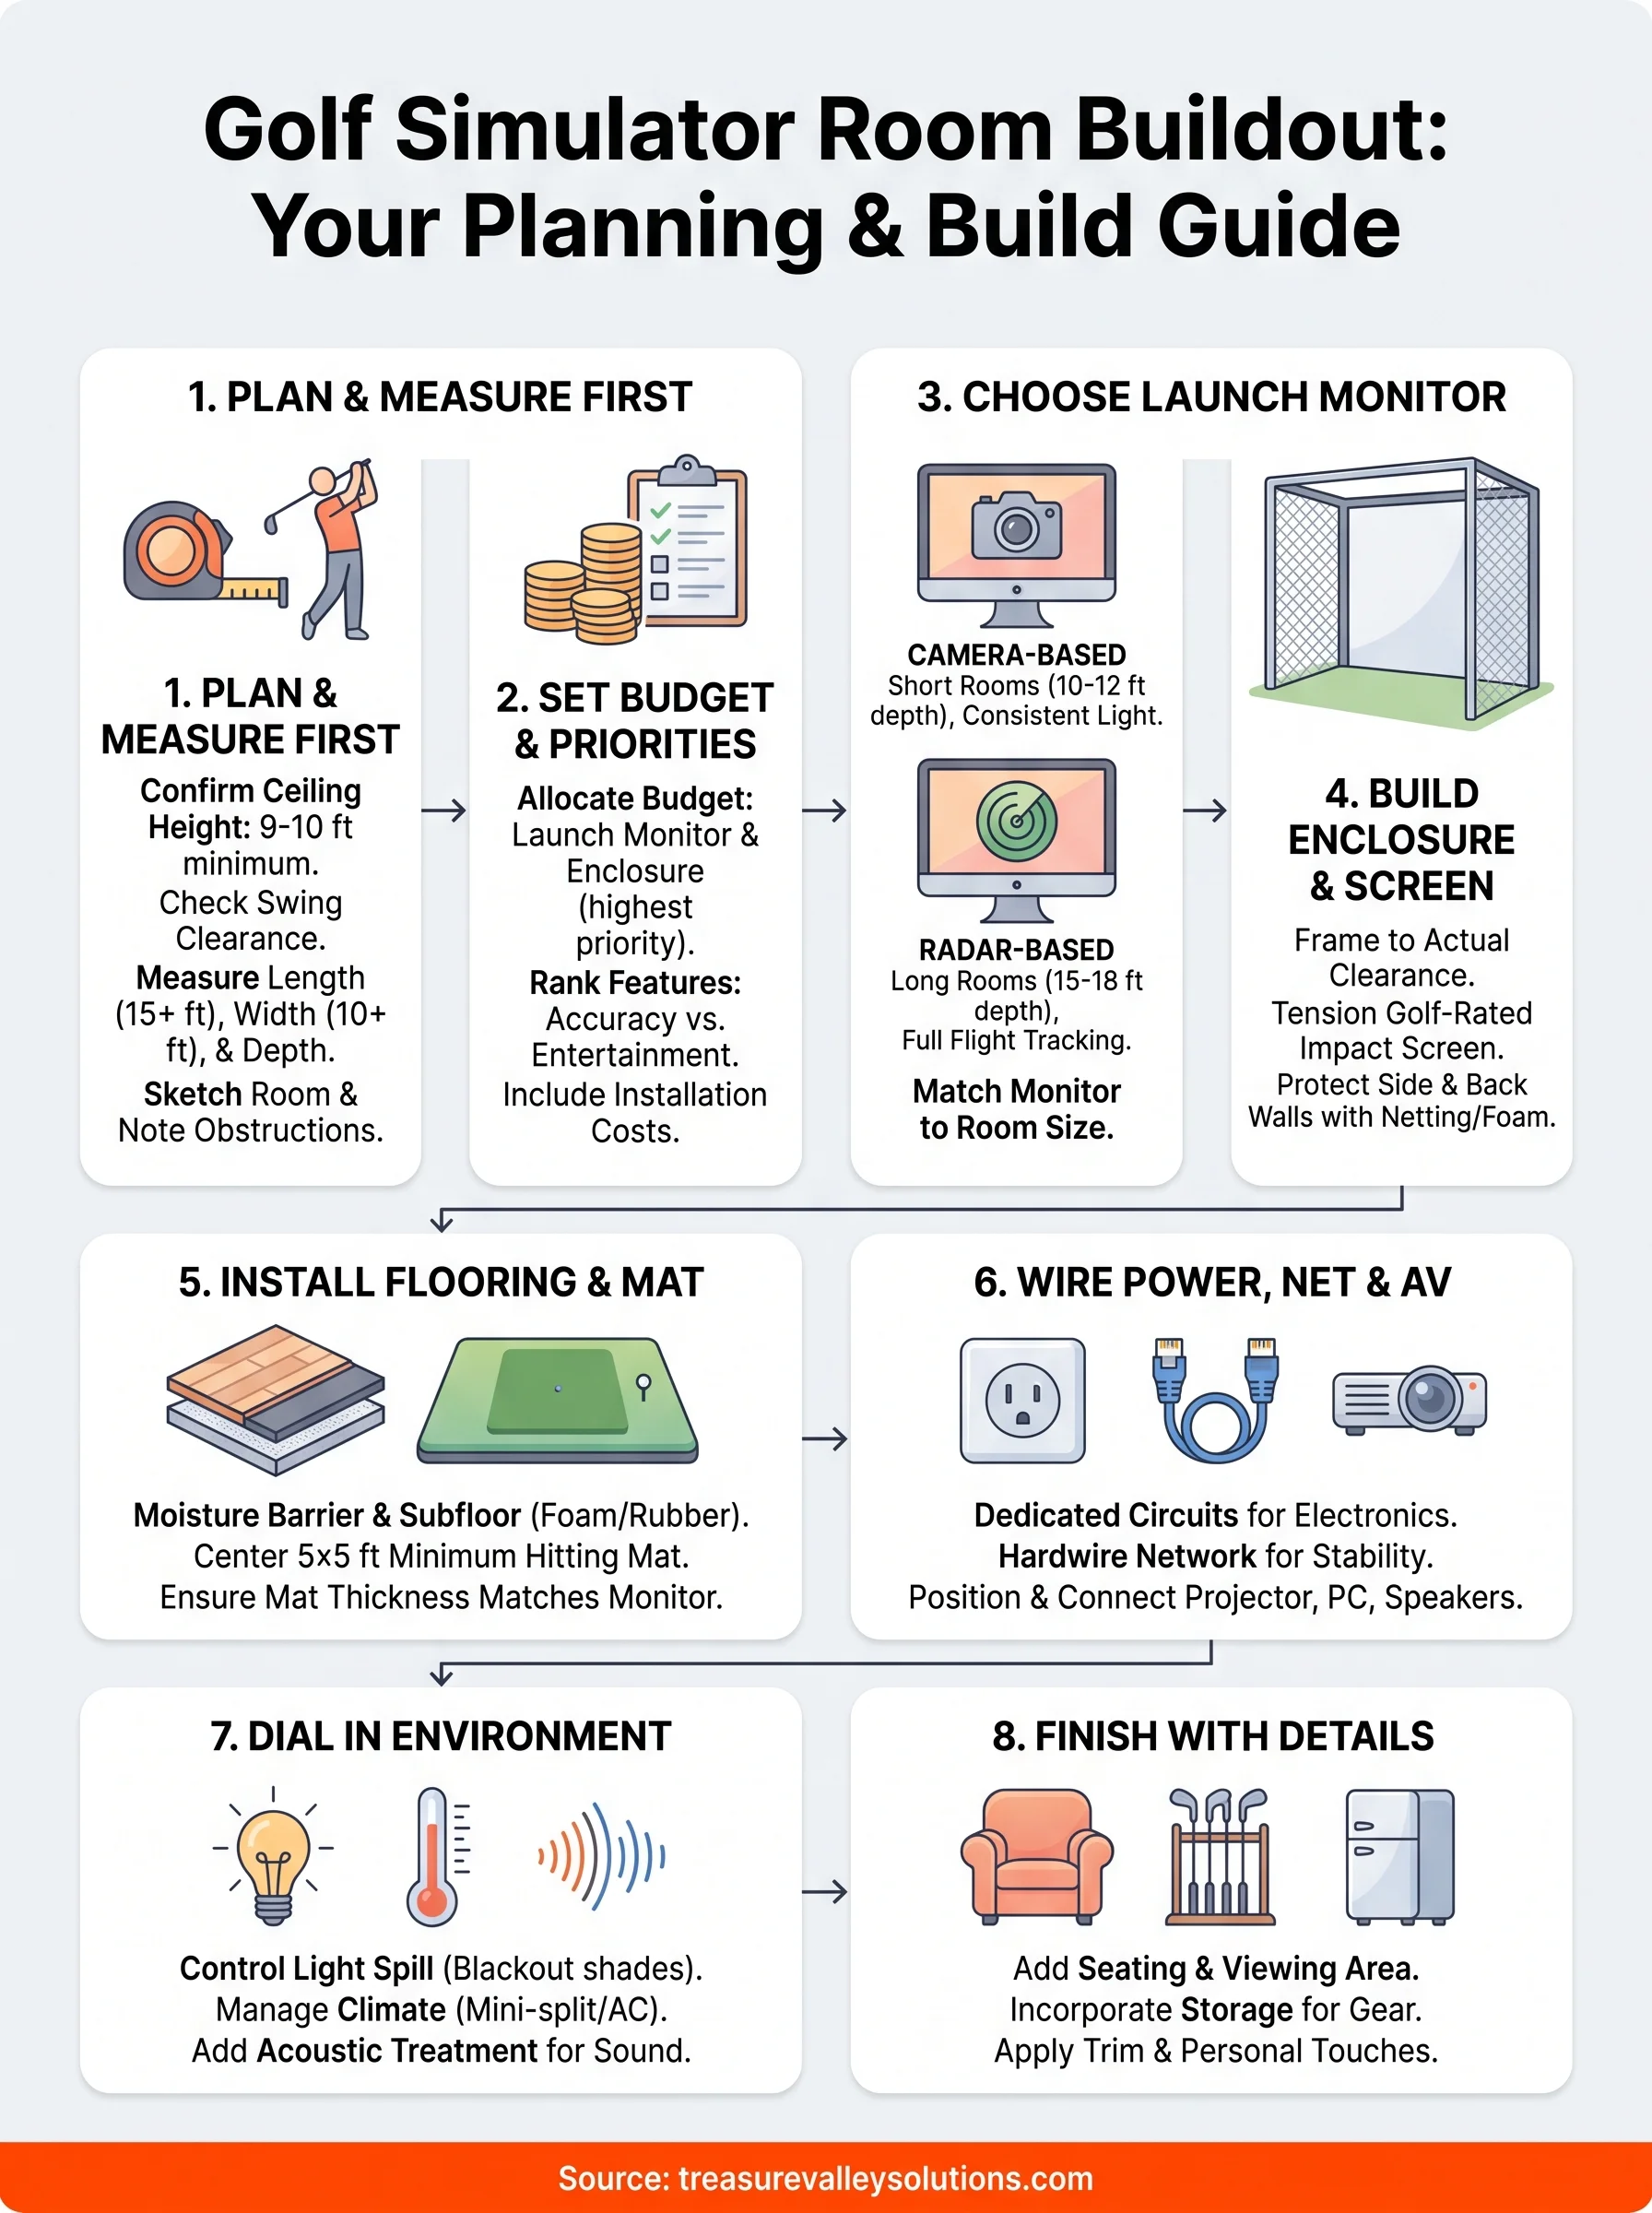
Turning your plan into a finished room
You now have every decision mapped out: room dimensions, budget breakdown, launch monitor type, and the finishing touches that make the space feel like part of your home instead of a leftover garage bay. A golf simulator room buildout succeeds or fails on planning done before the first stud goes up, not on how much you spend on gear. Go back through your sketch from Step 1, confirm your equipment priorities still match your space, and start sourcing materials with confidence.
Some of these steps, especially electrical work, projector calibration, and acoustic treatment, benefit from hands-on experience you build over dozens of installs, not your first weekend project. If you'd rather hand off the wiring, mounting, and programming to a local crew that does this work every week, reach out to our team and we'll help you turn this plan into a room you actually use.
Need Expert Help?
Ready to implement these solutions in your own home or business?
Our Services
View All Services
Serving the Treasure Valley
Local installation in your city