
A golf simulator transforms a spare room, garage, or basement into a year-round practice facility, but only if the installation is done right. Between choosing the right space, mounting a projector, t...
Golf Simulator Installation Steps: Room, Screen, Projector
A golf simulator transforms a spare room, garage, or basement into a year-round practice facility, but only if the installation is done right. Between choosing the right space, mounting a projector, tensioning an impact screen, and dialing in your launch monitor, there are plenty of details that can make or break the experience. Understanding the golf simulator installation steps before you start swinging keeps you from ripping out drywall or returning expensive equipment that doesn't fit.
At Treasure Valley Solutions, we design and install custom AV and smart technology systems across the Boise and Meridian area, and golf simulators sit right at the intersection of what we do best: projectors, displays, audio, and clean wiring. We've helped homeowners turn underused spaces into fully integrated entertainment setups, and simulators are one of the most rewarding projects we take on.
This guide walks you through every phase of the process, from measuring your room and ceiling height to mounting your projector, installing your impact screen, and configuring the software. Whether you're planning a DIY build or want a professional team to handle the technical side, you'll leave with a clear, actionable plan to get your simulator up and running.
What you need before you install anything
Skipping the planning stage is the fastest way to end up with equipment that doesn't work together or a screen that barely fits through the door. Before you follow any golf simulator installation steps, build a complete inventory of the hardware you need and record the key measurements of your space. Getting both right upfront saves you from expensive returns and second installation visits.
The core hardware components
Your simulator setup has four main components, and each one affects how you choose the others. The impact screen determines your room width and the throw distance your projector needs. Your launch monitor determines where you stand relative to the screen and what software it supports. Buy the wrong projector for your ceiling height, and the image won't fill the screen correctly. Choose a launch monitor that isn't compatible with your preferred simulator software, and you'll need to start over.
Every component decision creates a constraint for the next one, so confirm compatibility between your launch monitor, software, and projector before you purchase anything.
Here is the complete hardware checklist to confirm before installation begins. Check off each item and note the specific model so you can verify compatibility across the full system:
- Impact screen (size matched to your room width, typically 10 to 16 feet wide)
- Screen enclosure or frame (freestanding or wall-mounted)
- Short-throw or ultra-short-throw projector (matched to your throw distance)
- Launch monitor (camera-based or radar-based, positioned to the side or rear)
- Hitting mat (sized for your stance and swing width)
- Simulator software (confirm compatibility with your launch monitor model)
- PC or dedicated computer (check minimum specs listed by your software provider)
- HDMI or DisplayPort cable (length matched to your projector-to-PC distance)
- Side netting or safety padding (to protect walls and anyone standing nearby)
Room measurements you need to record
Before you order a single piece of hardware, walk into your planned space with a tape measure and write down five numbers. Your ceiling height is the most critical: most simulators need at least 9 feet of clearance, and 10 feet gives you a comfortable buffer for a full driver swing without clipping the ceiling on your backswing. Record your room depth as well, because you need enough distance behind the hitting position for a full follow-through, plus the projector's required throw distance in front of the screen.
Use this table as a recording template before you buy anything:
| Measurement | Your Space | Minimum Required |
|---|---|---|
| Ceiling height | __ ft | 9 ft (10 ft recommended) |
| Room width | __ ft | 12 ft minimum |
| Room depth | __ ft | 18 ft minimum |
| Screen-to-hitting-position distance | __ ft | 8 to 10 ft |
| Projector throw distance available | __ ft | Varies by projector model |
Once you have these numbers recorded, cross-reference your projector's throw ratio against the screen size you plan to install. Most manufacturers provide a throw distance calculator on their product pages so you can confirm the image fills the screen before you mount anything permanently.
Step 1. Plan your room, layout, and clearances
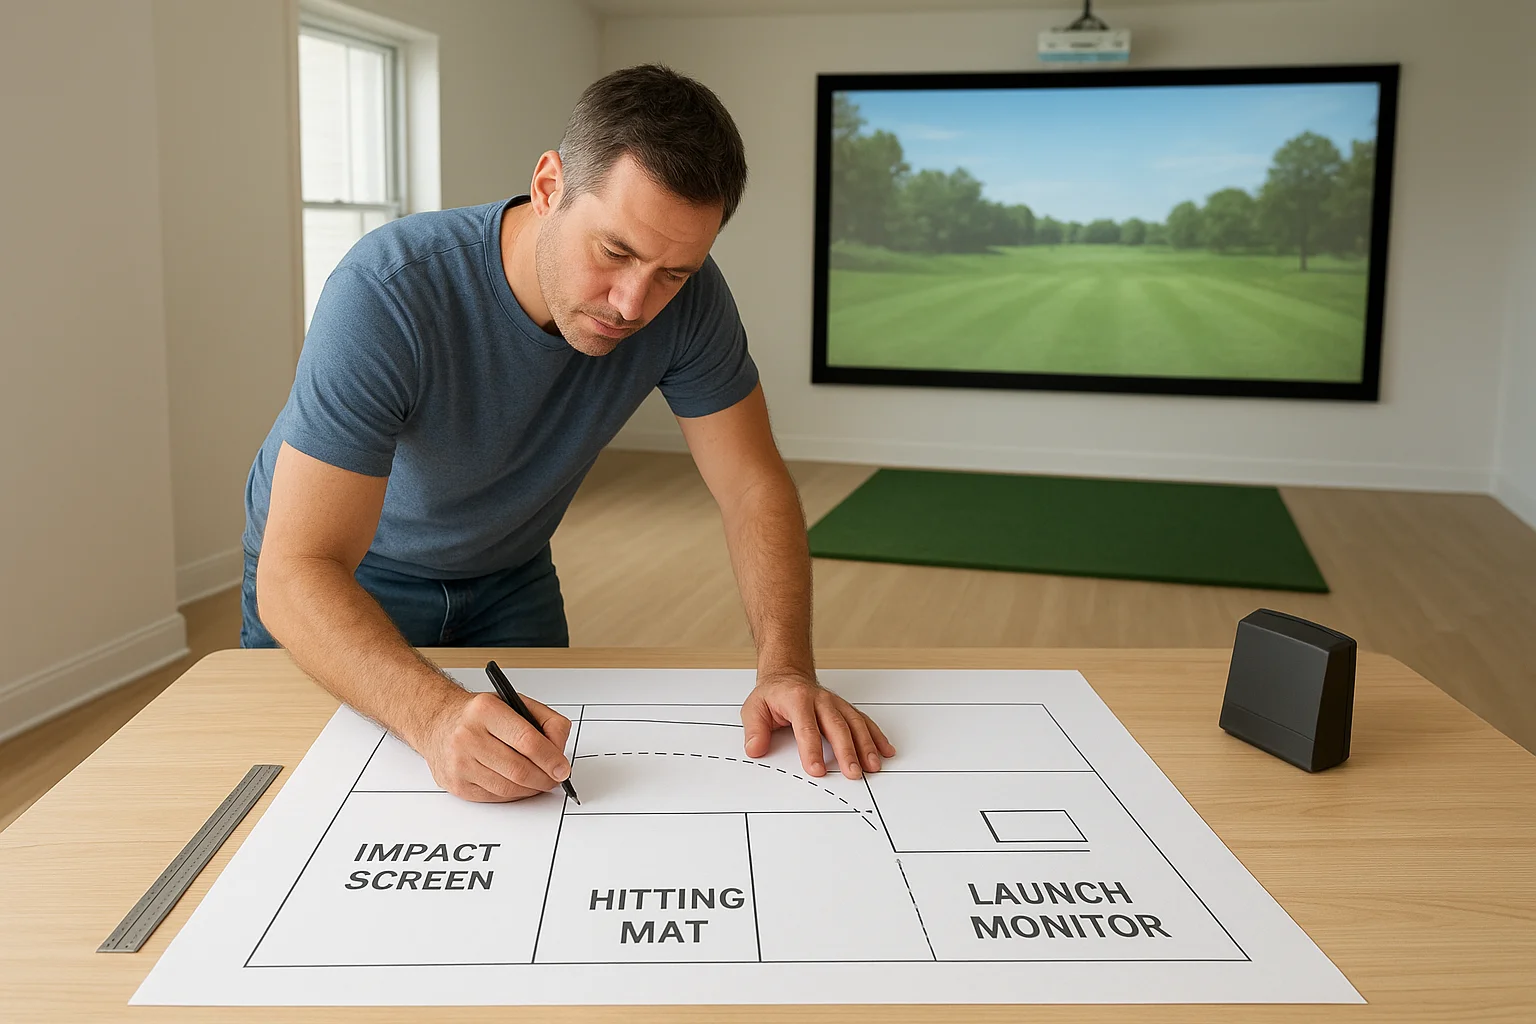
Room planning is where every set of golf simulator installation steps either succeeds or breaks down. Before you touch a single piece of hardware, sketch your space on paper and mark where each component will land. A rough drawing forces you to think through the flow from hitting mat to screen to projector, so you catch clearance problems on paper rather than after you've bolted something to the wall.
Map your hitting position and swing path
Your hitting position is the anchor point for everything else in the room. Place it so you have at least 5 feet of clearance on your dominant side for a full swing, and confirm at least 3 feet behind your stance for a complete follow-through without stepping into a wall. Left-handed golfers should flip those measurements accordingly.
If your room is on the narrow side, position the hitting mat slightly off-center toward your non-dominant side to give your swing arm more room.
Use the layout template below to place each component before you install anything:
| Component | Placement note | Distance from screen |
|---|---|---|
| Impact screen | Front wall or frame | 0 ft (flush) |
| Hitting mat | Center of room width | 8 to 10 ft |
| Launch monitor (rear) | Behind the mat | 5 to 7 ft behind mat |
| Launch monitor (side) | Non-dominant side | 3 to 4 ft to the side |
| Projector | Ceiling-mounted above mat | Varies by throw ratio |
Account for projector placement and cable runs
Once your hitting position is set, measure the distance from that point to the screen and calculate whether your projector's throw ratio produces a full image at that distance. A projector with a 1.2:1 throw ratio aimed at a 10-foot-wide screen needs roughly 12 feet of throw distance to fill the screen edge to edge.
Cable runs are often overlooked at this stage, and they cause the most headaches later. Mark the path from your PC to the projector on your room sketch, confirm the distance, and add 20 percent extra length to your cable order to account for routing through walls or along ceiling channels.
Step 2. Install the screen, enclosure, and safety padding
With your room mapped out and measurements confirmed, you can move into the physical build. This step in the golf simulator installation steps process sets the foundation for everything that follows, so take your time and get each component anchored correctly before moving on to the projector.
Set up the enclosure or frame first
Your enclosure or frame goes up before the screen does. If you're using a freestanding frame, assemble all the horizontal and vertical poles on the floor first and confirm the assembled dimensions match your recorded room width. Then stand the frame upright with a second person and anchor it to the floor using the hardware included with your kit. For a wall-mounted setup, locate your studs with a stud finder and use lag bolts rather than drywall anchors, since the screen takes repeated ball impact over time and the mount needs to hold that load reliably.
Never anchor an impact screen frame to drywall alone. Ball impact creates repeated stress on the mounting points, and a failed anchor mid-session sends the entire frame down.
Hang and tension the impact screen
Once the frame is secure, attach your impact screen to the frame using the built-in grommets and bungee cords or straps supplied with the screen. Start from the top center grommet, work outward to the corners, and then move down the sides. Apply even tension across the full screen surface so the fabric lies flat without sagging in the middle. A screen that sags distorts the projected image and causes balls to deflect unpredictably on impact.
Add side netting and wall padding
Side netting panels attach to the outer edges of your enclosure frame and catch any shots that miss the screen. Attach foam padding or rubber panels to any wall sections within three feet of the hitting area, including side walls and the ceiling edge directly above the screen. Check that no hard surfaces are exposed within the swing path before you move on to projector installation.
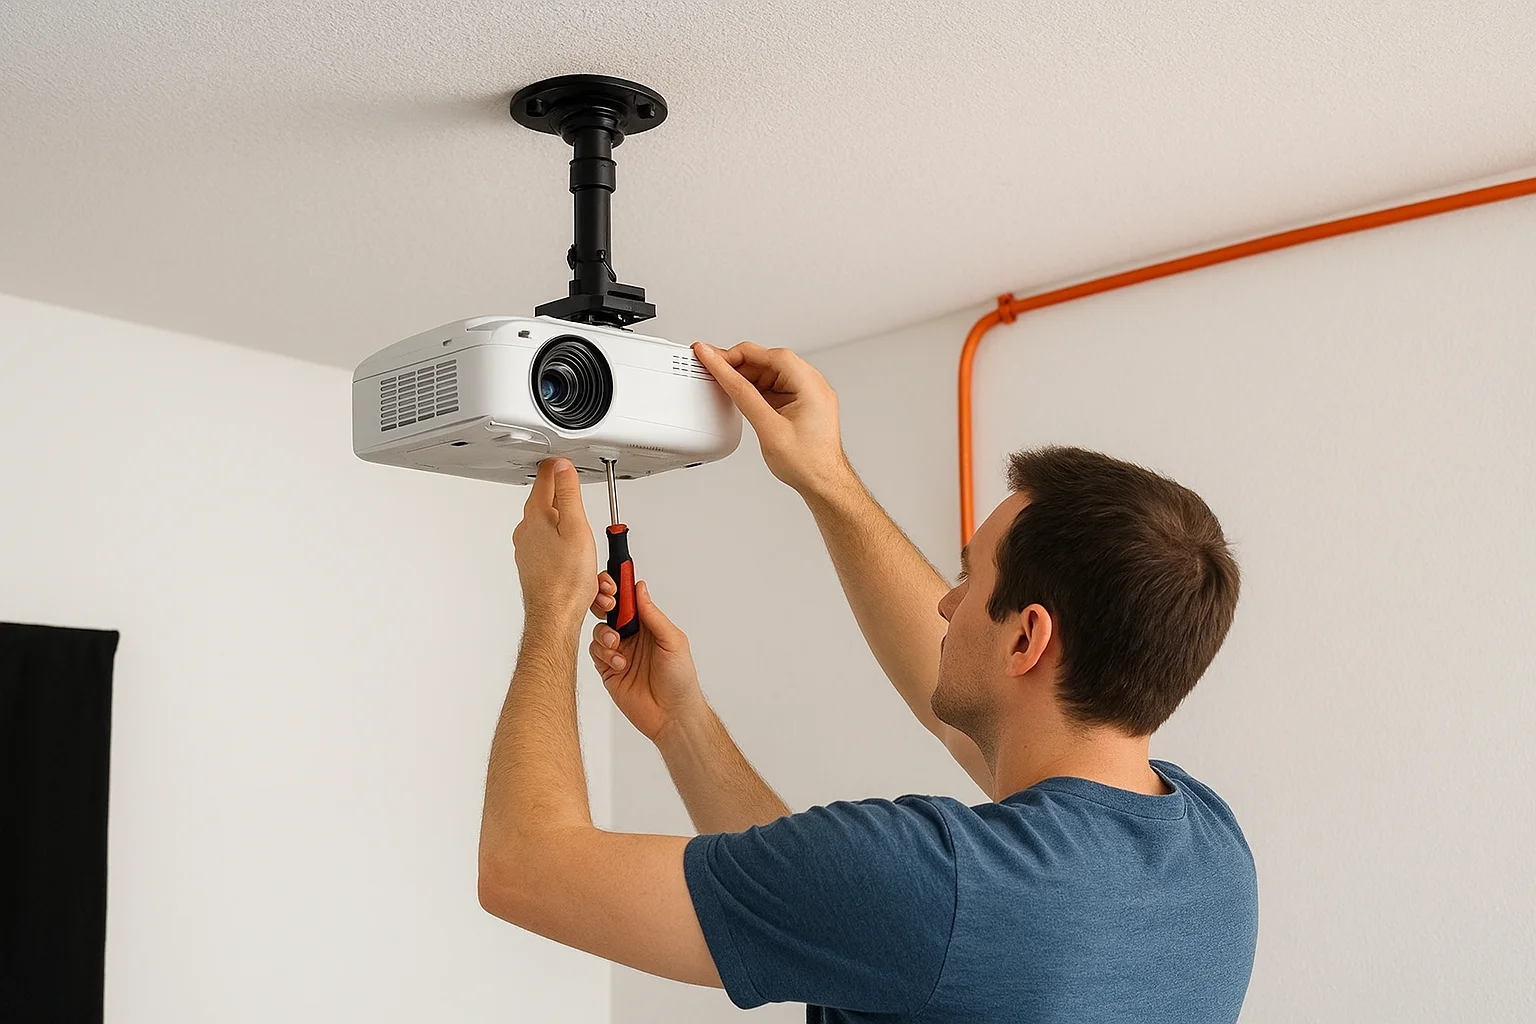
Step 3. Mount the projector and dial in the image
Your screen is up and anchored, so now you move into one of the most technically precise parts of the golf simulator installation steps: positioning your projector so the image lands perfectly on the screen every time. Get this step wrong and every session starts with manual adjustments instead of swings.
Choose your mount position and cable path
Ceiling mounting is the standard approach for simulators because it keeps the projector out of your swing path and produces a consistent throw angle. Mark your mount position directly above and slightly behind your hitting mat, at a distance that matches your projector's throw ratio multiplied by your screen width. For a 10-foot-wide screen and a 1.3:1 throw ratio, your projector needs to sit 13 feet from the screen surface.
Measure from the projector's lens to the screen, not from the ceiling bracket, since the lens position shifts the actual throw distance.
Use a ceiling stud or a wood blocking panel installed between two joists to create a solid mount point. A projector that wobbles during play creates image drift and shortens the life of the mount hardware. Run your HDMI or DisplayPort cable through the ceiling cavity to your PC location before you secure the mount permanently, since fishing cable after the projector is bolted in place is significantly harder.
Adjust the image to fill the screen
Once your projector is physically secured, power it on and use the lens shift or keystone controls to align the image with your screen edges. Work through these adjustments in order:
- Center the image horizontally using horizontal lens shift first
- Align the top and bottom edges using vertical lens shift
- Apply keystone correction only if lens shift does not fully square the image
- Confirm the image fills the screen edge to edge without overflow onto the frame
Check the final image alignment from your hitting position, not from directly below the projector, since that is the perspective that matters during actual play.
Step 4. Set up the launch monitor and software
Your projector image is locked in, so now you tackle the final piece of the golf simulator installation steps: getting your launch monitor reading ball data accurately and feeding it into your simulator software. This step determines how well the system tracks your shots, so precise positioning and careful calibration matter more here than anywhere else in the build.
Position and connect your launch monitor
Your launch monitor's placement depends entirely on whether it's camera-based or radar-based. Camera-based units like the Garmin Approach R10 sit behind the hitting mat, typically 6 to 7 feet back from the ball position, aimed forward toward the screen. Radar-based units like the Bushnell Launch Pro mount to the side, roughly 3 feet to your non-dominant side and slightly behind the ball. Check your specific unit's manual for the exact offset measurements, since even a few inches affects data accuracy on slower swings.
Always place your launch monitor on a flat, stable surface and confirm its orientation matches the manufacturer's setup diagram before you run a single calibration shot.
Use this checklist to verify your launch monitor is ready before you launch the software:
- Unit is positioned at the correct distance and angle per manufacturer specs
- Power source is connected and indicator light confirms the device is on
- Pairing mode is active if connecting to your PC via Bluetooth or USB
- No obstructions block the sensor's field of view toward the ball position
Configure your software and calibrate the system
Once your launch monitor is connected to your PC, open your simulator software and walk through the initial setup wizard. Enter your hitting position, confirm the ball landing zone on the screen, and run the manufacturer's calibration sequence, which typically involves hitting five to ten shots at a defined target. Your software uses those shots to align its flight model with your specific room dimensions and monitor position.
After calibration, hit a short iron shot and verify the ball speed, launch angle, and carry distance in the data panel match what you expect for that club. If numbers look off, recheck your launch monitor position and run the calibration sequence again before moving into full rounds.
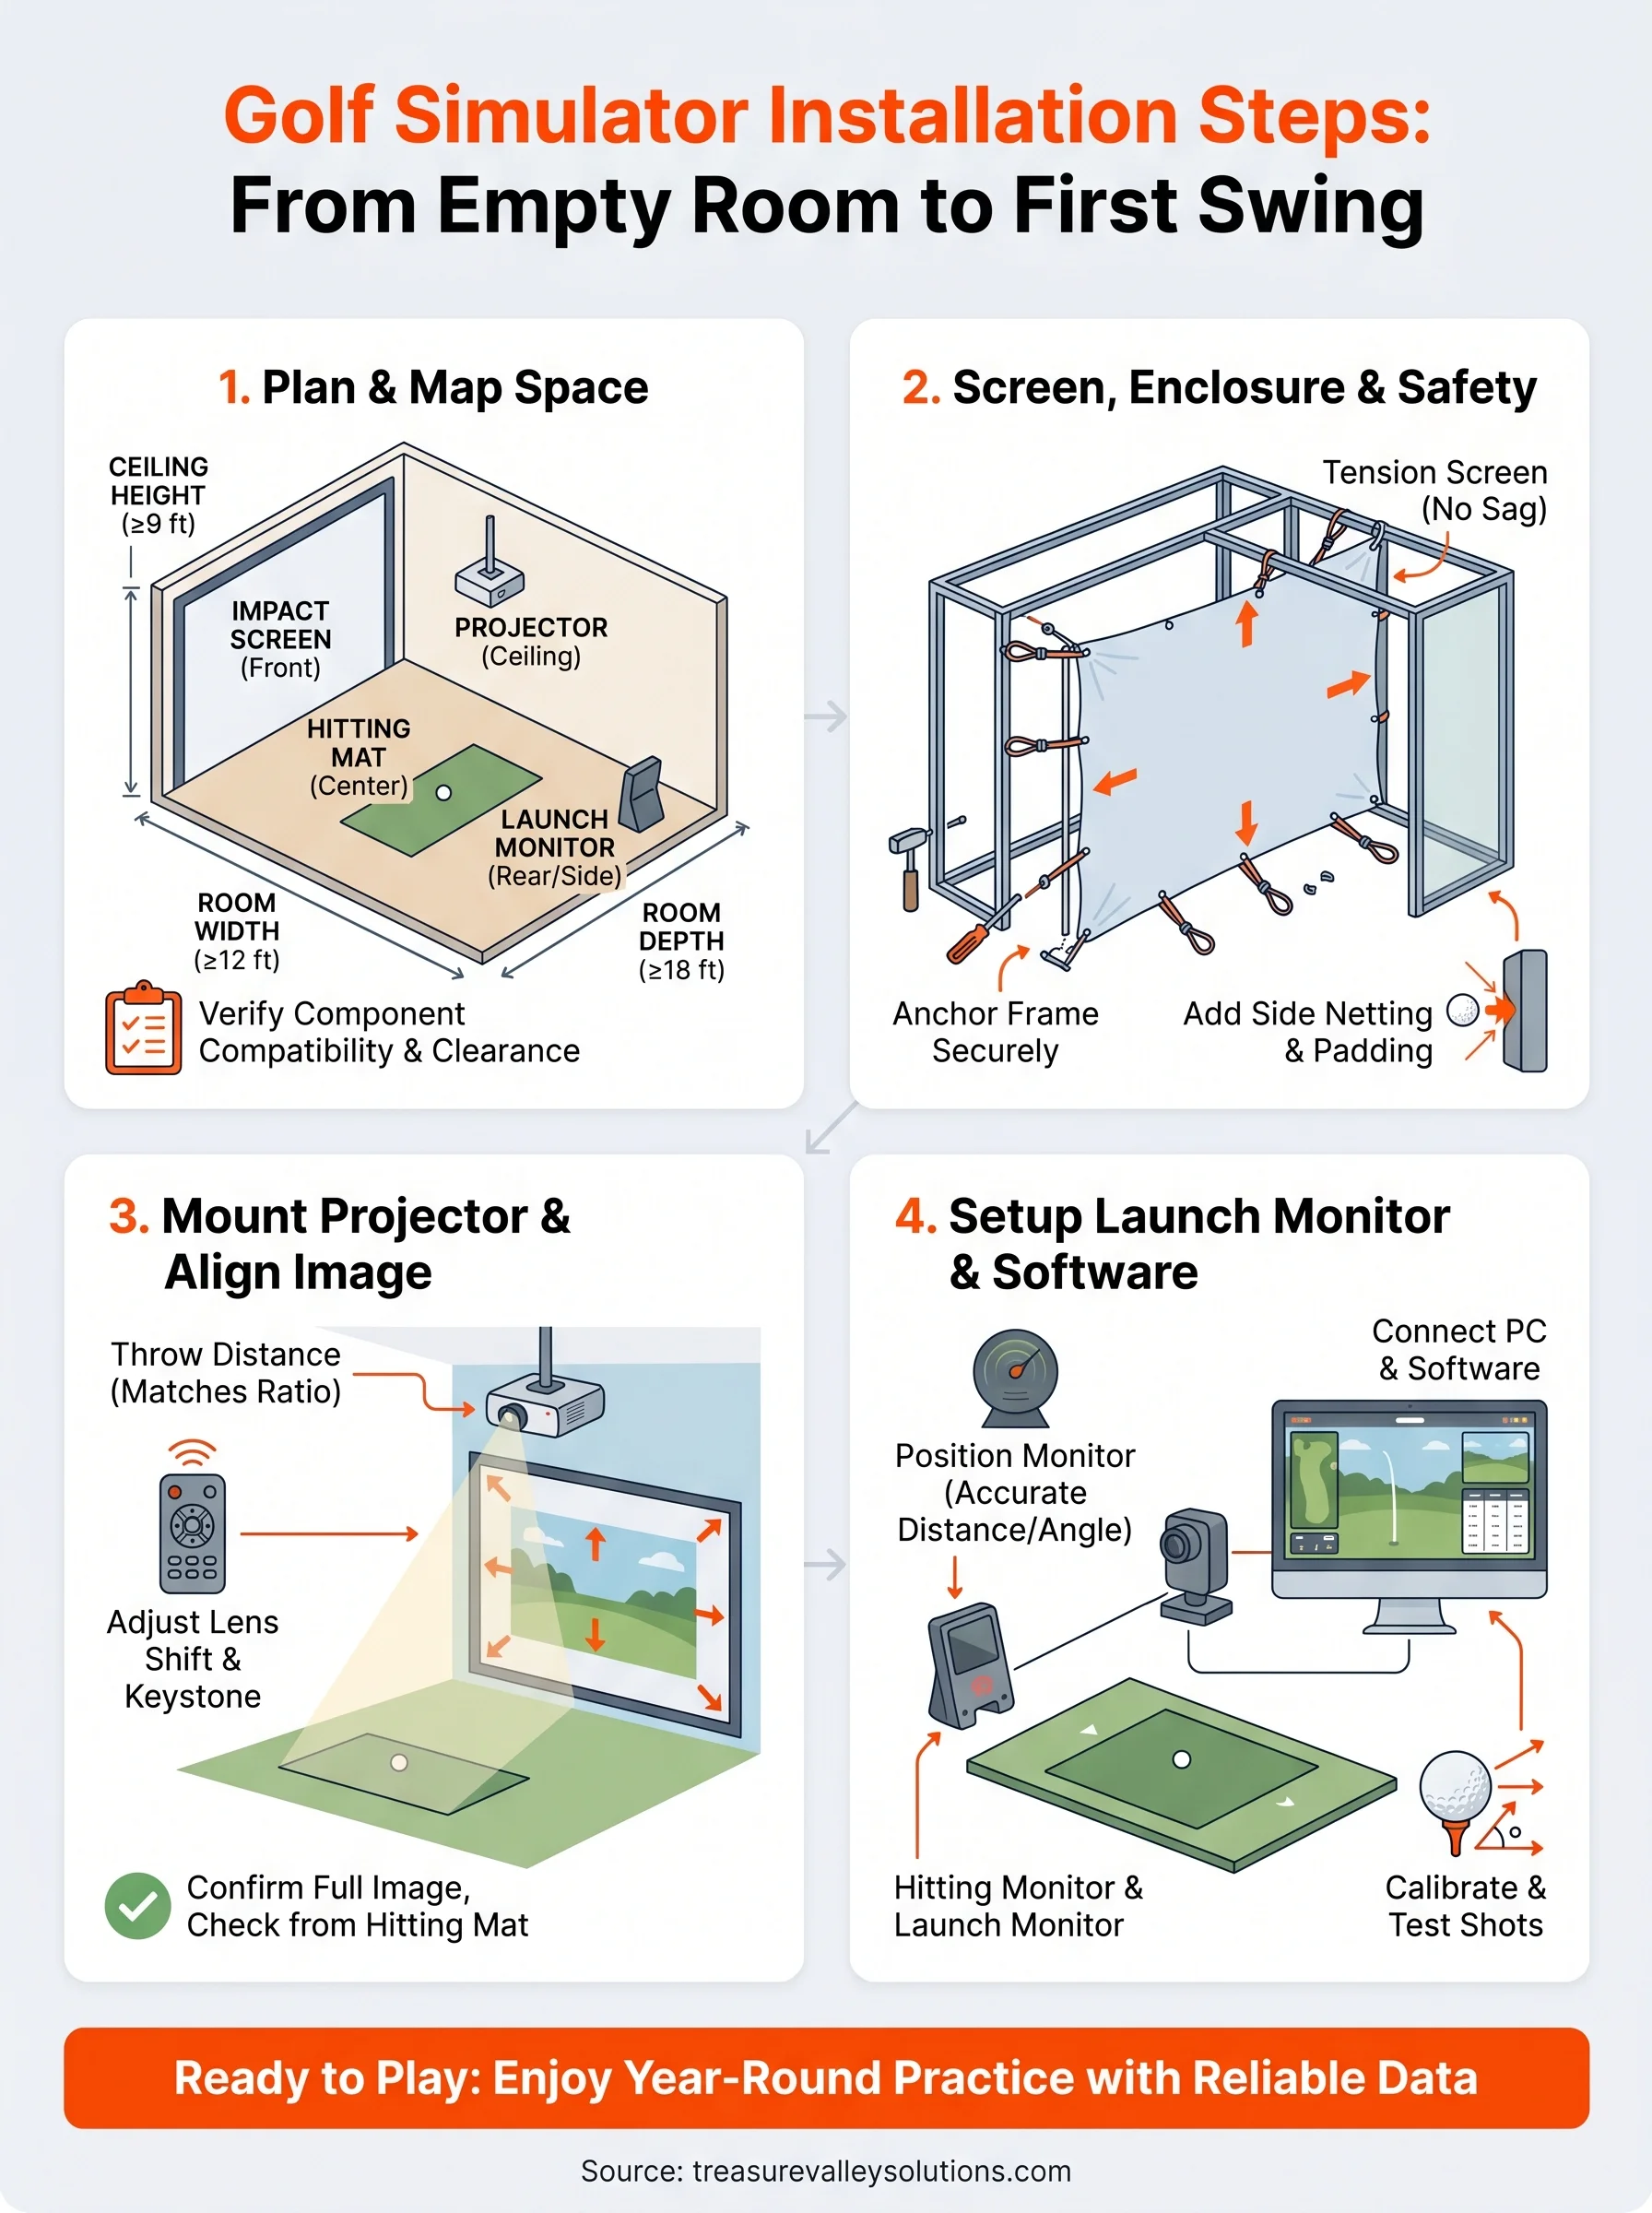
Ready to play and improve
Following these golf simulator installation steps in order gives you a setup that works reliably from the first session. You've planned your room, anchored your screen, dialed in your projector image, and calibrated your launch monitor. Every piece is in place and working together as a single system rather than a collection of mismatched components.
Now the room earns its keep. You get year-round practice regardless of Idaho weather, honest shot data after every swing, and a setup that improves the longer you use it. The key is getting the installation right the first time so you spend your sessions analyzing course data, not troubleshooting hardware.
If you want a team that handles the projector mounting, cable management, and full system integration for you, see what we've built for other homeowners and reach out to start your project.