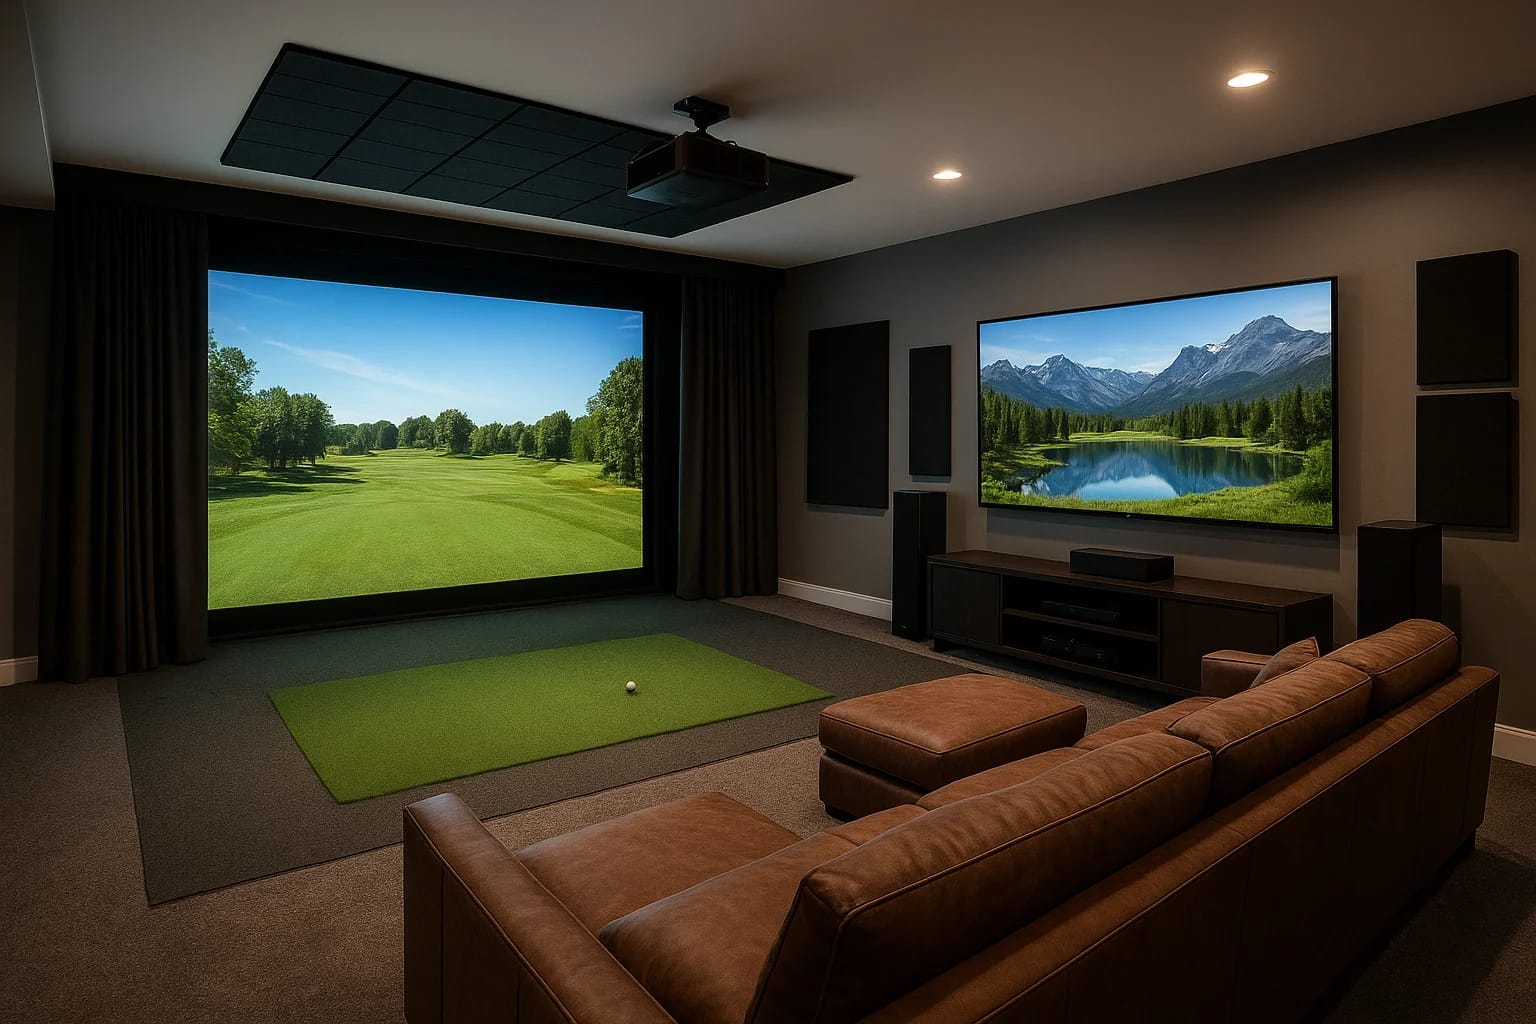
A dedicated home theater is great. A golf simulator is great. But what if you could walk into one room and have both, a space where movie night and a round at Pebble Beach happen on the same screen? T...
Golf Simulator Home Theater Integration: How To Build It
A dedicated home theater is great. A golf simulator is great. But what if you could walk into one room and have both, a space where movie night and a round at Pebble Beach happen on the same screen? That's exactly what golf simulator home theater integration delivers, and it's one of the most rewarding multi-use room projects we design and install at Treasure Valley Solutions.
The challenge isn't just buying a projector and a launch monitor. It's getting the acoustics, screen selection, lighting control, and source switching to work together without compromise. A poorly planned setup means you're constantly swapping cables, fighting ambient light, or settling for underwhelming audio that doesn't do justice to either experience. A well-planned one gives you a room that transitions seamlessly between uses with the press of a button.
This guide walks you through how to build a room that genuinely performs as both a golf simulator and a home theater, from screen and projector selection to audio design, automation, and room layout considerations. Whether you're finishing a basement or converting a spare room, you'll find the technical guidance and design direction you need to get this right the first time.
What you need before you start
Before you buy anything or hire anyone, gather the basic information about your space. Successful golf simulator home theater integration starts with knowing your room's exact dimensions, ceiling height, structural details, and existing electrical capacity. Without these numbers, you risk purchasing gear that physically won't fit or relying on wiring that can't support the load.
Room dimensions and ceiling height
Your room needs to meet minimum clearance requirements for both uses before anything else makes sense. For golf, the standard recommendation is at least 10 feet of ceiling height, 15 feet of width, and 20 feet of depth to swing freely and position the impact screen at a safe distance. Those same dimensions support a comfortable projection throw and proper seating arrangement for theater use.
If your ceiling falls below 9 feet, a golf simulator becomes unsafe and the projection image suffers. Measure before you commit to any gear.
Grab a tape measure and record these five numbers:
- Floor-to-ceiling height at multiple points (basements often slope near joists)
- Usable wall width where the screen will mount
- Depth from the screen wall to where you plan to sit or stand
- Door and window locations that affect light control and layout options
- HVAC vent positions that influence projector mount placement
Electrical and network requirements
Your room needs [dedicated circuits](https://treasurevalleysolutions.com/blog/golf-simulator-installation) for the projector, simulator hardware, amplifier, and subwoofers. A single shared 20-amp circuit will trip breakers under that combined load, so plan for at least two dedicated 20-amp lines, plus low-voltage runs for HDMI, ethernet, and speaker wire roughed in before any walls close up.
Pull your home's electrical panel schedule or ask a licensed electrician to assess available capacity. Confirm you also have a wired ethernet connection available, since simulator software and 4K streaming both perform more reliably on a hard-wired network than on Wi-Fi.
Step 1. Map the room for golf and viewing
Before you place a single piece of gear, sketch your room to scale and mark two distinct zones: the golf swing area and the theater seating area. In a successful golf simulator home theater integration, these zones share the same screen wall but serve completely different purposes, so understanding where each begins and ends prevents costly layout mistakes.
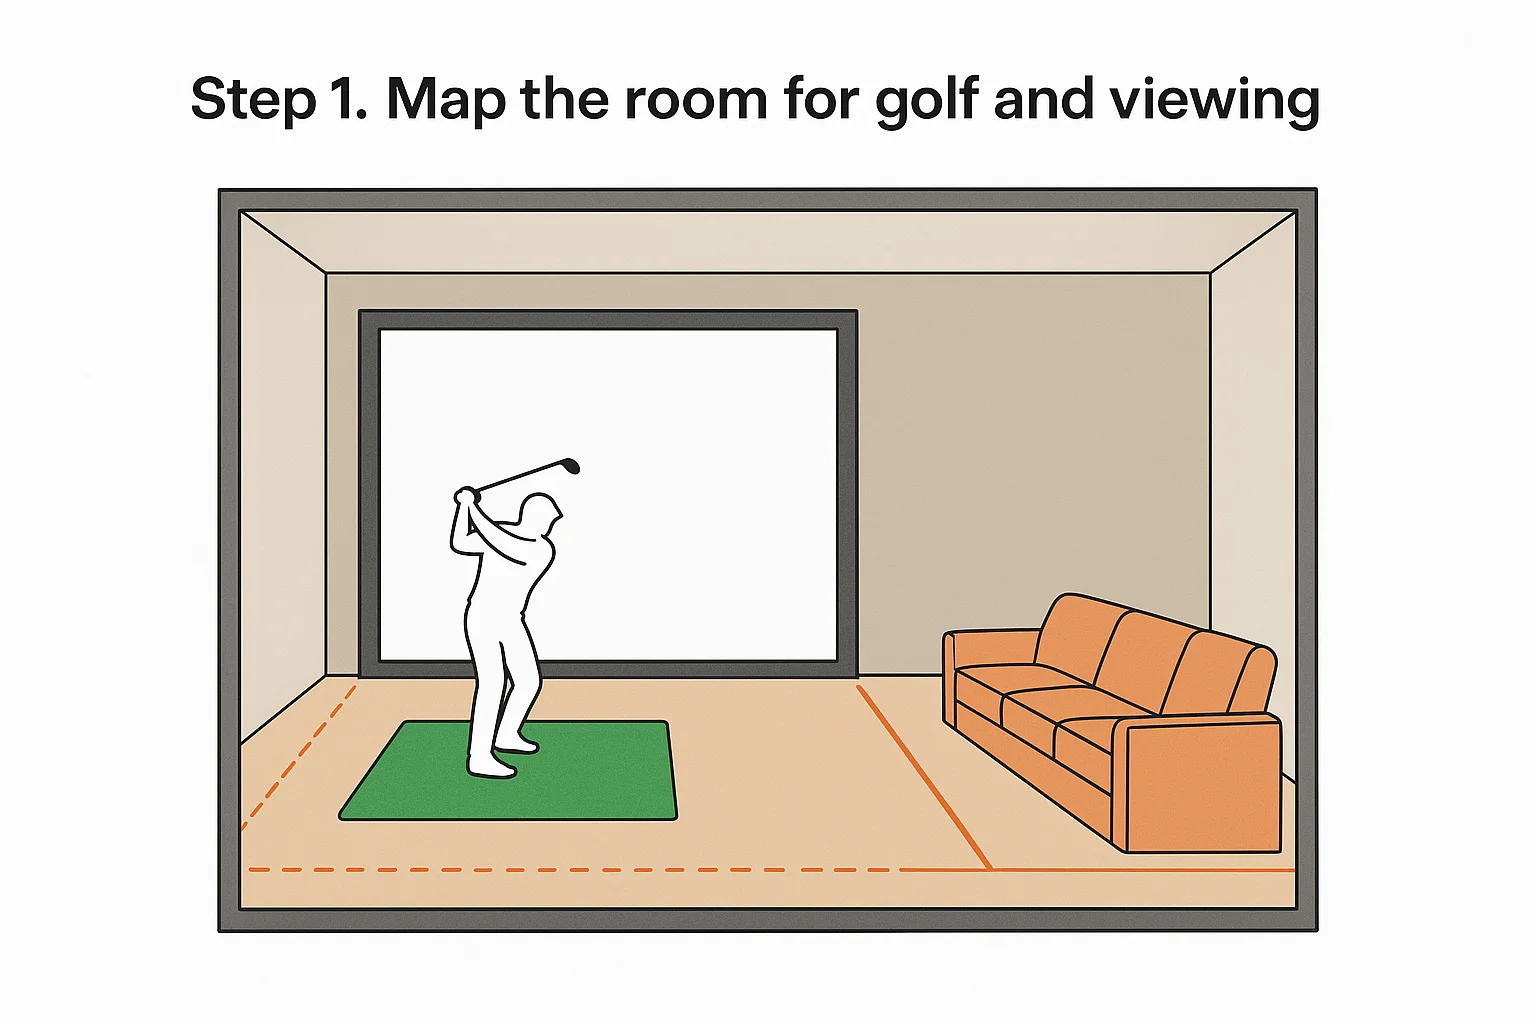
Define the swing zone first
The swing zone needs at least 10 feet of unobstructed depth from the impact screen to the hitting position, plus clear side clearance for a full follow-through. Mark this zone on your sketch before you plan seating, since it takes priority and locks in your screen wall location.
- Hitting position to screen: 8-10 feet minimum
- Side clearance from center: 5 feet on each side
- Ceiling height above hitting area: 10 feet minimum
Position seating behind the swing zone
Your seating area sits directly behind the hitting zone, which means the total room depth must accommodate both uses. Plan for at least 6 to 8 feet of additional depth behind the golfer's position for a row of seats at a comfortable viewing distance.
Seating placed too close to the hitting position creates a safety hazard and forces viewers into a bad screen angle.
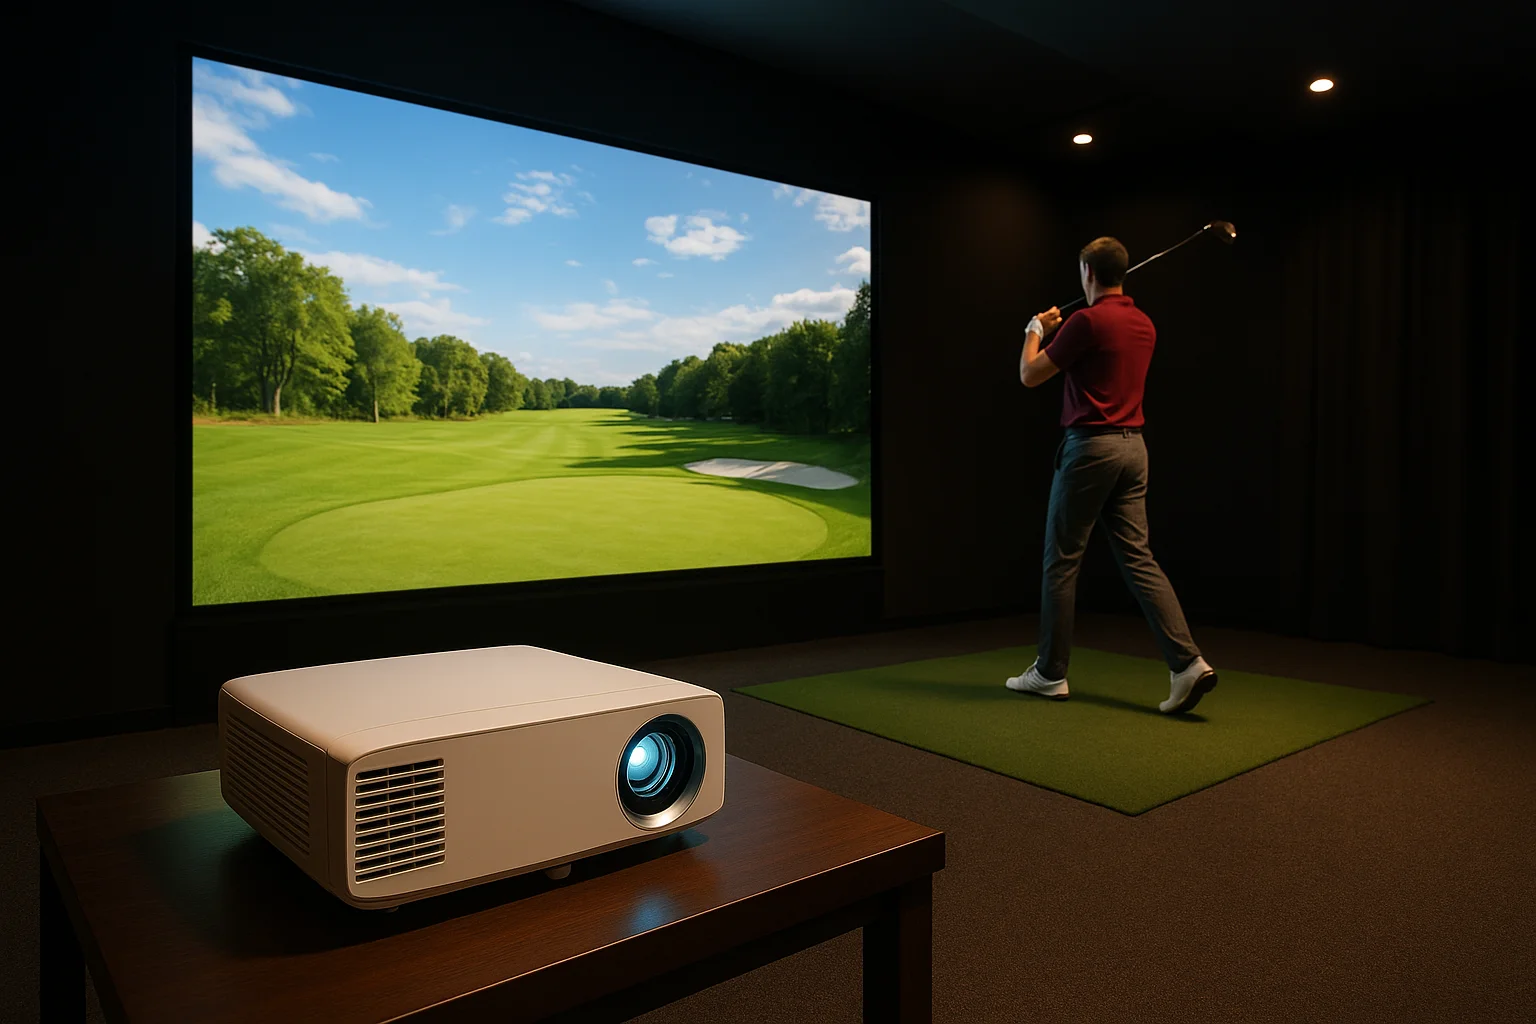
Step 2. Pick a screen and projector that do both
The screen and projector are the core of your golf simulator home theater integration, and choosing the wrong combination forces you to compromise one experience for the other. You need a setup that handles bright, fast-moving simulator graphics and still delivers a rich, cinematic image when the lights go down.
Choose an impact screen with the right gain
Your impact screen needs to survive repeated ball strikes while still projecting a clean, uniform image. Look for screens with a 1.0 to 1.3 gain rating and a tight woven material that diffuses light evenly. Avoid high-gain screens; they create hot spots that damage the theater image.
A screen rated for at least 300 mph ball speed covers typical swing speeds and protects your projector from errant shots.
Match your projector to the throw distance
For this type of room, your projector must work within the actual throw distance without losing brightness. Target a projector with a minimum of 3,500 lumens to cut through any residual ambient light during simulator sessions. A short-throw lens also reduces shadow interference when the golfer stands near the screen.
- Lumens: 3,500 minimum
- Contrast ratio: 10,000:1 or higher for theater depth
- Resolution: 4K native preferred
Step 3. Add sound, lighting, and seating that fit
Sound, lighting, and seating are the details that define a successful golf simulator home theater integration. Each choice here affects both uses simultaneously, so you need to plan for both functions at once rather than optimizing one and retrofitting the other.
Design the audio for impact and immersion
Your room needs front-loaded audio positioned to deliver clear simulator feedback and full cinematic surround sound. Place two to three front speakers behind an acoustically transparent screen panel to keep the soundstage locked to the image during both uses.
A subwoofer placed inside the swing zone creates a safety hazard and will take direct hits from off-center shots.
Acoustic panels on the side walls reduce flutter echo during simulator sessions and tighten low-frequency response for movies. Mount them at ear height between the seating area and the screen wall for the most noticeable improvement in both modes.
Control light and plan seating for both uses
Motorized blackout shades eliminate ambient light during simulator play and theater viewing without requiring permanent construction changes. Keep your seating rows positioned well behind the swing zone with a clear walking aisle so the golfer can move to the hitting position freely without disrupting anyone seated behind.
Step 4. Wire, control, and protect the space
Your wiring plan determines whether your golf simulator home theater integration runs smoothly or becomes a constant source of frustration. Every cable, control system, and surge protector needs to be installed before the walls close, so plan this step alongside your framing and electrical work, not after.
Run all cables before finishing walls
Pull your HDMI 2.1 cables, ethernet lines, speaker wire, and low-voltage control wiring in a single rough-in phase. Label both ends of every cable at the wall and at the equipment rack to save significant time during final installation.
- HDMI 2.1: projector, simulator PC, and streaming source
- Cat6 ethernet: simulator PC, streaming device, and control system hub
- Speaker wire: front three channels, surrounds, and subwoofer positions
Set up a single control system
A dedicated control system like Control4 or Lutron lets you switch between golf mode and theater mode with a single button press, triggering the projector input, lighting scene, and audio preset simultaneously. Place your equipment rack outside the swing zone in a ventilated closet or corner cabinet to protect every component from errant shots.
A whole-home surge protector installed at your panel protects every connected component from power spikes that damage projectors and amplifiers.
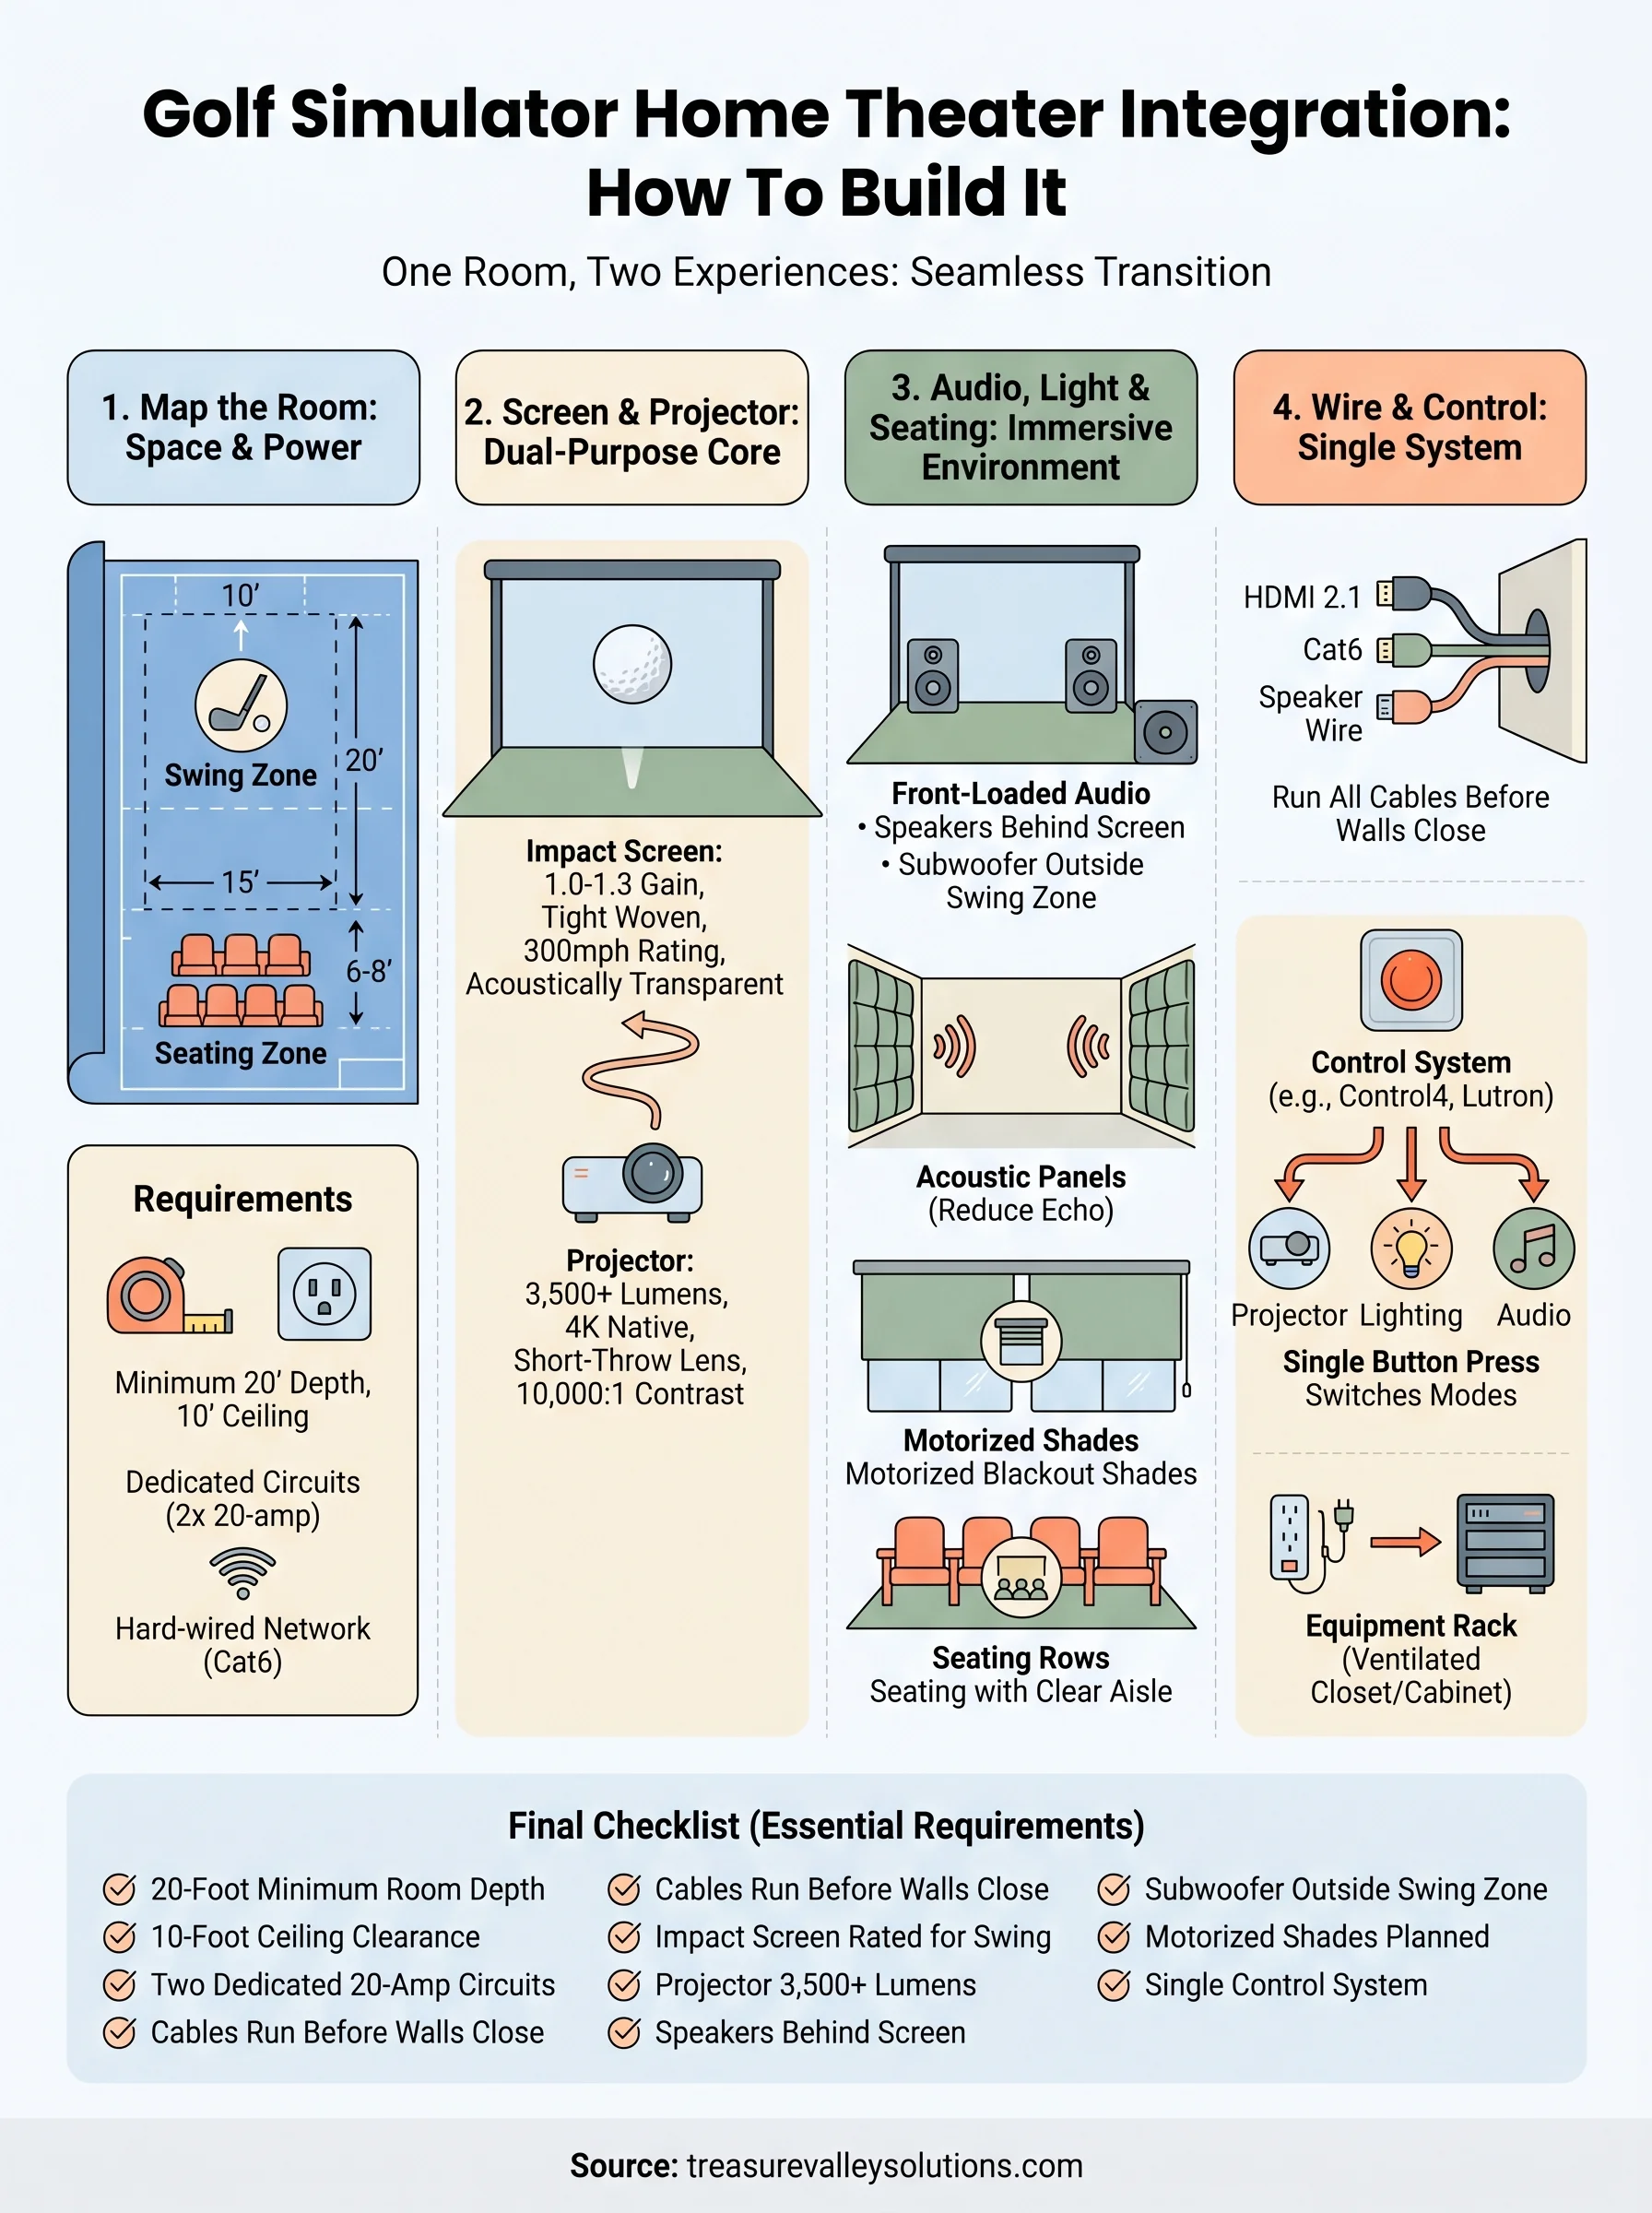
Final checklist
A complete golf simulator home theater integration comes down to executing each step in the right order. Use this checklist before you finalize your purchase list or break ground on the build.
- Room depth meets the 20-foot minimum for swing zone plus seating
- Ceiling height clears 10 feet throughout the hitting area
- Two dedicated 20-amp circuits are planned
- All cable runs are scheduled before walls close
- Impact screen rated for your swing speed is selected
- Projector lumens meet the 3,500 minimum
- Front speakers sit behind an acoustically transparent panel
- Subwoofer is positioned outside the swing zone
- Motorized blackout shades are on the lighting plan
- A single control system handles both modes
If you have every box checked, your room is ready to build. If you are still working through the details, the team at Treasure Valley Solutions can help you close the gaps. See examples of our completed projects and reach out when you are ready to move forward.