A home golf simulator turns a spare room or garage bay into a year-round practice facility, no tee times, no weather delays, no rushing to beat sunset. But pulling one together involves more than buyi...
Golf Simulator Setup Guide: DIY Room, Gear, And AV Plan 2026
A home golf simulator turns a spare room or garage bay into a year-round practice facility, no tee times, no weather delays, no rushing to beat sunset. But pulling one together involves more than buying a launch monitor and hanging a screen. A solid golf simulator setup guide needs to cover room dimensions, impact screens, projectors, hitting mats, and the AV configuration that ties it all together. Skip any of those details, and you end up with a frustrating experience or expensive do-overs.
That's where most people get stuck. There are dozens of launch monitors at wildly different price points, projector specs that actually matter for simulator use, and room requirements that can make or break the whole project. Whether you're working with a $2,000 budget or building out a dedicated simulator room from scratch, the decisions you make early on determine how good the final result looks, feels, and performs.
At Treasure Valley Solutions, we design and install custom AV systems across the Boise and Meridian area, including the projector placement, audio integration, and display calibration that golf simulators demand. We've put together this guide to walk you through every step: room prep, essential gear, budget-friendly DIY options, and the AV planning that most setup guides gloss over. By the end, you'll have a clear path from empty room to first swing.
What you need and what it costs in 2026
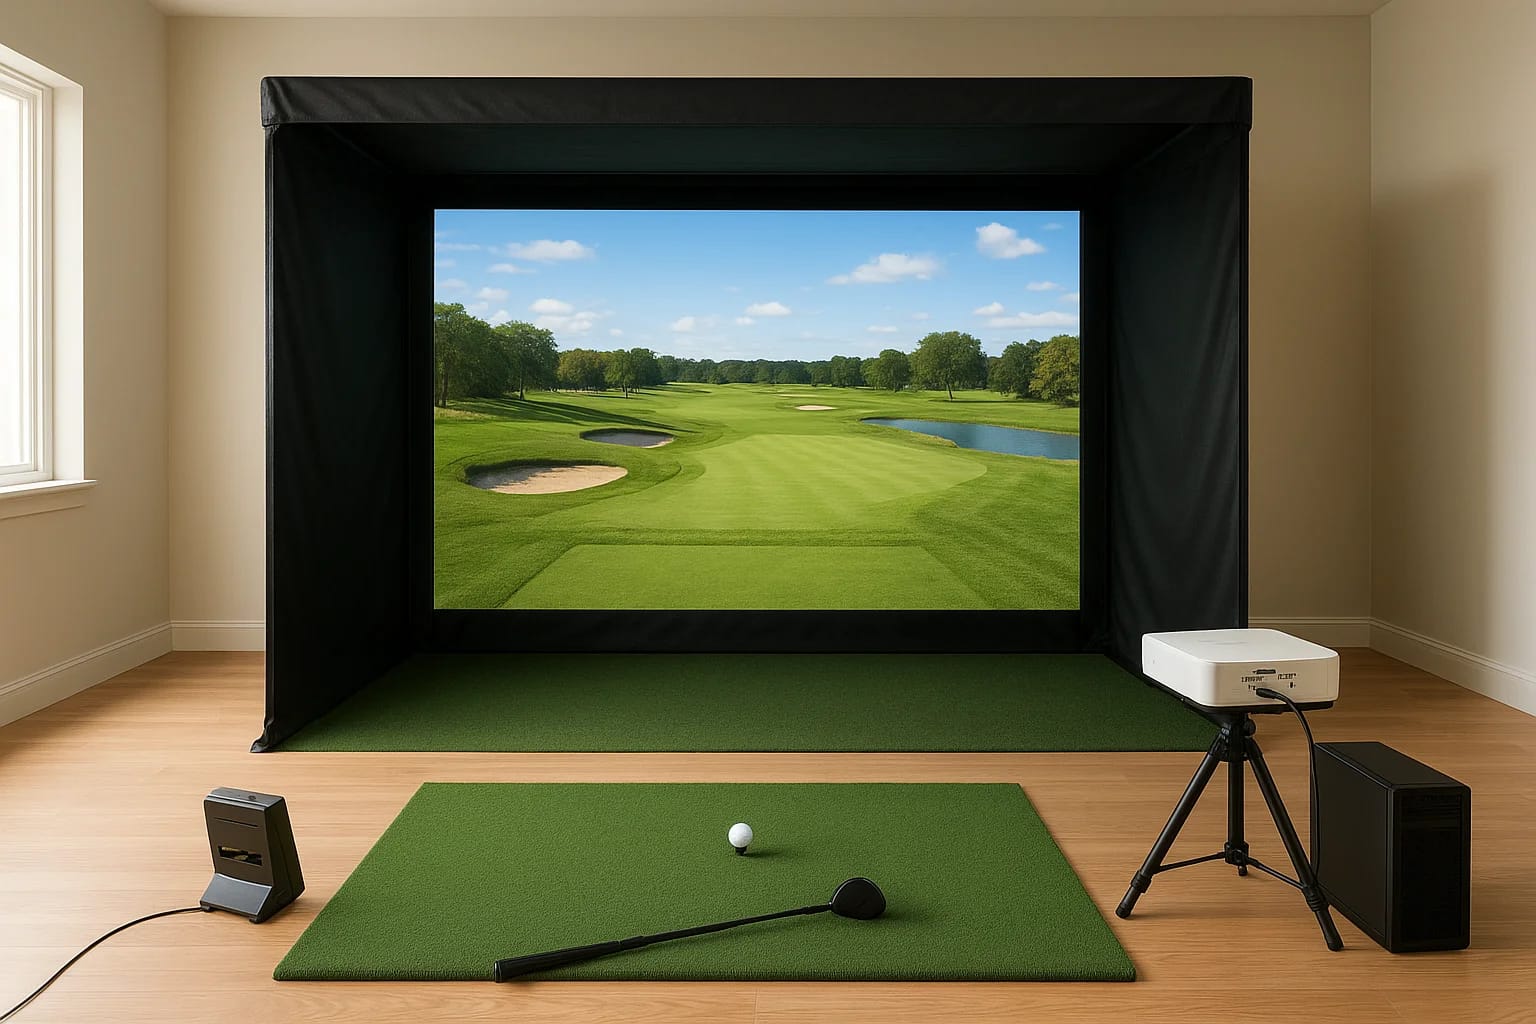
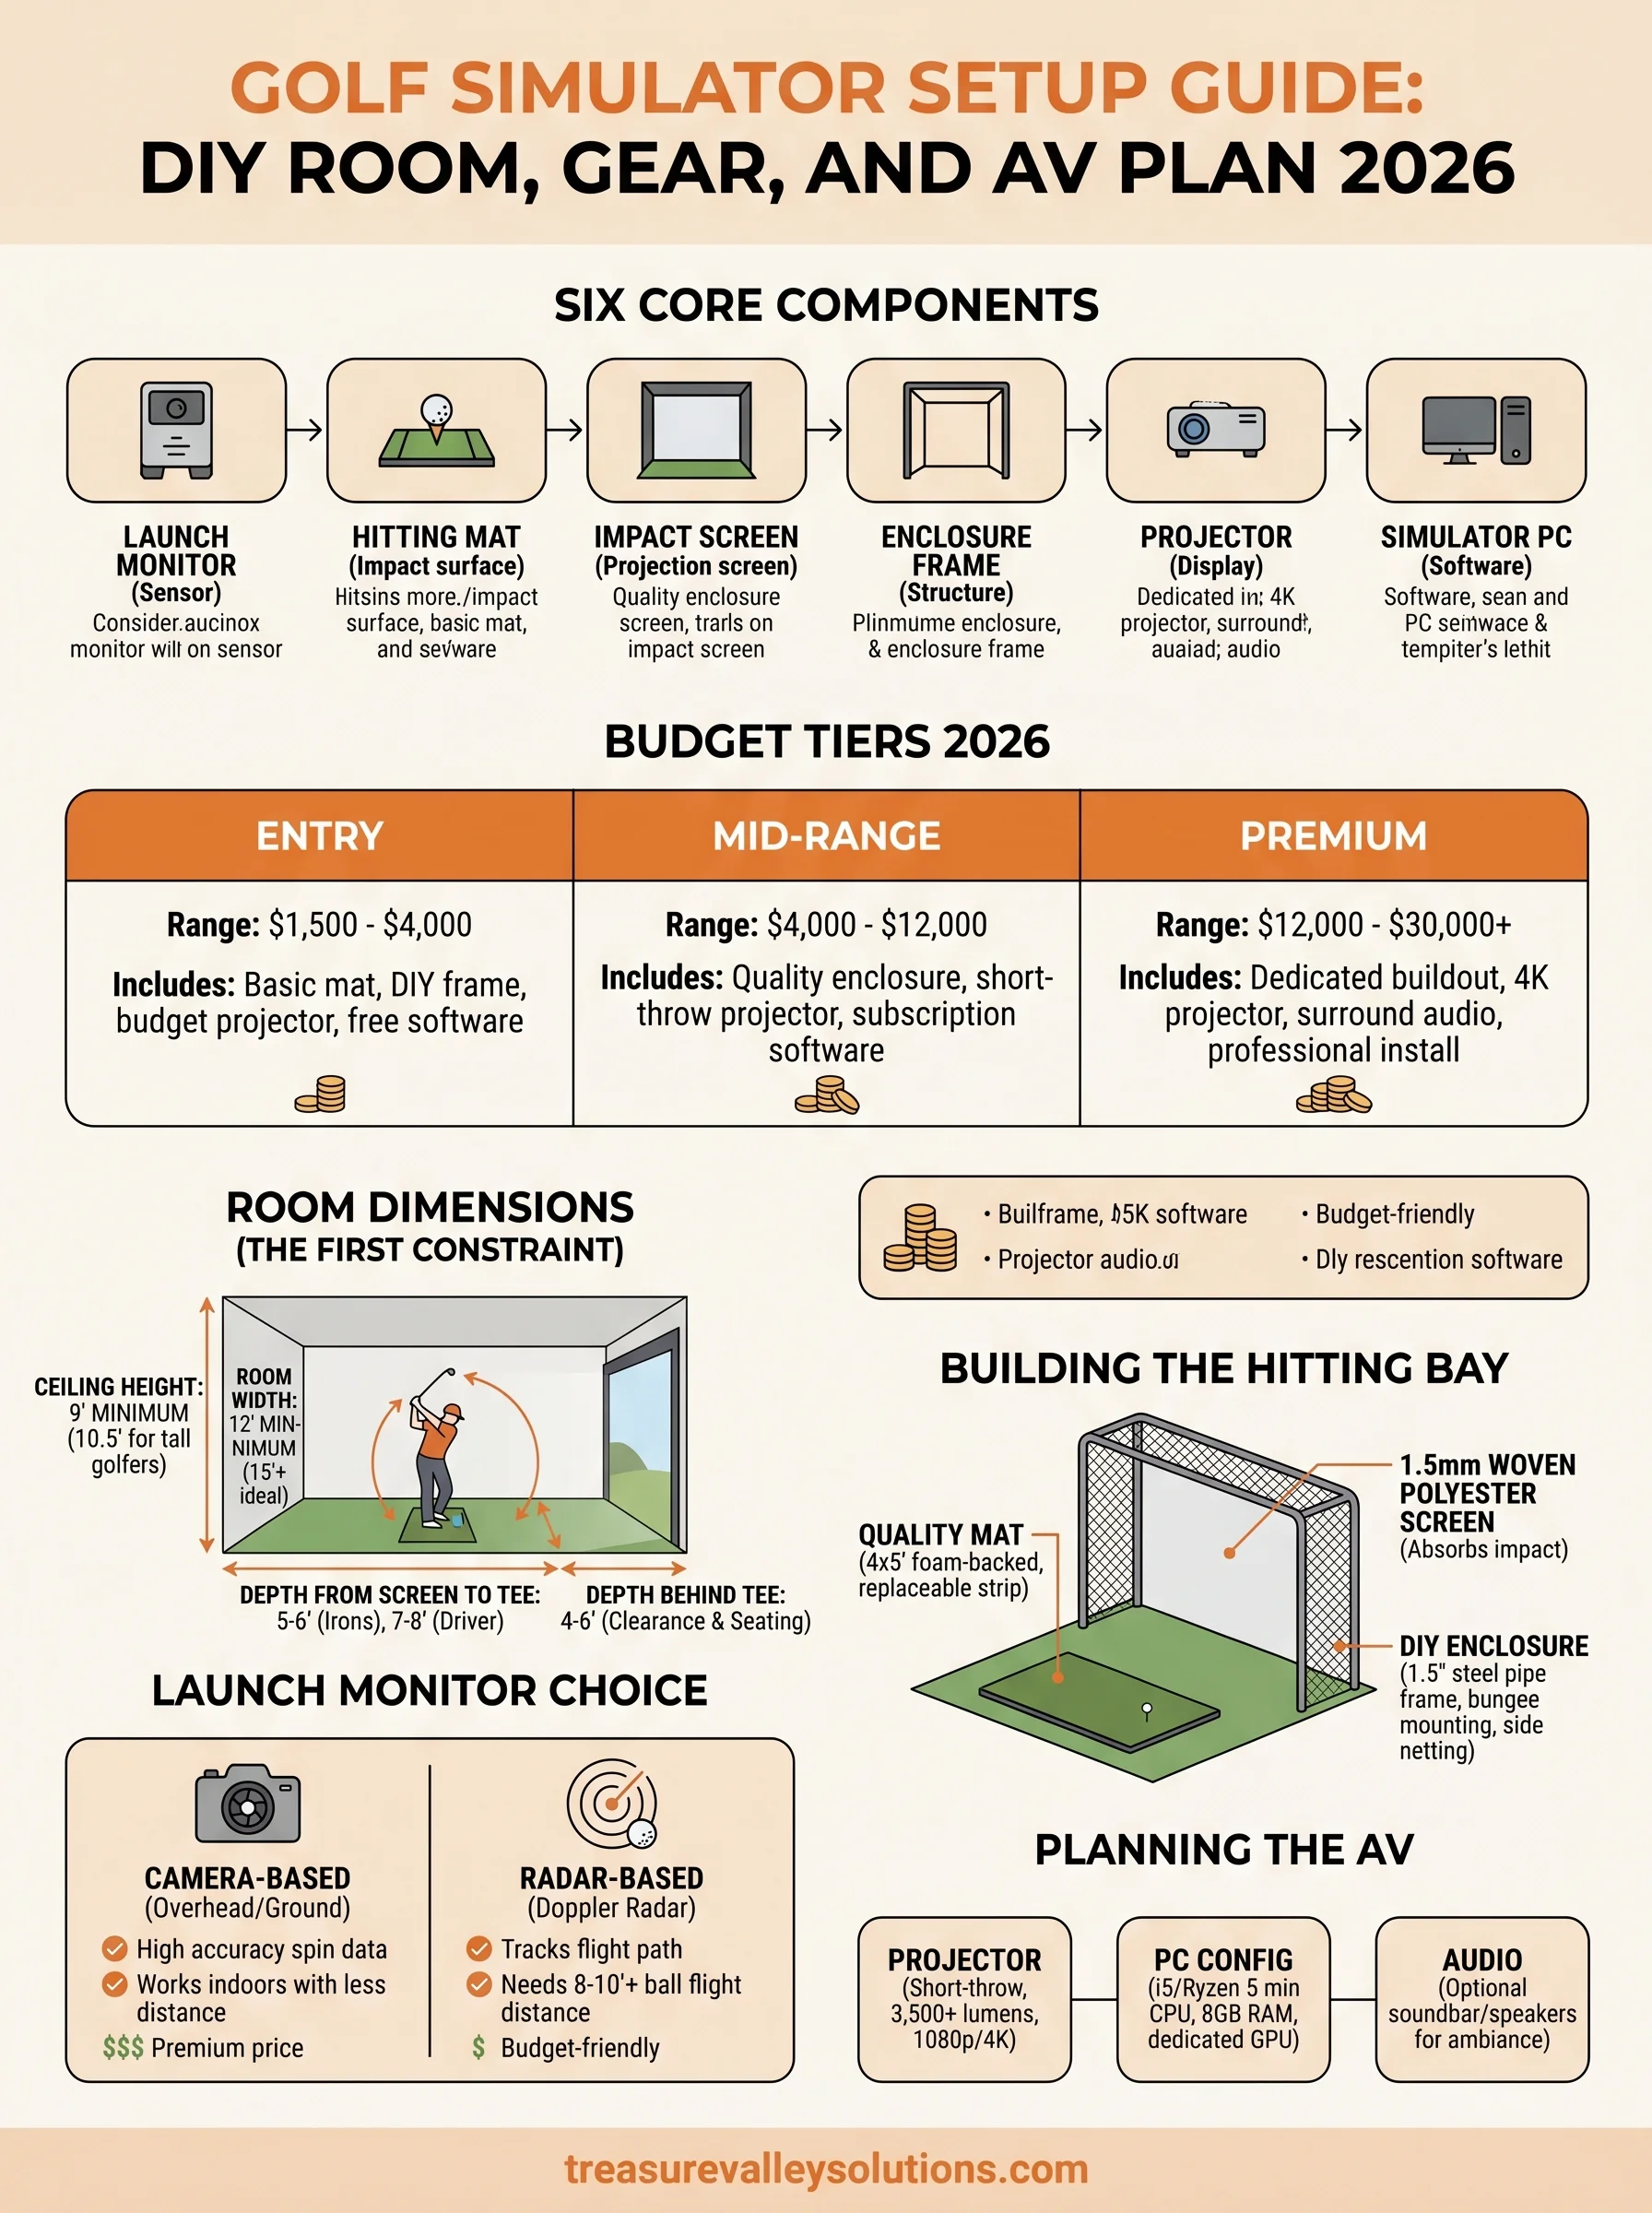
Every complete golf simulator setup guide covers six core components: a launch monitor, hitting mat, impact screen, enclosure frame, projector, and a computer running simulator software. Miss one of those pieces and the whole system either fails to work or produces data you can't trust. Before you spend a single dollar, get a clear picture of what each component does and how much it realistically costs, so you can build a budget that actually holds.
The six core components
A launch monitor is the brain of the system. It reads ball speed, spin rate, launch angle, and club path, then feeds that data to your simulator software to calculate where the shot lands. Your hitting mat takes the physical punishment of every swing, so quality matters more than most first-time buyers expect. An impact screen is the surface your projector displays onto, and it also needs to absorb repeated ball strikes without tearing or creating dangerous bounce-back toward the hitter.
The enclosure frame is the structure that holds the screen in place and contains off-center shots. Your projector throws the course image onto the screen, and the specs matter a great deal: throw ratio and brightness determine whether the image looks sharp or washed out in your specific room. Finally, the simulator PC runs the golf software and processes the launch monitor data in real time, so it needs enough processing power to avoid lag during play.
Your launch monitor choice drives the cost of everything else, since higher-end sensors require better software subscriptions, faster PCs, and more precise projector placement to get full value out of them.
Budget tiers for 2026
Here is an honest cost breakdown at each tier, so you can match your goals to a realistic spending range before committing:
| Tier | Total Budget | Launch Monitor Examples | What You Get |
|---|---|---|---|
| Entry | $1,500 - $4,000 | Garmin R10, Rapsodo MLM2PRO | Basic mat, DIY frame and screen, budget projector, free or low-cost software |
| Mid-Range | $4,000 - $12,000 | Mevo+ Pro Package, SkyTrak+ | Quality enclosure, short-throw projector, included software subscription |
| Premium | $12,000 - $30,000+ | Uneekor EYE XO2, Foresight GCQuad | Dedicated room buildout, 4K projector, surround audio, professional installation |
Most DIY builders land in the $4,000 to $8,000 range when they do their own framing and screen assembly. That budget covers a reliable launch monitor, a quality mat, a usable enclosure, and a projector that performs well. If you want a polished result with a proper AV setup, including calibrated audio and a short-throw 4K projector, plan for $10,000 or more for the full build.
Ongoing costs to factor in
Hardware is a one-time purchase, but simulator software subscriptions are an annual expense you need to account for from the start. E6 Connect runs around $200 per year at the base tier, while GSPro costs about $150 per year. Full-featured platforms like TGC 2019 and Creative Golf 3D fall in a similar range. Also budget for replacement hitting mats, since entry-level mats wear out in 12 to 18 months under regular use. A commercial-grade mat costs $300 to $600 and holds up significantly longer, which makes it the smarter buy even on a tighter initial budget.
Step 1. Measure the room and choose a layout
Room dimensions are the first real constraint in any golf simulator setup guide, and they determine what equipment will actually work in your space. A mismatch between your room and your chosen projector or enclosure forces expensive returns or workarounds that compromise the final result. The three numbers that matter most are ceiling height, room width, and depth from the screen to the tee position.
Minimum dimensions you need
Ceiling height is the hardest constraint to work around. You need at least 9 feet of clearance from the floor to the lowest obstruction, including any overhead lights, beams, or HVAC ducts. Ten feet is the standard recommendation for most swing types, and taller golfers or those with an upright swing plane should target 10.5 feet to avoid contact with the ceiling on full driver swings.
For room width, plan on a minimum of 12 feet, with 15 feet or more giving you comfortable margins for off-center shots and enclosure framing. Depth from the screen to your tee position needs to be at least 5 to 6 feet for iron shots and 7 to 8 feet for full driver swings. Add another 4 to 6 feet behind the tee for projector placement, swing clearance, and seating.
If your ceiling clears 9 feet but not 10, stick to camera-based launch monitors mounted at ground level rather than overhead units that require extra clearance above the hitting zone.
A simple room measurement checklist
Run through this checklist before you finalize any equipment purchases:
- Ceiling height: Measure at the exact tee position, not just the room center
- Width: Measure wall to wall at both the screen end and the tee position
- Depth: Measure from the screen wall to the rear wall
- Obstructions: Note any light fixtures, sprinkler heads, beams, or vents
- Power outlets: Locate existing outlets for the projector, PC, and lighting
- Flooring: Confirm the surface is level, since uneven floors affect mat stability
Choosing a layout: centered vs. offset
Most standard simulator layouts place the tee at the center of the room width, directly in front of the screen. This works well for rectangular rooms with 15 feet or more of width. In a narrower garage bay, an offset layout shifts the tee position slightly toward one side to give a right-handed golfer more backswing clearance, which is where most contact with side walls happens.
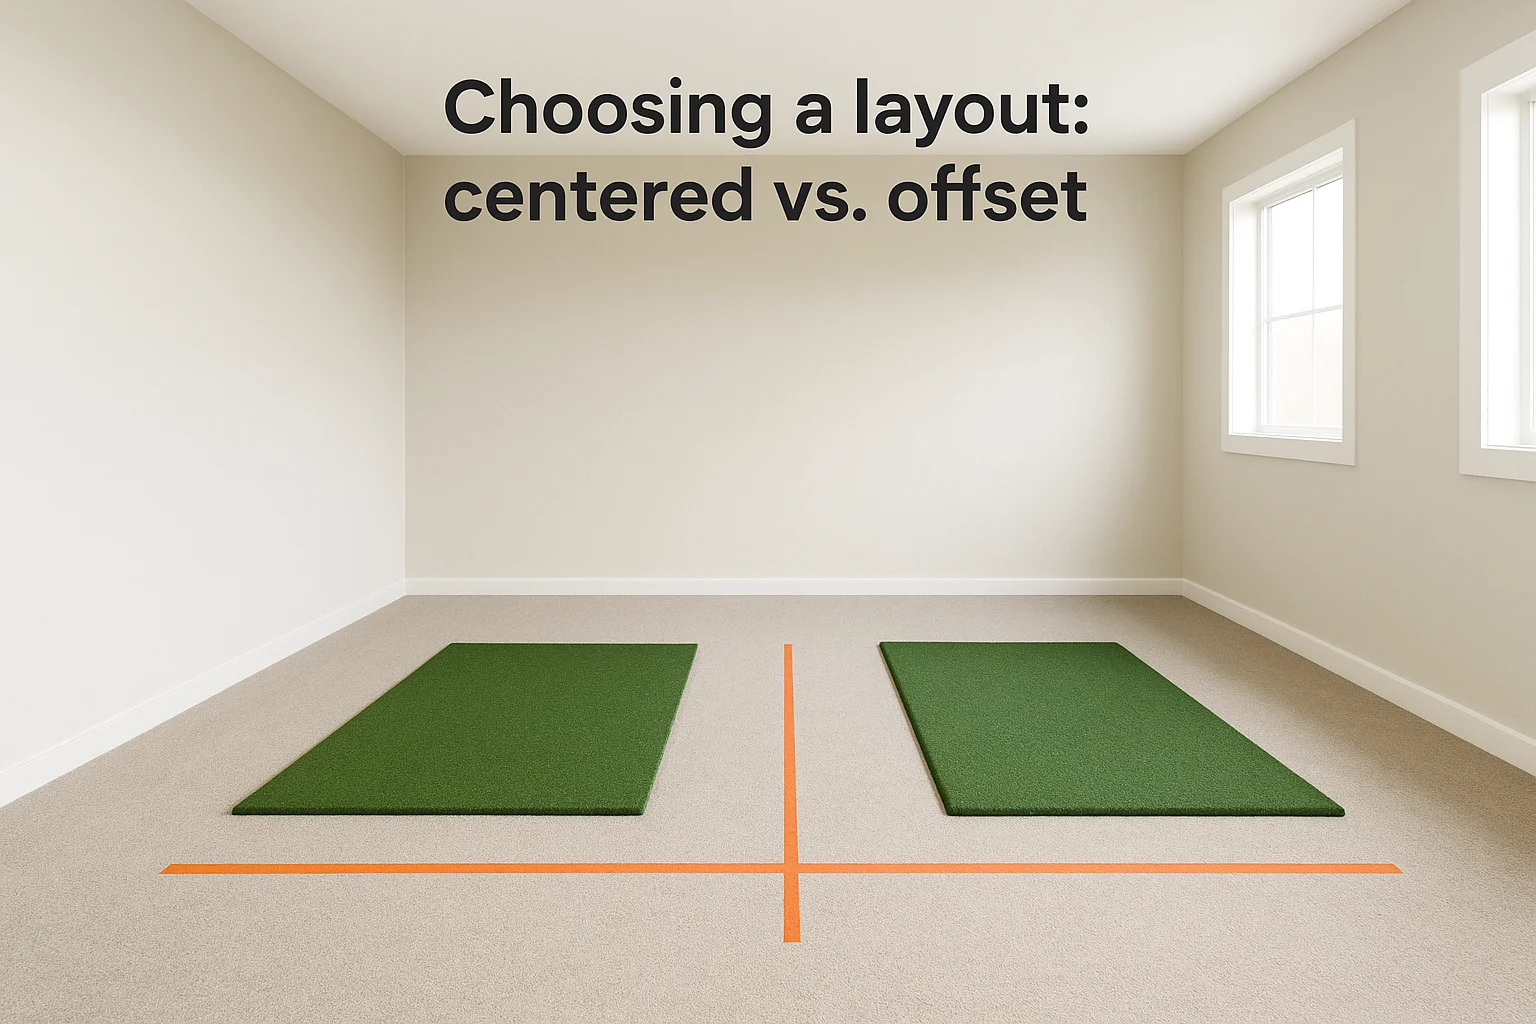
Whichever layout you choose, mark the tee position on the floor with tape before ordering an enclosure. Confirming that position first lets you verify projector throw distance, side clearance, and swing arc all work together before any money changes hands.
Step 2. Pick the launch monitor and software
The launch monitor you choose shapes every other decision in this golf simulator setup guide, from the software you can run to the PC specs you need to the projector brightness required to see data overlays clearly. There are two main sensor technologies on the market: camera-based systems and radar-based systems. Each has specific room requirements and accuracy trade-offs you need to understand before spending money.
Camera-based vs. radar-based monitors
Camera-based launch monitors like the Uneekor EYE XO2 and Foresight GCQuad mount overhead or at ground level and use high-speed cameras to capture the club and ball at impact. They deliver the most accurate spin data available and work well indoors because they don't need the ball to travel far to collect measurements. The trade-off is cost: most camera-based units start at $5,000 and climb well past $10,000 for professional-grade models.
Radar-based monitors like the Garmin R10, Mevo+, and SkyTrak+ use Doppler radar to track the ball's flight path. They're significantly cheaper, and the entry-level R10 sits under $700. Radar units do need a minimum of 8 to 10 feet of ball flight to produce accurate readings indoors, so your room depth matters more with this type of sensor.
If your room depth is under 14 feet from screen to rear wall, a camera-based monitor gives you cleaner data than a radar unit that doesn't have enough flight distance to lock on accurately.
Matching software to your monitor
Not every software platform works with every launch monitor, so confirm compatibility before you buy. Here is a quick reference for common pairings in 2026:
| Launch Monitor | Compatible Software |
|---|---|
| Garmin R10 | GSPro, E6 Connect, Garmin Golf app |
| Mevo+ (Pro Package) | FSX Play, E6 Connect, Creative Golf 3D |
| SkyTrak+ | SkyTrak Golf, TGC 2019, E6 Connect |
| Uneekor EYE XO2 | REFINE+, E6 Connect, Creative Golf 3D |
| Foresight GCQuad | FSX 2020, E6 Connect |
Your PC requirements change based on the software you select. E6 Connect recommends at minimum an Intel Core i5 processor, 8GB of RAM, and a dedicated GPU. GSPro runs on similar specs. If you plan to run 4K course graphics, step up to a Core i7 or Ryzen 7 with 16GB of RAM and a mid-range discrete graphics card to avoid frame drops during play.
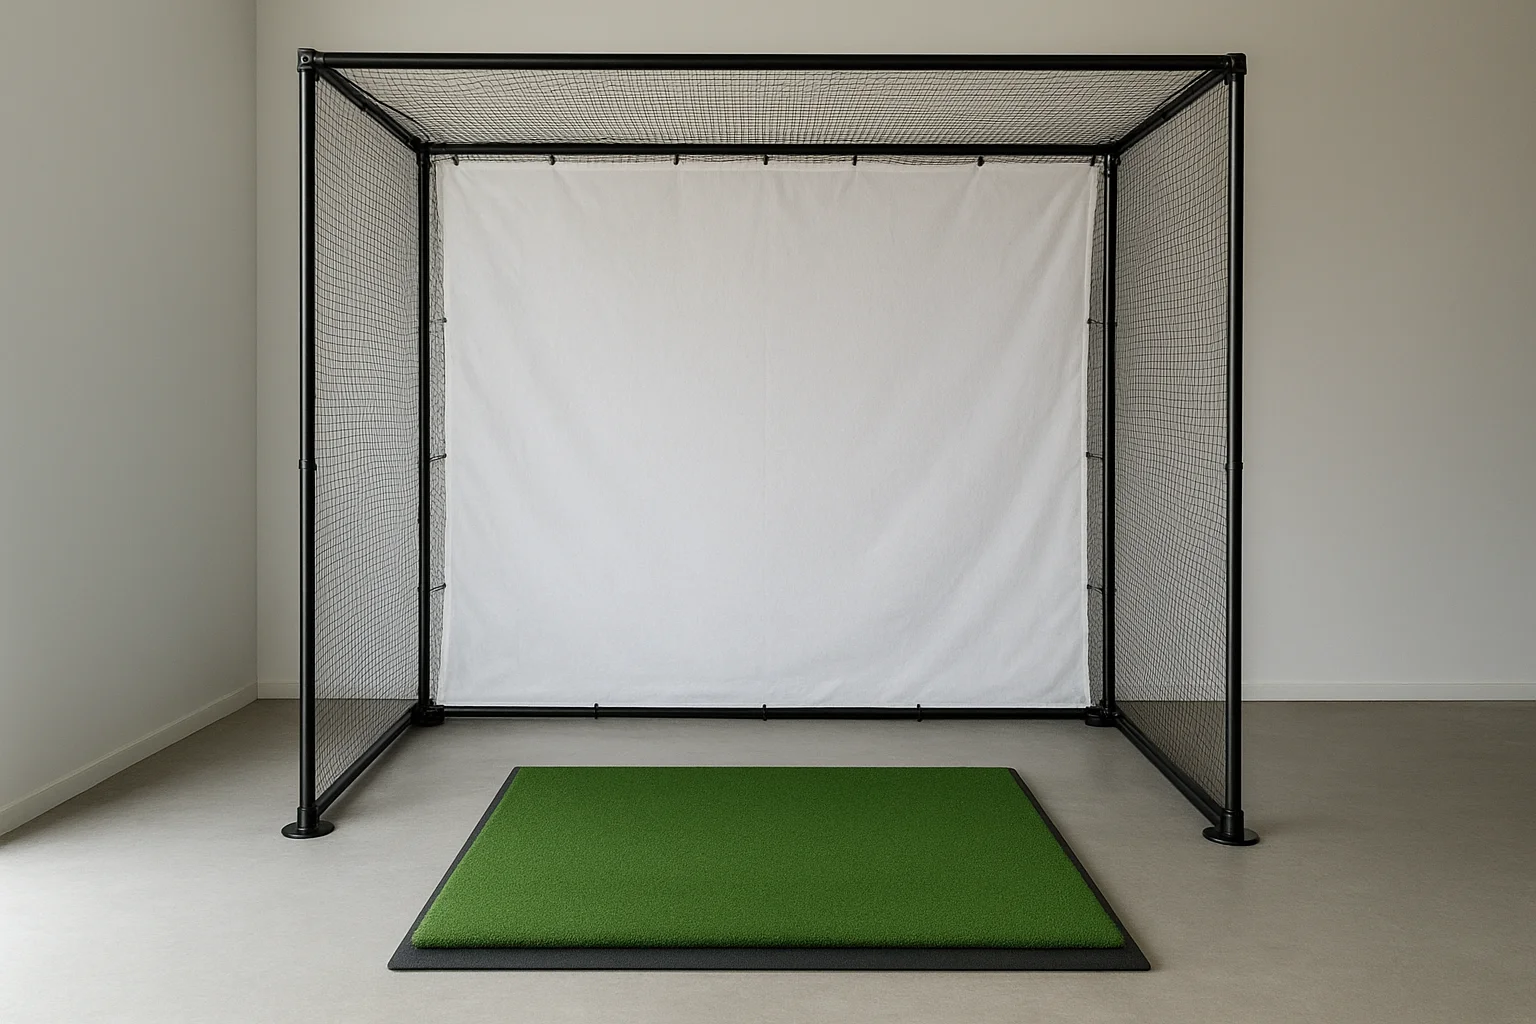
Step 3. Build the hitting bay: mat, screen, enclosure
The hitting bay is the physical core of your simulator, and every component in it takes a beating on a regular basis. This section of the golf simulator setup guide focuses on the three parts that determine how safe, durable, and functional your build actually is: the mat, the impact screen, and the enclosure frame that holds everything together.
Choose the right hitting mat
Your mat needs to handle thousands of strikes without destroying your joints or your club shafts. Foam-backed commercial turf mats in the 4x5 foot or 5x5 foot range give you enough surface to take a full stance for every club in the bag. Avoid thin rubber-backed mats sold for putting practice, since they transmit shock directly to your wrists on low-ball strikes.
Look for a mat with a replaceable hitting strip down the center. Full mat replacements cost $300 to $600, but a mat with a swappable center panel lets you replace only the worn section for around $50 to $80, which saves money over time. Place the mat on a 1/2-inch rubber underlayer to reduce vibration transfer to the floor and keep the mat from shifting during your swing.
Select and mount the impact screen
Impact screens are rated by thickness and weave density, and both numbers affect how well the screen absorbs ball energy without bounce-back. A 1.5mm woven polyester screen handles shots up to 150 mph ball speed comfortably, which covers most amateur golfers. Step up to a 2.0mm or dual-layer screen if multiple players are using the bay or if your launch monitor consistently shows ball speeds above 160 mph.
Mount the screen with bungee cord loops through grommets along the frame rather than rigid attachments, since this lets the screen flex on impact and dramatically extends its lifespan.
Frame the enclosure
A basic DIY enclosure uses 1.5-inch steel pipe or 1.5-inch aluminum square tube for the uprights and crossbars. Cut the frame to match your screen dimensions, typically 10 feet wide by 9 feet tall for a standard residential setup. Use floor flanges bolted to a plywood base to keep the uprights stable without drilling into the floor. Side netting panels attach to the frame with zip ties or hook-and-loop straps, and they catch any shot that misses the screen to protect your walls and return the ball safely.
Step 4. Plan the AV: projector, PC, and audio
The AV side of a golf simulator setup guide is where most DIY builds fall short. Picking the wrong projector or under-speccing the PC creates a setup that feels sluggish and looks flat, which undermines the whole experience. Getting these three components right makes every session feel like you're actually on the course.
Pick the right projector
Your projector choice comes down to throw ratio and brightness, and both specs are non-negotiable for simulator use. A standard throw projector works if you have at least 10 to 12 feet of distance between the lens and the screen. Short-throw and ultra-short-throw models let you place the unit much closer, which is the smarter choice in most garage setups where ceiling-mount depth is limited.
For most dedicated simulator rooms, target a projector with at least 3,500 lumens and a native resolution of 1080p or higher to keep the course image sharp and visible even with ambient light present.
Brightness matters because simulator software renders detailed course graphics that wash out quickly on an underpowered bulb. Epson and BenQ both produce projector lines built specifically for short-throw and bright-room use, which is why you'll see them recommended consistently across simulator forums. Aim for a throw ratio between 0.5 and 0.8 if you're placing the unit 5 to 7 feet from the screen.
Configure your PC for smooth performance
Your simulator PC needs enough headroom to run course rendering and launch monitor data processing simultaneously without dropping frames. A minimum build for 1080p play looks like this:
| Component | Minimum Spec | Recommended Spec |
|---|---|---|
| CPU | Intel Core i5 / Ryzen 5 | Core i7 / Ryzen 7 |
| RAM | 8GB DDR4 | 16GB DDR4 |
| GPU | GTX 1660 / RX 580 | RTX 3060 / RX 6700 |
| Storage | 256GB SSD | 512GB SSD |
Connect the PC to the projector via HDMI 2.0 or DisplayPort to support full 1080p at 60Hz without compression artifacts.
Add audio to complete the experience
Audio is optional but worth the investment if you're building a dedicated room. A compact 2.1 soundbar or a pair of bookshelf speakers placed behind the hitting position delivers crowd noise, course ambiance, and feedback sounds that make each shot feel more engaging. Keep speaker cables routed along the wall base and secured with cable clips so they stay clear of your swing path and the mat area.
Final checks before your first round
Running through a short checklist before you swing for the first time saves you from interrupting your session to troubleshoot avoidable problems. Confirm that your projector image fills the screen evenly with no keystone distortion, and verify that your launch monitor connects to the software and registers a test shot before you start. Walk the full swing arc with a club in hand to check for clearance on all sides, ceiling included. Make sure your hitting mat sits flat with no curling edges, and run an audio check if you added speakers. These final steps take less than ten minutes but catch the issues that most first-time builders miss.
A complete golf simulator setup guide gives you the framework, but every room has small quirks that only show up during that first live test. If your AV setup needs professional calibration or you want help designing the whole system from scratch, contact our team at Treasure Valley Solutions to get started.