
Building a home golf simulator is one of those projects that sounds straightforward until you start measuring your ceiling height and comparing launch monitors. The difference between a setup that fee...
Golf Simulator Planning Guide: DIY Room Size, Gear Checklist
Building a home golf simulator is one of those projects that sounds straightforward until you start measuring your ceiling height and comparing launch monitors. The difference between a setup that feels like a real round and one that frustrates you after a month comes down to planning. A solid golf simulator planning guide saves you from expensive mistakes, rooms that are too short for a full swing, screens that wash out under ambient light, or projectors mounted at the wrong throw distance.
At Treasure Valley Solutions, we design and install custom AV and technology systems throughout the Boise and Meridian area, and golf simulators sit right at the intersection of what we do best: display technology, audio, calibrated equipment placement, and clean wiring that doesn't turn your garage or spare room into a cable nightmare. We've helped homeowners across the Treasure Valley build simulator rooms that actually work, and last.
This guide covers everything you need to get started: minimum room dimensions for safe, accurate play, a complete gear checklist so nothing gets overlooked, and a step-by-step breakdown of the DIY build process. Whether you're converting a basement, a spare bedroom, or a bay in your garage, you'll walk away with a clear plan to follow from first measurement to first swing.
What to decide before you buy anything
Every golf simulator project stalls or goes over budget when you skip the planning stage and go straight to comparing products. Before you spend a dollar, you need to make three core decisions: what you want the simulator to do, how much you're willing to spend, and which room it will live in. Get those three anchors in place first, and every product choice after that becomes much easier to evaluate.
Define your primary use case
Your use case determines which launch monitor, software platform, and screen size you actually need. A golfer who wants serious swing data for lessons and off-season practice needs a radar- or camera-based launch monitor with accurate ball and club tracking. Someone who primarily wants to play virtual rounds with family has different priorities: realistic course graphics, smooth software, and a comfortable viewing setup matter more than granular spin data.
Getting clear on your use case before shopping prevents you from overspending on data you'll never look at or underbuying on features you'll use every single session.
Think through how often you'll use the simulator and who else will use it. A setup built around one player's practice routine is different from one the whole family plays on weekends. Write down your top three priorities and keep them visible throughout the build process.
Set a realistic budget range
Golf simulator budgets range from under $2,000 for a basic net and hitting mat combo to over $30,000 for a fully enclosed room with a premium launch monitor and high-resolution projector. Knowing where the meaningful quality thresholds sit helps you spend efficiently:
| Budget Range | What you typically get |
|---|---|
| Under $2,500 | Basic net, entry-level launch monitor, no projector |
| $2,500 to $7,000 | Mid-tier launch monitor, projector-based screen, simulation software |
| $7,000 to $15,000 | High-accuracy launch monitor, dedicated enclosure, short-throw projector |
| $15,000 and above | Professional-grade radar, custom enclosure, 4K projection, full AV integration |
Build your budget as a range rather than a fixed number. Unexpected costs show up in almost every build: outlet placement, dedicated circuits, ceiling reinforcement, flooring, and acoustic panels. Leave at least 15 percent of your total unallocated to absorb those additions without stalling the project.
Choose your room before you choose your gear
This is the step most people skip, and it causes the most regret. Room dimensions drive nearly every downstream decision: the projector throw ratio, the enclosure width, the screen size, and whether a given launch monitor will track accurately in your space.
Walk through every room or space you're considering and physically measure the ceiling height, width, and depth. Bring a tape measure and write the numbers down. A ceiling that feels tall enough for a normal swing might fall short for a driver, and a room that looks wide enough might clip your follow-through on a full iron.
Also consider power and lighting access at this stage. Projectors and launch monitors both need reliable power, and most rooms need at least one dedicated 20-amp circuit to avoid tripped breakers mid-round. Checking this now saves a significant amount of rework later.
Using this golf simulator planning guide as your framework, you'll work through exact measurements and minimum clearances in the next section. For now, narrow your room candidates to two or three options so you're not redesigning your layout every time you learn a new constraint.
Step 1. Measure your room and swing clearances
Accurate measurements are the foundation of this entire build. Pull out a tape measure and record ceiling height, room width, and room depth before you look at a single product listing. Those three numbers will either confirm a room works or eliminate it entirely, and no equipment choice compensates for a space that's simply too small for a full swing.
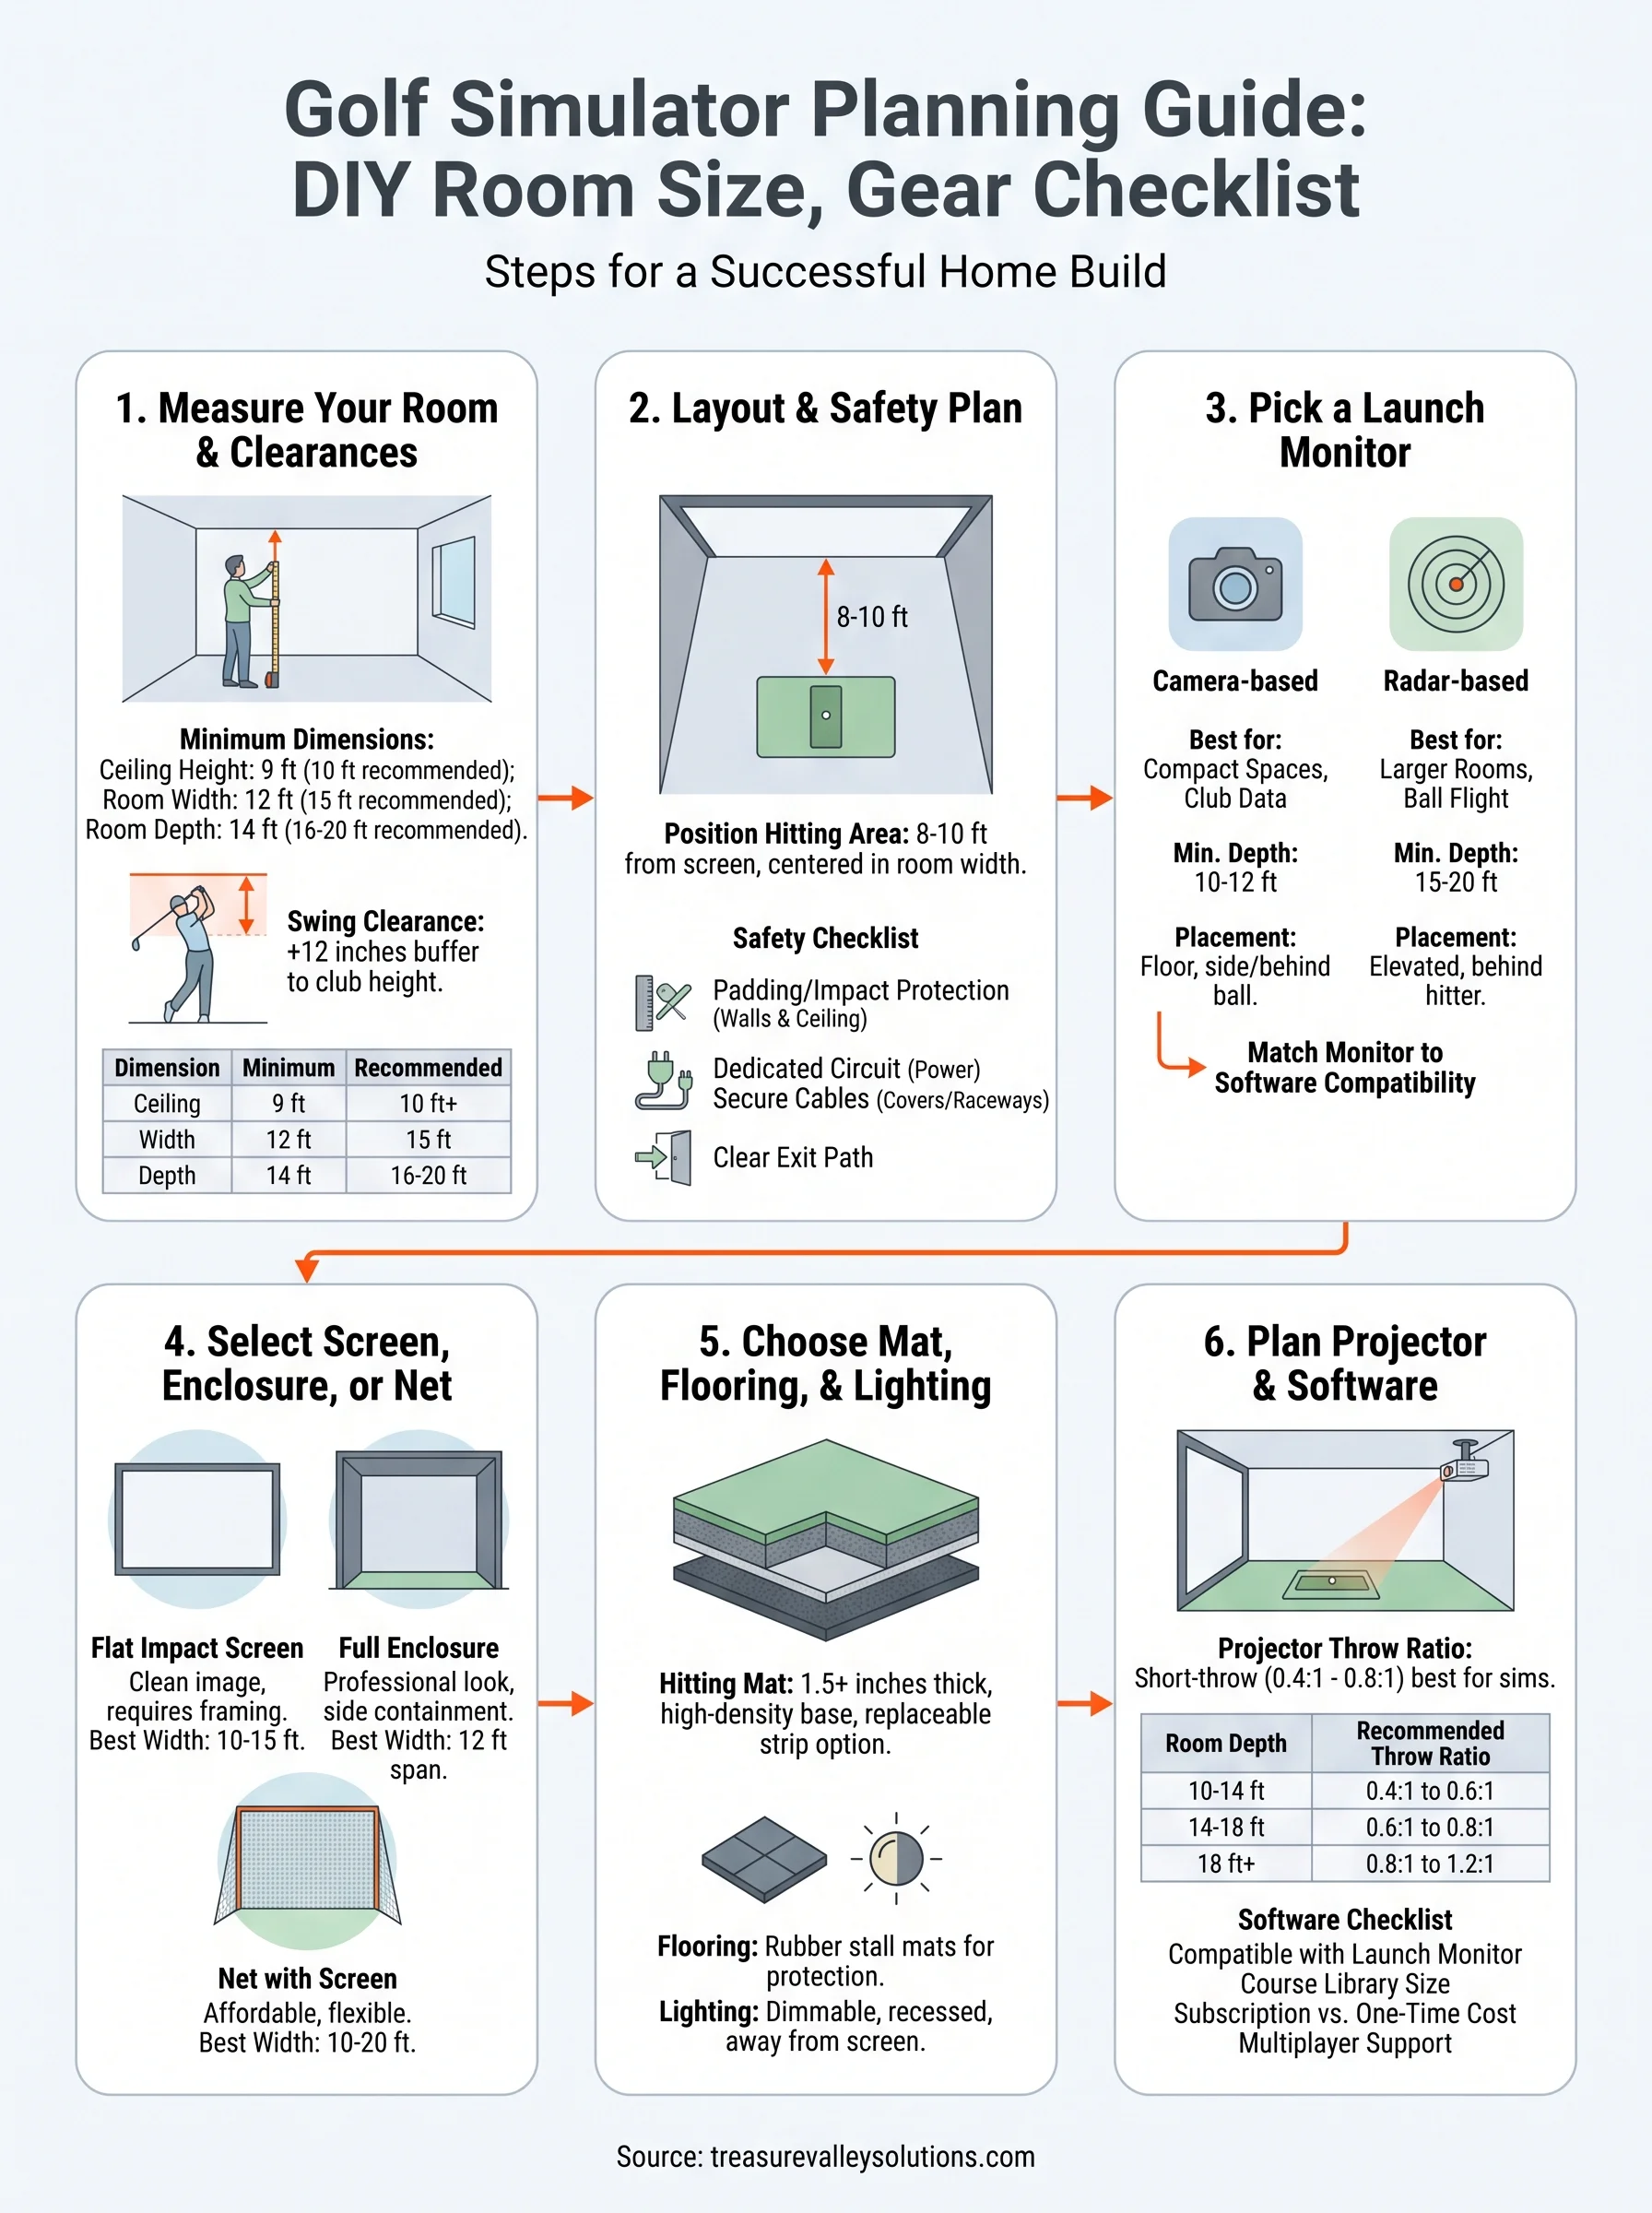
Minimum room dimensions
Most golfers need more room than they initially expect. A minimum ceiling height of 9 feet works for shorter players swinging short irons, but 10 feet is the practical standard that accommodates most players swinging a driver without clipping the ceiling on the backswing. Width should be at least 12 feet to give you side clearance on full shots, and 15 feet of depth gives you enough room between the hitting position, the screen, and any rear-mounted launch monitor.

If your ceiling measures under 9 feet, that room is not a viable simulator space regardless of how appealing the rest of the layout looks.
Use this table as your baseline before you commit to a room:
| Dimension | Minimum | Recommended |
|---|---|---|
| Ceiling height | 9 ft | 10 ft or higher |
| Room width | 12 ft | 15 ft |
| Room depth | 14 ft | 16 to 20 ft |
How to measure swing clearance
Stand at your intended hitting position and hold your longest club at the top of your backswing. Have someone mark the highest point the club reaches against the wall or ceiling behind you, then measure from the floor to that mark. Add 12 inches of buffer to that number to account for different clubs, different swing planes, and the likelihood that other people of varying heights will use the setup.
Repeat this process for your side clearances. Extend your club fully through impact on both sides and note how close the club head comes to the walls. A cramped follow-through not only changes your swing mechanics but can also produce inaccurate launch monitor readings if the club path gets artificially restricted by the walls around you.
Finishing this step in your golf simulator planning guide gives you a set of hard numbers to reference for every gear decision that follows, from screen width to enclosure sizing to projector placement.
Step 2. Choose a layout and safety plan
Once you have your room measurements locked in, the next step in this golf simulator planning guide is deciding exactly where everything goes inside that space. Layout decisions affect safety, accuracy, and usability in equal measure, so treat this step with as much care as your measurements.
Position the hitting area correctly
Your hitting position should sit 8 to 10 feet from the impact screen in most setups. That distance gives the launch monitor enough space to read ball flight accurately and keeps you far enough from the screen that you won't make contact on a mishit. Mark your hitting position on the floor with painter's tape before you finalize anything, then stand there with your longest club to confirm you have comfortable clearance on all sides.

If you're tight on depth, prioritize distance between the hitter and the screen over any other dimension, since striking the screen damages it and creates a real safety hazard.
Place your hitting mat centered in the room width rather than offset to one side. Centering the mat gives equal side clearance for both right- and left-handed players and prevents the enclosure walls from interfering with the swing path.
Build a simple safety checklist
Safety padding and containment belong in your plan before you finalize any equipment purchases. Walls and the ceiling within striking distance need foam padding or thick impact protection in case of a wayward shot or an accidental club release. Foam wall pads used in batting cages work well here and are widely available through sporting goods retailers.
Use this checklist as a template when planning your safety setup:
- Impact screen rated for golf ball speeds in your specific setup
- Side wall padding within 3 feet of the hitting position on both sides
- Ceiling padding or netting above and behind the hitting zone
- Golf netting on any open sides behind or flanking the hitting position
- Dedicated circuit confirmed for projector and launch monitor power
- All floor cables secured in cable covers or raceways outside the swing path
- Clear exit path out of the hitting area with no tripping hazards
Electrical safety matters just as much as physical padding. Position all power strips and surge protectors well outside the swing zone, and confirm that your circuit can handle the combined load of your projector, launch monitor, and any ambient lighting you plan to run simultaneously.
Step 3. Pick a launch monitor that fits your space
The launch monitor is the brain of your simulator. It captures ball speed, launch angle, spin rate, and club data on every shot, feeds that information into your software, and determines how realistic your experience feels. The right monitor for your setup depends directly on your room dimensions, your budget, and what data points matter most to you in this golf simulator planning guide.
Camera-based vs. radar-based systems
These two technologies track the ball in fundamentally different ways, and each has specific space and placement requirements that affect which one works in your room. Camera-based systems like the Foresight Sports GC series use high-speed cameras to capture the ball and club at impact. They perform well in shorter rooms because they don't need significant ball flight distance to produce accurate readings. Radar-based systems like Trackman and FlightScope track the ball through its full flight arc using Doppler radar, which typically requires more room depth and a specific mounting angle to function accurately.
If your room depth is under 16 feet, a camera-based monitor will almost always outperform a radar system in that space.
Use this table to match launch monitor type to your room dimensions:
| Monitor Type | Minimum Room Depth | Typical Placement | Best For |
|---|---|---|---|
| Camera-based | 10 to 12 ft | Floor-level, beside or behind ball | Compact spaces, club data focus |
| Radar-based | 15 to 20 ft | Elevated, mounted behind the hitter | Larger rooms, ball flight focus |
| Photometric | 10 to 14 ft | Floor mat or beside hitting area | Mid-size rooms, balanced data |
Match the monitor to your software
Every launch monitor connects to simulation software differently, and not all monitors work with all platforms. Before you commit to a unit, confirm it supports the software you plan to run. Check the manufacturer's compatibility documentation directly on their website to verify support for your preferred platform. Also confirm whether software licensing fees are bundled into the purchase price or billed separately as a subscription, since that cost adds up significantly over a multi-year ownership period.
Checking compatibility before you buy prevents the frustrating situation where your hardware arrives and won't connect to the software your entire layout was built around.
Step 4. Select a screen, enclosure, or net
Your hitting surface and containment setup form the physical boundary of your simulator room, and choosing the wrong combination creates both safety problems and data problems. A screen that's too small clips your ball flight visualization, and a net without adequate containment lets errant shots damage walls, equipment, or anything stored nearby. This golf simulator planning guide step helps you match the right containment system to your room dimensions and usage habits.
Impact screen options
Impact screens are the standard display surface for projector-based simulator setups. They absorb the ball on contact and display the projected image without tearing or stretching over time when you select a screen rated for your launch monitor's expected ball speed output. Most quality impact screens list their impact rating in miles per hour, and you should confirm your launch monitor's measured ball speed falls under that threshold before purchasing.
Never mount a standard projector screen in a simulator room, since golf ball impacts will destroy it within one session.
Use this table to compare the three most common screen configurations:
| Screen Type | Best Room Width | Key Advantage | Key Limitation |
|---|---|---|---|
| Flat impact screen | 10 to 15 ft | Cleanest image, easy install | Requires framing or enclosure |
| Curved impact screen | 12 to 16 ft | Wider field of view | Costs more, harder to frame |
| Golf net with screen | 10 to 20 ft | Affordable, flexible | Image quality lower than dedicated screen |
Enclosures vs. open nets
A full enclosure wraps a frame around your screen and adds side containment panels that catch shots that miss the primary screen surface. This option makes the most sense if your room width allows at least 12 feet of enclosure span and you want a finished, professional look. Enclosure kits from manufacturers like Carl's Place and Rain or Shine Golf ship with frame components, screen material, and side panels, letting you assemble a complete unit without custom fabrication.
Open net setups cost less and work well in wider rooms or garage bays where a framed enclosure would feel cramped. You mount a hitting net across the room and hang your impact screen in front of it, using the net as a second layer of containment behind the screen. Secure any net system to wall studs or ceiling joists with hardware rated for the expected load, not just basic hooks, to prevent the entire assembly from shifting during heavy use.
Step 5. Choose a mat, flooring, and lighting
The surface under your feet and the light in your room directly affect shot accuracy, physical comfort, and the quality of your projected image. Most simulator builders focus on the launch monitor and screen while treating the mat and lighting as an afterthought, and that's a mistake. Getting this step right in your golf simulator planning guide keeps your body feeling good after long sessions and prevents ambient light from washing out your screen.
Pick the right hitting mat
Your hitting mat is where every shot starts, and a thin or poorly constructed mat transfers harsh impact forces up through your wrists and elbows over time. Look for a mat that's at least 1.5 inches thick with a high-density base layer, not just a thin rubber backing. A mat sized at least 4 feet wide by 5 feet deep gives you room to move your stance without stepping off the edge mid-swing.
A mat that feels firm on day one will feel even firmer after a hundred iron shots, so prioritize thickness and density over aesthetics when comparing options.
Consider a mat with a replaceable hitting strip, since that section takes the heaviest wear and a replaceable design saves you from replacing the entire unit after a season of heavy use. Place the mat on top of a foam underlayment cut to the same dimensions for an extra layer of shock absorption beneath the base.
Protect the surrounding floor
The floor outside your hitting mat takes divot tool drops, club head skids, and equipment weight year after year. Rubber stall mats, available at most farm supply and hardware stores, are a practical and affordable option for covering the full room floor. Lay them wall to wall before you position your mat and enclosure, since moving heavy equipment to retrofit flooring later is a frustrating project.
Set up lighting that works with projection
Your projector produces its clearest image when ambient light levels in the room stay low and consistent. Overhead fluorescent or bright LED fixtures that cast direct light onto the screen surface wash out contrast and dull the course visuals significantly. Install dimmable recessed lighting positioned toward the back of the room and away from the screen face, so you can dial down brightness before each session without making the room completely dark during setup and club changes.
Step 6. Plan the projector, display, and software
Your projector, display setup, and simulation software form the last major layer of this golf simulator planning guide, and the three components need to work together as a connected system rather than three separate purchases. A projector with the wrong throw ratio turns your screen into a dark, cropped image, and software that isn't compatible with your launch monitor produces inaccurate course data no matter how clean your swing is.
Choose the right projector throw ratio
The throw ratio of a projector determines how wide an image it produces at a given distance from the screen. Short-throw projectors with a ratio between 0.4:1 and 0.8:1 work best in simulator rooms because they produce a large image from a close mounting position, which keeps the projector outside your swing path and reduces shadow interference during your shot. Long-throw units require significantly more distance between the lens and screen, which most simulator rooms simply can't provide.
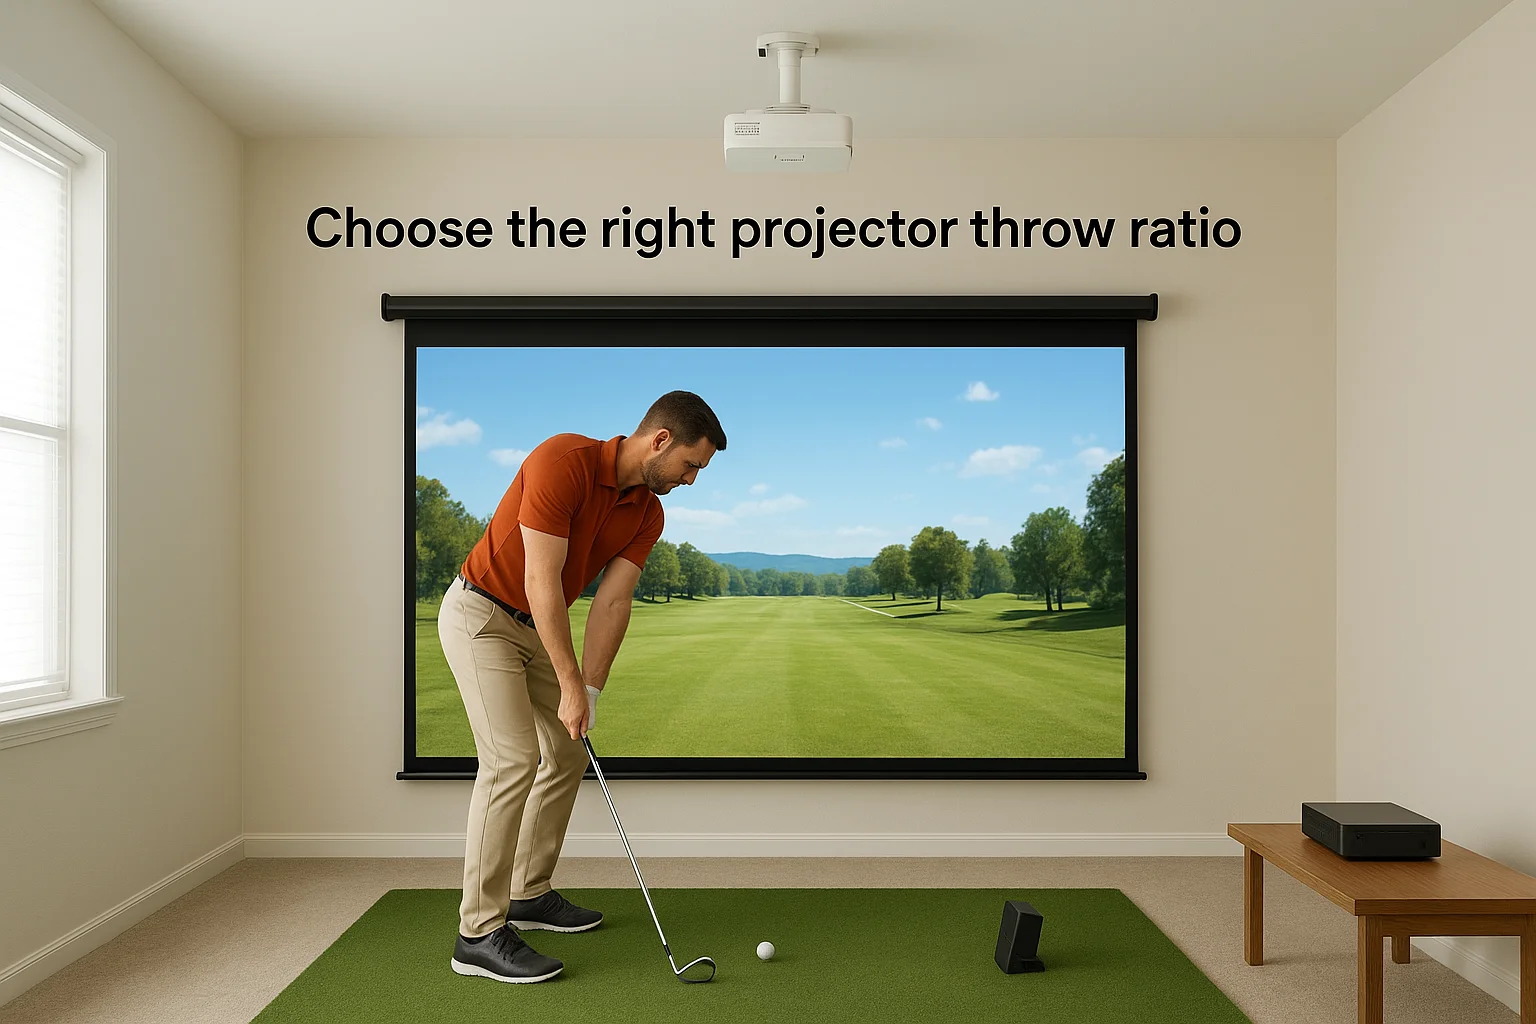
Mount your projector above and slightly behind the hitting position rather than between you and the screen, so your body never breaks the projection beam during a swing.
Use this table to match throw ratio to your room depth:
| Room Depth | Recommended Throw Ratio | Typical Mount Position |
|---|---|---|
| 10 to 14 ft | 0.4:1 to 0.6:1 | Ceiling mount behind hitter |
| 14 to 18 ft | 0.6:1 to 0.8:1 | Ceiling mount, 8 to 10 ft from screen |
| 18 ft or more | 0.8:1 to 1.2:1 | Rear ceiling mount or shelf |
Confirm the projector's minimum and maximum image width at your intended mounting distance before purchasing. Manufacturers publish this in their spec sheets as a throw distance chart, and matching those numbers to your room depth takes less than five minutes.
Match your software to your launch monitor
Simulation software licenses vary significantly in price and in the number of courses, practice modes, and multiplayer features they include. Confirm compatibility with your launch monitor directly on the software developer's website before you buy either product, since not all platforms support all hardware.
Use this quick checklist when evaluating any software platform:
- Confirmed compatibility with your specific launch monitor model
- Course library size that meets your intended use
- Practice range and fitting tools if you plan to use the setup for lessons
- Subscription vs. one-time pricing structure and what each covers
- Multiplayer support if more than one person will use the setup regularly
Installing and updating your simulation software on a dedicated PC or mini PC mounted near the projector keeps your wiring clean and eliminates the latency issues that come from running long HDMI cables across the room.
Ready to build
You now have every layer of this golf simulator planning guide mapped out: room dimensions, safety setup, launch monitor selection, screen and containment, flooring, lighting, and your projector and software pairing. Work through the steps in order and confirm each decision before moving to the next, since earlier choices directly constrain later ones. Measure your room before you buy your monitor. Confirm your throw ratio before you mount anything.
If your project involves custom AV integration, clean cable routing, or a full room build that needs a professional installation, Treasure Valley Solutions works with homeowners across the Boise and Meridian area to design and install setups that perform the way you expect from day one. Take a look at examples of our completed projects to see how we approach these builds, and reach out when you're ready to move from planning to installation.