
You've decided a golf simulator belongs in your home or business, now you need someone who can actually build it right. A golf simulator setup near me search pulls up plenty of results, but not every...
Golf Simulator Setup Near Me: 7 Local Installer Tips
You've decided a golf simulator belongs in your home or business, now you need someone who can actually build it right. A golf simulator setup near me search pulls up plenty of results, but not every installer understands the AV integration, room requirements, and calibration work that separates a great simulator experience from an expensive disappointment.
At Treasure Valley Solutions, we handle custom technology installations across the Boise and Meridian area, from home theaters and whole-room AV systems to the kind of integrated setups that golf simulators demand. Projector placement, screen sizing, lighting control, and network configuration are exactly what our team does every day.
This article breaks down seven practical tips for finding and vetting a local installer who can get your golf simulator dialed in correctly. Whether you're converting a spare room, finishing out a garage, or adding a simulator to a commercial space, these tips will help you ask the right questions and avoid costly mistakes before you commit.
1. Start with a local integrator like Treasure Valley Solutions
When you search golf simulator setup near me, you'll find gear retailers, DIY forum threads, and a handful of actual installation companies. The difference between buying parts and hiring a fully qualified local integrator is substantial. A technology integrator handles the planning, installation, and configuration as a single coordinated project rather than leaving you to manage separate vendors and figure out why things don't work together.
What a full-service installer handles
A full-service installer covers far more than mounting a screen and plugging in a projector. They assess your room dimensions, ceiling height, and structural conditions to determine what equipment will actually perform in your specific space. From there, they design the projector throw angle, route cables cleanly, configure the launch monitor, and set up lighting control so the image stays sharp and consistent during play.
The most expensive simulator mistakes happen during the planning phase, not at the point of purchase.
At Treasure Valley Solutions, we integrate all of these components into a tested and calibrated system before handing it back to you. That includes network setup, power circuit planning, and post-install configuration so everything works from day one.
What to ask on the first call
Before you book any installer, ask a few direct questions. Confirm they have hands-on experience with projector-based AV systems and not just basic audio or security installs. Ask whether they handle the electrical and network side or subcontract those pieces to someone else.
Find out what happens after installation day if a setting drifts or a component needs adjustment. A company that answers these questions clearly and without hesitation is worth a follow-up conversation.
When this option makes the most sense
Hiring a full-service local integrator pays off most when your build involves a dedicated room, custom framing, or commercial-grade equipment. If you're converting a basement, finishing a garage bay, or adding a simulator to a business, the scope goes well beyond a consumer DIY kit.
You also benefit from a local team when you want ongoing calibration and support without shipping hardware back to a manufacturer or posting in forums hoping someone has seen your error code before.
2. Measure your room like an installer would
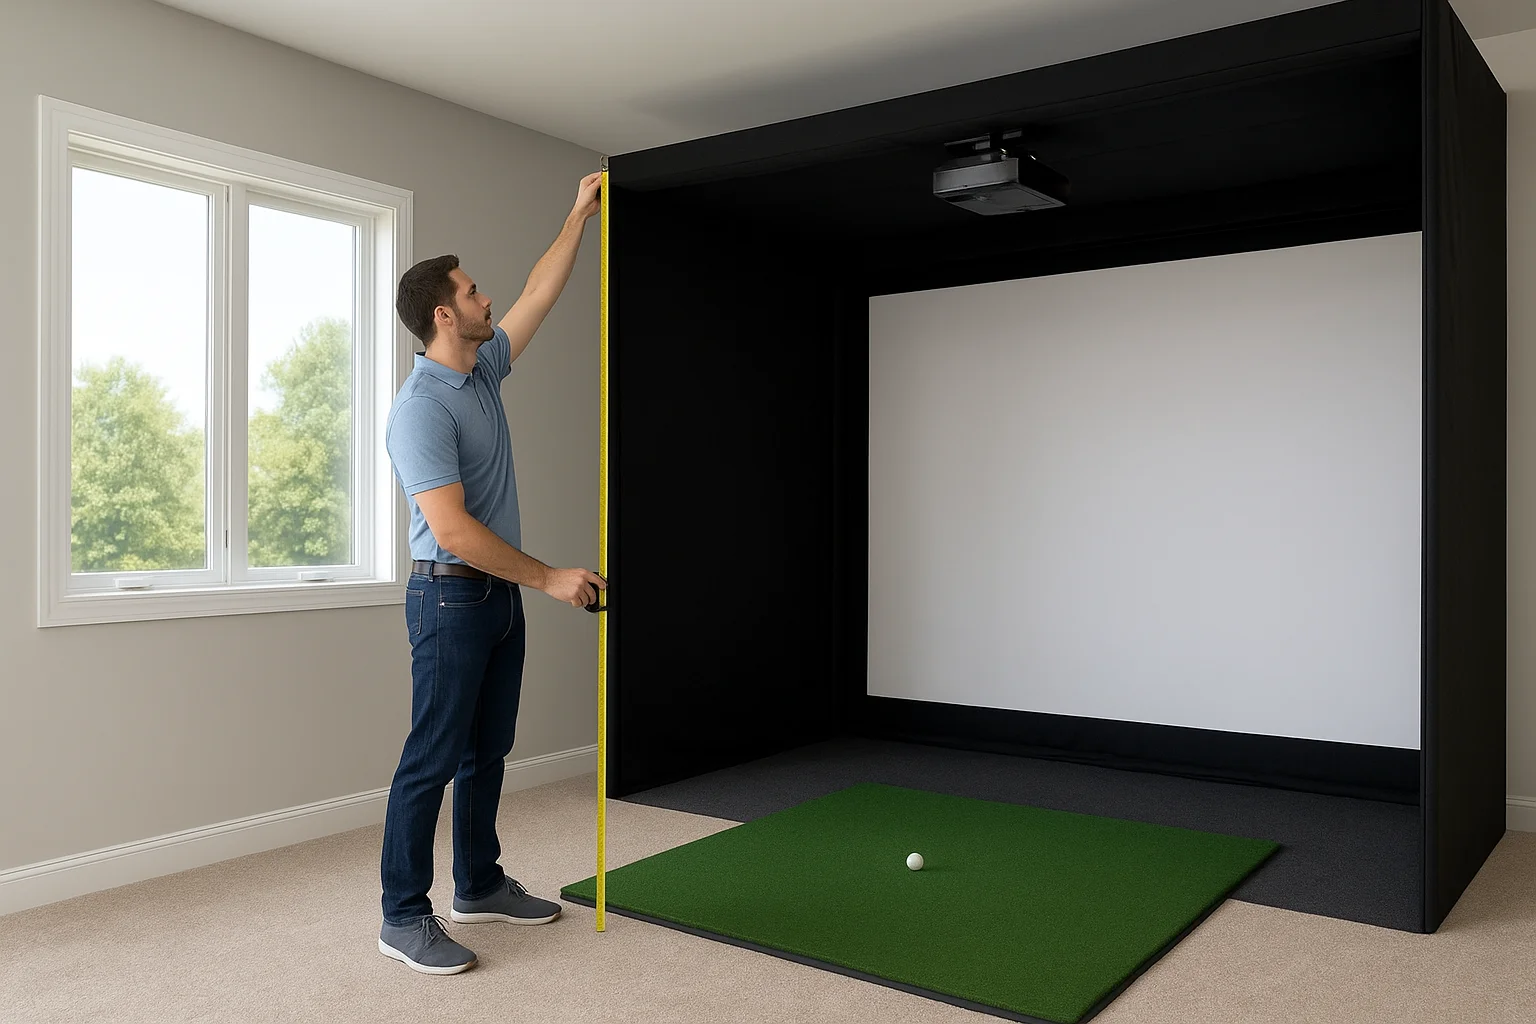
Before any installer orders equipment, they walk the room with a tape measure. Accurate dimensions determine screen size, projector model, enclosure type, and cable routing. Skipping this step and ordering gear based on estimates leads to corrections that cost far more than proper measurement would have.
Minimum space targets for comfort and safety
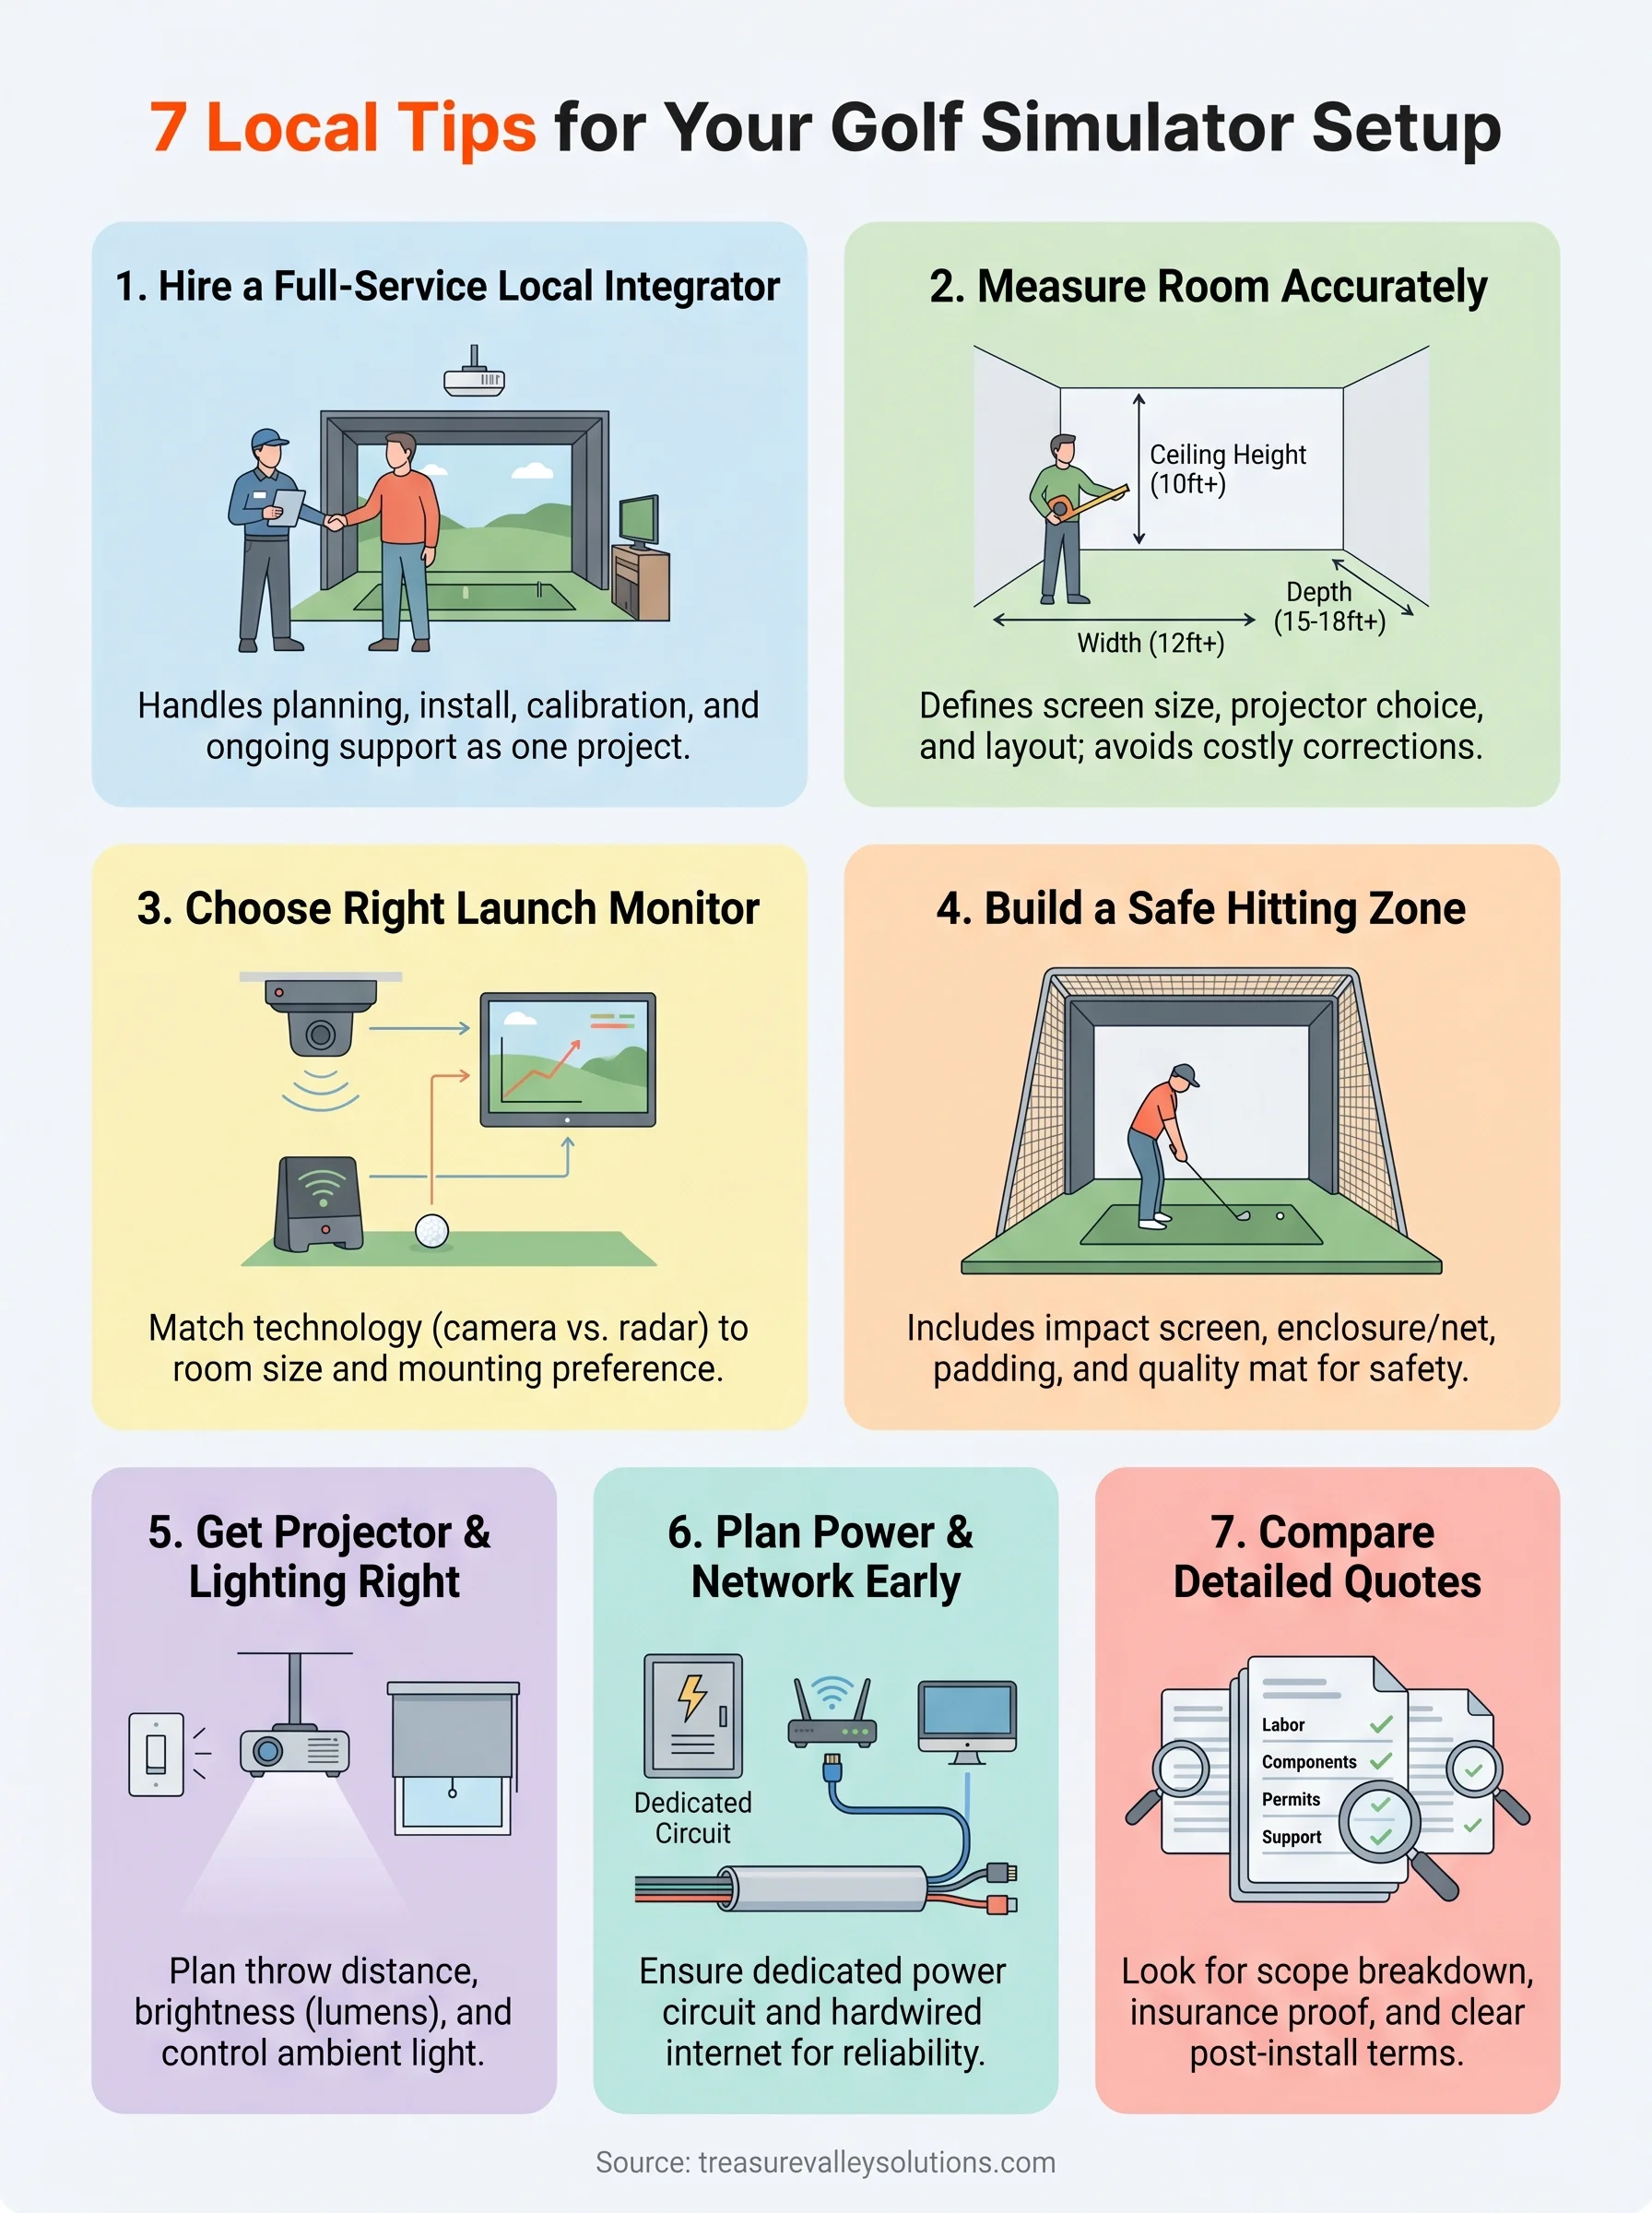
Most indoor golf simulator setups require at least 10 feet of ceiling height, 12 feet of width, and 15 to 18 feet of depth from the hitting position to the screen. These numbers give a full-swing golfer enough clearance to avoid the ceiling, side walls, and overhead fixtures during a normal swing.
Tight rooms do not just limit your swing; they limit your equipment options and drive up the cost of custom solutions.
Common layout mistakes that raise costs
Two errors show up repeatedly in simulator builds that go over budget:
- Placing the hitting position too close to the screen, which forces a more expensive short-throw projector model
- Ignoring HVAC vents and structural beams, which add significant labor costs when cables need to route around them
How room size impacts equipment choices
Smaller rooms push you toward short-throw projectors and side-mounted launch monitors, both of which carry higher price tags than standard configurations. Larger rooms open up more affordable equipment tiers and give your installer flexibility to position components where they perform best rather than where they simply fit.
When you search for a golf simulator setup near me, bring your room measurements to the first conversation. Your installer can confirm whether your space supports the build you have in mind before any money changes hands.
3. Choose the right launch monitor for your space
The launch monitor is the brain of your simulator. It captures ball speed, launch angle, spin rate, and carry distance to feed your simulator software accurate shot data. Choosing the wrong type for your room creates calibration problems that no amount of post-install adjustment will fully resolve.
Camera-based vs radar-based indoors
Camera-based systems capture high-speed images of the ball at impact, which makes them reliable in shorter rooms where radar signals can reflect off nearby walls. Radar-based units work well in larger spaces but need adequate ball flight distance to read data accurately. When searching for a golf simulator setup near me, ask your installer which technology suits your specific room dimensions before you commit to any hardware.
Floor, side, and overhead mounting tradeoffs
Most camera systems mount overhead or to the side, which keeps the hitting mat clear and reduces trip hazards during play. Floor-mounted radar units sit behind the hitting position, requiring enough clearance behind the golfer for safe operation. Side-mount configurations often require structural anchoring, which your installer should plan for during the room design phase rather than on install day.
Calibration and accuracy checkpoints
A launch monitor that ships accurately does not stay accurate without proper setup and verification.
Your installer should run test shots and compare readings against known benchmarks before finishing the install. Confirm that the unit sits level, lighting conditions meet manufacturer specs, and firmware is fully updated so the data your simulator receives reflects real-world ball flight.
4. Build a safe hitting area that protects people and property
A golf simulator that looks great on paper can still cause real damage if the impact zone is not built correctly. Errant shots, club follow-through, and ricochets are predictable hazards that your installer should address before a single ball gets hit. Planning the hitting area carefully protects your equipment, your walls, and anyone in the room.
Screen, net, and enclosure options
Your impact screen is the first line of defense, but it should not be the only one. High-density polyester screens handle direct ball impact well, while a surrounding net or full enclosure catches shots that miss the screen or deflect sideways. Full enclosures cost more upfront but eliminate the need to patch walls and replace fixtures later.
Skipping a side net to save money rarely saves money once you factor in repair costs from off-center shots.
Flooring and hitting mat choices that reduce injury risk
Thick rubber underlayment beneath your hitting mat reduces joint stress during repeated swings and keeps the mat from shifting mid-shot. Avoid hard tile or smooth concrete directly under the hitting position, as both increase fall risk and fatigue during longer sessions. Your installer should confirm the mat thickness and surface grip match your swing style and club selection.
Safety add-ons installers recommend
When evaluating a golf simulator setup near me, ask your installer about padded wall panels and corner guards for rooms with limited clearance. These additions are inexpensive relative to the overall build cost and significantly reduce injury risk when golfers step back from the hitting position or lose grip on a club during a swing.
5. Get the projector and lighting plan right the first time
The projector and lighting plan determines whether your simulator feels like a premium experience or a frustrating one. Poor planning here causes washed-out images, misaligned screen fills, and playability problems that are expensive to fix after walls are closed and cables are buried.
Short throw vs standard throw and placement rules
Your room depth drives this decision. Short-throw projectors work where the unit sits under 10 feet from the screen, while standard-throw models need more distance to fill the screen without distortion. Ask your installer to calculate the exact throw ratio before ordering, since switching projector models after mounting brackets are already installed adds real labor cost.
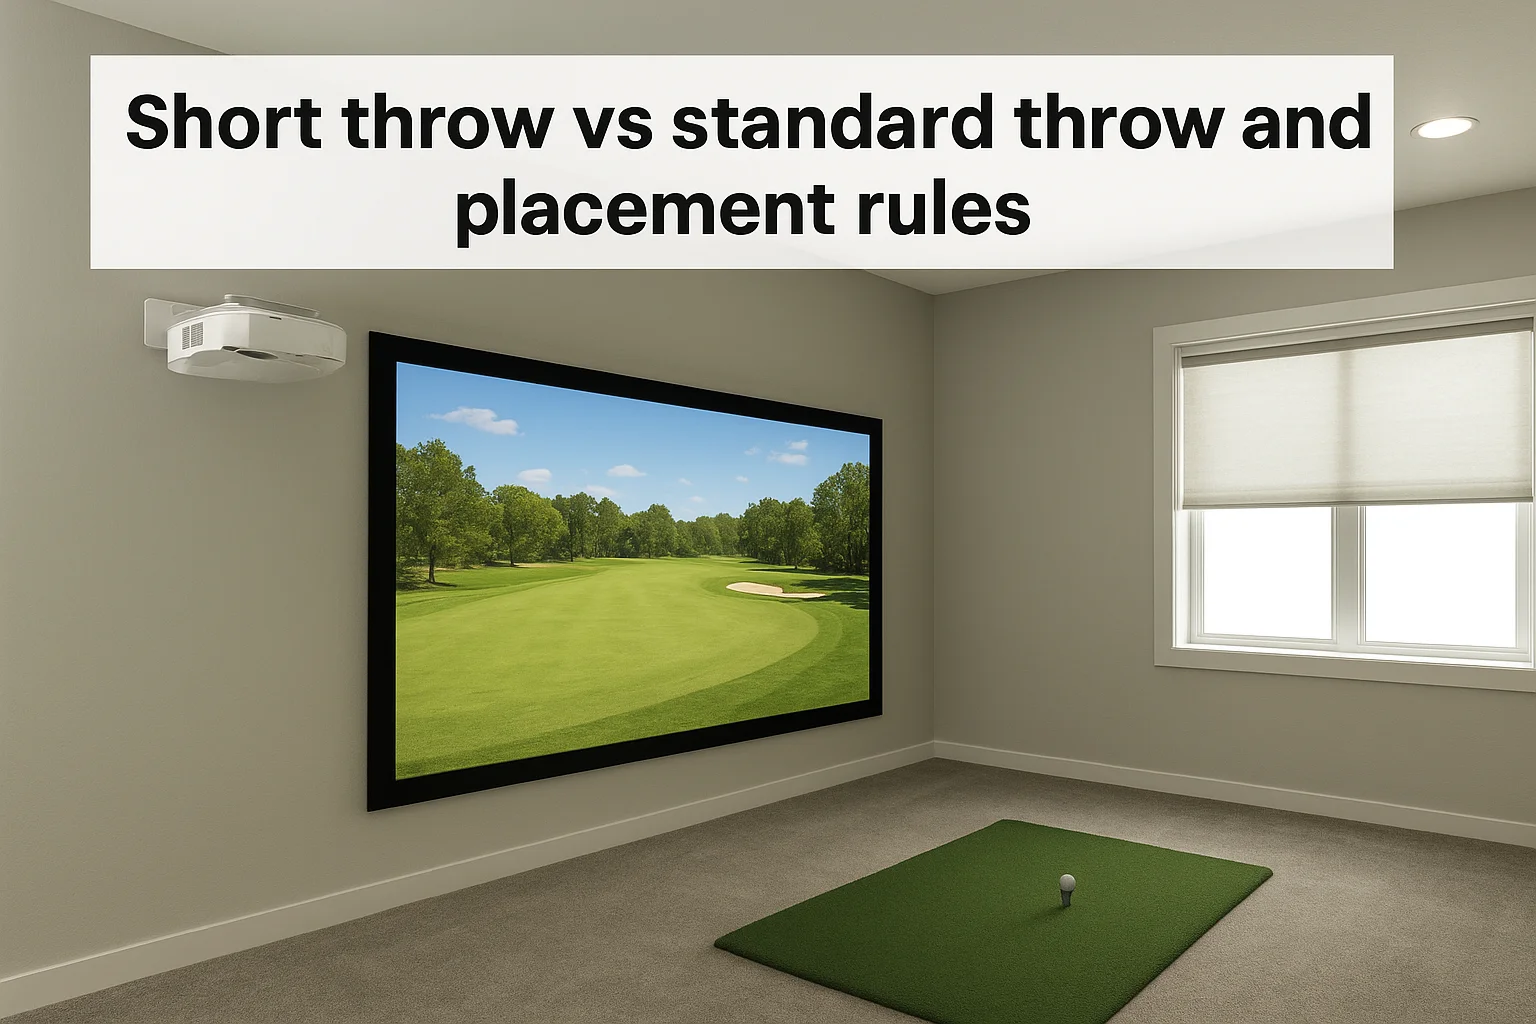
A ceiling or floor mount position also affects image geometry. Your installer should confirm the lens offset and keystone correction range for any unit they recommend before finalizing the design.
Brightness, aspect ratio, and screen fit
Lumens rating and screen size must match for a clear, usable image. Most simulator builds need 3,500 to 5,000 lumens to handle ambient light without washing out shot data at the edges of the screen.
Your aspect ratio should match the simulator software output, typically 16:9. Screen gain and surface texture both affect how the image looks during play, so your installer should run a full-brightness test image before calling the mount position final.
Mismatched aspect ratios are one of the most common problems installers correct on a second visit.
Lighting control for a playable image
Any golf simulator setup near me search should list lighting as a line item, not an afterthought. Overhead recessed lights and uncovered windows wash out projected images and reduce visibility during play. A basic dimmer system or automated shading delivers consistent conditions without manual adjustments before each round.
6. Plan power, network, and cable routing before install day
Most simulator builds fail to account for power, data, and cable routing until the install crew arrives, and that delay costs both time and money. Addressing these three areas during the planning phase keeps your project on schedule and prevents the need to open walls a second time.
Electrical and circuit considerations
Your simulator draws power from multiple components simultaneously: the projector, launch monitor, computer, display monitors, and any lighting controls you include. Running all of these from a single residential circuit risks tripping breakers mid-round. Ask your installer to confirm dedicated circuit requirements for your build before the electrician visits.
A single tripped breaker during a calibration session can corrupt launch monitor settings and add hours to your install timeline.
Internet reliability and hardwired options
Simulator software and online course libraries rely on a stable connection to function properly. A wireless signal that drops during play interrupts sessions and creates frustration that no equipment upgrade resolves. Your installer should plan a hardwired ethernet run to the simulator computer rather than depending on Wi-Fi, especially in garage or basement builds where walls and distance reduce signal strength.
Clean cable paths that stay serviceable
Any golf simulator setup near me search will surface installs where cables were run quickly and then forgotten. A clean install routes cables through conduit or raceways so individual runs can be replaced or upgraded without reopening walls. Ask your installer to label each cable at both ends before closing anything up.
7. Compare quotes by scope, timeline, and support
Not every quote covers the same work, and price differences between installers often reflect gaps in scope rather than actual savings. Before you sign anything, compare each proposal line by line to confirm what is and is not included.
What a detailed quote should include
A solid quote lists every component, labor phase, and configuration task separately rather than bundling everything into a single number. Look for line items covering projector mounting, cable routing, launch monitor calibration, network setup, and lighting control. Any quote that arrives as a lump sum with no breakdown gives you no way to evaluate what you are actually paying for.
Permits, insurance, and liability questions
Ask each installer whether electrical work or structural modifications require a permit in your jurisdiction. A licensed installer carries both general liability and workers' compensation insurance, which protects you if something goes wrong during the build. Request proof of both before anyone starts work.
Skipping the insurance question is the fastest way to inherit liability for an injury that happens on your property during the install.
Ongoing support options after setup
Your golf simulator setup near me search should end with an installer who offers more than a handshake on completion day. Ask specifically about recalibration visits, software update support, and response time for service calls. A company that provides clear post-install terms is far more likely to stand behind the system when something needs adjustment six months after your first round.
Your next step
Every tip in this article points toward the same conclusion: a golf simulator setup near me search delivers the best results when you work with a local team that handles design, installation, and support as one connected project rather than three separate problems. The right installer saves you from expensive corrections, calibration headaches, and equipment mismatches that show up after the work is done.
Treasure Valley Solutions has handled custom AV and technology integrations across the Boise and Meridian area since 2014. Our team brings the same structured approach to simulator builds that we apply to home theaters, commercial AV systems, and whole-home automation projects. You get a tested, calibrated, and fully supported system from a local crew that stands behind the work long after install day.
Ready to get started? Contact Treasure Valley Solutions to discuss your space, your goals, and what a professional simulator build actually involves.