
You've decided you want a golf simulator in your home or business, now comes the hard part. Between projectors, launch monitors, impact screens, enclosures, and the room itself, a golf simulator insta...
Golf Simulator Installation Meridian Idaho: How To Choose
You've decided you want a golf simulator in your home or business, now comes the hard part. Between projectors, launch monitors, impact screens, enclosures, and the room itself, a golf simulator installation in Meridian, Idaho involves more moving pieces than most people expect. Get it right, and you'll have a setup that performs like a pro facility. Get it wrong, and you're stuck with a frustrating, expensive mess.
That's where understanding the full scope of the project matters. Choosing the right components is only half the battle. You also need a space that meets specific requirements, proper wiring and networking, calibrated AV equipment, and someone who knows how to tie it all together. It's a technology integration project at its core, which is exactly what we do at Treasure Valley Solutions.
Since 2014, we've been designing and installing custom AV and smart technology systems across the Treasure Valley. Golf simulators sit right at the intersection of what we handle every day: projectors, displays, networking, and clean professional installations in dedicated spaces. This guide walks you through everything you need to consider before committing to a golf simulator setup, from room dimensions and equipment choices to finding the right installation partner in the Meridian area.
What a golf simulator installation includes
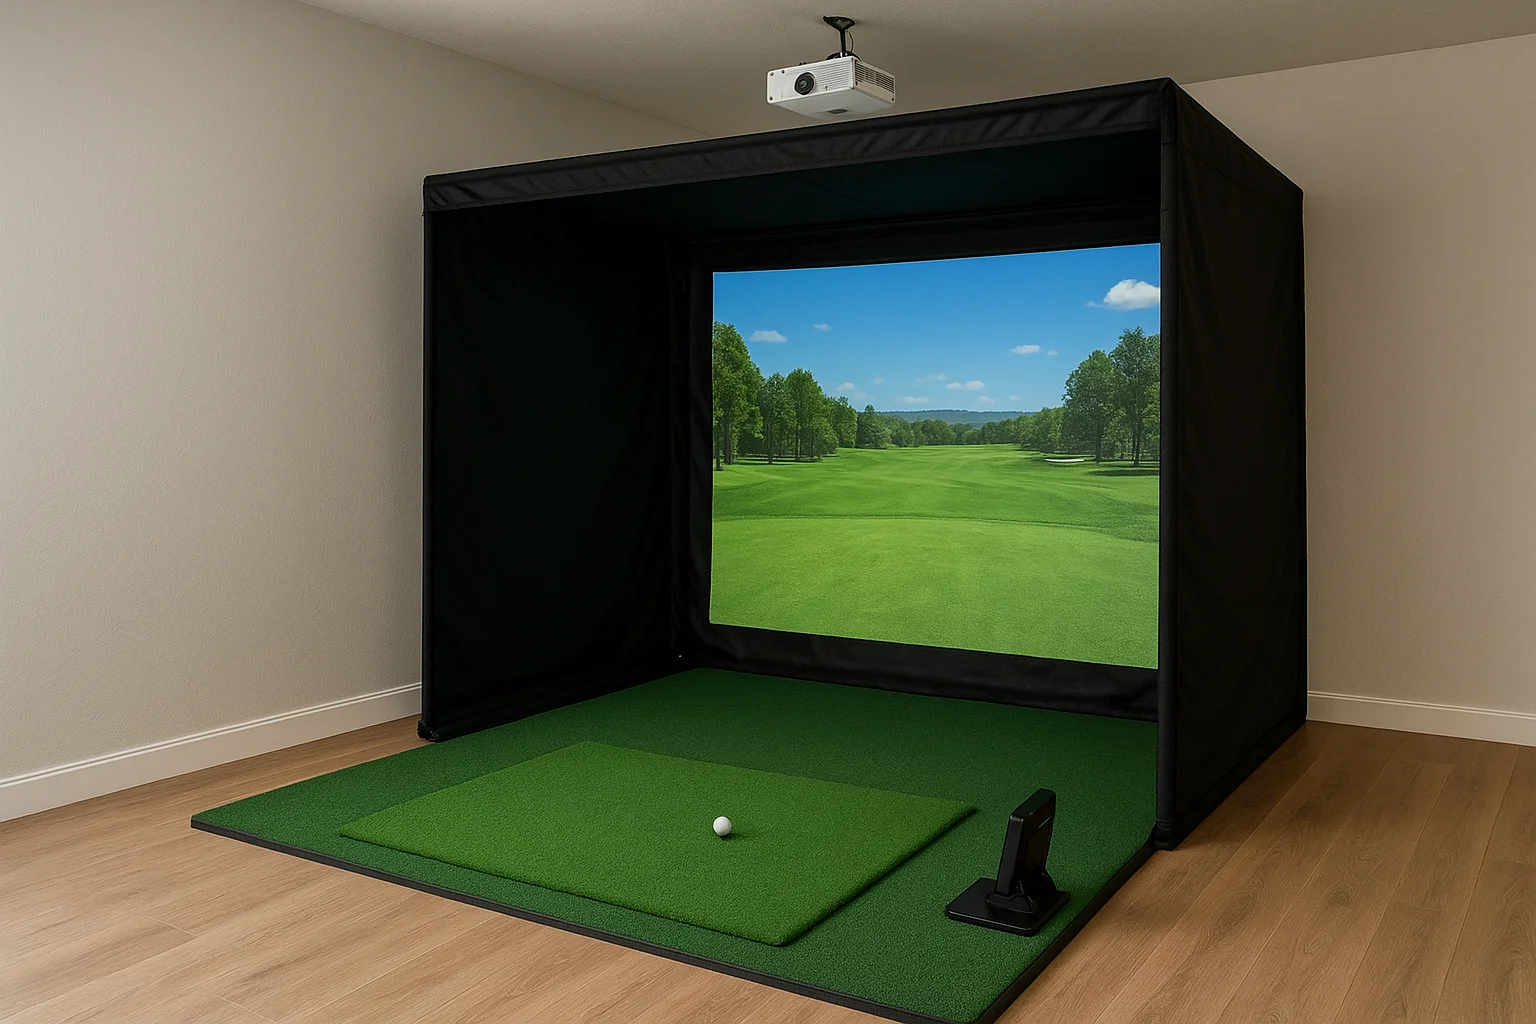
A golf simulator is more than a screen and a projector. A complete installation involves six to eight distinct components that all need to work together precisely, and each one affects the performance of the others. Before you start comparing prices or calling installers, you need to understand what you're actually buying and building. Skipping this step is how people end up with setups that look good in photos but frustrate them every time they use them.
The core hardware
The hardware side of a golf simulator covers five main components: a launch monitor, projector, impact screen, enclosure frame, and hitting mat. Each component comes with its own specs and compatibility requirements, so you can't just mix and match whatever is cheapest. Here's a breakdown of what each piece does and what to watch for:
| Component | What it does | Key spec to watch |
|---|---|---|
| Launch monitor | Tracks ball and club data | Accuracy rating, camera vs. radar |
| Projector | Displays the simulation | Throw ratio, lumens, resolution |
| Impact screen | Receives the projection | Material durability, seam placement |
| Enclosure frame | Holds the screen and contains the ball | Size compatibility with your space |
| Hitting mat | Simulates turf, protects your floor | Thickness, tee height options |
The launch monitor is the most critical piece of hardware in your setup. A cheaper screen won't ruin your experience, but an inaccurate launch monitor will.
The room preparation and structural work
Your room needs specific dimensions before any hardware goes in. Minimum ceiling height is typically 9 feet for shorter players and closer to 10 feet for taller golfers with a full swing. Minimum room depth runs around 15 to 20 feet depending on the launch monitor type, since camera-based units often need more distance behind the hitting position. Width should be at least 12 feet to give you safe lateral clearance.
Beyond dimensions, the room itself needs prep work before installation day. Walls may need padding or protective panels to handle errant shots, and flooring matters more than most people expect. A hard concrete floor with a thin mat on top won't absorb impact properly and can cause joint strain over time. If you're converting a garage or basement in the Meridian area, you'll likely need a dedicated electrical circuit added before any hardware goes in.
The software and calibration layer
Simulation software is what ties the hardware together and determines which courses you can play, how realistic the graphics look, and how accurately the system responds to your shot data. Popular platforms each have different licensing models, course libraries, and hardware compatibility requirements. Your launch monitor brand often dictates which software options you have, so this decision flows upstream from everything else.
After the hardware is installed and the software is configured, calibration is not a finishing touch but a core part of the build. The projector needs to align precisely with the screen, the launch monitor needs to be positioned and tested for your specific hitting zone, and the software settings must match your room dimensions exactly. A proper golf simulator installation in Meridian, Idaho accounts for all of this before the installer ever leaves your property. Skipping calibration is the most common reason setups underperform right out of the gate.
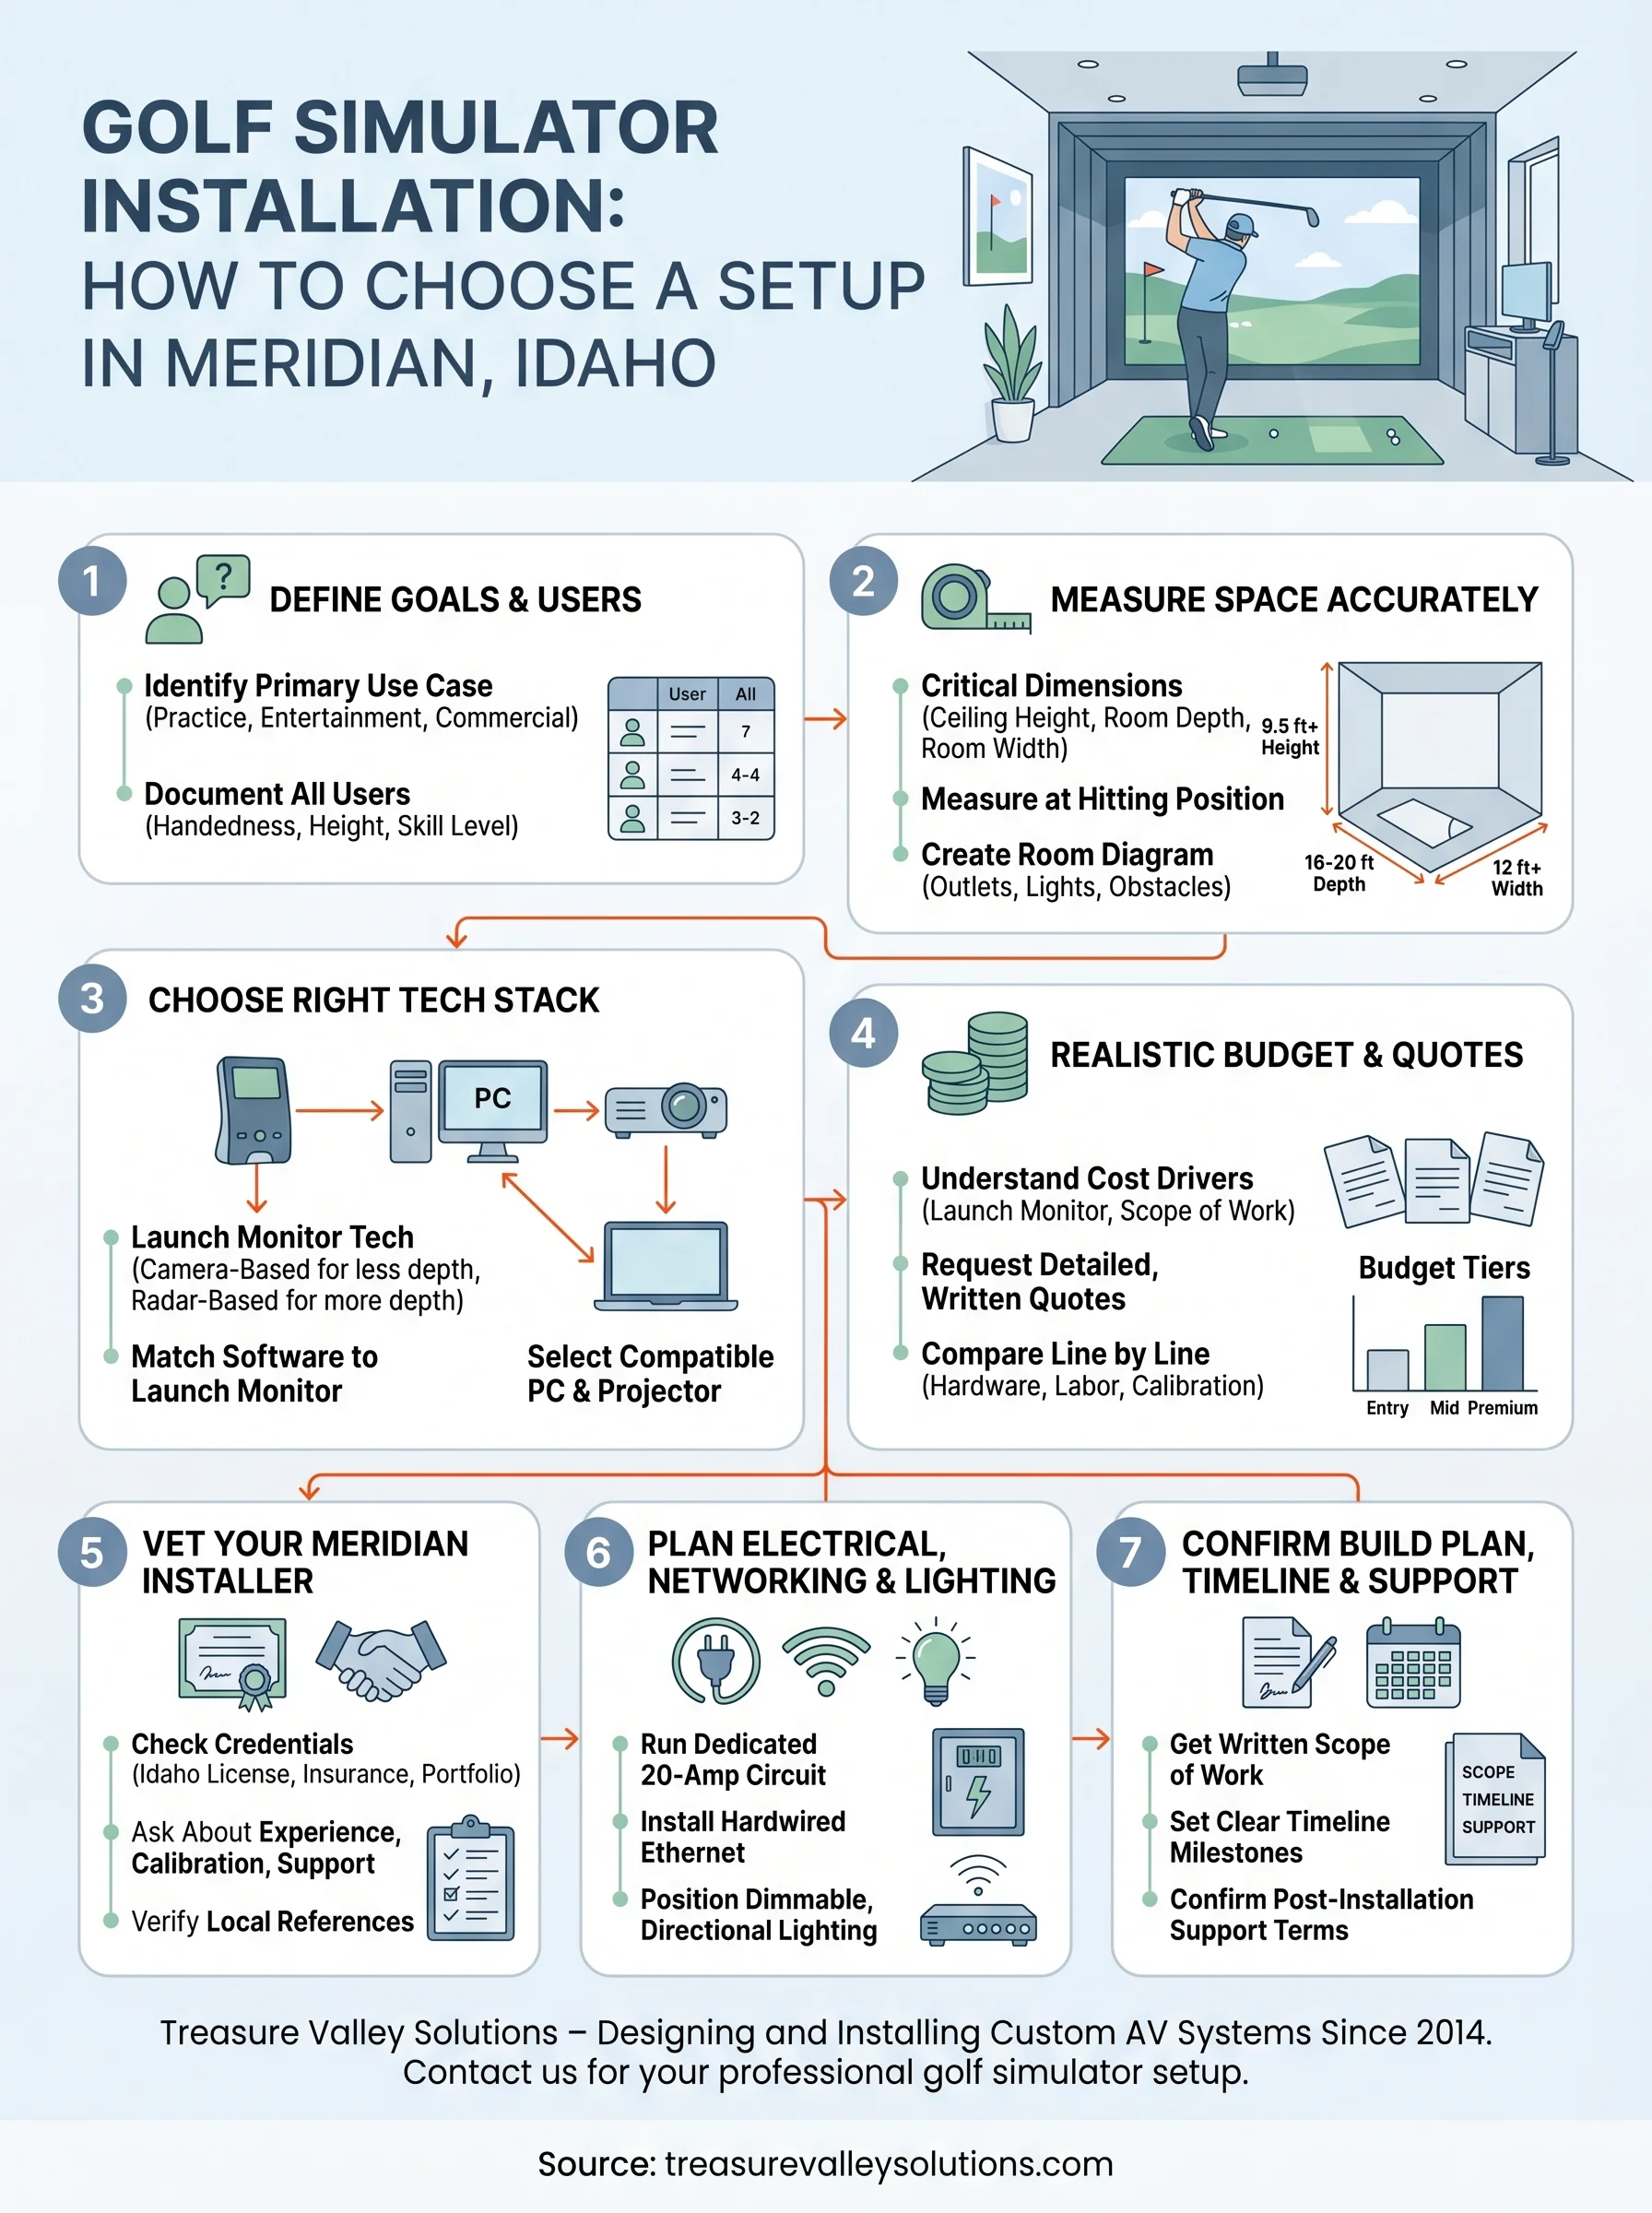
Step 1. Define your goals and who will use it
Before you buy a single piece of hardware or call a single installer, you need to answer two questions: what do you want to do with this simulator, and who is going to use it. These answers shape every decision that follows, from the launch monitor you choose to the ceiling clearance you need. Skipping this step is how people end up with an expensive setup that works perfectly for someone else but falls flat for their own situation.
Know your primary use case
Your primary use case determines the level of hardware accuracy you actually need. A serious golfer using the simulator for year-round practice needs a high-accuracy launch monitor with detailed shot data, ball spin readings, and club path feedback. Someone building a social space for casual rounds with friends can work with a mid-tier launch monitor and put their budget toward a bigger screen, better audio, and a comfortable seating area instead.
If you're paying for a high-end launch monitor but only use the simulator for entertainment, you're spending money on specs you'll never use.
Common use cases fall into three categories:
- Practice and training: Prioritize launch monitor accuracy, shot data, and software with swing analysis tools and a strong course library.
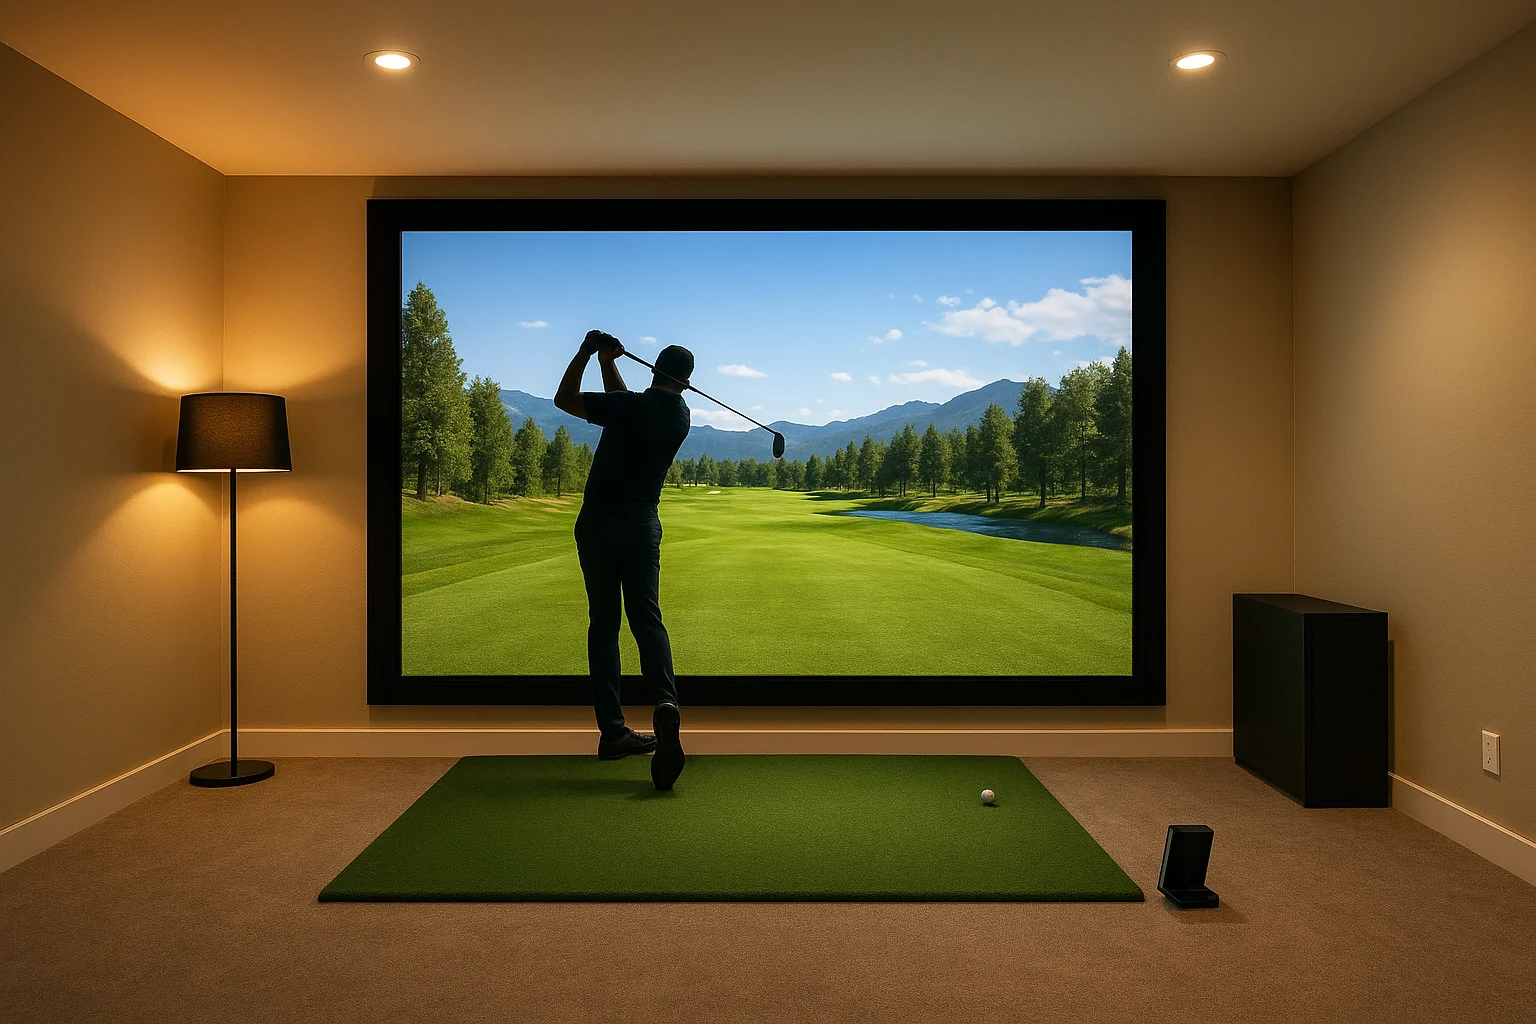
- Entertainment and social play: Prioritize screen size, visual quality, multiplayer modes, and comfort in the surrounding space.
- Commercial or venue use: Prioritize durability, remote management, and software that supports pay-per-use or hourly booking features.
Know who's swinging
Room requirements shift significantly depending on the height and swing style of your primary users. A left-handed golfer needs clearance on the opposite side compared to a right-handed player. Taller players need more ceiling height and more depth behind the hitting position to avoid risk on a full backswing.
For a golf simulator installation in Meridian, Idaho with multiple users, such as a family with adults and teens or a business serving different clients, document each user type before your installer visits. A simple table gives your installer concrete specs to design around, rather than building to a generic average that fits nobody well:
| User type | Height | Handedness | Skill level |
|---|---|---|---|
| Primary adult | 6'1" | Right | Intermediate |
| Secondary adult | 5'7" | Left | Beginner |
| Occasional teen | 5'4" | Right | Beginner |
Step 2. Measure your space the right way
Room measurements are the foundation of any golf simulator installation in Meridian, Idaho, and getting them wrong costs you money. If you measure inaccurately or skip dimensions entirely, your enclosure won't fit, your projector throw distance will be off, and your installer will show up to a space that wasn't designed for what you ordered. Measure your room before you buy anything, and measure it in a specific order.
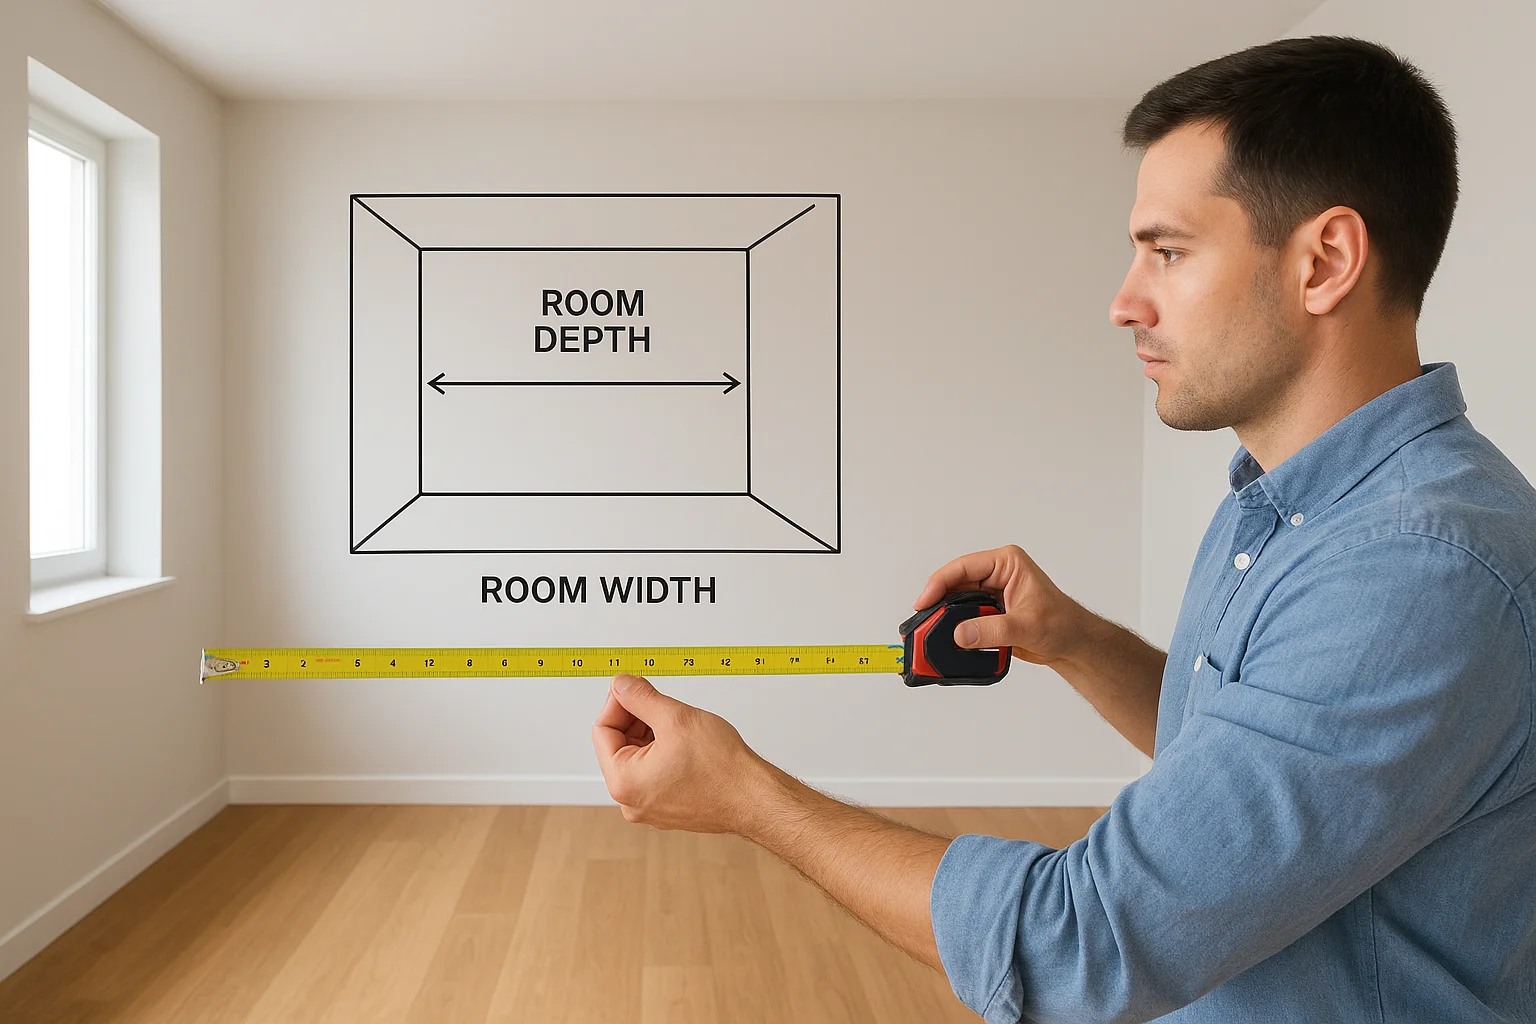
The three dimensions that matter most
Your space needs to pass three checks before any hardware selection makes sense: ceiling height, room depth, and room width. Each one eliminates or unlocks specific hardware options, so take all three measurements with a tape measure, not an estimate.
A single inch of ceiling height can determine whether a full swing is safe or a liability waiting to happen.
Use this table as your measurement checklist:
| Dimension | What to measure | Minimum target |
|---|---|---|
| Ceiling height | Floor to lowest obstacle (beam, duct, fixture) | 9.5 ft for most adults |
| Room depth | Back wall to planned screen position, plus hitting distance | 16 to 20 ft total |
| Room width | Wall to wall in the hitting zone | 12 ft minimum |
Take ceiling height at the actual hitting position, not the center of the room. Beams, ductwork, and light fixtures can drop into the swing path even when the peak ceiling is high enough. Measure at the spot where the golfer will stand.
How to document and share your measurements
Once you have your numbers, create a simple room diagram you can share with your installer. You don't need architectural software. A hand-drawn sketch with labeled dimensions works perfectly. Include the location of any existing electrical outlets, light switches, and HVAC vents, since these affect where your enclosure and projector mount can realistically go.
Your diagram should include:
- Ceiling height at hitting position, screen wall, and room center
- Distance from each side wall to the planned hitting area
- Location of doors, windows, and any fixed obstacles
- Existing outlet positions and their distance from the hitting zone
Bring this diagram to every installer conversation. It shortens the quoting process, prevents surprises on installation day, and shows your installer that you've done the groundwork.
Step 3. Choose the right simulator tech stack
Once you know your space and your goals, your next job is selecting the hardware and software that make the simulator actually work. These decisions are connected, meaning your launch monitor choice limits your software options, your software requirements shape your PC specs, and your projector selection depends on your throw distance. Make these choices in the right order and everything fits together cleanly. Make them randomly and you'll end up with incompatible gear and a frustrating rebuild.
Pick your launch monitor technology
Launch monitors fall into two categories: camera-based and radar-based. Camera-based units like those from Foresight Sports or Full Swing capture ball data using high-speed cameras and work well in shorter rooms. Radar-based units like those from Garmin or Bushnell typically need more space behind the ball to track the full flight path accurately. Your ceiling height and room depth from Step 2 directly determine which category fits your space.
Camera-based launch monitors generally perform better indoors, while radar-based units often need more room depth to stay accurate.
Use this comparison to guide your decision:
| Type | Room depth needed | Accuracy | Price range |
|---|---|---|---|
| Camera-based | 10 to 15 ft | High | $2,000 to $20,000+ |
| Radar-based | 15 to 20 ft | Moderate to high | $200 to $3,500 |
Match your software to your launch monitor
Your launch monitor brand determines which simulation software you can run, so check compatibility before you buy anything. Some platforms like E6 Connect or GSPro work with a broad range of hardware. Others are proprietary and only run on one brand's device. The software you choose also sets your PC hardware requirements, so once you confirm your platform, you can select a computer that handles it without lag, stuttering, or crashes during play.
Build your tech stack in this specific order:
- Choose your launch monitor based on room depth and budget
- Confirm which software platforms support that monitor
- Review the software's minimum and recommended PC specs
- Select a projector with the correct throw ratio for your screen distance
Following this sequence for your golf simulator installation in Meridian, Idaho prevents the most common and costly mistake: purchasing components separately that turn out to be incompatible with each other once everything arrives.
Step 4. Set a realistic budget and compare quotes
Budget conversations are where most simulator projects go wrong. People either undershoot what a quality setup actually costs, or they get a low quote from an unqualified installer and realize later what corners were cut. Setting a realistic budget before you talk to anyone puts you in a position to evaluate quotes honestly rather than just picking the lowest number you hear.
Understand what drives the cost
A complete golf simulator installation in Meridian, Idaho typically falls into three cost tiers based on the quality of the launch monitor and the scope of the room work involved. Software licensing, PC hardware, screen size, and professional installation labor all stack on top of the hardware base price. Understanding where each dollar goes helps you make intentional trade-offs instead of arbitrary cuts.
The launch monitor is the single biggest cost driver in any simulator budget, often representing 40 to 60 percent of the total hardware spend.
Use this breakdown as a starting framework:
| Tier | Launch monitor type | Estimated total range | Best for |
|---|---|---|---|
| Entry | Radar-based, mid-range | $5,000 to $12,000 | Casual and social use |
| Mid-range | Camera-based, prosumer | $12,000 to $25,000 | Practice and mixed use |
| Premium | Camera-based, professional | $25,000 to $50,000+ | Serious training or commercial |
These ranges include hardware, software, a basic enclosure, and professional installation. They do not include electrical upgrades, room modifications, or furniture.
Request and compare quotes the right way
When you contact installers, give each one the same information so you're comparing apples to apples. Send your room diagram from Step 2, your use case from Step 1, and a clear list of the components you're considering. Ask each installer to quote the same scope in writing.
Your quote request should specify:
- Room dimensions and any structural constraints
- Preferred launch monitor model or technology type
- Software platform you've identified
- Whether electrical work or room prep is included
- Expected timeline from deposit to completed installation
Once you have three quotes back, compare them line by line rather than just comparing the final number. A quote that's 20 percent lower often means a cheaper enclosure, no calibration included, or unlicensed labor. Ask each installer to explain any line item that differs from the others before you make a decision.
Step 5. Vet your Meridian installer like a pro
Choosing the wrong installer is the fastest way to ruin an otherwise solid simulator build. Your launch monitor, projector, and enclosure only perform the way they should if the person installing them understands AV integration, not just basic handyman work. Before you hand anyone a deposit, treat this step like a job interview, because that's exactly what it is.
What to look for in an installer's credentials
Not every general contractor or AV company has hands-on experience with golf simulator installations, and the difference shows in the finished product. You want someone who has completed multiple builds, understands throw ratios and projection alignment, and knows how to run clean cable management through a dedicated room. Licensing and insurance are non-negotiable in Idaho, so ask to see both before any work begins.
An installer who can't show you photos of past simulator builds has no business quoting you on one.
Look for these credentials before you schedule a site visit:
- Active Idaho contractor license (verify through the Idaho Division of Building Safety)
- Proof of general liability insurance with coverage for your project type
- Portfolio of completed simulator installations, not just general AV projects
- References from clients in the Treasure Valley area who had similar builds
- Familiarity with your chosen launch monitor brand and software platform
Questions to ask before you hire
Your first conversation with a potential installer tells you a lot. Experienced integrators ask about your room dimensions, your goals, and your hardware choices before they ever quote a price. If someone gives you a number without asking those questions first, that's a sign they're working from a script rather than a plan. Push them with specific questions and pay attention to how they respond.
Use this list of questions during every installer conversation for your golf simulator installation in Meridian, Idaho:
- How many golf simulator installations have you completed in the past 12 months?
- Which launch monitor brands and software platforms have you worked with?
- Do you handle electrical and networking, or do you subcontract that work?
- What does your calibration process look like after installation?
- What support do you offer if something stops working after you leave?
Step 6. Plan electrical, networking, and lighting
Most people treat this step as an afterthought, but electrical, networking, and lighting decisions need to happen before installation day, not during it. If your installer shows up and your room lacks a dedicated circuit or has a consumer-grade router stuffed in a closet two rooms away, the build either stalls or gets compromised. Getting these three systems right is what separates a simulator that performs consistently from one that frustrates you every time you use it.
Run a dedicated electrical circuit
Your simulator draws significant continuous power from the projector, PC, launch monitor, and any ambient equipment running simultaneously. Sharing that load with other outlets in the room creates voltage drop, tripped breakers, and hardware wear over time. You need a dedicated 20-amp circuit run directly from your panel to the simulator room, and in many cases you'll want two if you're also powering a mini-fridge, speakers, or other equipment in the space.
Contact a licensed Idaho electrician before your installer quotes the final build, so electrical costs are included in your total from day one, not added as a surprise later.
Work with your electrician to place outlets where your installer actually needs them: near the projector mount, behind the PC location, and along the enclosure frame. Guessing outlet positions and running extension cords through a finished room is a poor fix that creates both a safety hazard and an eyesore.
Lock down your networking before install day
Simulation software requires a stable internet connection for course downloads, software updates, and multiplayer features. A weak Wi-Fi signal in a basement or garage space kills that reliability. For a clean golf simulator installation in Meridian, Idaho, run a hardwired Ethernet connection to the room rather than relying on wireless. A single Cat6 cable from your router or a network switch gives your simulator PC a stable, low-latency connection that won't drop mid-round.
Set the right lighting before the screen goes up
Ambient light is the enemy of projector image quality. Overhead fluorescent or recessed lights pointed at your impact screen wash out the image, especially during daytime use. Plan for dimmable, directional lighting positioned behind or beside the hitting position rather than in front of the screen. Blackout options on any windows in the room are equally important. Address your lighting layout during the planning phase so your installer can account for switch placement and fixture positioning as part of the overall room build.
Step 7. Confirm the build plan, timeline, and support
You've vetted your installer, locked in your components, and sorted your electrical and networking. Now you need to make sure everything you've agreed on is documented in writing before any work begins. A verbal plan feels solid in the room and falls apart fast when a product ships late or a miscommunication surfaces on installation day. Confirming the build plan, timeline, and support terms up front is the last thing standing between you and a smooth golf simulator installation in Meridian, Idaho.
Get the build plan in writing
Your installer should provide a written scope of work that lists every component by model number, every task included in the installation, and every item that is explicitly not included. Read it line by line and confirm it matches what you discussed. If anything is missing or vague, ask for a revision before you sign anything or transfer a deposit.
Your written build plan should include:
- Each hardware component listed by brand, model, and quantity
- Screen size, enclosure dimensions, and projector mount type
- Electrical and networking work to be completed before or during installation
- Calibration steps the installer will perform before marking the job complete
- Any room prep or protection work included in the scope
Set clear timeline milestones
A quality installation rarely happens in a single day, especially if electrical work or room modifications are involved. Ask your installer to break the project into phases and give you a date for each one. This protects you from a deposit disappearing into a vague "a few weeks" estimate.
A written timeline with specific milestone dates gives you a clear basis for follow-up if the project falls behind schedule.
| Phase | What happens | Target date |
|---|---|---|
| Pre-installation | Electrical and networking complete | Agreed date |
| Hardware delivery | All components on-site and verified | Agreed date |
| Installation day | Enclosure, screen, projector, PC set up | Agreed date |
| Calibration and testing | Launch monitor and software dialed in | Agreed date |
Confirm post-installation support
Before your installer leaves, confirm what support looks like after the job is done. Ask specifically whether they offer a warranty on their labor, how you reach them if something stops working, and what their typical response time is for service calls. An installer who dodges this question is one you'll struggle to reach when you actually need them.
Put the support terms in writing the same way you documented the build plan. A simple email confirmation of the warranty period and contact process is enough. You've invested significantly in this setup, and knowing exactly who to call and how fast they respond gives you the confidence to actually use it.
Next steps
You now have a complete framework for planning a golf simulator installation in Meridian, Idaho from room measurement through post-installation support. Each step in this guide builds on the one before it, so work through them in order rather than jumping straight to hardware shopping. Define your goals first, measure your space second, and let those two decisions drive every choice that follows.
When you're ready to move from planning to building, Treasure Valley Solutions is the local team to call. We've been designing and installing custom AV and technology systems across the Treasure Valley since 2014, and golf simulator builds sit squarely in our wheelhouse. We handle projectors, networking, enclosure setup, calibration, and ongoing support so you get a finished room that works every time you step up to swing. Tell us about your project and we'll get back to you with next steps.