
A dedicated golf simulator room is only as good as its AV system. You can spend thousands on a premium launch monitor and impact screen, but if your golf simulator AV setup, projector, PC, and sound,...
Golf Simulator AV Setup: Wiring Projector, PC, And Sound
A dedicated golf simulator room is only as good as its AV system. You can spend thousands on a premium launch monitor and impact screen, but if your golf simulator AV setup, projector, PC, and sound, isn't wired correctly, you'll deal with input lag, washed-out images, and audio that kills the experience. Getting the signal chain right from the start matters more than most people realize.
The challenge is that a golf simulator isn't a standard home theater. You're combining a gaming PC, a short-throw projector, and a surround sound system into a space that often doubles as a media room. Each component has specific wiring requirements, and the order you connect everything affects performance. At Treasure Valley Solutions, we design and install these kinds of multi-purpose AV rooms across the Boise and Meridian area, so we see firsthand what works and what causes headaches.
This guide walks you through the full wiring process, from positioning your projector and routing HDMI runs to integrating a sound system that handles both simulator audio and movie nights. Whether you're building out a new space or upgrading an existing setup, you'll have a clear plan for every connection by the end.
What you need before you start
Before you touch a single cable, you need to know what gear you're working with. A golf simulator AV setup involves more components than a standard home theater, and missing one piece mid-install wastes time and forces you to redo runs you've already tucked into walls or conduit.
Confirm every component is on hand and powered on for a basic test before you start any permanent cable routing.
Hardware checklist
Your core hardware list should be locked in before installation day. Each component plays a specific role in the signal chain, and swapping one out at the last minute often means different port types or power requirements that change your entire wiring plan.
| Component | What to confirm |
|---|---|
| Gaming or simulator PC | GPU outputs: HDMI 2.0, DisplayPort, or both |
| Short-throw projector | Input ports, throw ratio, native resolution |
| Impact screen or projection surface | Confirmed size and distance from lens |
| AV receiver | Number of HDMI inputs, audio decoding support |
| Surround sound speakers | Impedance and wire gauge requirements |
| HDMI cables | Length and version (2.0 minimum for 1080p/60Hz) |
Cable and length considerations
Cable length directly affects signal quality, especially for HDMI runs over 15 feet. If your PC sits at a rack or desk and the projector mounts at ceiling height or behind the impact screen, you may need an active HDMI cable or an HDBaseT extender to maintain a clean signal over longer distances. Passive cables work fine under 15 feet; beyond that, you risk signal dropout or resolution drops. Measure your actual runs before ordering, and add a few extra feet to account for routing around corners and through conduit.
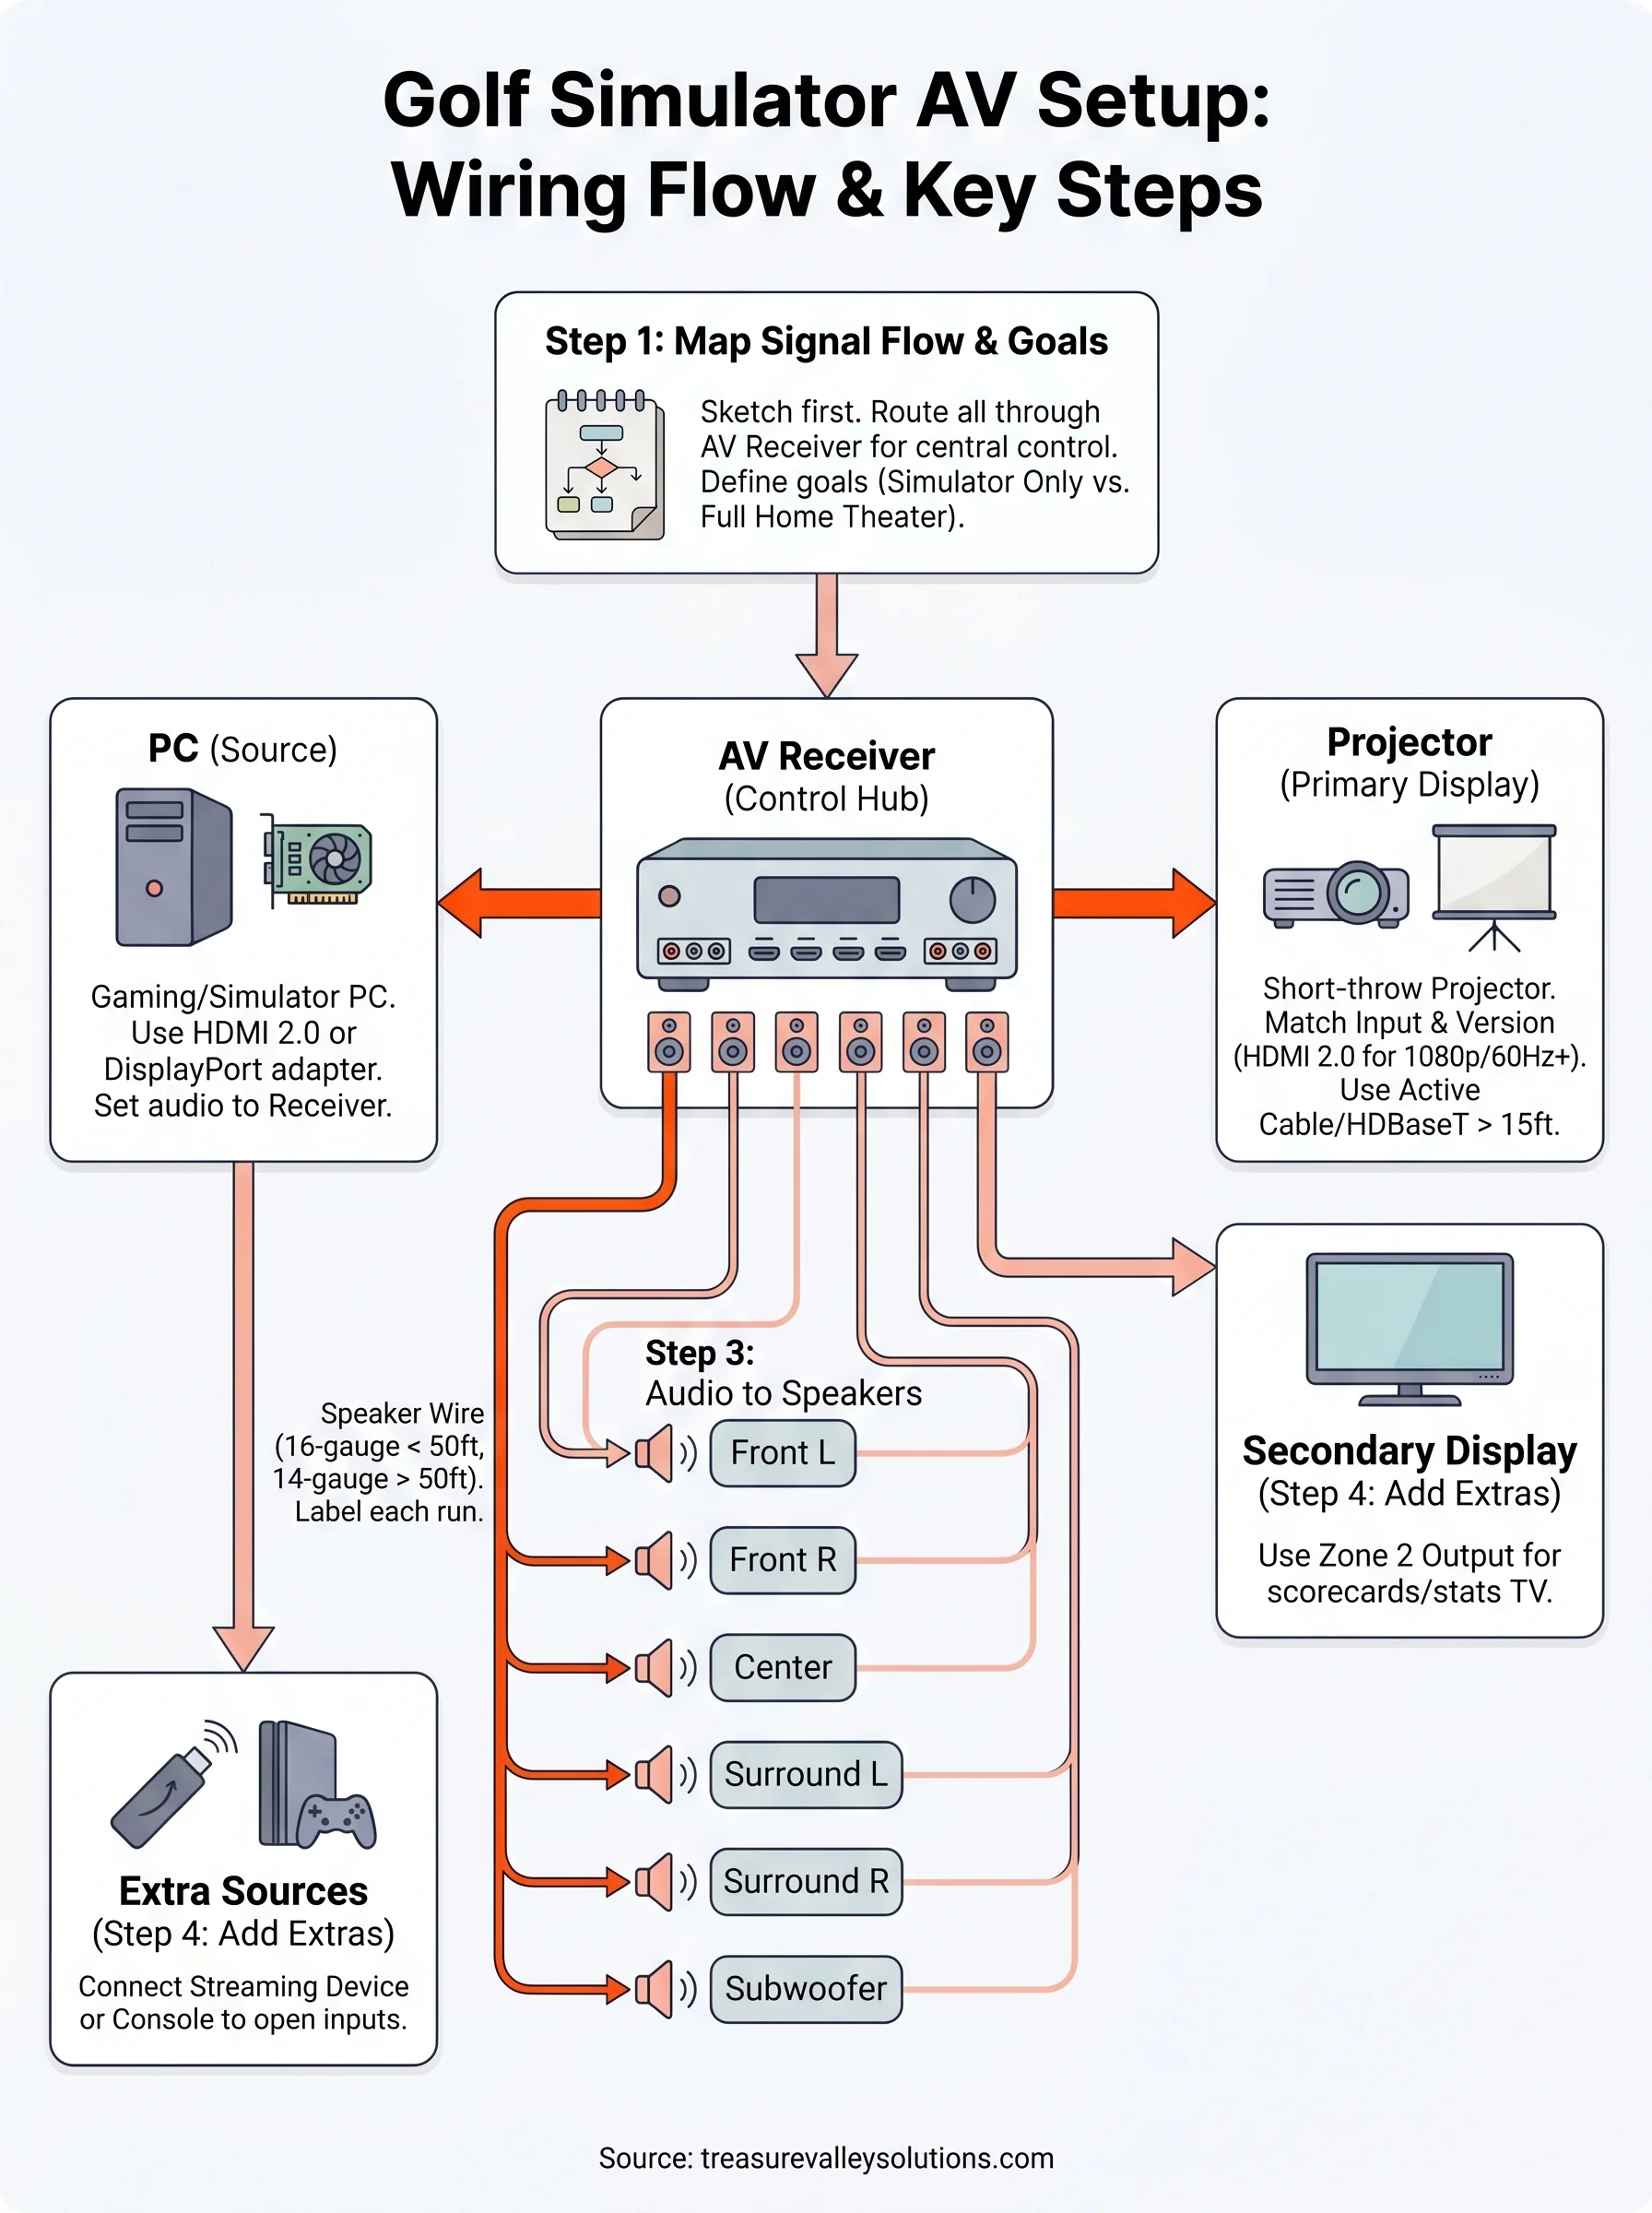
Step 1. Map your signal flow and goals
Before you route a single cable, sketch your signal flow on paper. A signal flow diagram shows you exactly how video and audio travel from your PC to each output device, which helps you catch potential bottlenecks before they become expensive mistakes. Knowing your goals upfront, whether you want surround sound for the simulator only or a full home theater setup, changes which components you buy and how you wire them.
Draw a simple signal flow diagram
Your diagram doesn't need to be elaborate. A basic flowchart with boxes and arrows covers everything you need for a solid golf simulator AV setup. Here's a simple template for a typical single-receiver configuration where one AV receiver handles all switching:
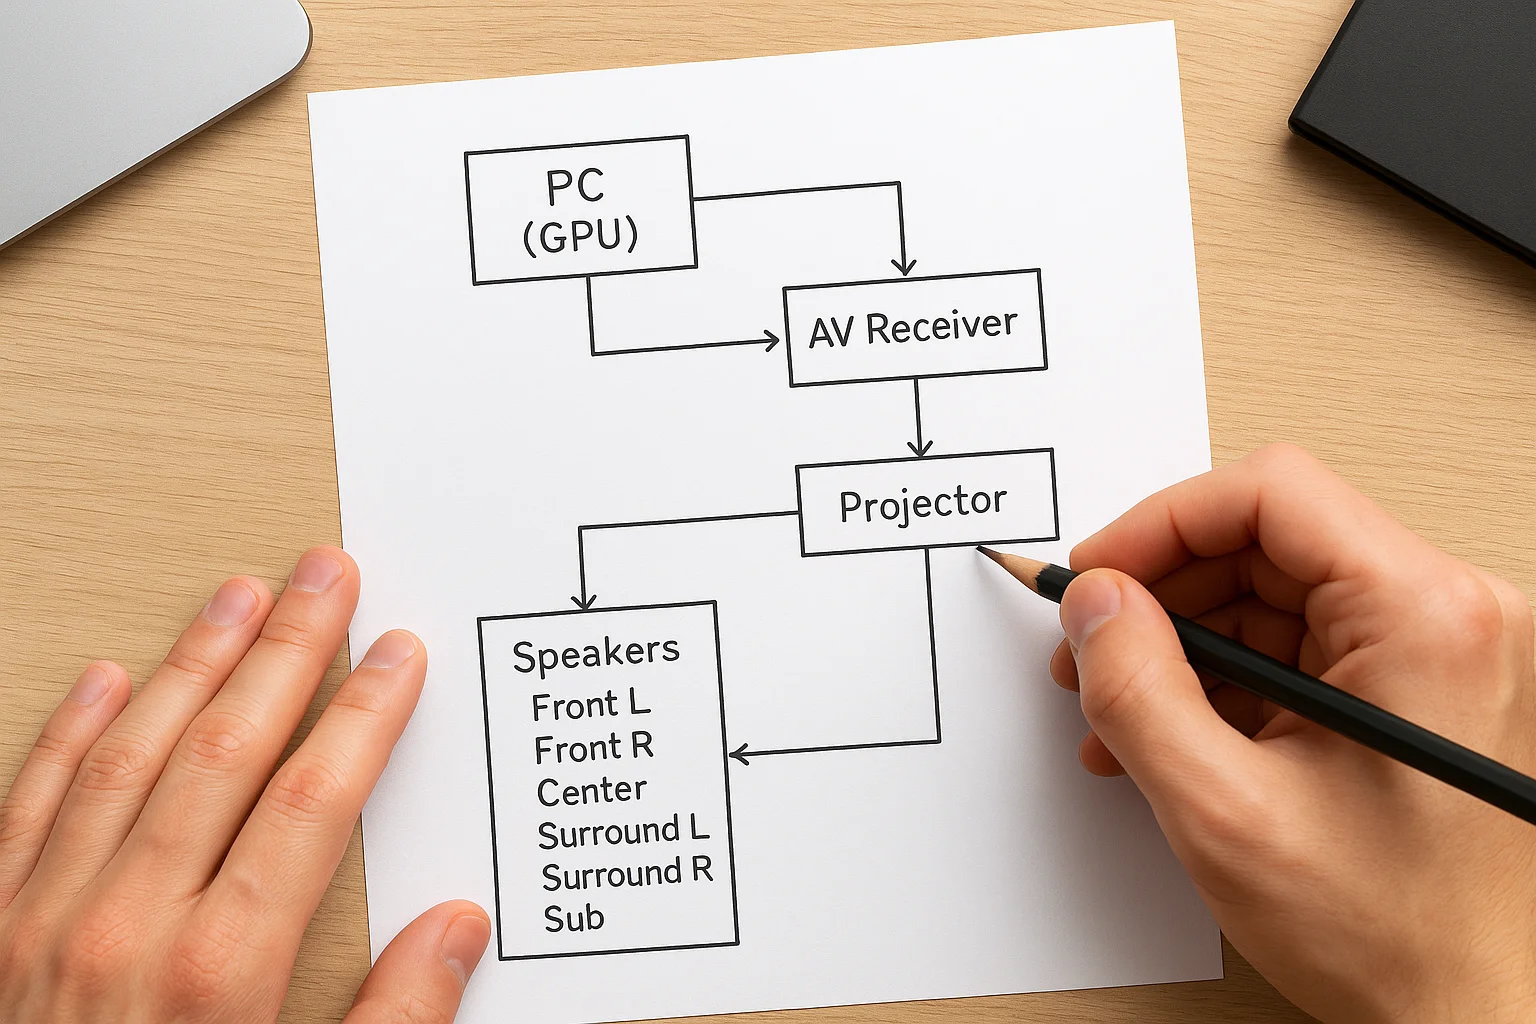
PC (GPU) --> HDMI --> AV Receiver --> HDMI Out --> Projector
                          |
                   Speaker Outputs
                          |
          Front L, Front R, Center, Surround L, Surround R, Sub
Route all video and audio through your AV receiver so you control everything from one central point.
This layout keeps your cable runs clean and organized and gives you a single point of control for the entire room. When you decide to add a second display or a streaming device later, you just plug into an open input on the receiver rather than rewiring everything from scratch.
Step 2. Wire video from PC to projector
With your signal flow mapped, you're ready to run the video connection from your PC to your projector. This is the most critical physical connection in your golf simulator AV setup because any weakness here, a wrong cable version or a port mismatch, shows up immediately as dropped frames, signal loss, or a degraded image on your impact screen.
Choose the right cable and port
Your GPU output and projector input need to match in both connector type and HDMI version. HDMI 2.0 supports 1080p at 60Hz, which covers most simulator software requirements. If your projector only has HDMI 1.4 inputs, verify the spec sheet before buying cables, since mismatched versions are the most common source of resolution failures on install day.
Always verify your projector's input specifications before purchasing cables to avoid resolution and refresh rate issues that are difficult to diagnose after the cable run is complete.
Use this table to pick the right connection type for your hardware and run length:
| Connection type | Max resolution | Best use case |
|---|---|---|
| HDMI 2.0 | 4K/60Hz | Primary PC-to-projector run under 15 ft |
| DisplayPort to HDMI adapter | 4K/60Hz | GPU lacks a dedicated HDMI 2.0 port |
| HDBaseT extender | 1080p/60Hz | Runs longer than 15 feet |
Step 3. Get audio to your speakers
With video confirmed, you connect audio next. Your AV receiver handles all audio decoding in a typical golf simulator AV setup, so the connection from your PC to the receiver is the only audio run you need to manage at the source. Use HDMI ARC or an optical cable depending on what your receiver and PC support, and keep this cable run as short and direct as possible.
Connect your PC to the AV receiver
Most gaming PCs output audio over HDMI by default, which means the same cable carrying your video signal to the receiver also carries audio. Confirm your Windows audio output is set to the receiver rather than your monitor or onboard PC speakers before running any tests.
Set your PC's audio output device to your AV receiver in Windows Sound Settings before running any audio tests.
Route speaker wire from the receiver
Run dedicated speaker wire from each terminal on your receiver to each speaker location. Use 16-gauge wire for runs under 50 feet and 14-gauge for anything longer to prevent resistance-related volume loss. Label each end of every run with the channel name, such as Front L, Center, or Sub, so you can confirm every connection quickly during final testing.

Step 4. Add extra sources and displays
Most golf simulator AV setups eventually need more than a PC and a projector. A streaming device, a second display, or a gaming console all connect through the same AV receiver you already wired, which is why centralizing your signal flow earlier saves time now.
Add each new source to an open HDMI input before running any permanent cable so you can verify the signal works first.
Connect a second display
Your receiver's zone 2 output sends a signal to a secondary TV without adding extra hardware. Run an HDMI cable from that output to your second screen and configure it as a separate zone in the receiver's settings menu. Label each input with a custom name so switching sources takes one button press rather than a manual cable swap.
Common second-display options for a simulator room:
- Side-wall TV for scorecards
- Overhead monitor for player stats
- TV in an adjacent seating area
Add streaming or console sources
Plug your streaming device or game console into an open HDMI input on the receiver. Assign each device a clear name in the receiver's onscreen settings menu so every source stays identifiable.
Before locking down cable management, test each source at both the projector and secondary display to confirm signals route cleanly to both outputs without interference.
Ready to tee off
Your golf simulator AV setup comes down to one principle: clean signal flow from a single, organized source. When you map your connections before you run cable, match your HDMI versions to your hardware specs, and route audio and video through one central receiver, every component works together instead of against each other. The steps in this guide give you a repeatable process you can follow on install day without second-guessing each connection.
If you've worked through each step and everything tests cleanly, your room is ready. Each source routes to your projector and secondary display, your speakers decode correctly, and adding future devices is as simple as plugging into an open input.
If your space needs a more complex setup or you want a professional to handle the full wiring and programming, our team installs these systems across the Boise and Meridian area. Check out examples of our completed AV projects to see what a finished room looks like.