
A great golf simulator can turn a spare room or garage into a year-round practice space, but bad lighting will undermine the whole setup. Get your golf simulator lighting setup wrong, and you'll deal...
Golf Simulator Lighting Setup: Placement, Products & Tips
A great golf simulator can turn a spare room or garage into a year-round practice space, but bad lighting will undermine the whole setup. Get your golf simulator lighting setup wrong, and you'll deal with washed-out projector images, inaccurate launch monitor readings, or a hitting area so dim you can't track the ball. The fix isn't complicated, but it does require some planning around placement, brightness, and color temperature.
At Treasure Valley Solutions, we design and install custom lighting and AV systems across the Boise and Meridian area, including dedicated spaces like home theaters, media rooms, and yes, golf simulator rooms. We've seen firsthand how much the right lighting transforms both the visual quality and the performance accuracy of these setups. It's one of those details that separates a frustrating experience from a genuinely great one.
This guide covers everything you need to get your simulator lighting right: where to place fixtures, what products work best, how to protect your projector image, and the technical details that help your launch monitor do its job. Whether you're building out a new simulator room or fixing issues with an existing one, you'll walk away with a clear plan you can act on.
What good simulator lighting must do
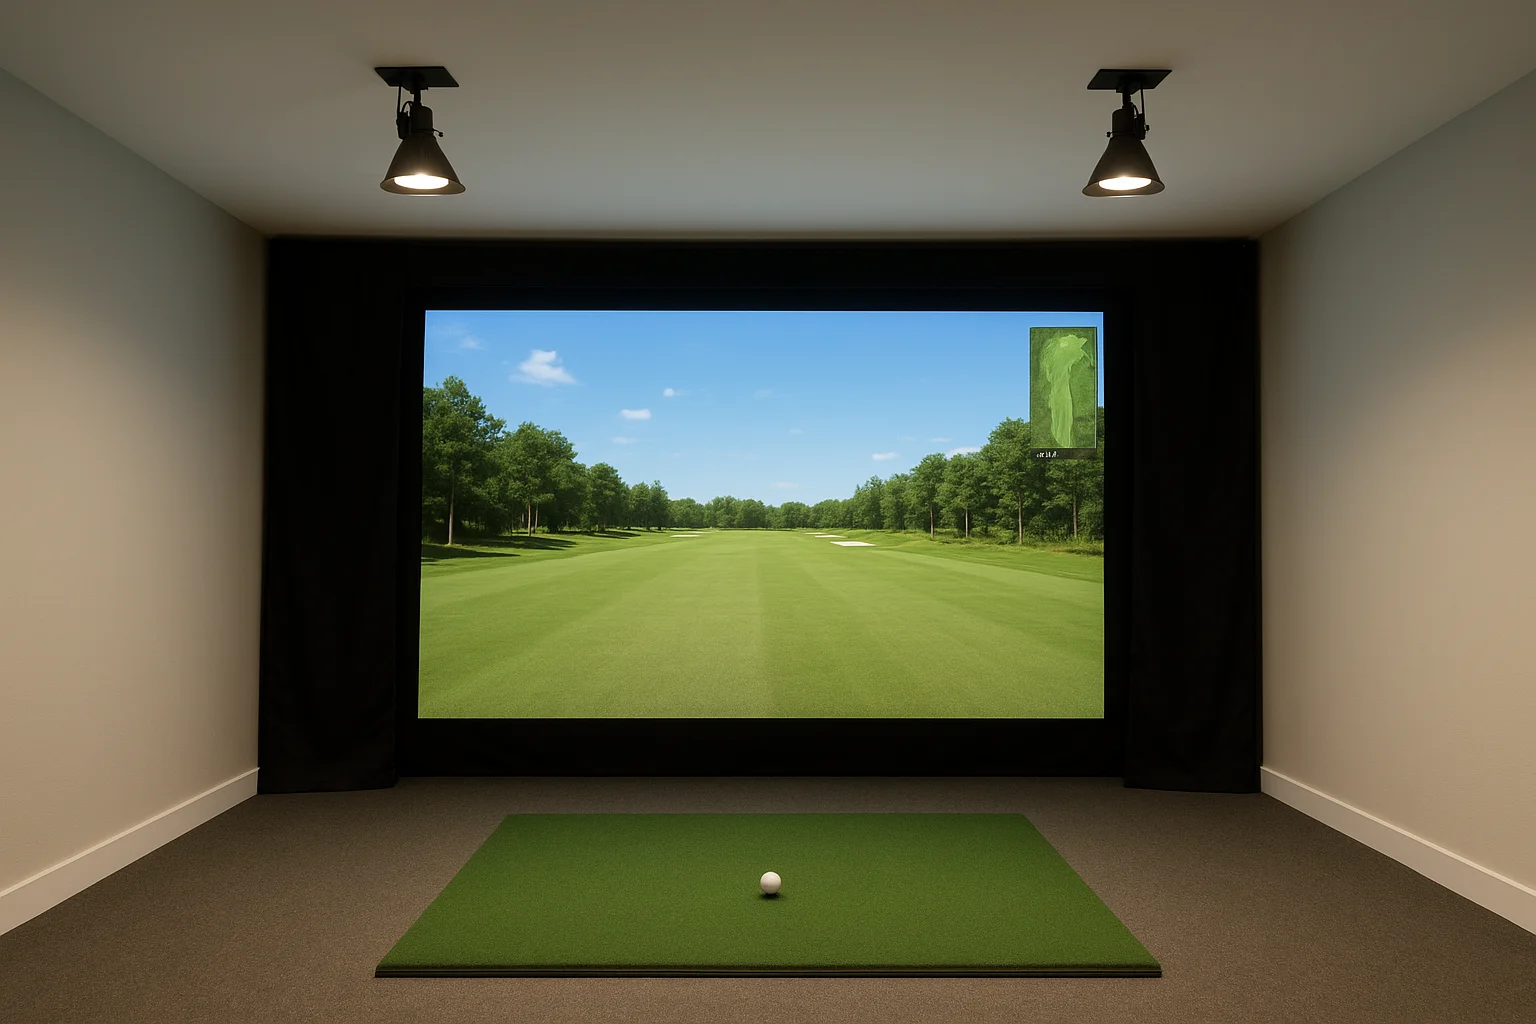
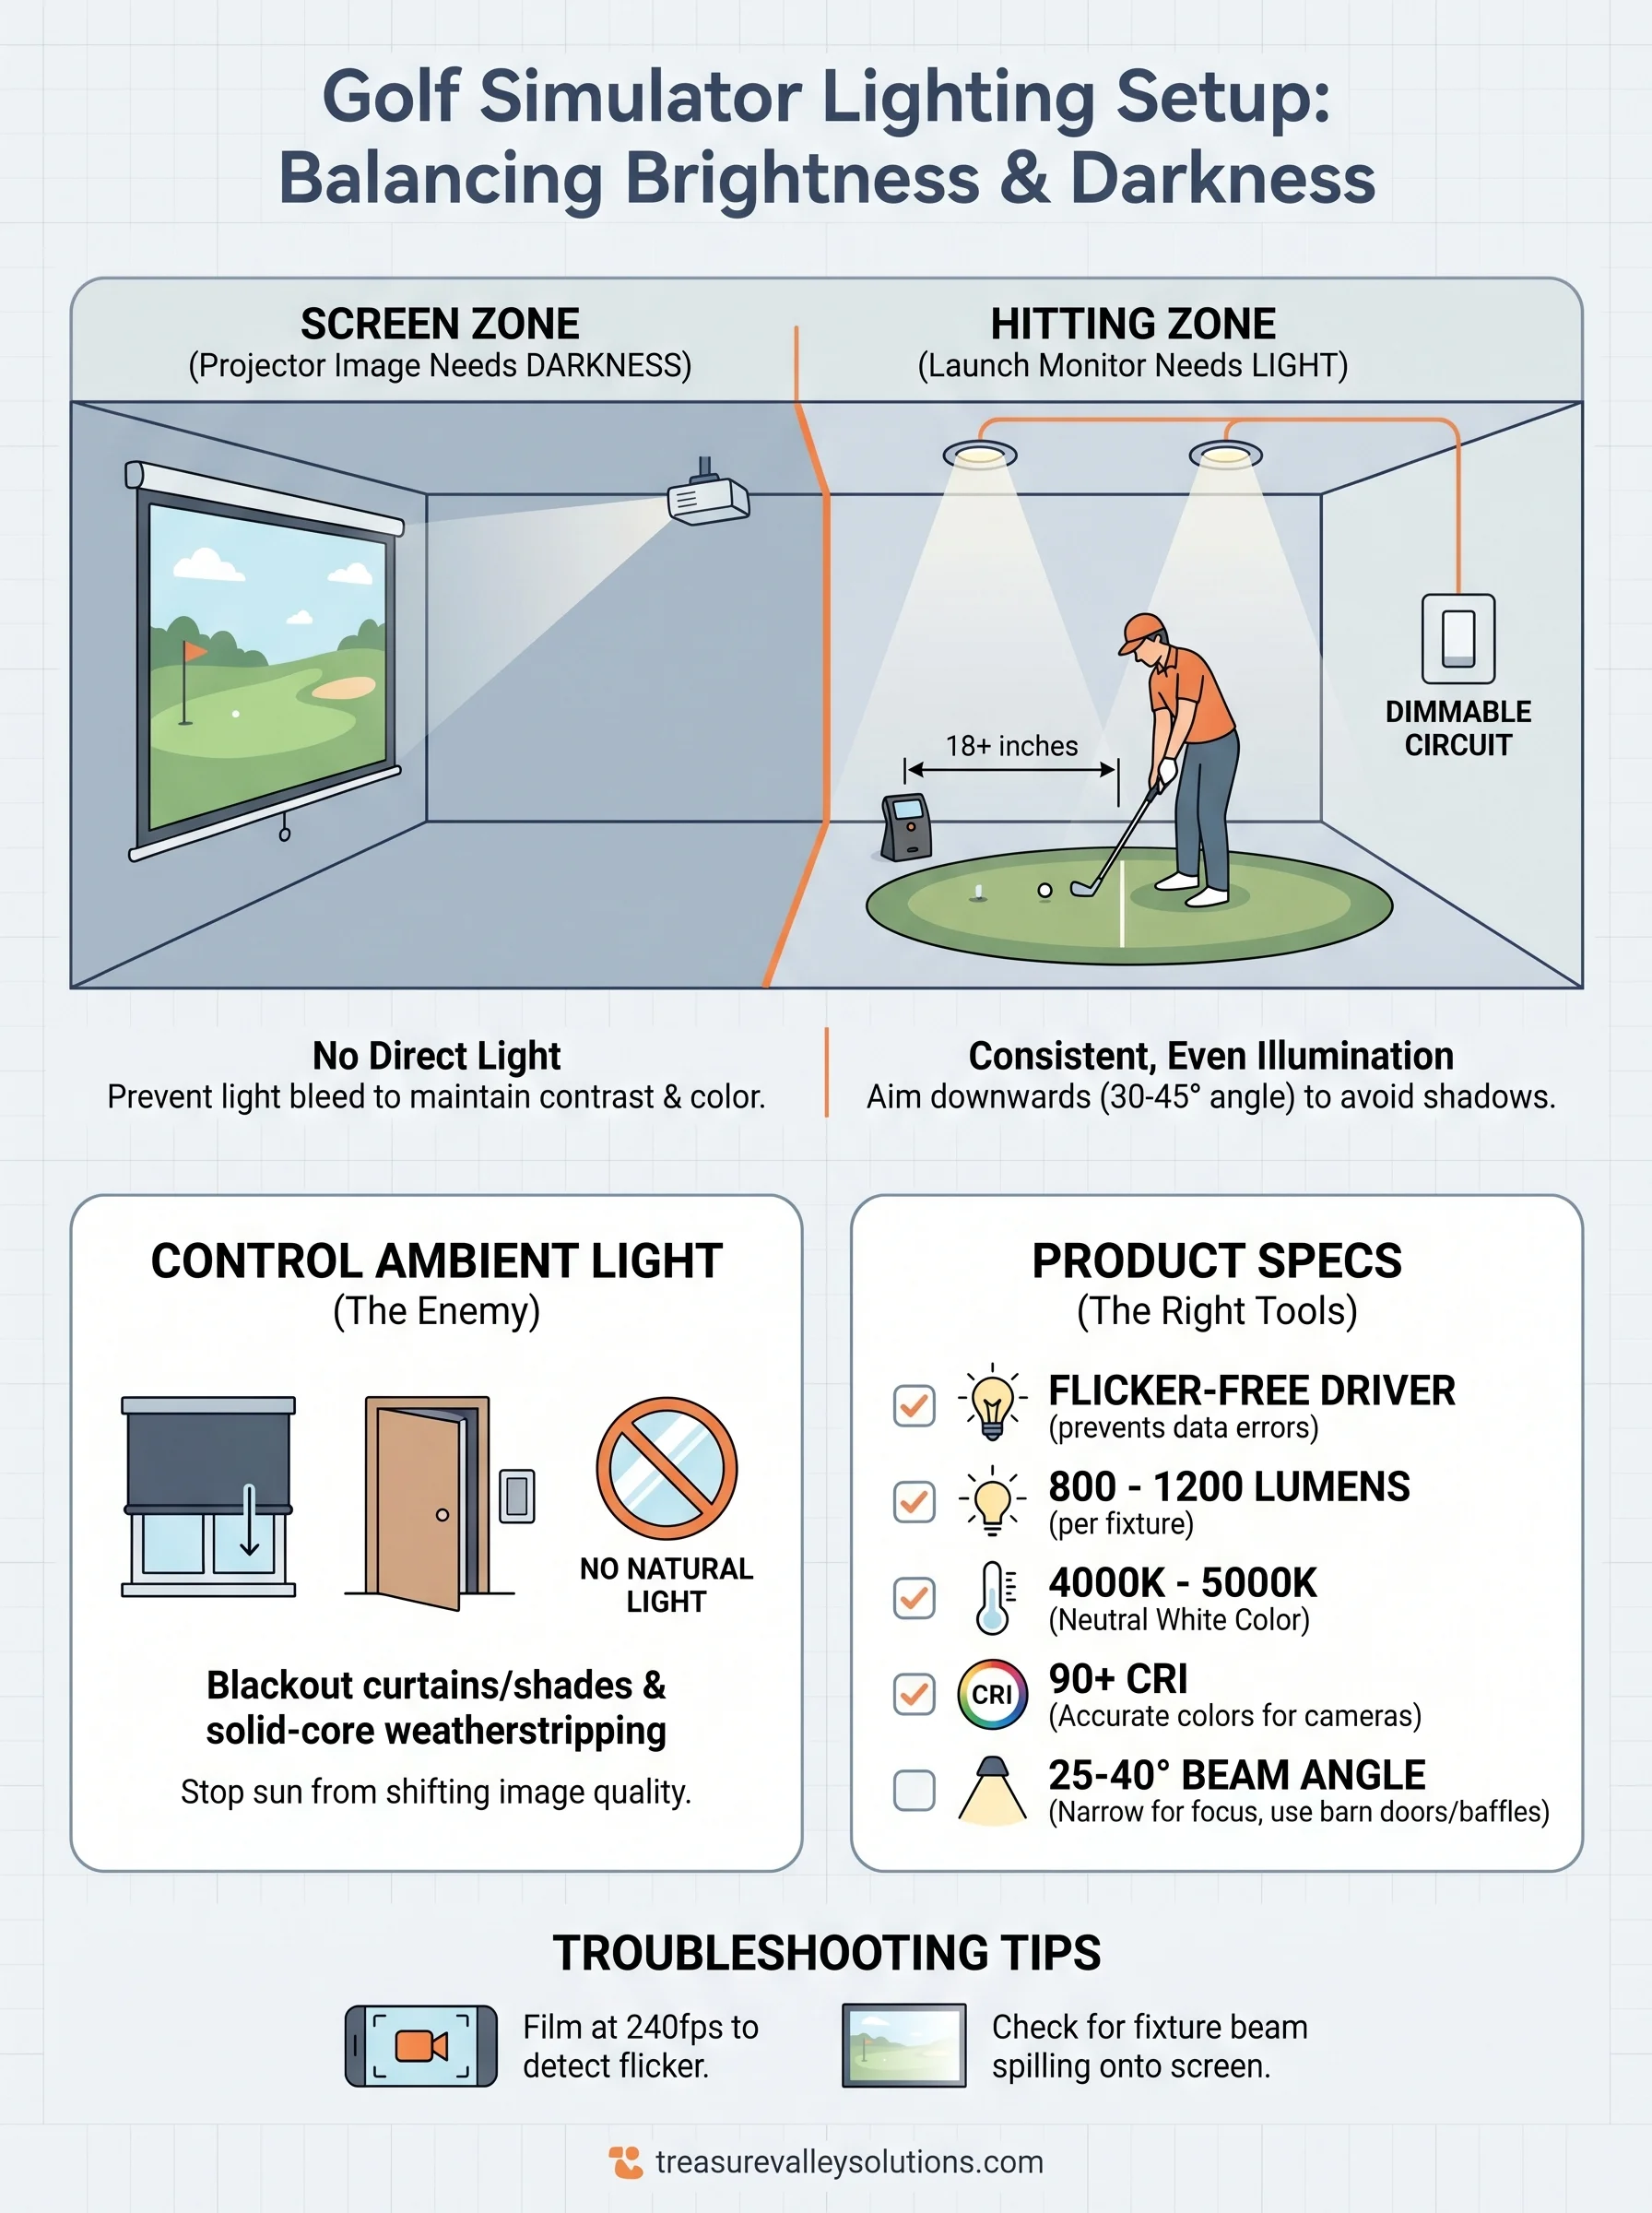
A golf simulator room has two competing lighting needs working against each other. Your projection screen needs darkness to display a sharp, high-contrast image, while your hitting zone needs enough light for accurate ball tracking and comfortable visibility. A well-designed golf simulator lighting setup solves both problems at once, without sacrificing either.
Getting this balance right is the single most important decision in your simulator room build.
Illuminate the hitting area consistently
Your launch monitor relies on consistent, even illumination to track the ball. Devices like the Garmin Approach R10 or Foresight GC3 use cameras to capture ball and club data at high frame rates. Uneven lighting, deep shadows, or flickering bulbs can introduce errors into that data, and you won't always know why your readings are off. Steady, diffused light aimed at the hitting zone is what these devices need to perform accurately.
Here's what consistent hitting-zone lighting looks like in practice:
- Minimum 50 foot-candles of illumination measured at the hitting surface
- No flickering: use LED fixtures with flicker-free drivers rated for high-frequency output
- Lights positioned to eliminate shadows behind the ball and across the mat
Protect the projection screen from light bleed
Your projector competes with every ambient lumen in the room. Each lumen that lands on the screen surface reduces contrast and fades color, which makes it harder to read shot trajectory in the simulator image. Washed-out fairways and sky tones turn a sharp image flat. Directional fixtures and smart zoning keep light where you need it and away from the screen entirely.
Color temperature also plays a role in how the overall room looks. A range of 4000K to 5000K gives you neutral, clean light in the hitting area without adding a warm yellow cast that shifts screen colors. Keeping all fixtures outside the projector's throw angle prevents lens flare that further degrades image sharpness.
Plan the room and control ambient light
Before you choose a single fixture, map every light source in your room and identify every place ambient light enters uncontrolled. Windows, door gaps, and recessed can lights placed in the wrong spot will work against your simulator no matter how powerful your projector is. A solid golf simulator lighting setup starts with a room audit, not a shopping list.
Block natural light first
Natural light is the biggest threat to projector image quality, and it shifts constantly throughout the day as the sun moves. Install blackout curtains or blackout roller shades on any windows in the room. If your simulator is in a garage, solid-core weatherstripping and blackout panels over door gaps and side windows will stop the light bleed that sidesteps even a bright, high-lumen projector.
Controlling ambient light before you add any fixtures saves you from constantly fighting image washout during daytime play sessions.
Zone the room into two areas
Divide your space into the hitting zone and the screen zone, and treat them as entirely separate lighting environments. Wire each zone to its own dimmer circuit so you can adjust hitting-zone brightness independently without affecting the screen side at all. A simple room breakdown looks like this:
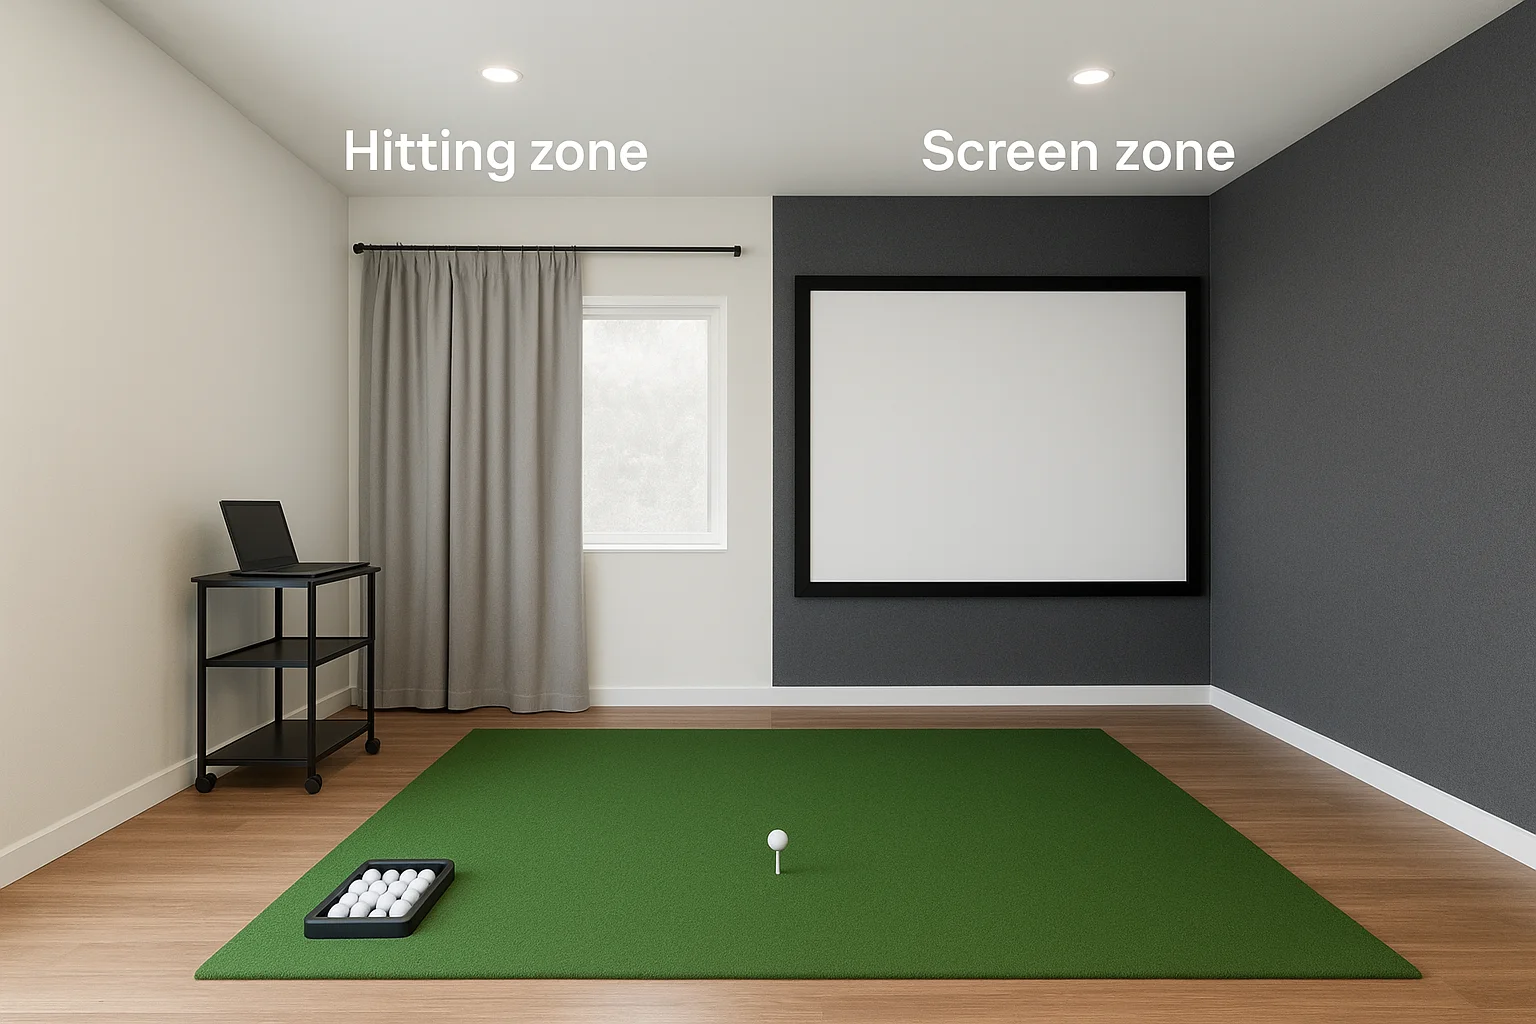
- Hitting zone: all fixtures, aimed downward at the mat and hitting area
- Screen zone: zero direct light from any source or fixture
Light the hitting zone without washing out the screen
Fixture placement does more work than fixture brightness in a golf simulator lighting setup. You want light falling on the hitter and the mat, not scattering toward the screen. The practical rule: mount every fixture at least 18 inches behind the hitting position, pointed downward at roughly a 30 to 45-degree angle toward the mat. This keeps the light cone focused on the strike zone and out of the projector's throw path.
Placing a light even slightly in front of the hitting position sends spill light directly onto the screen surface and kills contrast fast.
Position fixtures behind and above the hitter
Recessed or track-mounted fixtures work best when installed in the ceiling directly over or slightly behind where you stand to hit. Aim for a mounting height between 8 and 10 feet, which keeps the beam angle tight. Two fixtures placed symmetrically on either side of the centerline eliminate shadows across the ball and mat without creating a single hot spot that could confuse your launch monitor camera.
Aim downward and shield the beam
Use fixtures with adjustable barn doors or deep-baffle trims to cut off any forward light scatter. A focused beam keeps illumination where the launch monitor needs it. Point each fixture straight down or tilted slightly toward the mat, and verify no light cone reaches the screen wall before you finalize the position.
Pick fixtures and bulbs that work
Not every LED fixture is suitable for a golf simulator lighting setup. You need bulbs and housings that deliver flicker-free, consistent output at the right brightness and color temperature, without creating glare that bounces off the screen or mat surface.
The fixture type matters as much as the bulb inside it, so choose both with the same care.
Choose recessed or track LED fixtures
Recessed can lights with adjustable gimbal trims give you the directional control you need to aim the beam precisely at the hitting zone. Track lighting works equally well if your ceiling joists make recessed installation difficult. Look for fixtures rated at 800 to 1200 lumens per unit with a beam angle between 25 and 40 degrees. A narrow beam keeps spill light contained and away from the screen wall.
Match color temperature and CRI
Your hitting zone benefits most from fixtures in the 4000K to 5000K range, which produces neutral white light that does not cast yellow or blue tints over the mat or ball. Pair that with a CRI rating of 90 or above, which ensures colors render accurately and your launch monitor camera reads the ball cleanly. Here is a quick reference for bulb specs to target:
| Spec | Recommended value |
|---|---|
| Color temperature | 4000K to 5000K |
| CRI | 90 or above |
| Lumens per fixture | 800 to 1200 |
| Beam angle | 25 to 40 degrees |
| Driver type | Flicker-free |
Test, tune, and troubleshoot readings
Once your fixtures are mounted and aimed, don't assume the setup is finished. Run a short test session with your launch monitor active and check whether ball speed, spin rate, and launch angle readings match your expected numbers from a known club and swing. Small adjustments to fixture angle or dimmer level can eliminate errors before they become a pattern in your data.
Verify your readings against a trusted reference swing before committing to any lighting position permanently.
Check for shadows and hot spots
Walk the hitting zone slowly and look for uneven brightness or visible shadows across the mat surface. A phone camera in video mode picks up hot spots and dark patches that your eyes miss in real time. Adjust each fixture's gimbal angle by small increments and recheck until the mat surface looks evenly lit from edge to edge.
Fix the most common issues
A solid golf simulator lighting setup fails in predictable ways. Use this checklist to isolate the problem quickly:
- Inconsistent launch monitor readings: film the hitting zone at 240fps on your phone; replace any driver that shows banding or flicker
- Washed-out screen image: confirm no fixture beam angle reaches the screen wall, then lower the dimmer on your hitting-zone circuit
- Shadows behind the ball: add a second fixture placed symmetrically on the opposite side of the centerline
Next steps for your simulator room
Your golf simulator lighting setup comes down to three priorities: block ambient light, aim fixtures behind the hitter, and wire each zone to its own dimmer. Follow the placement rules and bulb specs in this guide, and your launch monitor will read accurately while your projector image stays sharp and high-contrast. Most lighting problems in simulator rooms trace back to fixture position, not fixture quality, so verify your beam angles before you call the setup done.
If you want a room that handles all of this without the trial and error, a professional installation makes a real difference. Treasure Valley Solutions designs and installs custom smart lighting systems for simulator rooms, home theaters, and media spaces across the Boise and Meridian area. We handle the planning, wiring, dimmer programming, and final tuning so your room works right from day one. See examples of our completed projects and reach out to start your build.