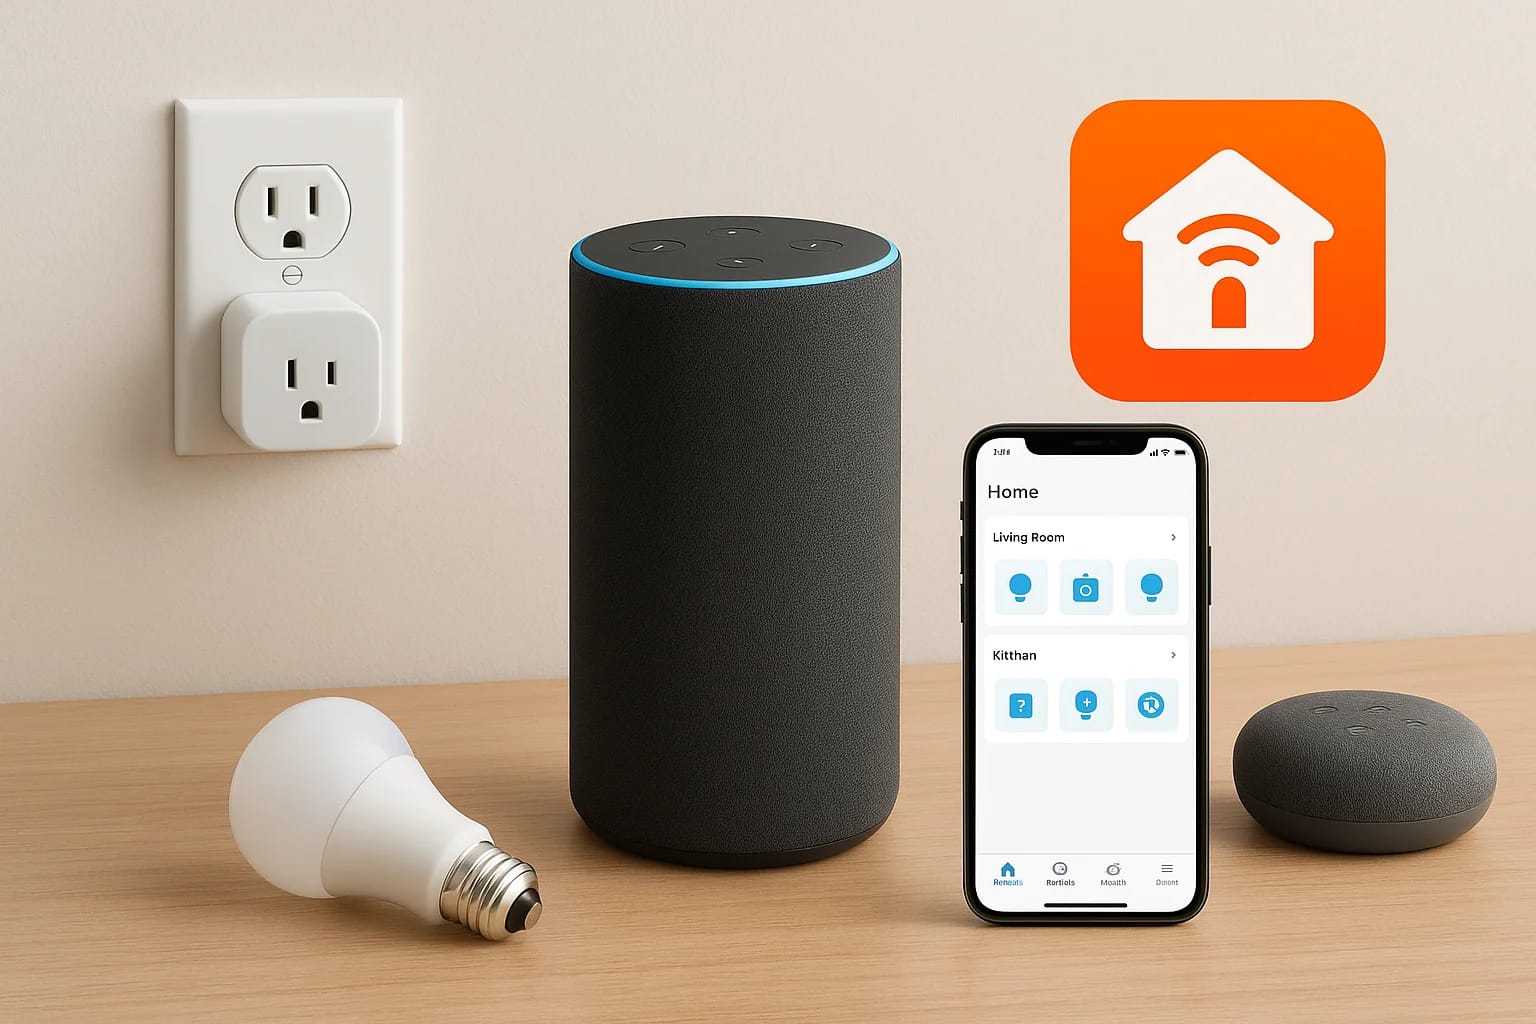
You just unboxed an Echo, you've got a few smart bulbs sitting on the counter, and now you're staring at the Alexa app wondering where to actually start. An Amazon Alexa smart home setup can feel over...
Amazon Alexa Smart Home Setup: Connect Devices And Routines
You just unboxed an Echo, you've got a few smart bulbs sitting on the counter, and now you're staring at the Alexa app wondering where to actually start. An Amazon Alexa smart home setup can feel overwhelming at first, there are dozens of device categories, multiple ways to group them, and a whole routine-building system most people never touch. But once you understand the structure behind it all, connecting and automating your devices becomes surprisingly straightforward.
This guide walks you through every step, from the initial Echo configuration to linking smart lights, locks, cameras, plugs, and thermostats. You'll learn how to organize devices into rooms, build routines that automate daily tasks, and troubleshoot the most common issues that trip people up. Whether you're setting up your first smart speaker or expanding a system that's already halfway built, you'll find practical answers here.
At Treasure Valley Solutions, we design and install custom smart home systems across the Boise and Meridian area, and Alexa integration is something we work with daily. We wrote this guide based on real setup experience, not spec sheets, so you get advice that actually holds up once the devices are on your wall. That said, if you hit a point where you'd rather hand the project to a professional, that's exactly what we do.
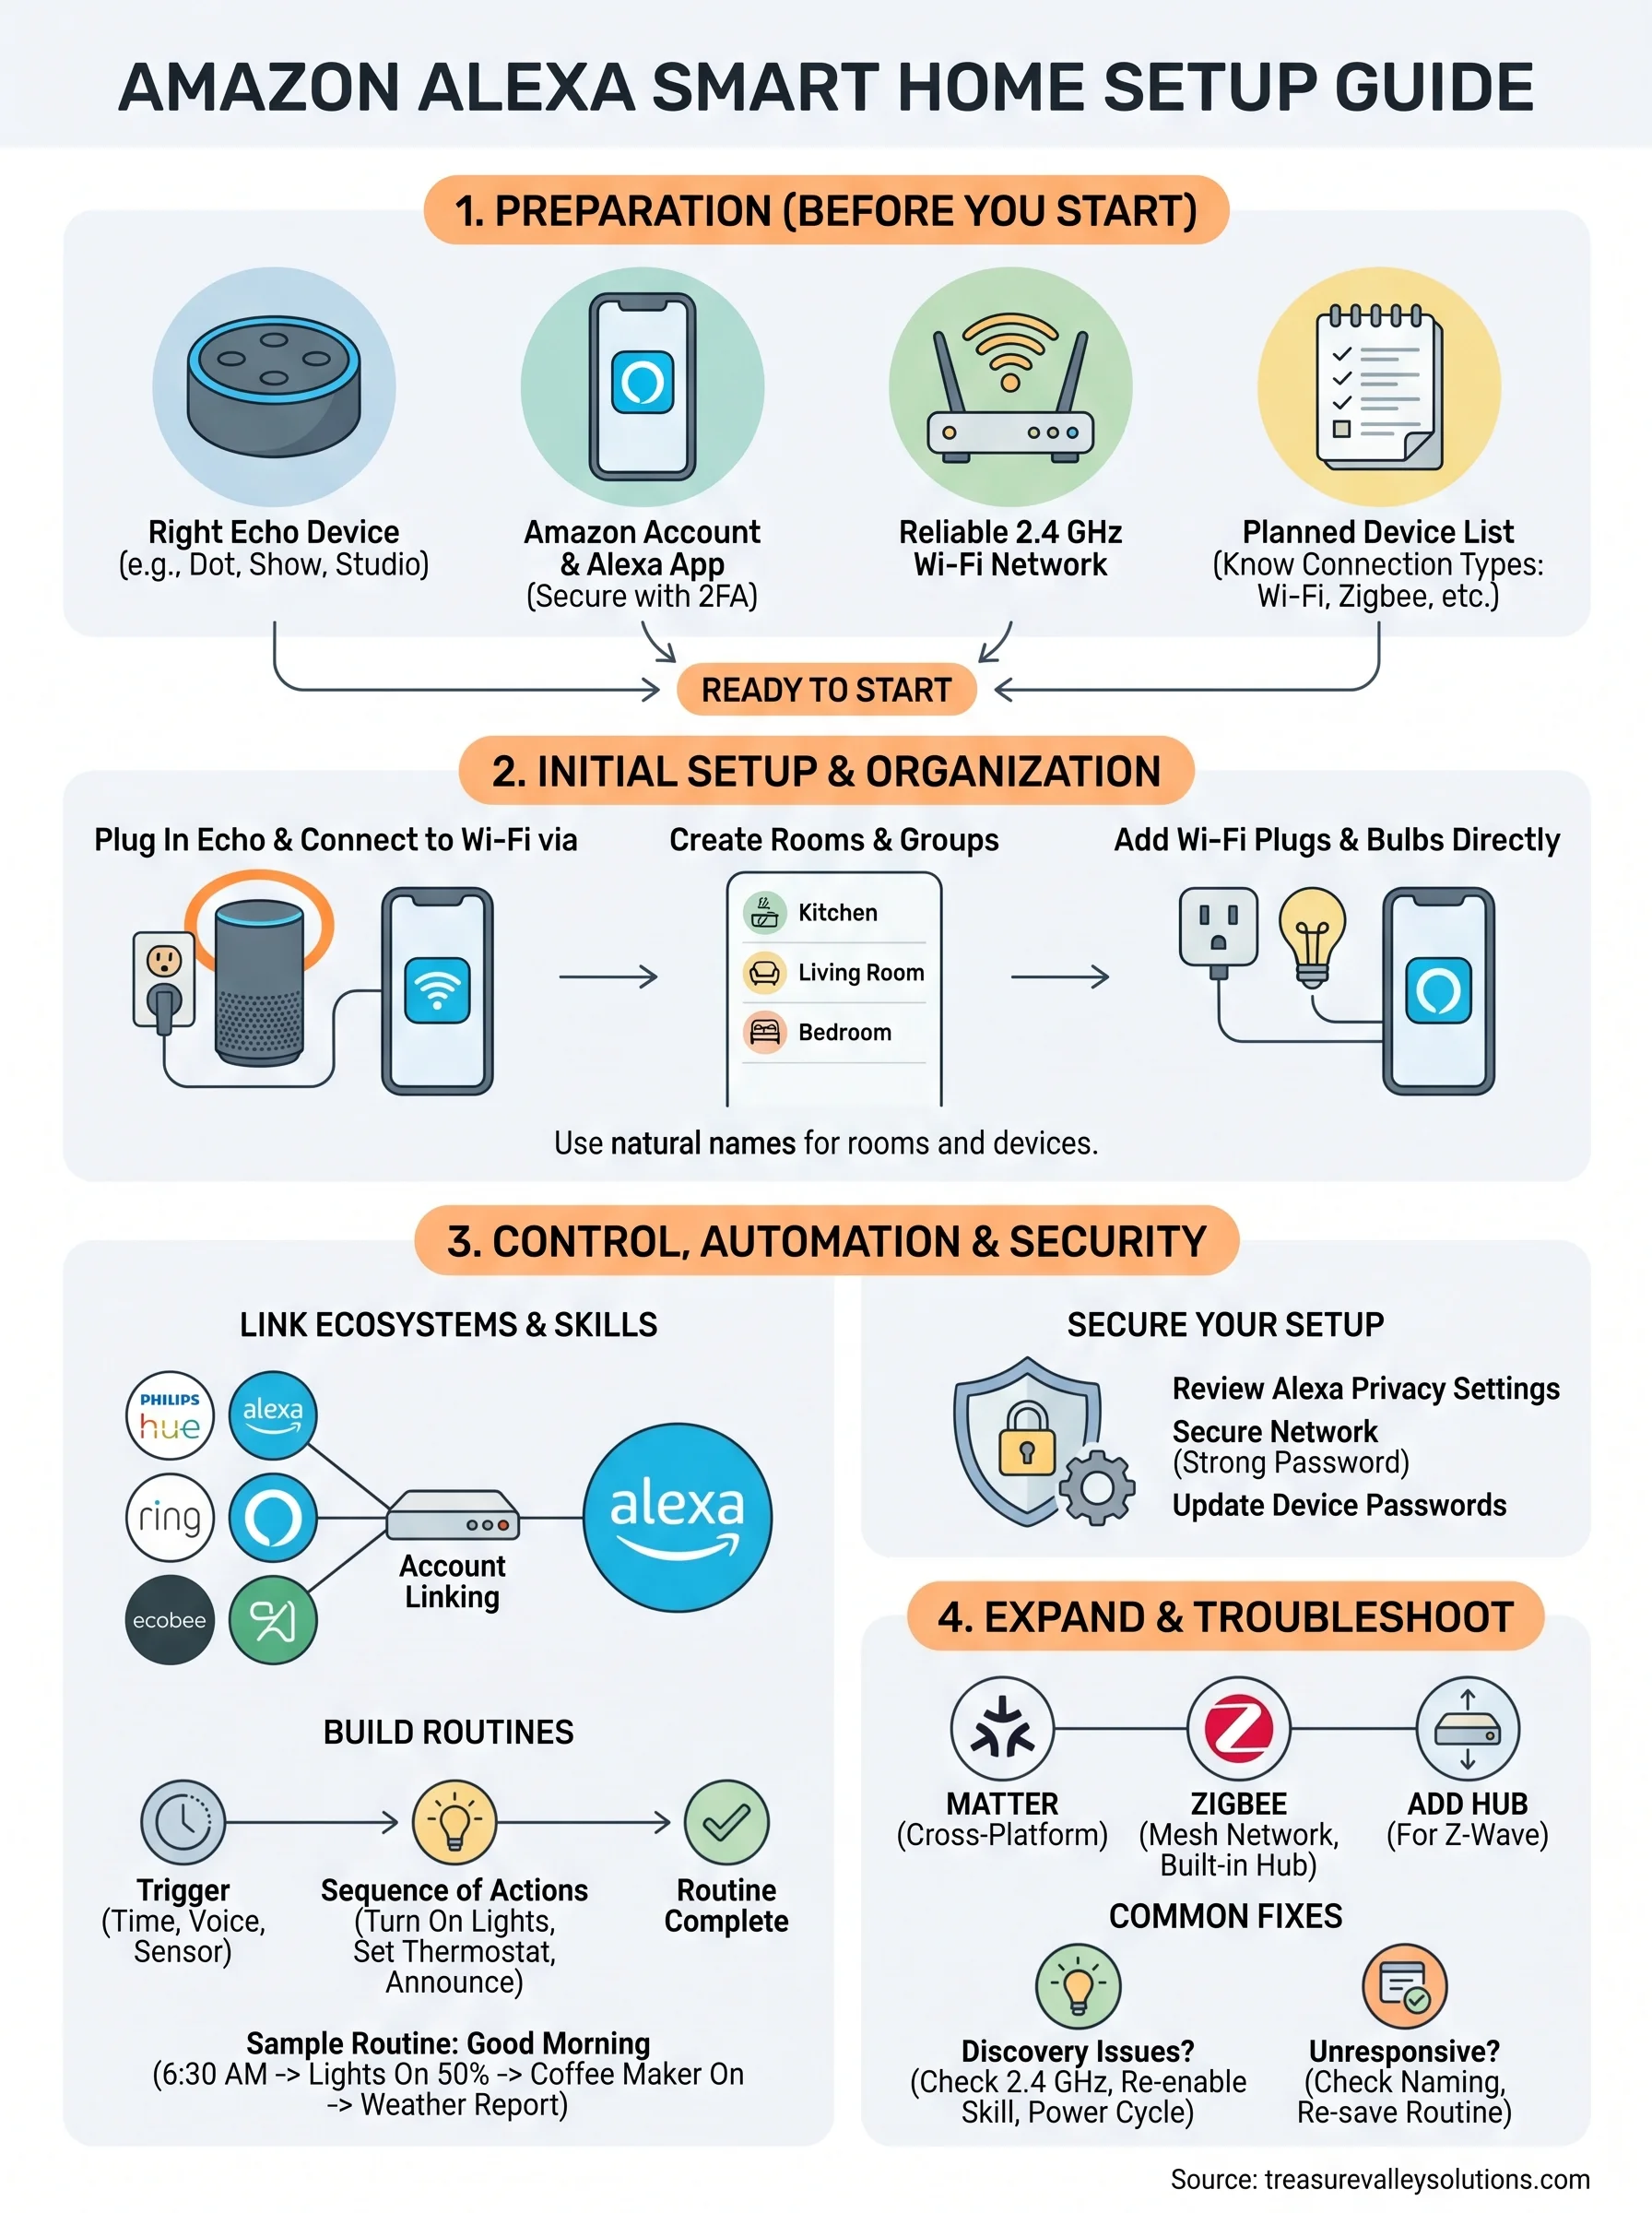
What you need before you start
Before you touch a single device, spending five minutes on preparation prevents the most common frustration in any amazon alexa smart home setup: discovering mid-project that your router, account, or device isn't compatible. Getting the basics locked in first means your setup moves forward without unnecessary backtracking.
The right Echo device for your space
Not every Echo works the same way, and the model you pick affects what you can do later. The Echo Dot is a compact option for bedrooms and offices where audio quality is secondary to voice control. The Echo Show adds a touchscreen, which is genuinely useful for controlling devices visually, checking camera feeds, and managing routines without speaking. If you plan to cover multiple rooms, pick up at least one Echo per main living area so you're not shouting across the house for a response.
| Device | Best for | Built-in hub support |
|---|---|---|
| Echo Dot (5th gen) | Small rooms, budget setups | Zigbee + Matter + Thread |
| Echo (4th gen) | Living rooms, mid-range audio | Zigbee + Matter + Thread |
| Echo Show 10 | Kitchen, visual device control | Zigbee + Matter + Thread |
| Echo Studio | Home theater, music priority | Zigbee + Matter + Thread |
Your Amazon account and the Alexa app
You need an active Amazon account before anything else moves forward. If you already shop on Amazon, use that same login. Once you have one, download the Alexa app to your phone (available on both iOS and Android). This app is the control center for your entire system; you add devices, build routines, assign rooms, and manage skills all from inside it. Sign in with the same credentials you use on Amazon.
Secure your Amazon account with two-factor authentication before connecting any smart locks, cameras, or door sensors to it.
Your phone also needs to stay on the same Wi-Fi network as your Echo during initial setup. Disable any VPN or automatic network-switching features on your phone before you begin, since jumping networks mid-setup will interrupt the pairing process.
A reliable 2.4 GHz Wi-Fi network
Most smart home devices, including the majority of Alexa-compatible bulbs and plugs, operate on 2.4 GHz Wi-Fi rather than 5 GHz. Before adding devices, log into your router and confirm you have a clearly named 2.4 GHz network. If your router broadcasts both bands under the same name, certain devices will either fail to connect or behave inconsistently once paired.
Router placement matters too. If your Echo sits far from the router, you may run into discovery failures or delayed responses. A basic mesh Wi-Fi system resolves coverage gaps without requiring any networking expertise. For homes where you plan to run more than three rooms of smart devices, mesh Wi-Fi is a practical investment upfront.
A list of your planned devices
Writing down every device you intend to connect before you start saves significant time. Note each device's brand, its companion app name, and whether it connects via Wi-Fi, Zigbee, Z-Wave, or Bluetooth. This matters because some devices require a separate hub while others pair directly to your Echo. Knowing the connection type in advance prevents you from purchasing a Z-Wave device and discovering later that Alexa doesn't support Z-Wave natively without an additional hub in the mix. A simple note on your phone works fine; the goal is to avoid mid-setup surprises.
Step 1. Set up your Echo and Alexa app
Getting your Echo online is the first physical step in any amazon alexa smart home setup. The process takes under ten minutes when your phone is running the Alexa app and you know your Wi-Fi password. Position your Echo in a central location before you plug it in, since starting in the right spot helps you test voice range realistically without moving cables around afterward.
Plug in and power up your Echo
Plug the included power adapter into the Echo and into a wall outlet. The ring light on the Echo will glow orange, which signals the device is in setup mode and ready to connect through the Alexa app. If the light shows blue or no color at all, hold the action button (the dot icon on top) for five seconds until the orange ring appears.
- Place the Echo at least eight inches from walls to avoid muffled audio and improve microphone pickup
- Keep it away from televisions or standalone speakers that could trigger unintended wake word responses
- Avoid positioning it near a microwave, since interference can disrupt the Wi-Fi signal during setup and regular use
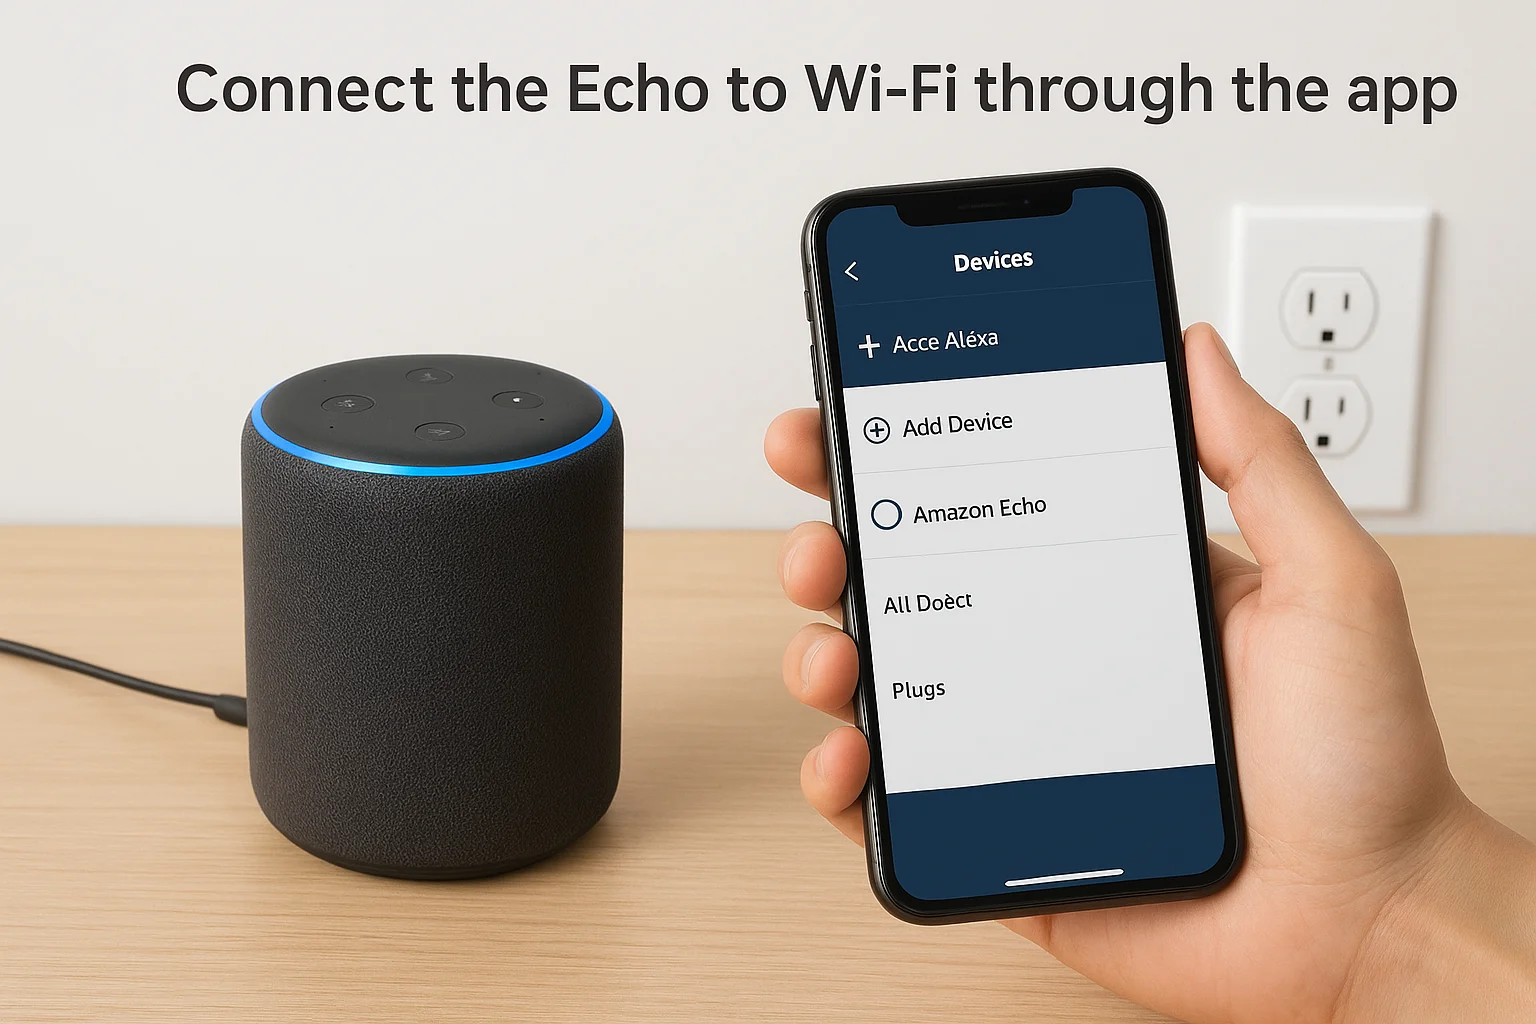
Connect the Echo to Wi-Fi through the app
Open the Alexa app on your phone and tap the Devices icon at the bottom right. Select the "+" icon in the top right corner, then choose "Add Device" and pick "Amazon Echo" from the list. Follow the on-screen prompts, which guide you through selecting your Echo model, confirming the orange ring is showing, and entering your Wi-Fi network credentials.
Use your 2.4 GHz network name during this step if your router broadcasts two separate bands, since most Echo devices prefer it for stable long-range connections.
Once the app confirms a successful connection, Alexa will speak a short introduction and the ring will turn blue briefly before going dark. Test the setup immediately by saying "Alexa, what time is it?" A clear spoken response confirms the microphone, speaker, and internet connection are all working. If Alexa stays silent, check that your phone is still on the same Wi-Fi network you used during pairing, then restart the device pairing process from the Devices tab in the app.
Step 2. Plan your smart home basics and rooms
Taking five minutes to map out your rooms and devices before you touch anything prevents a disorganized device list that becomes genuinely frustrating to fix once your amazon alexa smart home setup grows past a handful of gadgets. Alexa organizes everything around rooms and groups, and the names you assign right now become the exact phrases you say in daily voice commands. Building a clean structure before you add a single device saves significant backtracking later, especially when you start layering in routines and automation on top of individual device control.
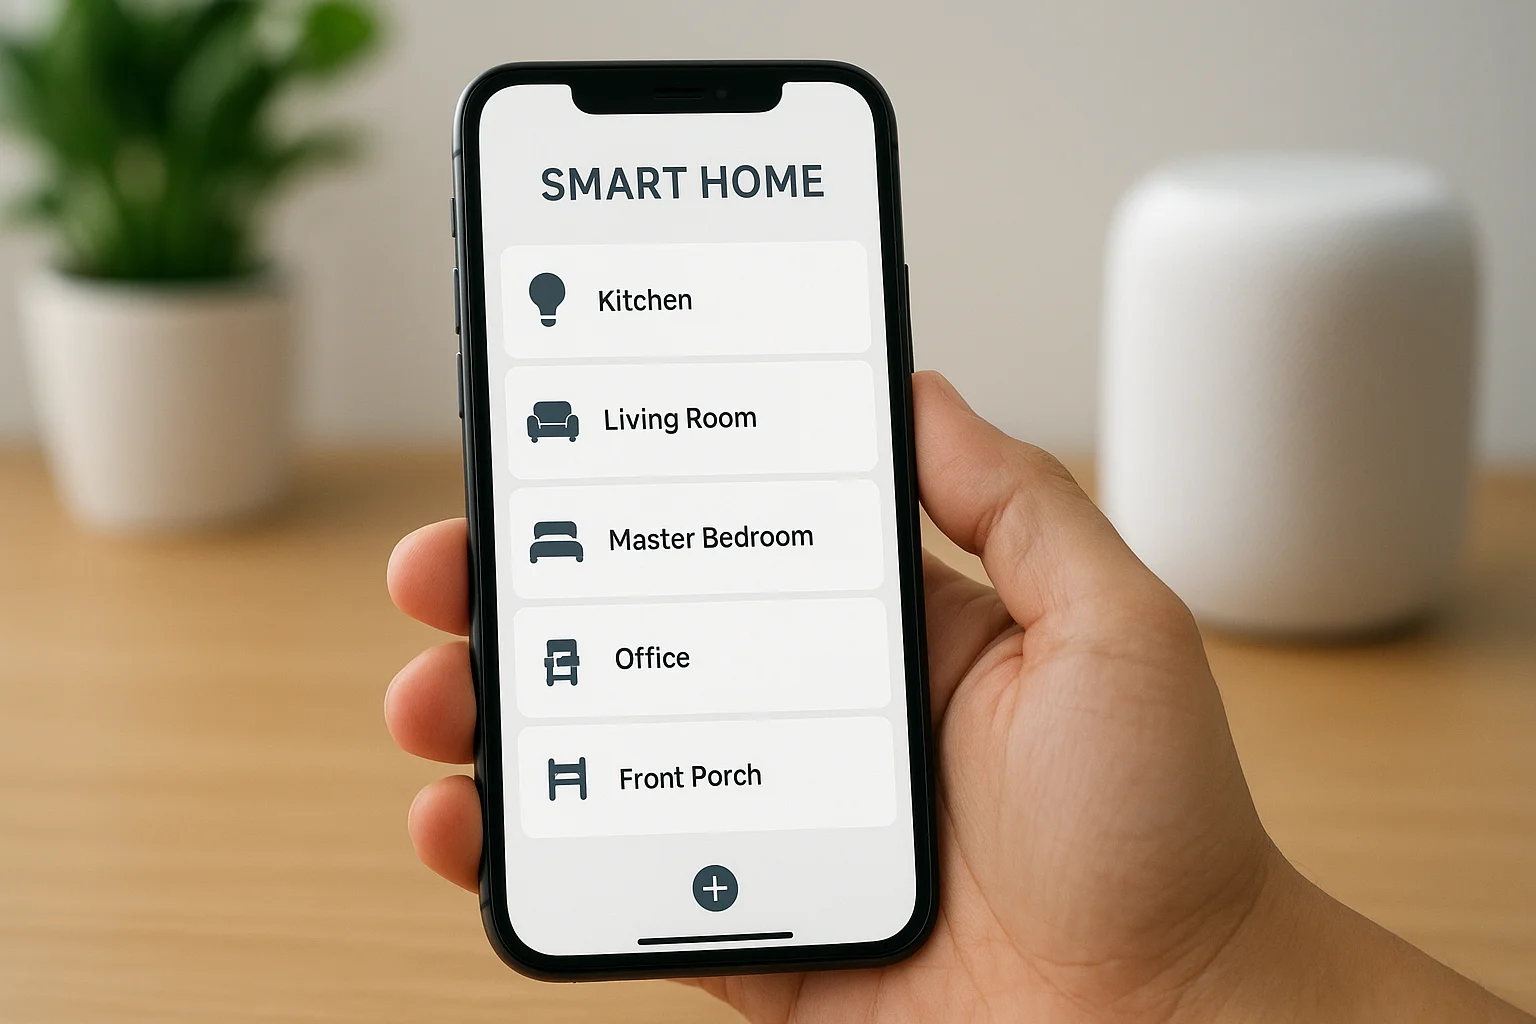
Map out your rooms in the Alexa app
The Alexa app uses a room-based group structure to connect devices and make voice commands work intuitively. When you say "Alexa, turn off the kitchen lights," Alexa finds every device assigned to a group called Kitchen and switches them off together. To create your first room, open the app, tap "Devices" at the bottom right, hit "+" in the top corner, then select "Add Group." Give each room a short, direct name you would say out loud naturally, without pausing to think about the phrasing.
Name rooms exactly as you'd say them in a spoken command, since "living room" will serve you better than "downstairs common area."
Here is a quick reference for room names that pair cleanly with voice commands:
| Room name | Voice command example |
|---|---|
| Kitchen | "Alexa, dim the kitchen lights" |
| Living Room | "Alexa, turn on the living room" |
| Master Bedroom | "Alexa, turn off master bedroom" |
| Office | "Alexa, set the office to 50%" |
| Front Porch | "Alexa, turn on the front porch" |
Decide which devices go where
Before you physically install or pair a single device, write down which devices belong in each specific room. A plug in the bedroom and a bulb in the hallway that get assigned to the wrong group will cause commands to trigger devices in the wrong space entirely. Keeping a simple list on your phone gives you a clear reference point while adding devices in the steps ahead, so each pairing decision happens with intention rather than guesswork.
Matching device type to actual room use keeps your setup practical and avoids buying hardware you never trigger. A bedroom typically benefits from a dimmable smart bulb, a plug for a bedside lamp, and possibly a door sensor. A kitchen setup usually focuses on a plug for a coffee maker and lighting above the workspace. Thinking through these combinations now means you buy exactly what you need, in the right quantities, before any installation begins.
Step 3. Add smart plugs and bulbs the easy way
Smart plugs and bulbs are the fastest win in any amazon alexa smart home setup because they pair directly to Wi-Fi with no hub required. Starting with these two device types builds your confidence with the pairing process before you move into more complex categories like cameras, locks, or thermostats. Adding a plug or bulb takes under three minutes once you know the pattern, and every device you add after this point follows a nearly identical flow inside the Alexa app.
Start with smart plugs
Smart plugs are the simplest entry point because they require no wiring and work with virtually any lamp, fan, or small appliance. Plug the device into a standard wall outlet, then plug your lamp or appliance into the smart plug itself. The plug needs to show a ready indicator (usually a blinking light) before you attempt to pair it through the Alexa app.
To add the plug, follow these steps in order:
- Open the Alexa app and tap Devices at the bottom right
- Tap "+" then select "Add Device"
- Choose your plug's brand from the list (TP-Link Kasa, Amazon Smart Plug, Wemo, etc.)
- Follow the in-app prompts to connect the plug to your 2.4 GHz Wi-Fi network
- Name the plug after the appliance it controls, such as "Bedside Lamp" or "Coffee Maker"
- Assign it to the correct room you created in Step 2
Name each plug after the appliance it controls rather than the outlet location, so voice commands feel immediate and natural during daily use.
Pair smart bulbs without a hub
Smart bulbs from Philips Hue, LIFX, Sengled, and Amazon itself all support direct Alexa pairing over Wi-Fi, meaning you skip the separate bridge entirely to get started. Screw the bulb into its fixture, switch the physical light switch on, and wait roughly 45 seconds for the bulb to enter pairing mode, which shows as a slow pulse or color cycle depending on the brand.
Open the Alexa app and follow the same "Add Device" path you used for the plug, this time selecting "Light" as the device category. Choose your bulb's brand, complete the steps, and assign the bulb to the correct room. Once linked, test it immediately by saying "Alexa, turn on [bulb name]" and confirming that the spoken command triggers an immediate physical response from the bulb.
Step 4. Connect popular device ecosystems and skills
Most smart home brands don't talk directly to Alexa by default. Instead, they connect through one of two paths: a linked account inside the Alexa app or an Alexa Skill from the skill store. Understanding which path your device uses is the key distinction that separates a smooth amazon alexa smart home setup from a frustrating one where devices show up paired in their own app but remain invisible inside Alexa entirely.
Link your smart home ecosystems through the Alexa app
Major platforms like Google Nest, Philips Hue, SmartThings, Ring, and ecobee connect to Alexa through account linking rather than a skill. This means you authorize Alexa to access your existing account with that brand, and all devices registered under that account appear automatically inside the Alexa app without re-pairing each one individually.
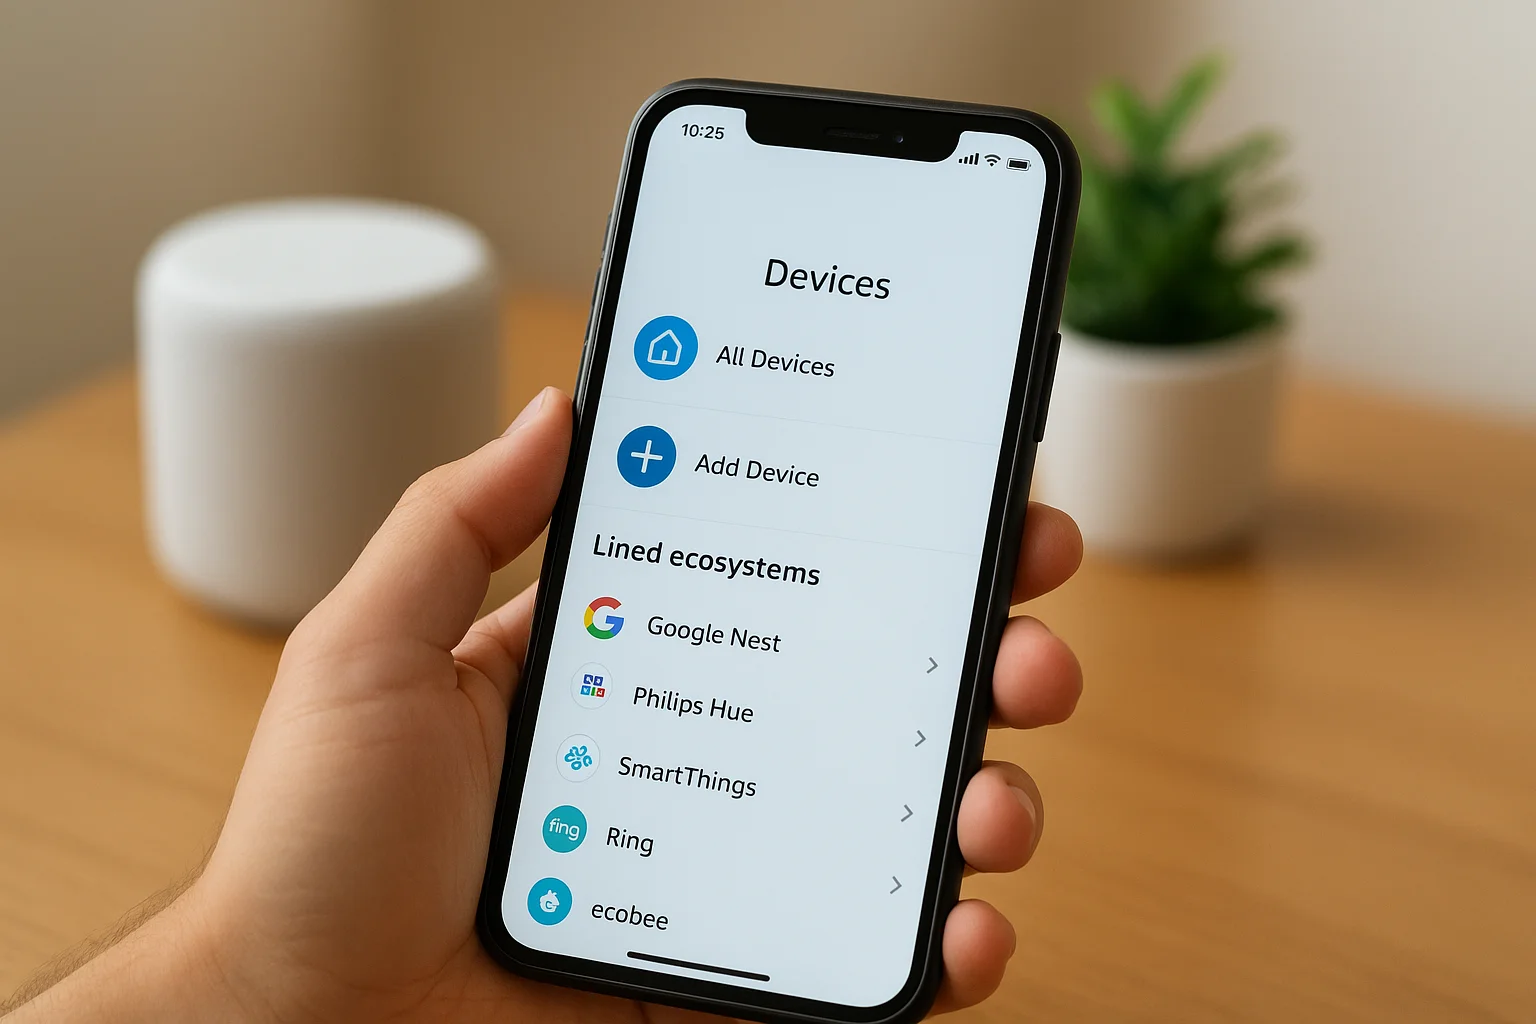
To link an ecosystem account, open the Alexa app, tap "Devices," tap "+" then "Add Device," and scroll to your brand's name. Alexa redirects you to that brand's login page, where you authorize the connection. Once you confirm, Alexa runs a device discovery and pulls in every compatible device tied to your account automatically.
Here are the most commonly linked ecosystems and what each one brings into Alexa:
| Ecosystem | Device types | Connection method |
|---|---|---|
| Ring | Doorbells, cameras, alarms | Account linking |
| Philips Hue | Bulbs, light strips, scenes | Account linking |
| ecobee | Thermostats, sensors | Account linking |
| SmartThings | Multi-device hub support | Account linking |
| TP-Link Kasa | Plugs, switches, bulbs | Account linking |
Enable skills for devices without native support
Some brands don't appear in the "Add Device" brand list, which means they require an Alexa Skill to bridge the connection. Skills work like small extensions that expand what Alexa can control, and enabling one takes under two minutes from inside the app.
Search for a skill using your device's brand name rather than the product model, since most manufacturers publish one skill that covers their entire product line.
Tap the menu icon in the top left of the Alexa app, select "Skills and Games," and use the search bar to find your brand. Tap "Enable to Use" and follow the prompts to log into the associated brand account. Once enabled, say "Alexa, discover devices" or open Devices and tap the discovery option. Your newly connected devices appear in the app within seconds, ready to assign to the rooms you set up in Step 2.
Step 5. Create groups for simple voice control
Groups are one of the most underused features in any amazon alexa smart home setup, and they're also one of the most practical. While rooms let you assign devices to a physical space, groups let you bundle devices across multiple rooms and control them all with a single spoken command. The difference matters once your system grows, because saying "Alexa, turn off the house" is far more useful than cycling through six individual room commands every night before bed.
Understand the difference between rooms and groups
Rooms in the Alexa app are tied to a physical location and primarily control devices assigned to that space. Groups extend that concept by letting you gather any combination of devices or rooms under one shared name, regardless of where those devices actually sit in your home. You can include an Echo device inside a group too, which means triggering the group activates the linked speaker as well, useful for whole-home audio scenes or consistent announcements.
A group named "Good Night" can contain every light in your home, the front door lock, and a specific Echo device to confirm the action out loud.
Build a multi-room group for whole-home control
To create a group, open the Alexa app, tap "Devices," tap "+" in the top right corner, and choose "Add Group." Select "Multi-Room Music" if the group is purely for audio, or choose "Smart Home Group" to bundle lights, plugs, and other devices together. Name the group something you would say naturally in conversation, and then check off every device or existing room you want included.
Here are practical group combinations that work well for most homes:
| Group name | What to include | Voice command use |
|---|---|---|
| All Lights | Every bulb in the home | "Alexa, turn off all lights" |
| Good Night | All lights + front door lock | "Alexa, good night" |
| Morning | Kitchen plug + living room lights | "Alexa, start my morning" |
| Away Mode | All lights + exterior plugs | "Alexa, away mode" |
After creating each group, test it immediately with a spoken command before moving on. Confirm that every device in the group responds at the same time, since a device that stays dark or unresponsive usually means it lost its room or group assignment during setup and needs to be re-added manually through the app.
Step 6. Build routines that automate your day
Routines are where your amazon alexa smart home setup shifts from convenient to genuinely useful. Instead of triggering devices one at a time with individual voice commands, a routine fires multiple actions in sequence from a single trigger: a scheduled time, a spoken phrase, a sensor detecting motion, or even a sunrise. Open the Alexa app, tap "More" at the bottom right, then select "Routines" and tap "+" to create your first one. You'll name the routine, choose a trigger, and then stack as many actions as you need.
Pick a trigger and build a time-based routine
Time-based triggers are the most reliable starting point because they run without any action on your part. You set a specific time, choose which days it applies, and the routine fires automatically every cycle. A morning routine set for 6:30 AM might turn on your kitchen lights at 40%, start your coffee maker plug, and have Alexa read the weather out loud before you've left the bedroom.

Build your first routine around a fixed daily event like waking up or going to bed, since those moments involve the most repetitive device actions and give you immediate, noticeable value.
Here is a ready-to-use morning routine template you can replicate directly in the Alexa app:
| Setting | Value |
|---|---|
| Trigger | Schedule: 6:30 AM, weekdays |
| Action 1 | Kitchen light ON at 50% |
| Action 2 | Coffee Maker plug ON |
| Action 3 | Alexa announces: "Good morning. Here's your weather." |
| Action 4 | Living room light ON at 30% |
Use voice phrases and sensors as triggers
Voice phrase triggers let you compress a multi-step command into one short sentence. Set the trigger phrase to "Alexa, good night," then add actions that turn off every light, lock the front door, and lower the thermostat to your sleep temperature. The routine handles all of it the moment you speak the phrase.
Motion and door sensors unlock a more proactive setup. When a compatible sensor detects activity in a specific room, the routine can switch on the light automatically without you saying a word. Assign the sensor to the correct room first, then select it as a "Smart Home" trigger when building the routine in the app. Test each sensor-based routine by walking through the trigger zone and confirming every assigned action fires within two seconds of detection.
Step 7. Set up smart home security and privacy
Security in an amazon alexa smart home setup is not a step you add after everything else is running; it's something you configure before your cameras, locks, and sensors go live. Alexa connects to your home network, your Amazon account, and potentially your front door, which means a poorly secured setup creates real vulnerabilities that extend well beyond someone hearing your music queue.
Review your Alexa privacy settings
The Alexa app gives you direct control over what data Amazon retains from your interactions, and most people never open this section after the initial setup. Open the Alexa app, tap "More," select "Settings," then choose "Alexa Privacy." From here you can review your voice history, delete saved recordings individually or in bulk, and toggle whether Amazon uses your recordings to improve its voice recognition model.
Disable the "Use of Voice Recordings" option under Alexa Privacy if you are uncomfortable with Amazon retaining audio samples from your home.
Turn on the Communications filter to prevent unrecognized voices from making purchases or accessing personal calendar data through your Echo. Set a voice purchasing PIN under Settings > Account > Voice Purchasing so that any purchase command requires a spoken code before Amazon processes it. For households with children, enable the Alexa Kids skill filter to restrict explicit content and limit what skills younger users can activate on their own.
Secure your devices and network
Your smart home is only as secure as the Wi-Fi network it runs on, so start by logging into your router and confirming that your network password is at least 12 characters and unique to your home setup. Change the default router admin credentials if you have not done so, since most router manufacturers ship devices with publicly known default usernames and passwords that take seconds to look up.
Assign smart locks, cameras, and sensors to a dedicated IoT network segment if your router supports it, since separating these devices from your main computers and phones limits the damage if a single device gets compromised. For each connected security camera, change the default device password inside the manufacturer's app immediately after pairing, since factory passwords are the most common entry point for unauthorized access. Run a quick audit of your linked skills every few months and remove any you no longer use, since inactive skills still hold account access permissions until you revoke them manually.
Step 8. Fix common discovery and control issues
Device discovery failures and unresponsive controls are the two most common friction points in an amazon alexa smart home setup, and both have clear, repeatable fixes. Before you dive into troubleshooting, run a manual discovery scan by opening the Alexa app, tapping Devices, then tapping the search icon in the top right corner. Alexa actively scans your network for compatible devices for roughly 45 seconds, and a fresh scan resolves the majority of "device not found" situations without requiring anything else.
When Alexa can't find your devices
Discovery failures almost always trace back to one of three sources: the device is on the wrong Wi-Fi band, the companion app is not fully configured, or the skill linking your device to Alexa needs to be re-authorized. Work through this checklist in order before trying anything more involved:
- Confirm the device is connected to your 2.4 GHz network, not 5 GHz
- Open the device's companion app and verify it shows the device as online before attempting Alexa discovery
- Check that the relevant Alexa skill is enabled under More > Skills and Games, and that the linked account credentials are current
- Power cycle the device by unplugging it for 30 seconds, then plug it back in and retry discovery
- Restart your Echo device by unplugging it for 10 seconds and running discovery again after it reconnects
If a device appears in its companion app but still won't surface in Alexa, disable and re-enable the linked skill entirely, since stale account tokens are a common cause of persistent discovery failure.
When voice commands stop working mid-routine
Devices that respond normally through the Alexa app but ignore spoken commands usually have a naming conflict or an incorrect room assignment. Say the exact device name out loud and check whether Alexa repeats a different name back in its response, which signals a mismatch between what you said and what the app registered. Open the device settings inside the app and rename it to something short and phonetically distinct, avoiding names that rhyme with other devices in your setup.
Routines that stop firing mid-sequence typically involve a single device losing its network connection and breaking the chain of actions. Open the routine, tap each action, and verify that every linked device still shows as online. Remove and re-add any offline device to its room, then re-save the routine and test the full sequence from trigger to completion.
Step 9. Expand with Matter, Zigbee, and hubs
As your amazon alexa smart home setup grows past Wi-Fi bulbs and plugs, you'll encounter devices that use different wireless protocols to communicate. Matter, Zigbee, and Z-Wave each solve specific problems around device reliability, range, and compatibility, and knowing which one applies to your situation lets you expand confidently without buying hardware that won't work with your existing system.
What Matter adds to your setup
Matter is an open connectivity standard backed by Amazon, Apple, Google, and others, and it addresses one of the most persistent frustrations in smart home setups: devices locked to a single brand's ecosystem. A Matter-certified device pairs with Alexa, Apple HomeKit, and Google Home simultaneously, so you're not stuck if you change voice assistants or add a second platform down the road.
Any Echo device from the 4th generation onward supports Matter as a controller, meaning you don't need additional hardware to start using Matter-certified products today.
To add a Matter device, open the Alexa app, tap Devices, tap "+", and select "Add Device." Choose "Matter" from the category list. Alexa generates a commissioning window and walks you through scanning the device's QR code or entering its numeric setup code. The device appears in your app within seconds, ready to assign to a room.
Use Zigbee devices through your Echo's built-in hub
Zigbee is a low-power mesh protocol that many smart sensors, bulbs, and locks use instead of Wi-Fi. Because Zigbee devices communicate through each other to extend signal range, a well-placed cluster of Zigbee bulbs effectively strengthens your entire device network without requiring a router upgrade or additional cabling.
Several Echo models include a built-in Zigbee hub (see the table in Step 1), which means you can pair Zigbee devices directly through the Alexa app without purchasing a standalone hub. Put your Zigbee device in pairing mode according to its manual, then open the Alexa app and run a standard device discovery. Alexa detects Zigbee devices automatically through the built-in hub and adds them alongside your existing Wi-Fi devices.
For Z-Wave devices, which Alexa does not support natively, you need a third-party hub such as SmartThings to bridge the connection. Once the hub links to Alexa through account linking, as covered in Step 4, every Z-Wave device registered in that hub appears inside the Alexa app and behaves exactly like any other connected device in your setup.
Where to go from here
You now have a complete roadmap for building a reliable amazon alexa smart home setup from scratch, covering everything from the first Echo pairing to automating daily routines and expanding into Matter and Zigbee. The most important next step is simply starting with one room, testing it until it works exactly as expected, and then repeating that process outward. Most systems grow one device category at a time, and every skill you build in Step 3 pays off directly when you tackle the more complex configurations in Steps 8 and 9.
Some setups reach a point where the time and complexity involved make a professional installation the smarter choice, especially in larger homes or commercial spaces where dozens of devices need to work together reliably from day one. If you're in the Boise or Meridian area and want the work done right the first time, reach out to our local smart home installation team and we'll take it from there.