
Figuring out how to install a home theater system can feel overwhelming when you're staring at a pile of speakers, receivers, and cables with nothing but a vague idea of where everything should go. Th...
How To Install A Home Theater System: Step-By-Step Setup
Figuring out how to install a home theater system can feel overwhelming when you're staring at a pile of speakers, receivers, and cables with nothing but a vague idea of where everything should go. The good news: with the right plan and some patience, you can build a setup that rivals what you'd find in a commercial cinema, right in your own home.
The key is getting each step right from the start. Room selection, speaker placement, display mounting, calibration, skip or rush any of these, and you'll end up with a system that underperforms. Do them well, and every movie night becomes an experience your family and friends actually look forward to.
At Treasure Valley Solutions, we've been designing and installing custom home theaters across the Boise and Meridian area since 2014. We've learned what works, what doesn't, and where most DIY setups fall short. This guide walks you through the full installation process step by step, drawing on that hands-on experience so you can make informed decisions, whether you tackle the project yourself or bring in a professional.
What you need before you start
Before you touch a single cable, spend 30 minutes getting organized. Jumping into the installation without a complete equipment list and a prepared room leads to delays, extra trips to the hardware store, and mistakes that take real time to fix. Treat this prep stage as part of the project itself. Skipping it is one of the main reasons DIY home theater setups end up looking and sounding worse than they should.
The core equipment list
The hardware you select defines how the system performs, so confirm your full equipment list before you buy anything. A standard home theater runs on a 5.1 configuration: a display, an AV receiver, front left and right speakers, a center channel speaker, two surround speakers, and a subwoofer. You can scale up to 7.1 or add overhead channels for object-based audio formats like Dolby Atmos if your room dimensions and budget support it.
Here's a quick breakdown of what each component does:
| Component | Purpose |
|---|---|
| AV Receiver | Processes and routes audio and video signals to all outputs |
| Front L/R Speakers | Carry the main stereo channels and sound effects |
| Center Channel Speaker | Anchors dialogue and center-panned audio |
| Surround Speakers (x2) | Build the surround sound field beside and behind you |
| Subwoofer | Reproduces low-frequency bass and physical impact |
| Display (TV or Projector + Screen) | Outputs your video signal |
| Source Devices | Blu-ray player, streaming stick, gaming console |
| HDMI Cables | Transfer audio and video between devices |
A receiver and speaker mismatch is one of the most common reasons a home theater underperforms from day one. Confirm that your receiver's power output aligns with your speakers' rated impedance and sensitivity before you purchase either component.
Tools and materials
You don't need a contractor's full toolkit, but having the right basic tools makes the difference between a clean, professional-looking install and one you'll want to redo. Gather these before the work begins:
- Stud finder
- Drill with bits (including a long flexible bit for in-wall cable runs)
- Level
- Measuring tape
- Fish tape or cable rods for routing cables through walls
- Wire stripper and crimper
- Velcro cable ties and cable management clips
- Electrical tape
- Wall anchors and appropriate mounting hardware for any drywall surfaces
Label your cables as you run them using masking tape and a marker. This one habit saves significant troubleshooting time when you're diagnosing a connection issue weeks or months after the install.
Room and electrical requirements
Your room needs to be ready before any installation begins. Check that you have enough electrical outlets near your equipment rack or display wall, because a receiver, display, and multiple source devices draw serious power. Running everything through a single overloaded strip creates both a fire hazard and a performance problem.
Measure your room's full dimensions and note the ceiling height, window locations, and door placements. These factors directly shape where your display mounts, where your speakers land, and whether acoustic treatment will help manage reflections. A room around 12 by 16 feet with an 8-foot ceiling works well for most setups. Understanding how to install a home theater system well means adapting your plan to the actual room you have, not forcing a generic layout onto a space it doesn't fit.
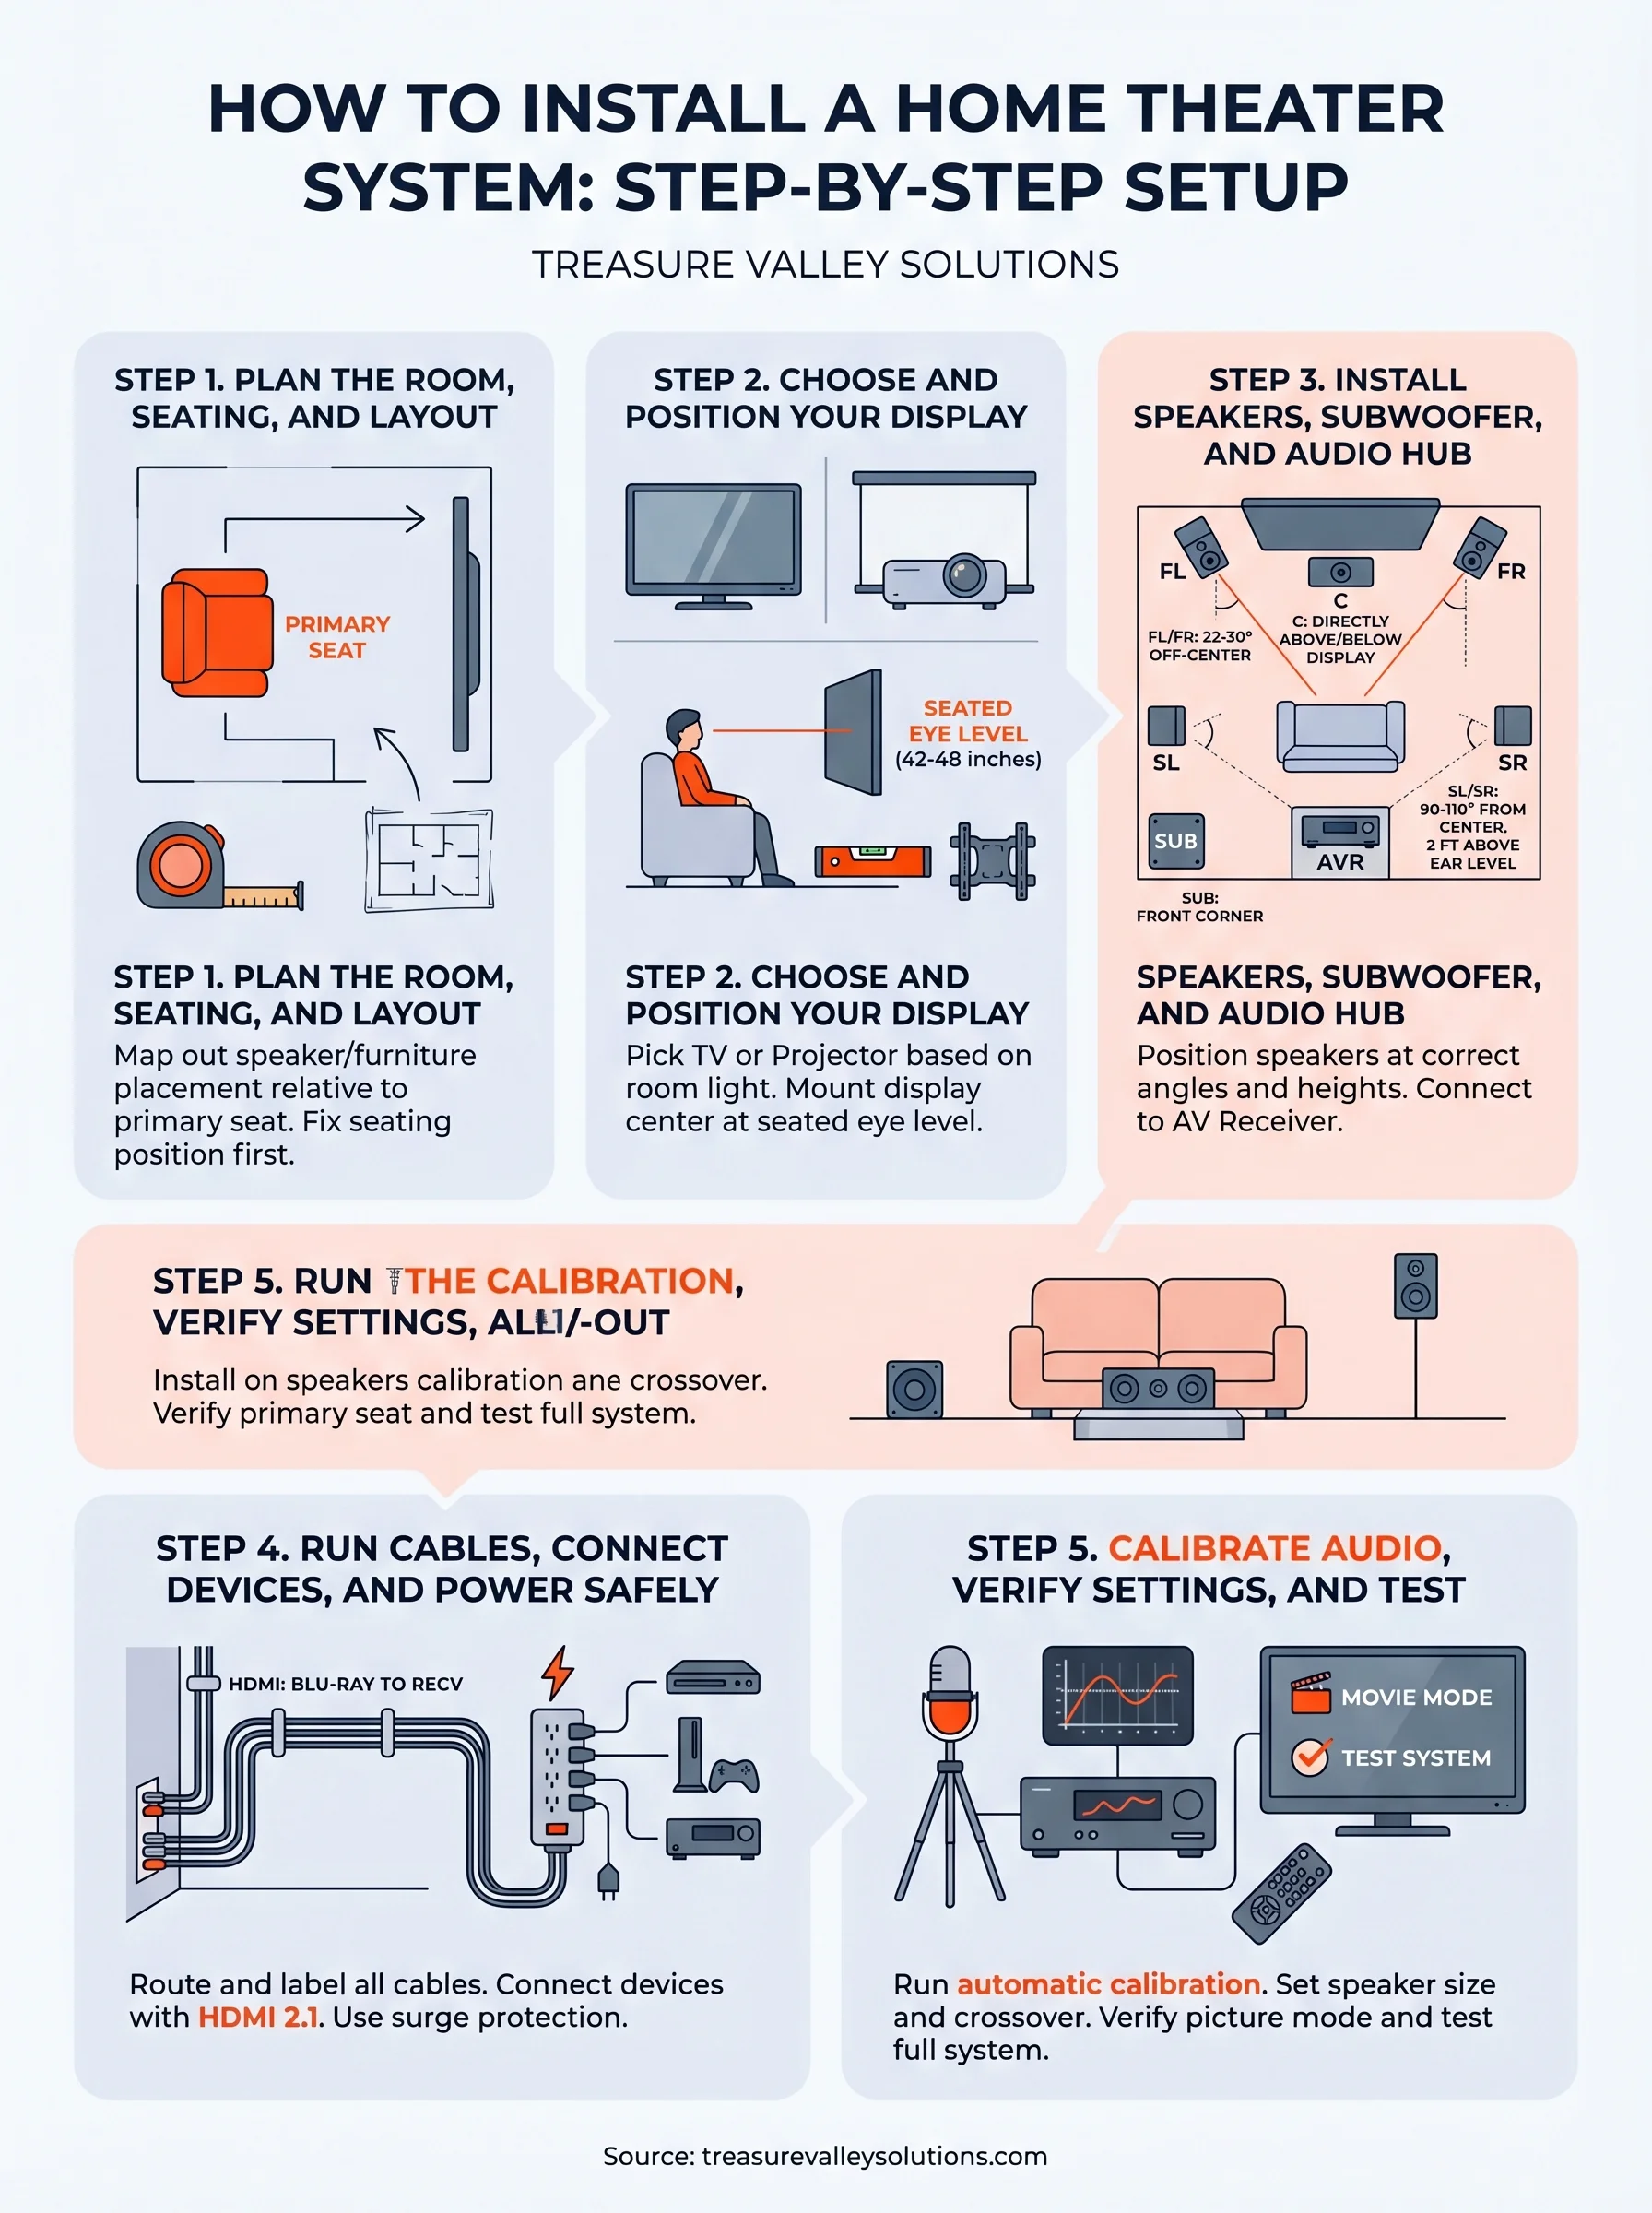
Step 1. Plan the room, seating, and layout
Planning the layout is the foundation of how to install a home theater system that actually performs well. Your seating position and room dimensions determine every other decision you make, from where the display mounts to where each speaker lands. Start by drawing a simple floor plan on paper with accurate measurements of length, width, ceiling height, windows, and doors.
Find your primary seating position
Your primary seat is the single most important reference point in the entire room. Everything else gets positioned around it. For a standard display, place your main seating at a distance of 1.5 to 2.5 times the screen's diagonal measurement. For a 75-inch TV, that puts you roughly 9 to 15 feet back. For a 120-inch projector screen, aim for 12 to 18 feet.
Place a chair or tape mark on the floor at your target seating distance before mounting anything. Adjust until the viewing angle and distance feel natural, then lock that position in as your reference point.
Use this quick reference for seating distance by screen size:
| Screen Size | Recommended Seating Distance |
|---|---|
| 65 inches | 8 to 13 feet |
| 75 inches | 9 to 15 feet |
| 85 inches | 11 to 18 feet |
| 120 inches (projector) | 12 to 18 feet |
Map out speaker and furniture placement
Once you fix your seating position, map where each speaker will sit relative to that spot. Your front left, center, and right speakers form a line across the front wall at ear level when seated. Surround speakers go to the sides or slightly behind the listening position, mounted at roughly 2 feet above seated ear height. Mark each location on your floor plan before moving any furniture or drilling any holes.
Keep your equipment rack or AV console close enough to the display that cable runs stay manageable, but position it so it does not block sightlines or create a visual distraction. Finalizing this layout on paper first saves you from unnecessary re-drilling and repositioning once the installation is underway.
Step 2. Choose and position your display
Your display choice shapes the entire feel of the room. TV panels and projector-and-screen combinations each have real advantages, and the right pick depends on your room's ambient light, available wall space, and how you plan to use the space day to day. Lock in your display type and exact mounting position before you buy mounts or run any cables.
TV vs. Projector: Pick the Right Display Type
TVs perform well in rooms with moderate to high ambient light, since their panels hold up against incoming light sources. Projectors produce a larger image at a lower cost per inch of screen, but they work best in rooms you can fully darken. As a practical benchmark, a 75-inch 4K TV typically runs between $800 and $2,000, while a projector-and-screen combination at 120 inches can start around $1,200 but requires a controlled lighting environment to deliver its best picture.
Use this comparison to guide your decision:
| Factor | TV | Projector + Screen |
|---|---|---|
| Room lighting | Any | Dark or controlled |
| Image size | Up to 100 inches (most models) | 100 to 150+ inches |
| Installation complexity | Low to moderate | Moderate to high |
| Typical cost range | $600 to $3,000+ | $800 to $4,000+ |
If your display wall has windows, a TV panel will deliver a more consistent picture than a projector across different times of day.
Mount Height and Viewing Angle
Mounting height is one of the most commonly mishandled steps when working through how to install a home theater system. The center of your display should land at seated eye level, which falls between 42 and 48 inches from the floor depending on your chair style and seating height. Placing the screen too high forces your neck upward for every session, which becomes uncomfortable quickly.
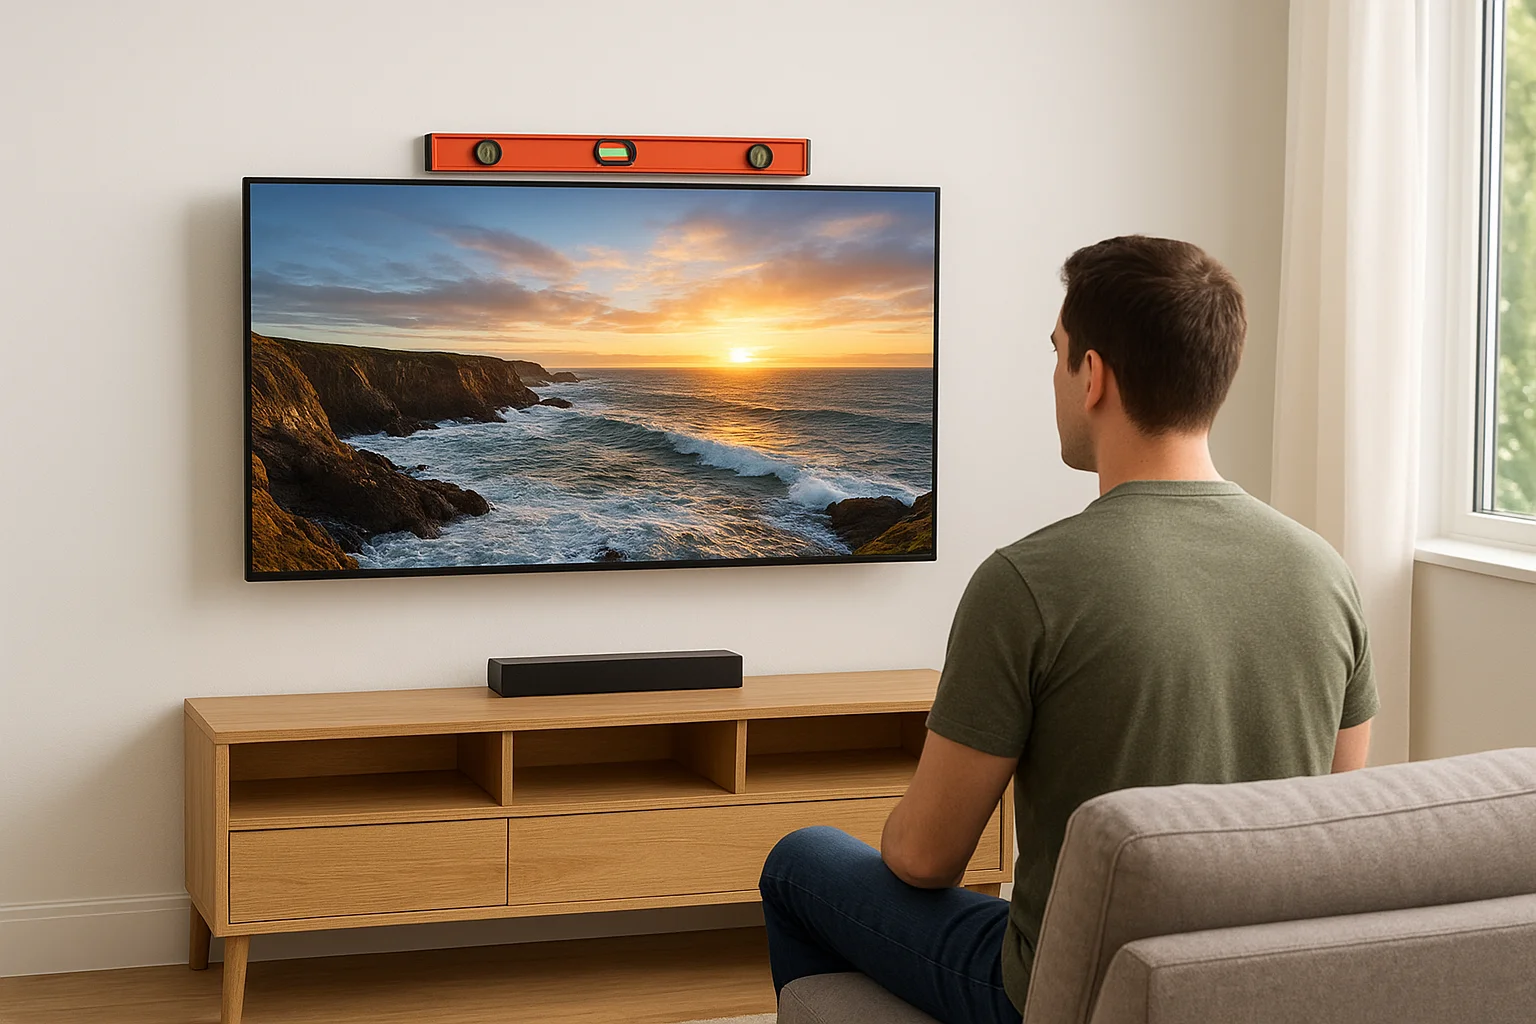
Position the display directly in front of your primary seating reference point from Step 1, centered horizontally on the wall. Use a level throughout the mounting process and confirm the mount's tilt angle puts the screen face perpendicular to your sightline before tightening the final bolts. A small correction here prevents hours of rework after cables are run and devices are connected.
Step 3. Install speakers, subwoofer, and audio hub
Speaker placement determines how much of your equipment's full potential you actually hear. Poor positioning wastes money on good hardware, while accurate placement makes even a mid-range system sound significantly better than its price suggests. This step is where understanding how to install a home theater system moves from visual setup to practical audio engineering, and getting the angles and heights right before running a single cable saves you from chasing sound problems later.
Position and Mount Your Speakers
Your front left, center, and right speakers form a horizontal arc across the front wall, each angled inward toward your primary seating position. The center channel mounts directly below or above the display, centered on the screen. Front left and right speakers sit at roughly 22 to 30 degrees off-center from your listening seat. All three should fire at ear level when seated, which typically puts them between 36 and 48 inches off the floor.
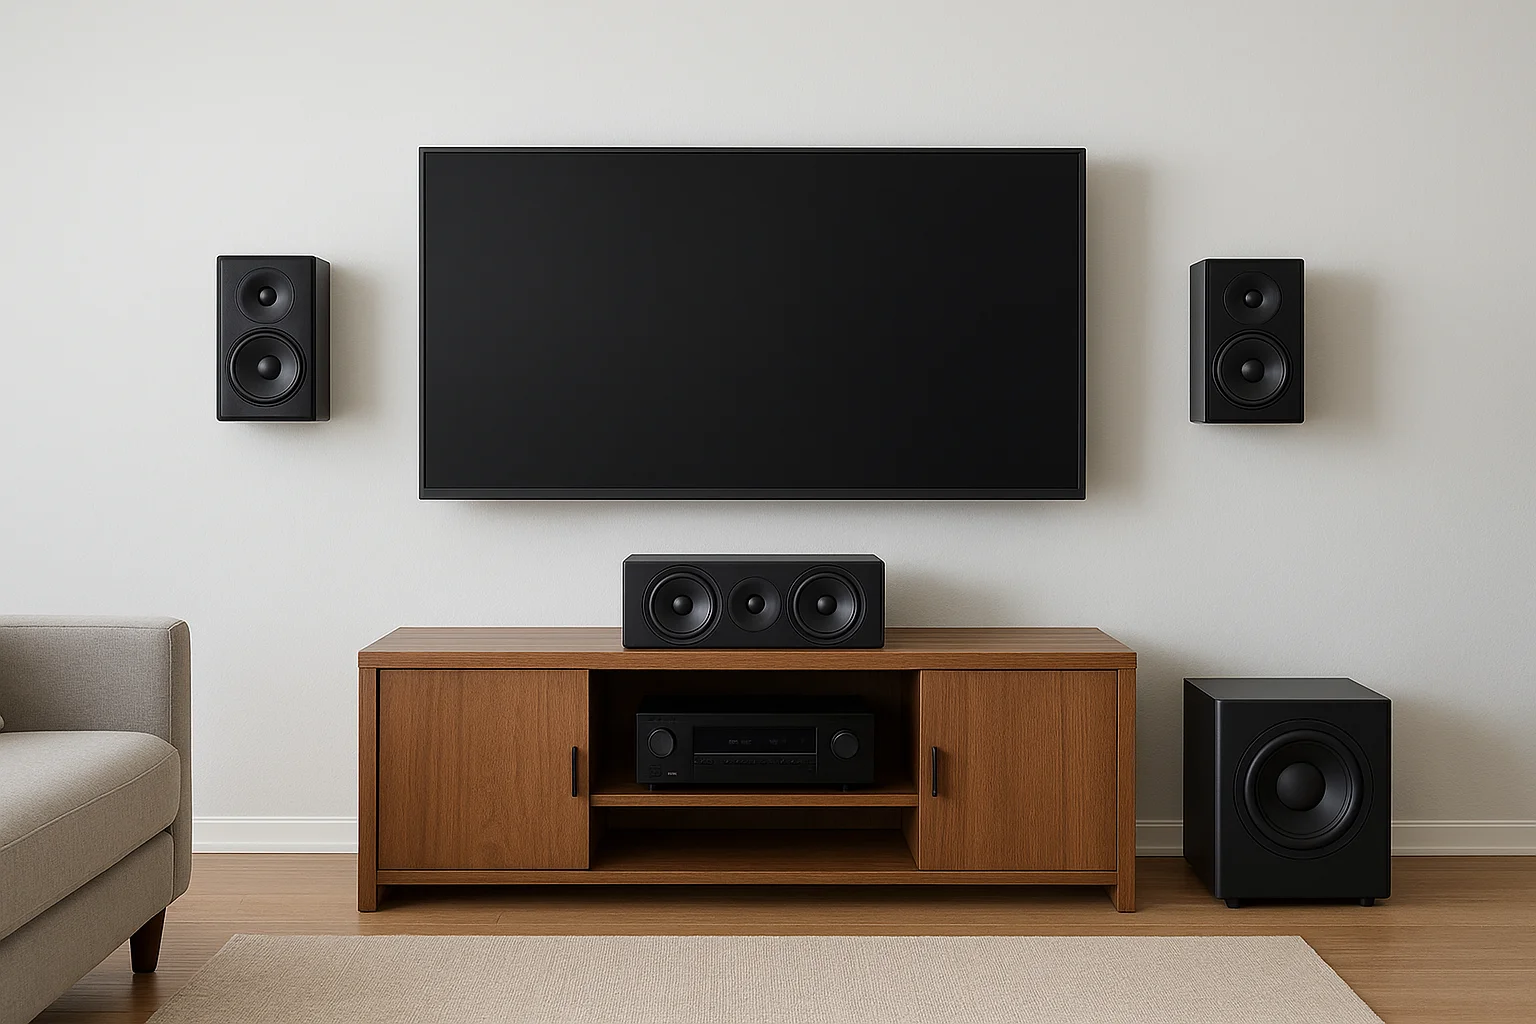
Surround speakers mount to the side walls at your seating position or just behind it, elevated to about 2 feet above seated ear height. Use the following placement reference before drilling any holes:
| Speaker | Position | Mounting Height |
|---|---|---|
| Front L/R | 22 to 30 degrees from center | Ear level (36 to 48 in) |
| Center Channel | Directly above or below display | Ear level |
| Surround L/R | 90 to 110 degrees from center | 2 ft above ear level |
| Subwoofer | Front corner or near front wall | Floor level |
Place the Subwoofer and Connect the AV Receiver
Subwoofer placement is more flexible than most people expect, because bass frequencies are largely non-directional. Start by placing it in a front corner of the room, since corners naturally reinforce low-frequency output. If the bass sounds boomy or uneven from your seating position, shift it along the front wall in small increments and listen again until the output balances out across your seat.
Your AV receiver acts as the central hub for every audio and video signal in the room, so give it adequate physical space. Rack or shelf-mount it in a ventilated location with at least 4 inches of clearance above the unit to prevent overheating. Connect your speaker wire runs to the receiver's labeled binding post terminals, matching polarity (positive to positive, negative to negative) on every channel without exception. Reversed polarity on even a single speaker collapses the stereo image and muddies dialogue in ways that are hard to diagnose after the fact.
Confirm each speaker is fully secured to its mount and that no wire connections are loose before you power the receiver on for the first time.
Step 4. Run cables, connect devices, and power safely
Cable management is the step that separates a clean, professional installation from a tangled mess you'll regret every time you need to troubleshoot. Organized cable runs protect your hardware, keep the room looking intentional, and make future upgrades significantly easier. Before connecting anything, plan the full path each cable will travel from source to destination.
Route and label your cable runs
Running cables inside the walls produces the cleanest result and removes tripping hazards, but it requires a long flexible drill bit, fish tape, and low-voltage wall plates at each opening. If in-wall routing is not an option in your space, surface cable raceways mounted along baseboards are a practical alternative that still looks deliberate. Either way, never run speaker wire or HDMI cables alongside high-voltage AC power lines inside the wall, because the interference will degrade your audio signal quality noticeably.
Use this labeling system before you seal anything up:
| Cable Type | Label Format | Example |
|---|---|---|
| HDMI | Source to destination | BLU-RAY to RECV |
| Speaker wire | Channel name | FR-L (Front Right Left) |
| Power cables | Device name | RECV-PWR |
| Subwoofer cable | Sub + location | SUB-CORNER |
Label both ends of every cable with masking tape and a marker before you run it through any wall or conduit. Finding an unlabeled cable behind a wall plate six months later costs you real time.
Connect devices to the receiver
HDMI 2.1 cables handle 4K at 120Hz and pass through object-based audio formats like Dolby Atmos without signal loss, so use them for every source-to-receiver and receiver-to-display connection in your setup. Plug your Blu-ray player, streaming device, and gaming console into the labeled HDMI inputs on your receiver, then run a single HDMI ARC or eARC cable from the receiver's monitor output to your display.
Connect each source device before powering anything on, and verify that your HDMI cable specifications match what your receiver and display both support. Mismatched cable specs are a common reason why full-resolution audio and video formats fail to pass through even after you've followed every other step correctly in how to install a home theater system.
Protect your system with proper power management
Every component in your system needs surge protection, not just a standard power strip. A quality surge protector with a joule rating above 2,000 will absorb voltage spikes that would otherwise damage your receiver, display, and source devices. Connect your receiver and display to a power conditioner if your budget allows, since clean power reduces noise in the audio signal and extends component lifespan.
Step 5. Calibrate audio, verify settings, and test
Calibration is the step most people skip, and it's the reason their system sounds worse than it should even after a careful installation. Your receiver's automatic calibration tool uses a test microphone to measure speaker distances, volume levels, and frequency response from your seating position, then applies corrections that no manual adjustment can reliably replicate. Run this process before you sit down for any actual content.
Run Automatic Speaker Calibration
Most modern AV receivers include a built-in calibration system. Audyssey MultEQ, Yamaha YPAO, and Denon's Dirac Live are the most common, and each one ships with a measurement microphone you plug directly into the receiver's front panel. Place the microphone at seated ear height using a small tripod or a stack of books, then follow the on-screen prompts. The receiver plays test tones through each speaker, measures the return signal, and calculates optimal delay and level settings automatically.
After the automated process finishes, verify the speaker size assignments manually in your receiver's speaker configuration menu. Speakers with woofers smaller than 6 inches should be set to "Small" so the receiver redirects bass content to the subwoofer rather than asking a small driver to reproduce frequencies it cannot handle. The table below shows the most common assignments:
| Speaker | Typical Size Setting | Crossover Frequency |
|---|---|---|
| Front L/R (bookshelf) | Small | 80 Hz |
| Front L/R (tower) | Large | 40 to 60 Hz |
| Center Channel | Small | 80 Hz |
| Surround L/R | Small | 100 to 120 Hz |
| Subwoofer | N/A | Set on sub itself |
Set every small speaker's crossover to 80 Hz unless your specific speakers are rated for lower frequencies, since 80 Hz is the standard reference point used by most Dolby and DTS formats.
Verify Video Settings and Test the Full System
Your display's picture mode should be set to "Movie" or "Cinema" rather than "Vivid" or "Dynamic," which inflate brightness and color saturation beyond what the content actually contains. Reduce backlight to a comfortable level for your room's lighting conditions, and confirm HDR is active if your display and source both support it.
Play a familiar Blu-ray or streaming title with strong audio mixing, something with clear dialogue, distinct surround activity, and deep bass, to confirm every channel fires correctly. Walk through how to install a home theater system mentally against what you hear: dialogue from center, effects from the fronts, ambience from the surrounds, and clean low-end impact from the subwoofer. Fix any channel that sounds absent or out of balance in your receiver's manual level controls before you call the installation complete.
Wrap-up and next steps
You now have a complete roadmap for how to install a home theater system from an empty room to a fully calibrated setup. Each step builds on the last: solid planning protects your speaker placement, accurate mounting protects your calibration, and careful calibration protects your investment in the hardware itself. Skip any stage and the whole system underperforms.
Most homeowners find that the planning and cable management stages take the most time, but they also deliver the biggest payoff in long-term reliability and sound quality. If any part of this process feels beyond your current tools or comfort level, that is a practical reason to bring in a professional rather than push through and create problems that are harder to fix after the fact.
Treasure Valley Solutions installs custom home theaters across the Boise and Meridian area. Take a look at our completed home theater projects to see what a professional installation actually looks like before you make your next move.