
A dedicated room for a golf simulator for home theater use sounds like a dream setup, until you realize how many details go into making both experiences actually work well together. Screen size, proje...
Golf Simulator For Home Theater: Design, AV, Layout Tips
A dedicated room for a golf simulator for home theater use sounds like a dream setup, until you realize how many details go into making both experiences actually work well together. Screen size, projector placement, speaker positioning, lighting control, and room dimensions all have to play nice with each other, or you end up with a space that's mediocre at both jobs instead of great at two.
The good news: with the right planning, a single room can deliver an immersive cinematic experience one evening and a round at Pebble Beach the next morning. It comes down to smart design choices and AV equipment that pulls double duty without compromise. At Treasure Valley Solutions, we design and install custom home theater and AV systems across the Boise and Meridian area, and we've seen firsthand how these hybrid rooms come together when the technical details are handled correctly.
This guide breaks down the layout considerations, AV gear, screen options, acoustic treatment, and lighting setup you need to build a room that genuinely works as both a golf simulator and a home theater, no sacrifices required. Whether you're converting a basement, a spare bedroom, or a garage bay, you'll walk away with a clear plan to get started.
What a hybrid sim theater needs to work
A hybrid room has to satisfy two sets of demands at the same time, and those demands often pull in opposite directions. Golf simulation needs a large, flat, impact-resistant screen, bright projector output, and enough swing clearance around the hitting area. A home theater needs accurate color reproduction, deep blacks, surround sound, and comfortable seating. Getting both right in the same space means understanding exactly where these requirements overlap and where they conflict.
The four systems that define the room
Every successful golf simulator for home theater setup relies on four interconnected systems working together. Getting any one of them wrong affects the others.
| System | Golf Sim Need | Home Theater Need |
|---|---|---|
| Projection | High brightness (4,000+ lumens) | High contrast ratio |
| Screen | Impact-rated, flat surface | Wide gain, accurate color |
| Audio | Ambient sound, course effects | Surround sound immersion |
| Lighting | Dimmable, no glare on screen | Full blackout capability |
The projector is usually the hardest compromise to get right, because brightness and contrast ratio tend to trade off against each other in the same price range.
Why room dimensions drive every other decision
Your room's physical dimensions set hard limits on what's possible before you spend a dollar on equipment. Ceiling height, room width, and throw distance all affect which projector and screen combination will actually work. Most golf simulators need at least 10 feet of ceiling clearance and 15 to 18 feet of depth to give you a full swing plus enough distance to the screen. Those same dimensions also determine how far back your seating can go for proper viewing angles.
Knowing these constraints upfront prevents expensive mistakes later, like purchasing a short-throw projector that washes out completely on a 120-inch screen in a room that gets too much ambient light.
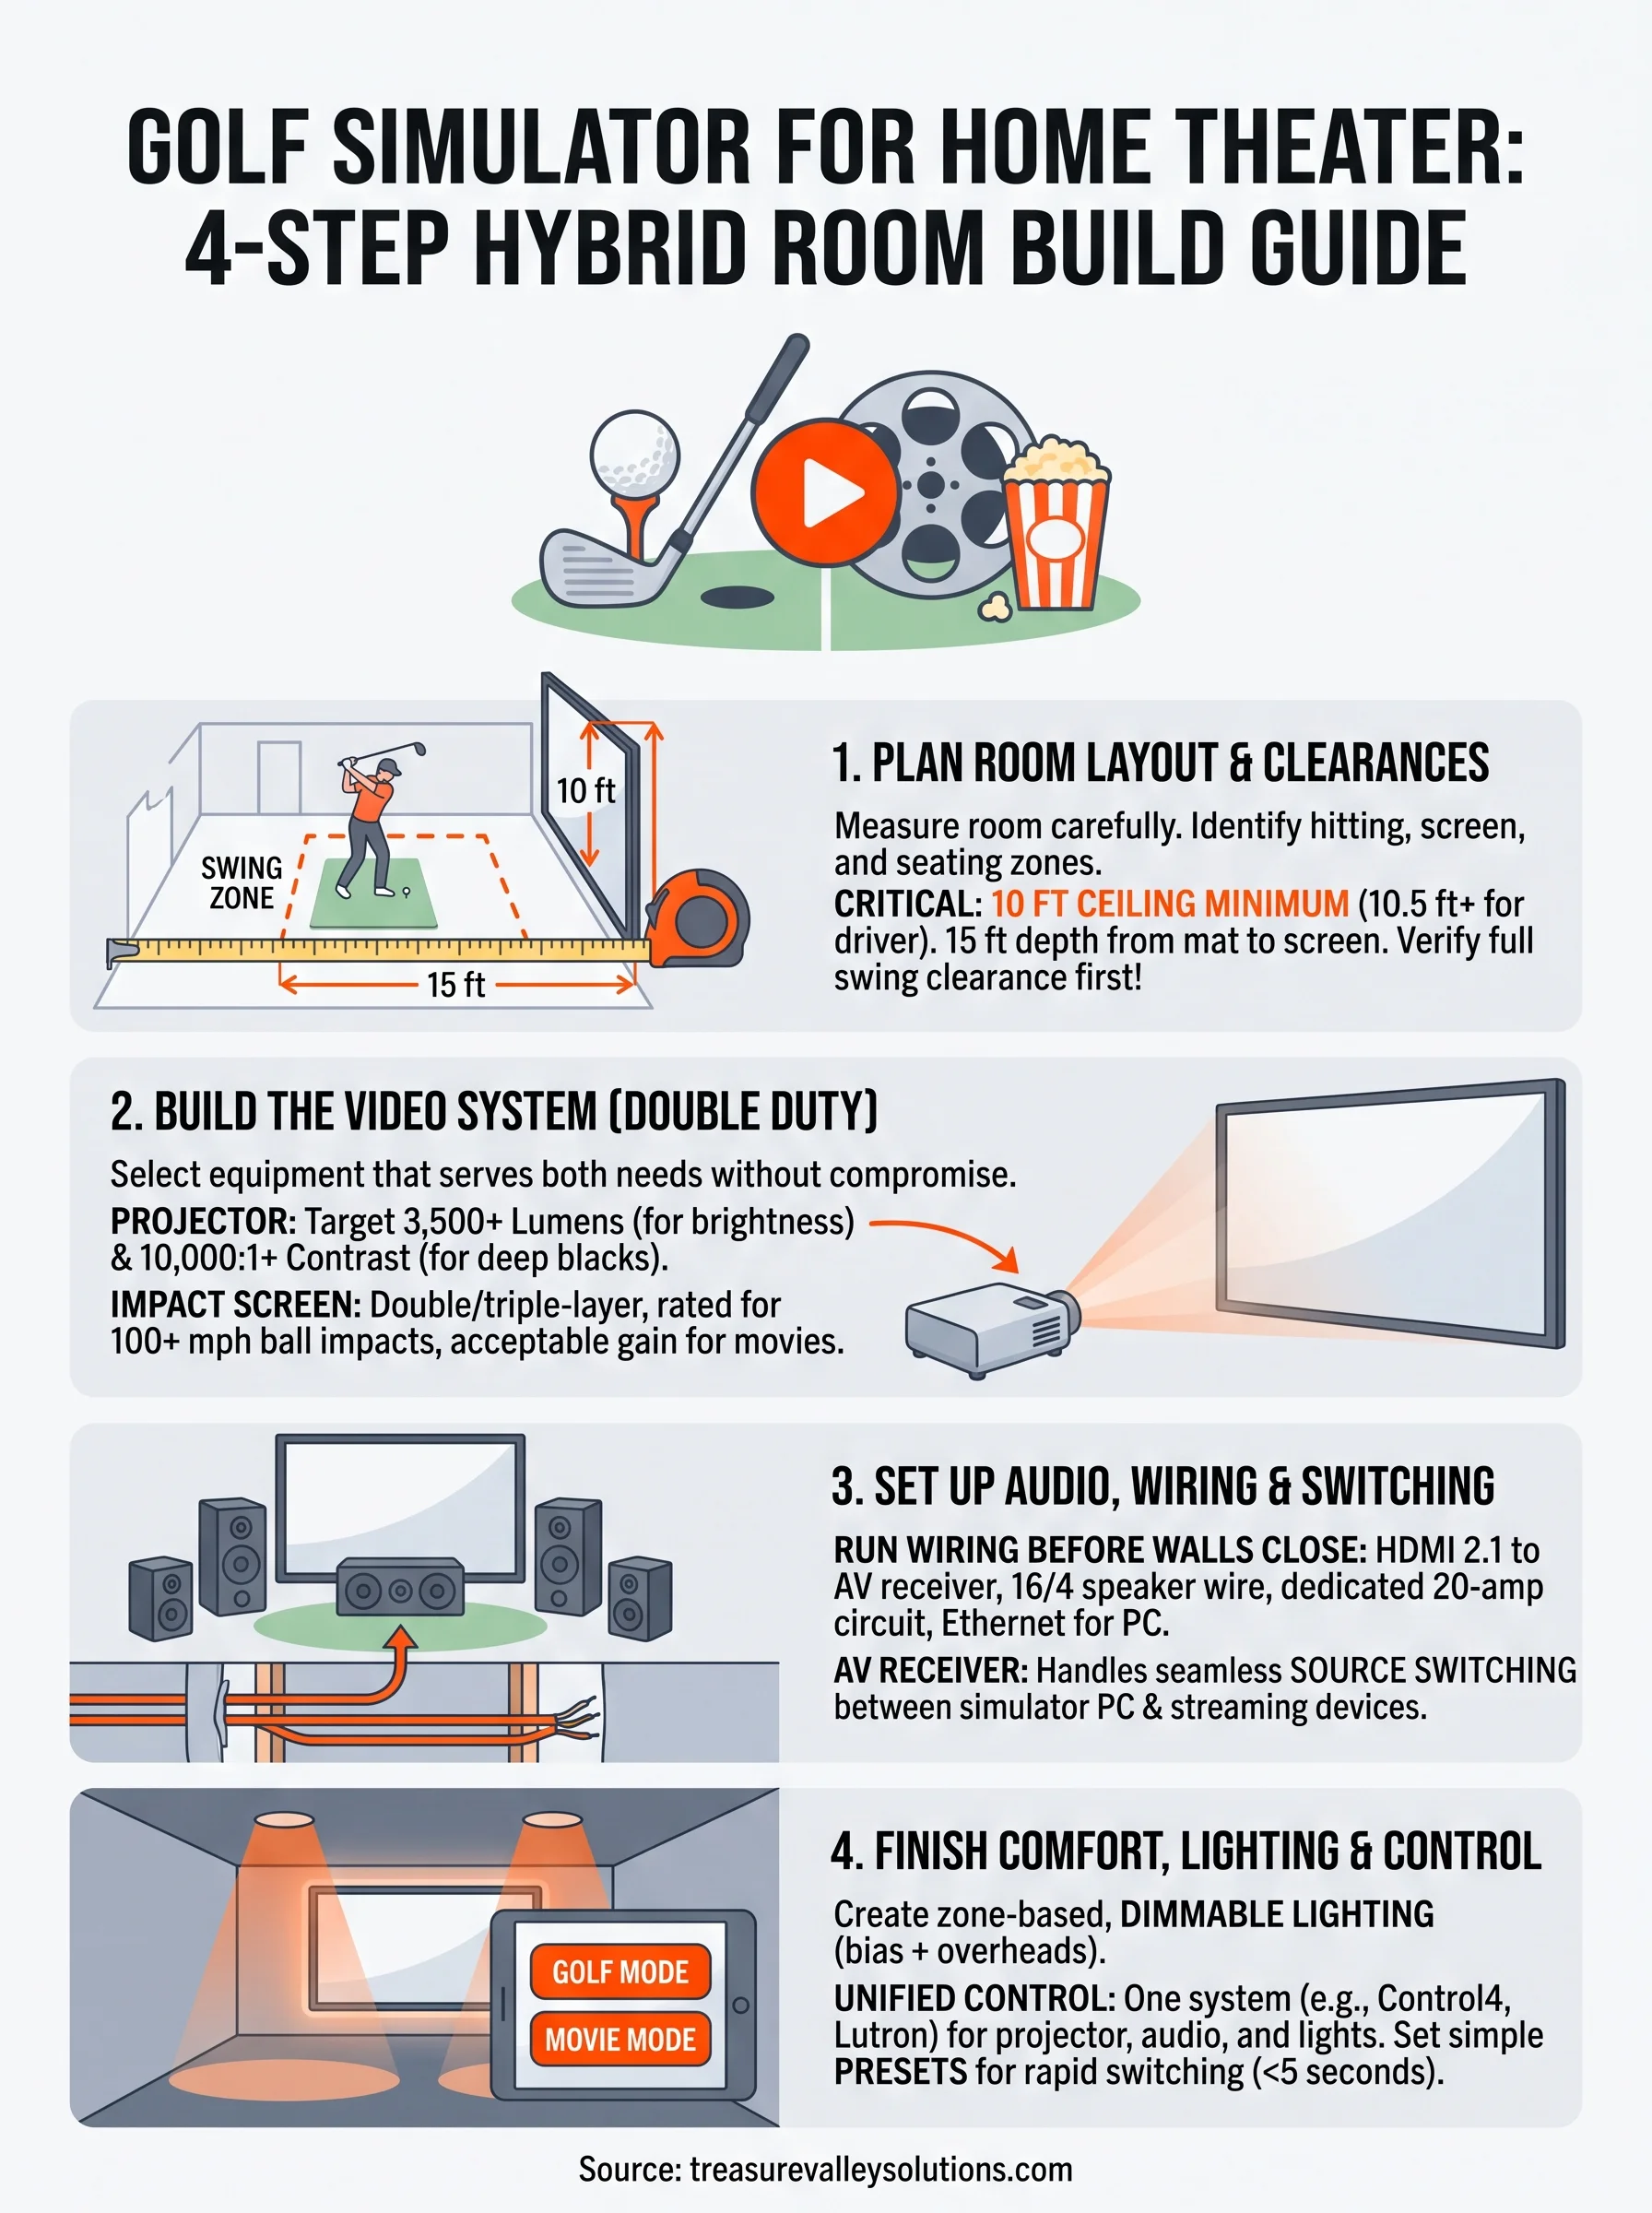
Step 1. Plan the room layout and clearances
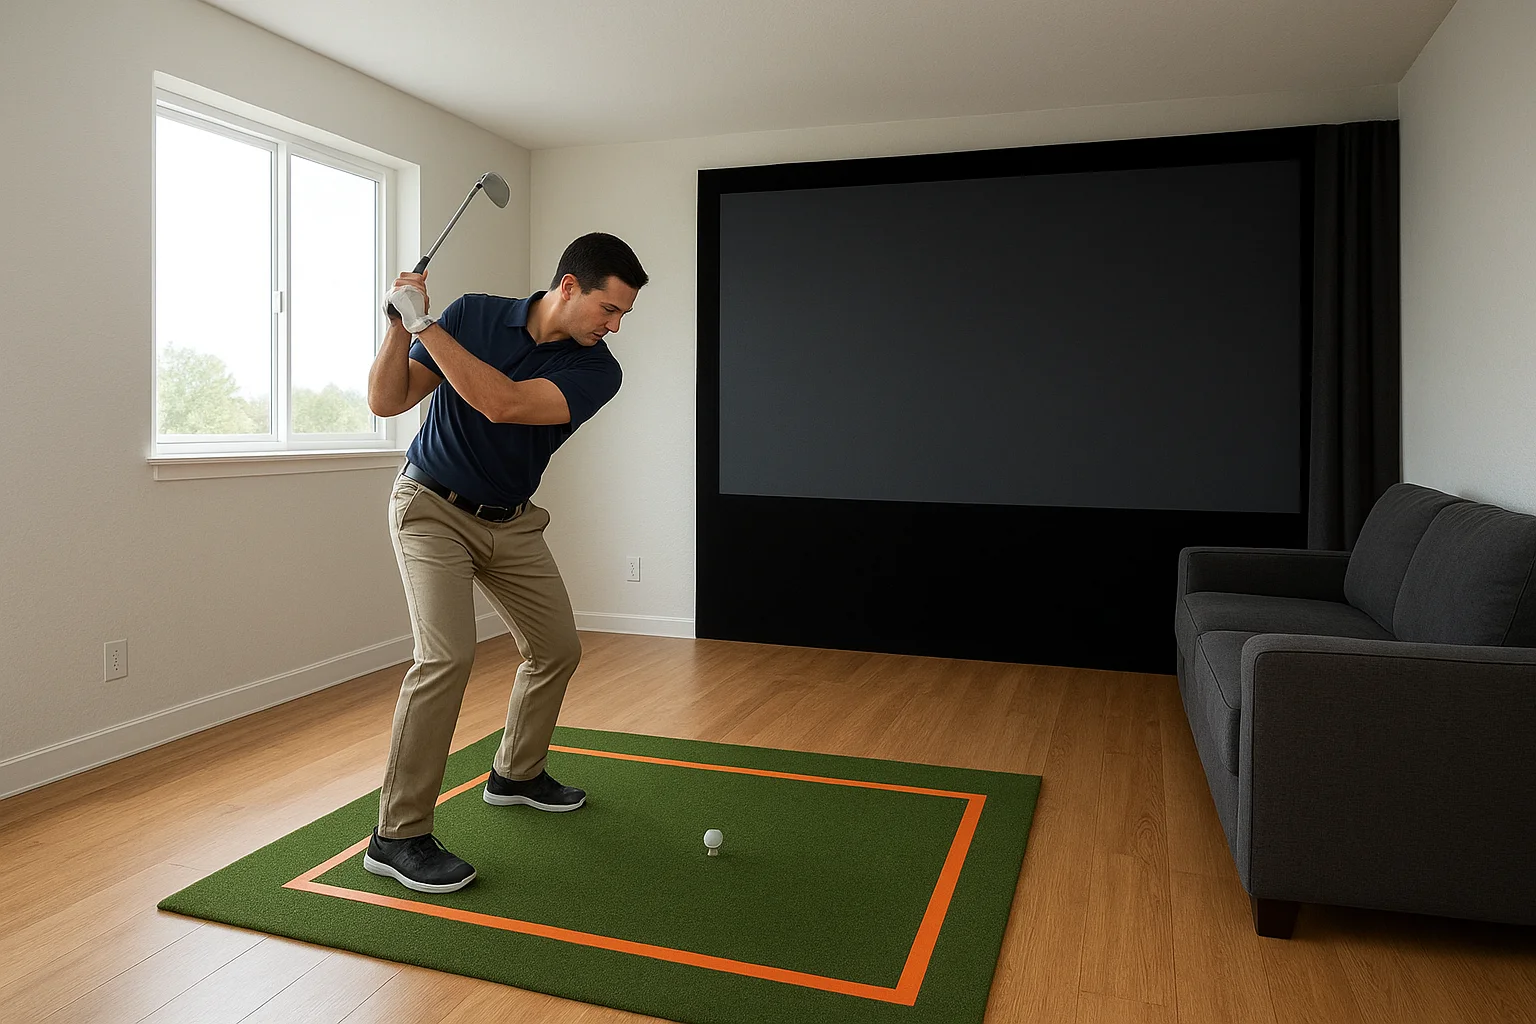
Before you buy a single piece of equipment, measure your room carefully and map out three distinct zones: the hitting area, the screen wall, and the seating area. These zones need to coexist without compromising the golf simulator for home theater experience on either side of the room.
Minimum dimensions you need
Your room needs to clear specific thresholds before anything else works. A 10-foot ceiling minimum is the standard baseline for most swing types, but taller players or those using a driver need closer to 10.5 feet. For room depth, plan on at least 15 feet from the hitting mat to the screen, with additional space behind the hitting position for seating.
Use these minimum clearances as your baseline:
- Ceiling height: 10 ft minimum, 10.5 ft for driver swings
- Room width: 15 ft minimum for full side clearance
- Screen-to-mat distance: 8 to 10 ft
- Seating depth: 8 to 12 ft behind the hitting position
Marking your swing zone
Once you have your dimensions confirmed, tape out the hitting area on the floor before any construction or purchases happen. Stand in position and take a slow-motion swing with your longest club to verify full clearance on both the backswing and follow-through, clear of walls, ceiling, and any planned speaker locations.
Marking the swing zone first prevents expensive surprises after screens and speakers are already installed.
Step 2. Build the video system for golf and movies
The projector and screen combination is the most critical piece of your golf simulator for home theater room. You need equipment that pulls double duty reliably, not two separate systems crammed into one space.
Choosing a projector that handles both jobs
Target a projector with at least 3,500 lumens of brightness and a contrast ratio of 10,000:1 or better. A 4K laser projector in the $2,000 to $4,000 range typically hits both targets without forcing you to choose one use over the other.
| Spec | Golf Sim Minimum | Home Theater Minimum |
|---|---|---|
| Brightness | 3,500 lumens | 2,000 lumens |
| Contrast ratio | 5,000:1 | 10,000:1 |
| Resolution | 1080p | 4K preferred |
Picking the right impact screen
Your screen needs to handle repeated ball impacts without tearing while still reflecting an accurate image for movies. Look for a double-layer or triple-layer impact screen rated for driver speeds above 100 mph.
A properly rated impact screen will outlast a standard projection screen by years in an active sim room.
These screens carry a relatively flat gain, which keeps color accuracy acceptable for cinema use without requiring a separate movie screen on the same wall.
Step 3. Set up audio, wiring, and source switching
Audio in a golf simulator for home theater room needs to handle two very different tasks: delivering surround sound for movies and playing realistic course audio during a sim session. A 5.1 surround setup covers both jobs well. Place your center channel above or below the screen, your front left and right speakers flanking the screen wall, and your surrounds on the side walls behind the seating position.
Run your wiring before the walls close
If your room is still under construction or being renovated, pull all your cables now before drywall goes up. Running wire through finished walls later costs significantly more time and money. Use this checklist as your wiring plan:
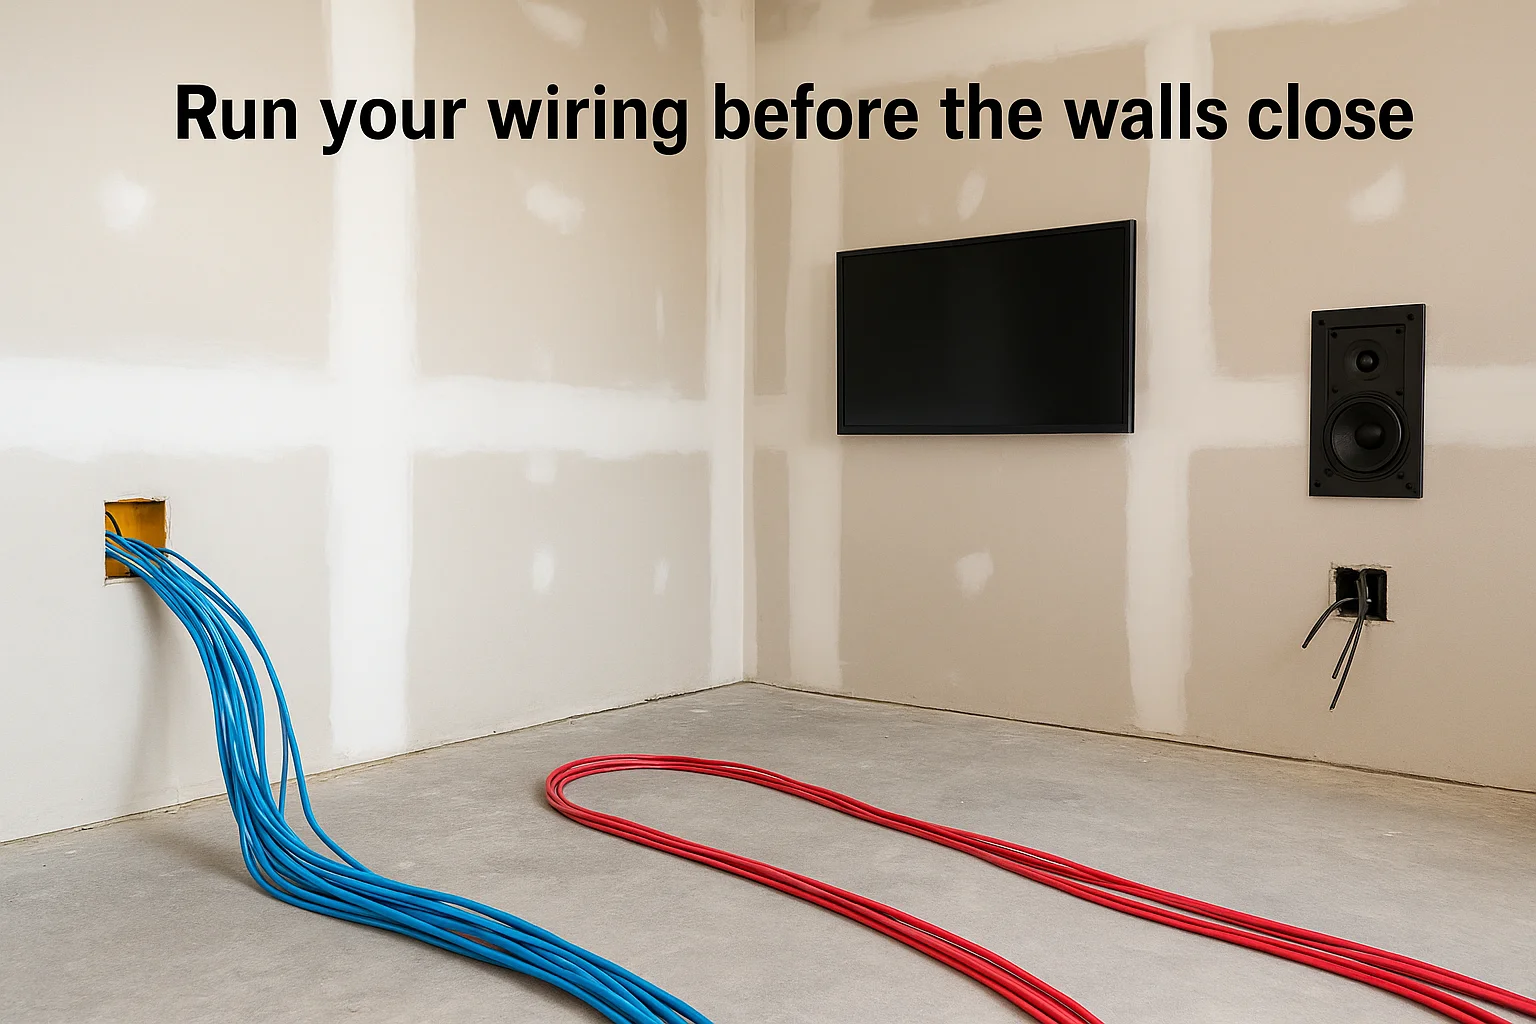
- HDMI 2.1 runs from the projector location to your AV receiver
- 16/4 speaker wire to each speaker position, including ceiling if you want Atmos
- Dedicated 20-amp circuit for the projector and receiver
- Ethernet to the simulator PC for software updates and streaming
Switch sources without friction
Your AV receiver handles source switching between your simulator PC, streaming device, and any gaming console. Choose a receiver with at least four HDMI 2.1 inputs so you never unplug anything. A single remote or app should let you switch between golf and movie mode in seconds.
Set up receiver presets for each mode so audio levels and EQ adjust automatically when you switch sources.
Step 4. Finish comfort, lighting, and easy control
The final layer of a great golf simulator for home theater room is the one most people leave until last and then rush: lighting, seating, and system control. Getting these details right means you can switch modes quickly and both experiences feel intentional rather than improvised.
Set up dimmable, zone-based lighting
Your room needs at least two lighting zones: one for the hitting area and one for the seating area. Use bias lighting behind the screen wall at roughly 6,500K to reduce eye strain during movies, and install dimmable overhead LEDs on a separate circuit so you can keep the hitting area bright during sim sessions without blowing out the screen.
A smart dimmer connected to your control system lets you trigger a "golf mode" or "movie mode" scene with a single tap.
Give yourself one control point
Tie your projector, receiver, lighting, and simulator PC into a single control system like Control4 or Lutron. Configure two simple presets using this template:
| Mode | Lights | Projector Input | Audio Preset |
|---|---|---|---|
| Golf | Overhead 80% | Simulator PC | Stereo/ambient |
| Movie | Bias only | Streaming device | Surround 5.1 |
This removes friction entirely so switching between activities takes less than five seconds.
Wrap-up and next steps
Building a golf simulator for home theater use in the same room is absolutely achievable when you work through the decisions in the right order: dimensions first, then projection, then audio, then control. Each step in this guide builds on the last, so skipping ahead creates problems you have to solve backward. Get your room measurements and swing clearances confirmed before you purchase anything, and the rest of the decisions become much easier to make.
If you want a system that works reliably from day one, the details matter: projector specs, cable routing, impact screen ratings, and source switching all have to line up. Rushing any one of those steps costs more to fix later than getting them right the first time. If you're planning a build in the Boise or Meridian area and want a professional design and installation behind it, see examples of our completed AV projects to get a sense of what's possible.