Figuring out how to install surveillance cameras at home doesn't have to feel overwhelming. Whether you're trying to keep an eye on your front porch, monitor your backyard, or build out a full propert...
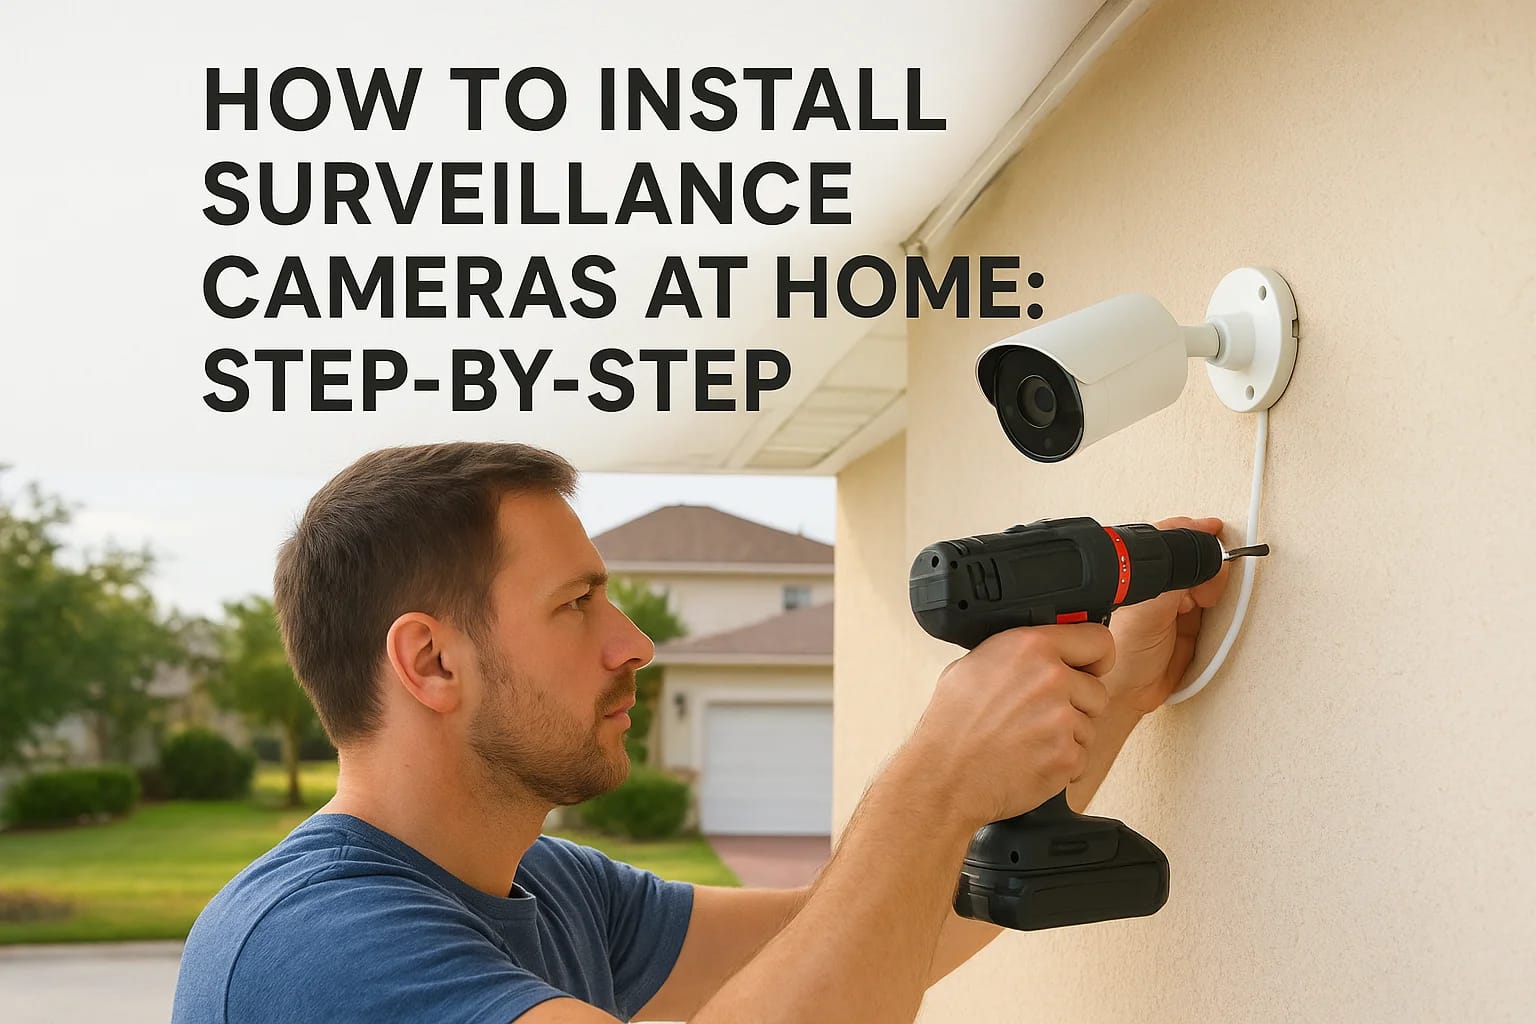
How To Install Surveillance Cameras At Home: Step-By-Step
Figuring out how to install surveillance cameras at home doesn't have to feel overwhelming. Whether you're trying to keep an eye on your front porch, monitor your backyard, or build out a full property surveillance setup, the process follows a logical sequence, and most homeowners can handle at least part of it themselves with the right guidance. That said, knowing what's involved upfront saves you from costly mistakes and wasted weekends.
At Treasure Valley Solutions, we've been designing and installing custom security camera systems across the Boise and Meridian area since 2014. We've seen firsthand what works, what doesn't, and where DIY projects tend to go sideways. That experience is exactly what shaped this guide, so you get practical, field-tested advice rather than generic instructions copied off a product box.
Below, we'll walk you through every step: choosing between wired and wireless cameras, mapping out optimal placement for real coverage (not just peace of mind), running cables, mounting hardware, and connecting everything so it actually works. We'll also cover the situations where calling in a professional makes more sense than doing it yourself. By the end, you'll have a clear plan for securing your home with surveillance cameras, whether you grab a drill or grab a phone to call us.
What to plan before you buy or drill
Rushing to buy cameras before you've thought through your property is one of the most common and expensive mistakes homeowners make. Before you figure out how to install surveillance cameras at home, you need a solid plan on paper first, because the decisions you make upfront determine everything from your equipment cost to how many blind spots you end up living with.
Know your property's layout and blind spots
Walk the perimeter of your home during daylight and sketch a rough diagram of your property. Mark every entry point: front door, back door, side gates, garage, and any ground-floor windows that face a street or alley. Then identify natural blind spots, areas where your line of sight from potential camera positions gets cut off by fences, hedges, overhangs, or corners. You'll want to cover these spots without over-buying cameras you don't need.
Once you have your sketch, note the lighting conditions at each location. A camera facing west will fight direct afternoon sun. A dark backyard corner needs a camera with strong night vision or an infrared range of at least 100 feet. These details change which camera models actually work and which ones waste your money.
A property walk takes 20 minutes and can prevent you from buying the wrong system entirely.
Decide on your goals and budget before anything else
Your goals directly shape your system design. Are you trying to deter package theft at the front door? Monitor your driveway and garage? Or do you want full perimeter coverage with remote viewing from your phone? Each goal calls for a different solution, and combining them without a plan leads to mismatched gear and gaps in coverage.
Set a realistic budget that accounts for cameras, a recorder or cloud storage subscription, mounting hardware, cables or Wi-Fi extenders, and professional installation if needed. A basic four-camera wired system runs roughly $300 to $600 in equipment alone. Work through this checklist before you spend a dollar:
- Number of entry points you need covered
- Indoor vs. outdoor camera requirements
- Preferred storage method (local NVR/DVR, cloud, or both)
- Power source availability at each planned camera location
- Wi-Fi signal strength at outdoor locations (for wireless systems)
- Whether you need two-way audio or motion-triggered alerts
Completing this list before you purchase anything keeps your project on budget and ensures the system you build fits your home rather than just filling boxes on a shelf.
Step 1. Choose the right camera system and gear
The camera system you choose sets the foundation for everything else in this project. Wired systems offer consistent reliability and no dependency on your Wi-Fi signal strength, while wireless systems install faster and let you reposition cameras without cutting new holes in your walls. Understanding the trade-offs before you purchase keeps you from spending money on gear that doesn't match your property or goals.
Wired vs. wireless: which fits your home
Both types work well, but they suit different situations. Wired PoE (Power over Ethernet) systems are the better pick for permanent installations, large properties, or spots where your Wi-Fi signal drops off. A single Ethernet cable carries both power and video to each camera, which simplifies the cable run and keeps the system stable long-term. Wireless systems work well for renters, smaller properties, or anyone who wants a faster setup without running cable through walls or attic space.
| Wired (PoE/DVR) | Wireless (Wi-Fi) | |
|---|---|---|
| Installation effort | Higher | Lower |
| Reliability | High | Moderate (Wi-Fi dependent) |
| Max resolution | Up to 4K | Up to 4K, varies by brand |
| Repositioning | Difficult | Easy |
| Best for | Permanent, full coverage | Rentals, quick setups |
If you plan to run more than four cameras or need footage that holds up legally, a wired PoE system is worth the extra installation work.
What specs actually matter
When learning how to install surveillance cameras at home, it's easy to get lost in marketing numbers. Focus on the specs that directly affect how well your system performs on your specific property. Resolution and field of view are the two most important starting points, followed by the environmental and storage specs listed below.
- Resolution: 1080p minimum; 4K for wide driveways or license plate capture
- Field of view: 90-130 degrees for most entry points; 160+ degrees for tight corners
- Night vision range: 65 feet minimum; 100+ feet for open areas
- Weatherproofing: IP67 rating or higher for any outdoor camera
- Storage: Local NVR/DVR avoids monthly cloud subscription fees
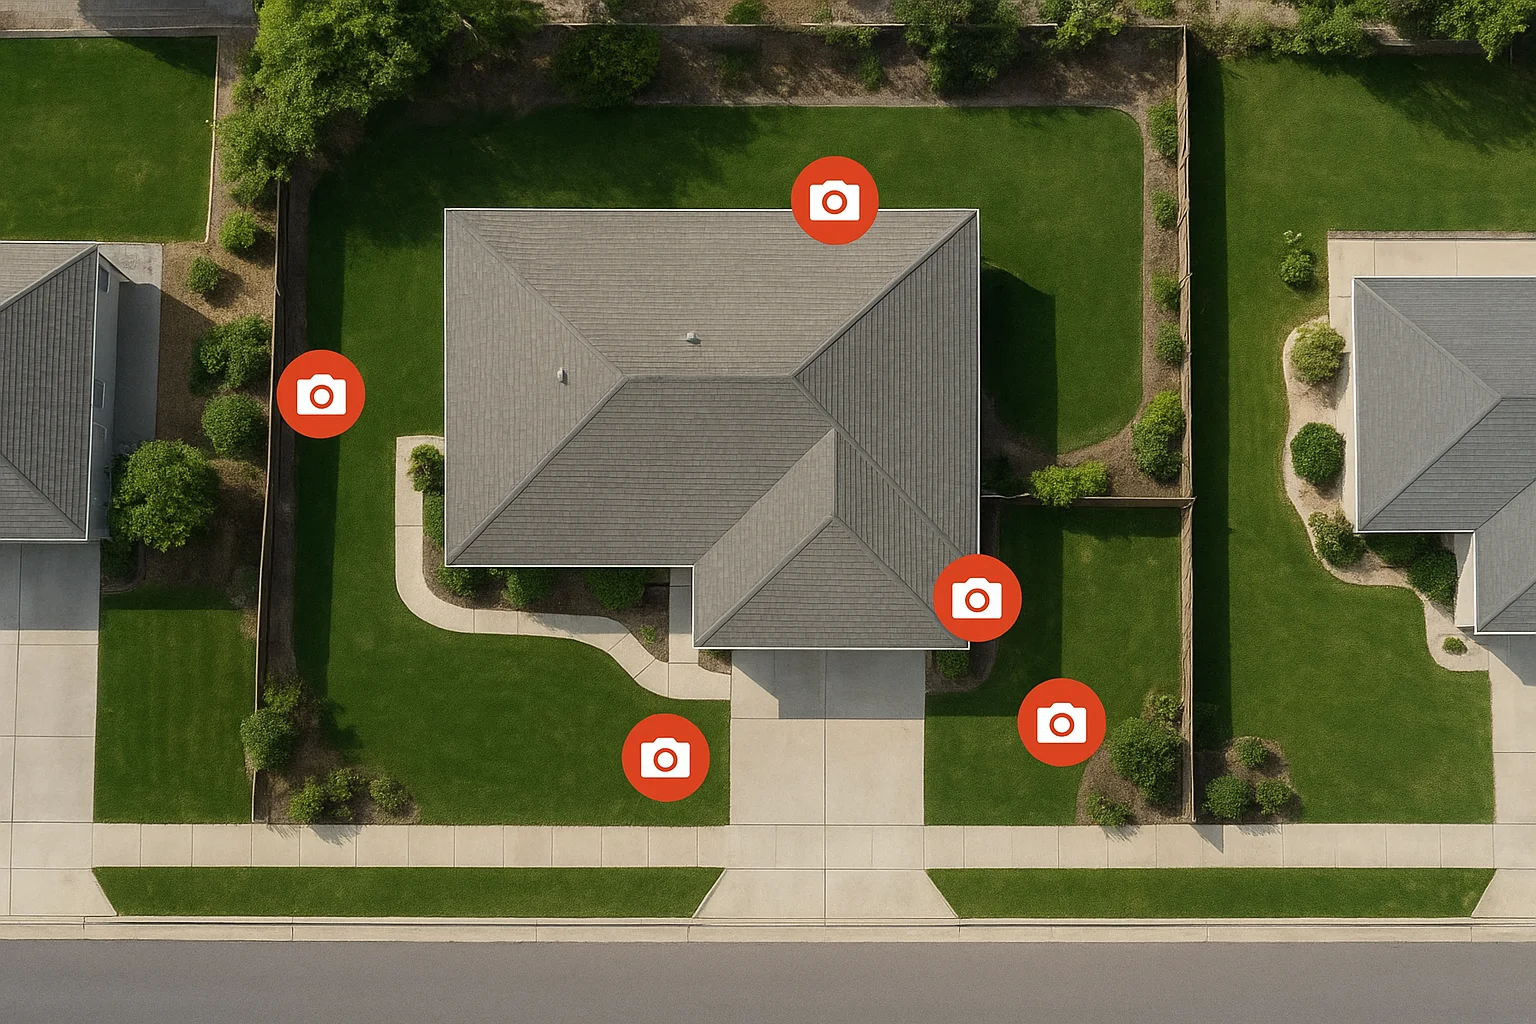
Step 2. Map camera locations for real coverage
Take the sketch you made during planning and refine it using Google Maps satellite view to get an accurate overhead picture of your property. Your goal in this step is to assign a specific camera to every entry point and high-risk zone you identified, while making sure each camera's field of view overlaps slightly with the next one so you eliminate blind spots without buying extra cameras.
The eight positions that matter most
Most residential properties share the same vulnerable zones. Cover these eight positions first before you consider any secondary areas, and you'll have a system that mirrors what professional installers deploy on comparable homes.
- Front door: Mount 8-10 feet high at an angle that captures faces, not just the tops of heads
- Back door: Same height rule; angle toward the approach path, not just the door itself
- Driveway and garage: Wide-angle camera (110 degrees or more) mounted at the garage corner
- Side gates: One camera per gate, aimed at the latch and approach path
- Backyard perimeter: Camera mounted at a rear corner, sweeping the yard's longest diagonal
- Ground-floor windows facing alleys or streets: Angle slightly downward to capture movement near the glass
- Front walkway or mailbox area: If package theft is a concern, add a dedicated wide-angle view here
- Detached garage or shed: A single camera mounted above the door covers the entry and the surrounding area
Overlapping fields of view by 15-20 feet between adjacent cameras means a person moving through your yard never exits the frame entirely.
Avoid these common placement errors
Two placement mistakes account for most of the gaps we find when auditing DIY systems. Mounting cameras too high captures rooftops instead of faces, and pointing cameras directly into light sources like street lamps or a sunrise produces washed-out footage exactly when you need it most. When you work through how to install surveillance cameras at home, treat camera height and light direction as fixed rules, not suggestions.
Step 3. Mount cameras and handle power and cabling
With your locations mapped, it's time to physically install. Gather your tools before you climb a ladder: a power drill, 3/8-inch masonry or wood bit, cable clips, waterproof silicone sealant, and a fish tape or cable rod for pulling wire through walls. Having everything in one place before you start saves multiple trips up and down and keeps the job organized.
Drilling and mounting the hardware
Mark your mount position with a pencil before you drill anything. Hold the camera bracket against the wall at the correct height (8-10 feet for most positions) and trace the mounting holes. Drill pilot holes, insert wall anchors if you're mounting into stucco or brick, and drive screws until the bracket sits flush with the surface. Apply a bead of waterproof silicone sealant around any hole where a cable enters the exterior wall to block moisture and insects from getting inside.
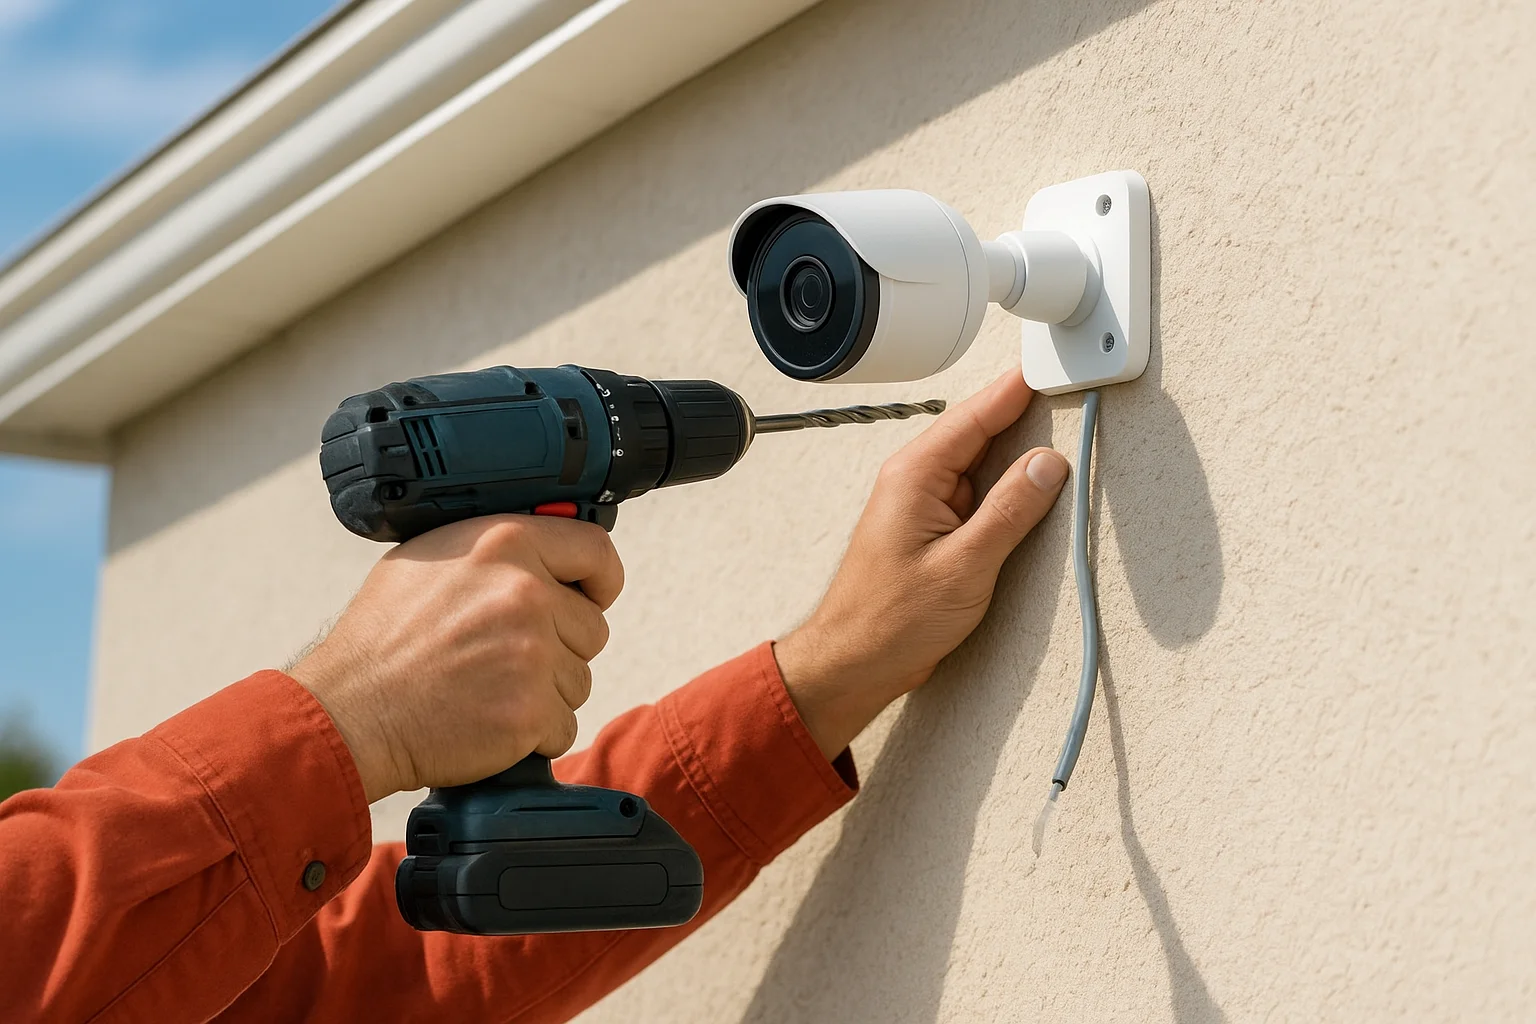
Follow this sequence for each camera:
- Drill pilot holes and insert anchors
- Feed the cable through the wall before attaching the bracket
- Secure the bracket with screws
- Attach the camera head and adjust the angle toward your target zone
- Seal all exterior cable penetrations with waterproof silicone
Running power and cable cleanly
For wired PoE cameras, run each Ethernet cable from the camera back to your NVR or PoE switch using the most direct route through your attic or wall cavities. Secure cables every 18-24 inches with cable clips to prevent sagging. For wireless cameras, confirm your Wi-Fi signal reaches at least -65 dBm at each camera location before you mount permanently; a phone Wi-Fi analyzer app shows signal strength at that exact spot.
Loose or exposed cable runs are the most common reason a finished installation looks unprofessional, so route cables cleanly as you go rather than cleaning them up at the end.
Knowing how to install surveillance cameras at home means treating cable management as part of the installation itself. Every cable run routed cleanly through walls or along fascia boards also makes future troubleshooting faster when you need to trace a fault.
Step 4. Connect, configure, secure, and test
With cameras mounted and cables run, you're ready to bring the system online. Connect each camera to your NVR or PoE switch using the Ethernet cables you ran in the previous step, or download the manufacturer's app if you're using a wireless setup. Power on the recorder first, then connect cameras one at a time so you can confirm each one appears in the interface before moving to the next.
Lock down your system settings
The default settings on most camera systems leave your footage exposed. Change the default admin password immediately to something unique, such as a 12-character mix of letters, numbers, and symbols, and disable any remote access features you don't plan to use. If your system connects to the internet for remote viewing, place it on a network segment separate from your other home devices to limit exposure if the system is ever targeted.
A camera system running factory-default credentials is far easier to access remotely than most homeowners realize, so treat this step as non-negotiable before you go live.
Work through this configuration checklist before you move to testing:
- Set motion detection zones to match your actual coverage areas
- Configure push notifications to your phone for motion events
- Set your recording schedule (continuous, motion-only, or time-based)
- Enable two-factor authentication if your system supports it
- Verify that the recorder's time and date settings are accurate
Test every camera before you call it done
Testing is the step most people skip when working through how to install surveillance cameras at home, and it's the step that surfaces every problem before it becomes a gap in your coverage. Walk through each camera's field of view while watching the live feed, confirming that motion triggers correctly and that night vision activates when ambient light drops. Review a short recorded clip from each camera to confirm footage is sharp, storage is writing properly, and timestamps are accurate on every channel.
Wrap-up and next steps
Working through how to install surveillance cameras at home takes more planning than most people expect, but the process is repeatable and straightforward when you follow the right sequence. Start with your property layout and goals, choose the system that matches your specific conditions, place cameras where they cover real entry points and not just obvious spots, and lock down your settings before you consider the job finished. Each step builds directly on the last, so skipping ahead almost always creates a problem you end up fixing twice.
If your property has complex cable runs, multiple buildings, or you want footage quality that holds up in court, professional installation removes the guesswork entirely. Our team at Treasure Valley Solutions has handled security camera projects across the Boise and Meridian area since 2014. Browse examples of our completed security installations to see what a finished system looks like, or reach out and we'll build a custom plan for your home.