You bought the cameras. You mounted them where they seemed logical. And then you check the footage only to find your driveway half-covered, your side yard completely invisible, and a perfect HD record...
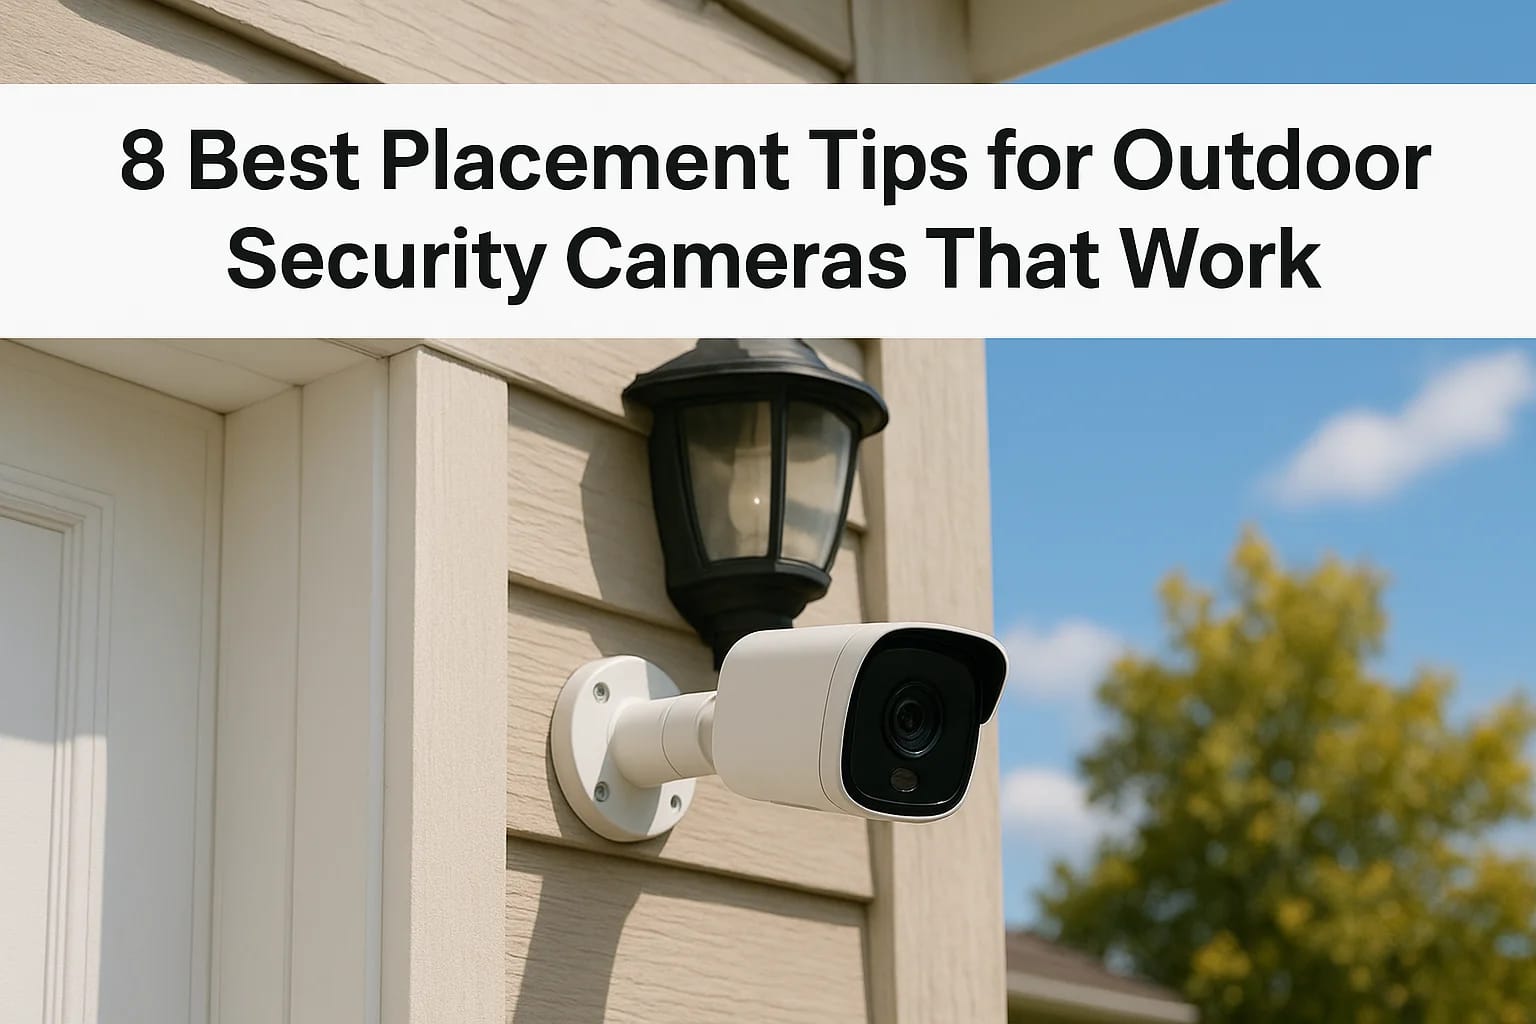
8 Best Placement Tips for Outdoor Security Cameras That Work
You bought the cameras. You mounted them where they seemed logical. And then you check the footage only to find your driveway half-covered, your side yard completely invisible, and a perfect HD recording of your garage wall. The truth is, the best placement for outdoor security cameras has less to do with the cameras themselves and more to do with where, and how, you position them.
Camera placement is the difference between a system that actually deters crime and one that just records evidence of what you missed. The wrong angle, the wrong height, or a single overlooked entry point can turn a solid camera into an expensive decoration. And in neighborhoods across the Treasure Valley, from Meridian to Eagle to Nampa, we see these same mistakes on nearly every install we're called in to fix.
At Treasure Valley Solutions, we've been designing and installing security camera systems since 2014. This guide breaks down eight proven placement strategies we use on real projects to help homeowners get full coverage, fewer blind spots, and footage that's actually useful. Whether you're installing cameras yourself or planning a professional setup for your property, these tips will help you get it right the first time.
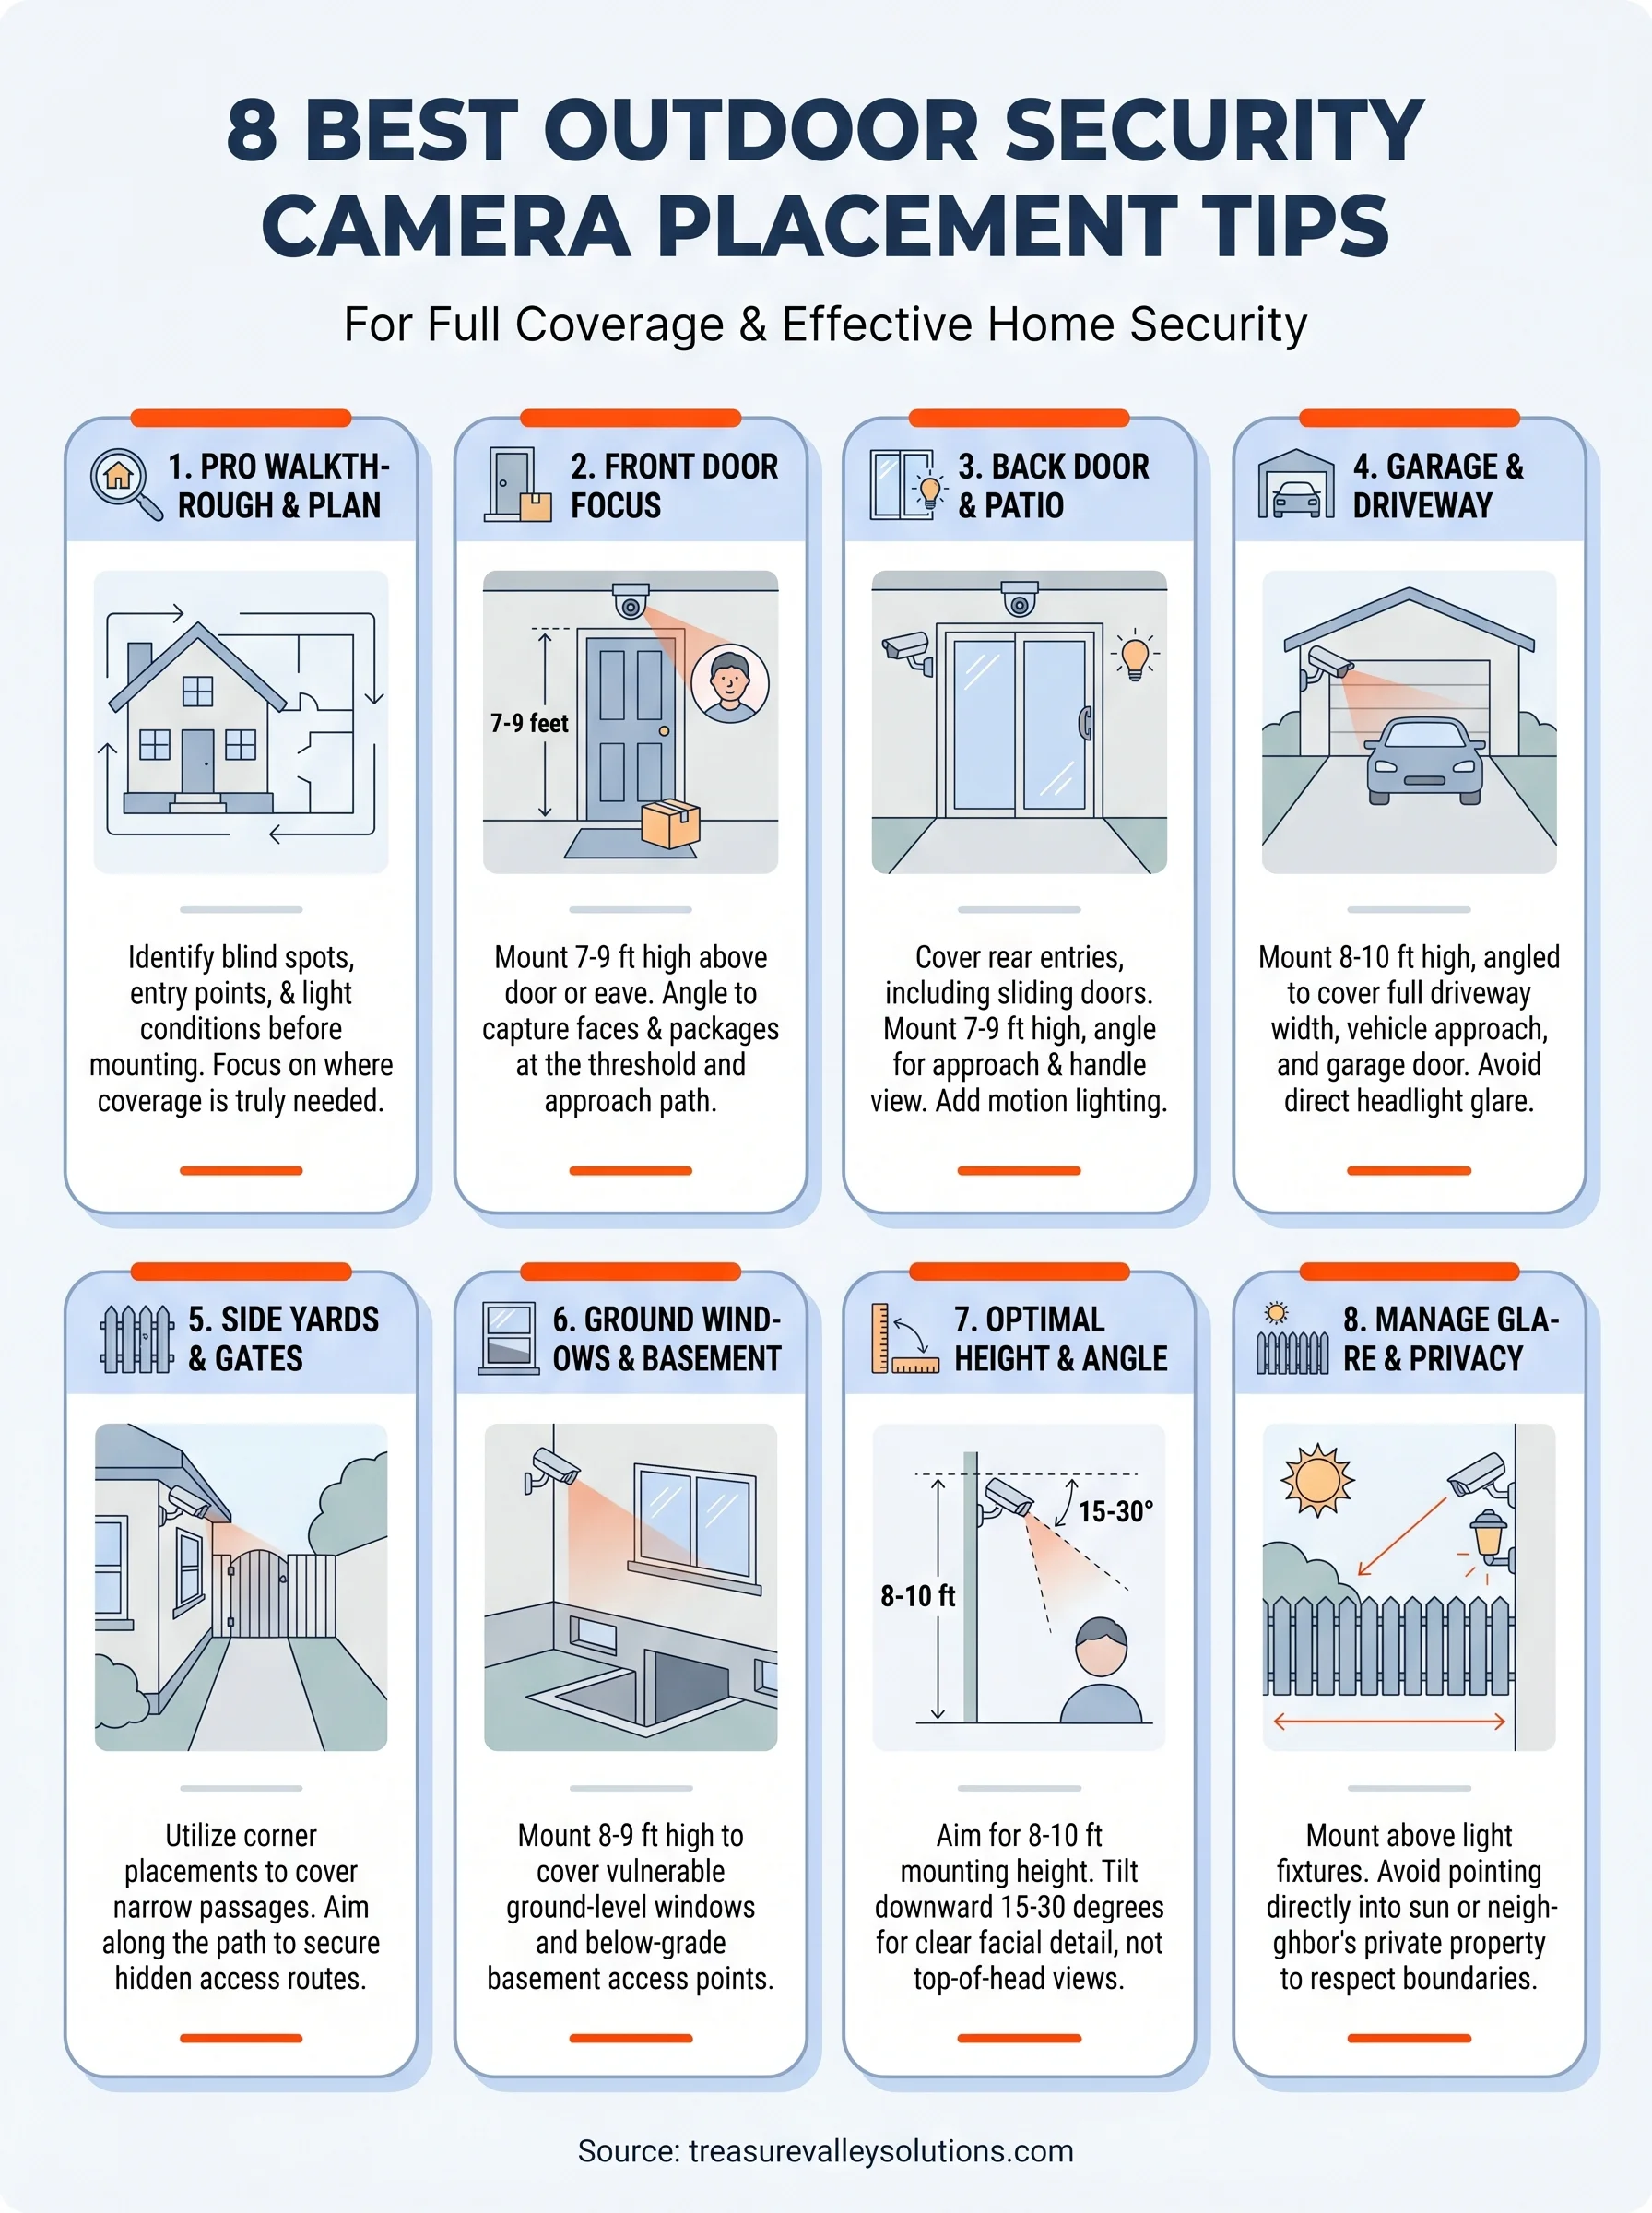
1. Start with a pro walkthrough and coverage plan
Before you mount a single camera, walk your property like an intruder would. Most homeowners skip this step and end up covering the spaces they assume matter instead of the spots that actually need coverage. A quick perimeter walk takes 10 to 15 minutes and shows you where your blind spots are, which entry points are exposed, and how light and landscaping affect your angles before you commit to drilling anything.
What to look for on a quick perimeter walk
Walk the full perimeter of your home and identify every point where someone could enter without being seen from the street or a neighboring property. Pay attention to how trees, fences, and walls create natural hiding spots along the way. Note where exterior lighting already exists and where it's completely absent, since both factors directly affect what type of camera you need and where it needs to go.
Look for these specific conditions as you walk:
- Recessed doorways or alcoves with no sightlines from the street
- Overgrown shrubs or trees that block views from likely camera positions
- Dark stretches along fences or between structures with no existing light source
- Side yards or narrow passages with no clear camera anchor point
How to prioritize areas when you only have 1 to 4 cameras
If you're working with a limited number of cameras, start with your three primary entry points: the front door, back door, and driveway. These locations account for the large majority of break-in attempts and package theft. Once those are covered, point any remaining cameras at secondary access points like side gates or a detached garage, rather than spreading coverage too thin across every corner of the property.
How overlapping views reduce blind spots and tampering
Two cameras with overlapping fields of view are harder to defeat than two cameras covering completely separate zones. When one camera can see another, anyone trying to disable or cover one device is immediately captured by the second.
Overlapping camera angles also close the narrow gaps between coverage zones where movement can slip through undetected, which matters most at corners and along long fence lines.
Overlapping views protect your system itself, not just your property, which is a detail most basic camera layouts ignore entirely.
When to call Treasure Valley Solutions for design and install
A coverage plan gets complicated fast when you're dealing with a large lot, unusual layouts, or a mix of wired and wireless equipment. Treasure Valley Solutions provides professional walkthroughs for homeowners across Meridian, Eagle, Nampa, and the greater Treasure Valley area. Getting expert eyes on your property before you buy gear can save you from placing cameras in positions that miss key angles or won't hold up through Idaho winters. Our team handles the full process from design through installation.
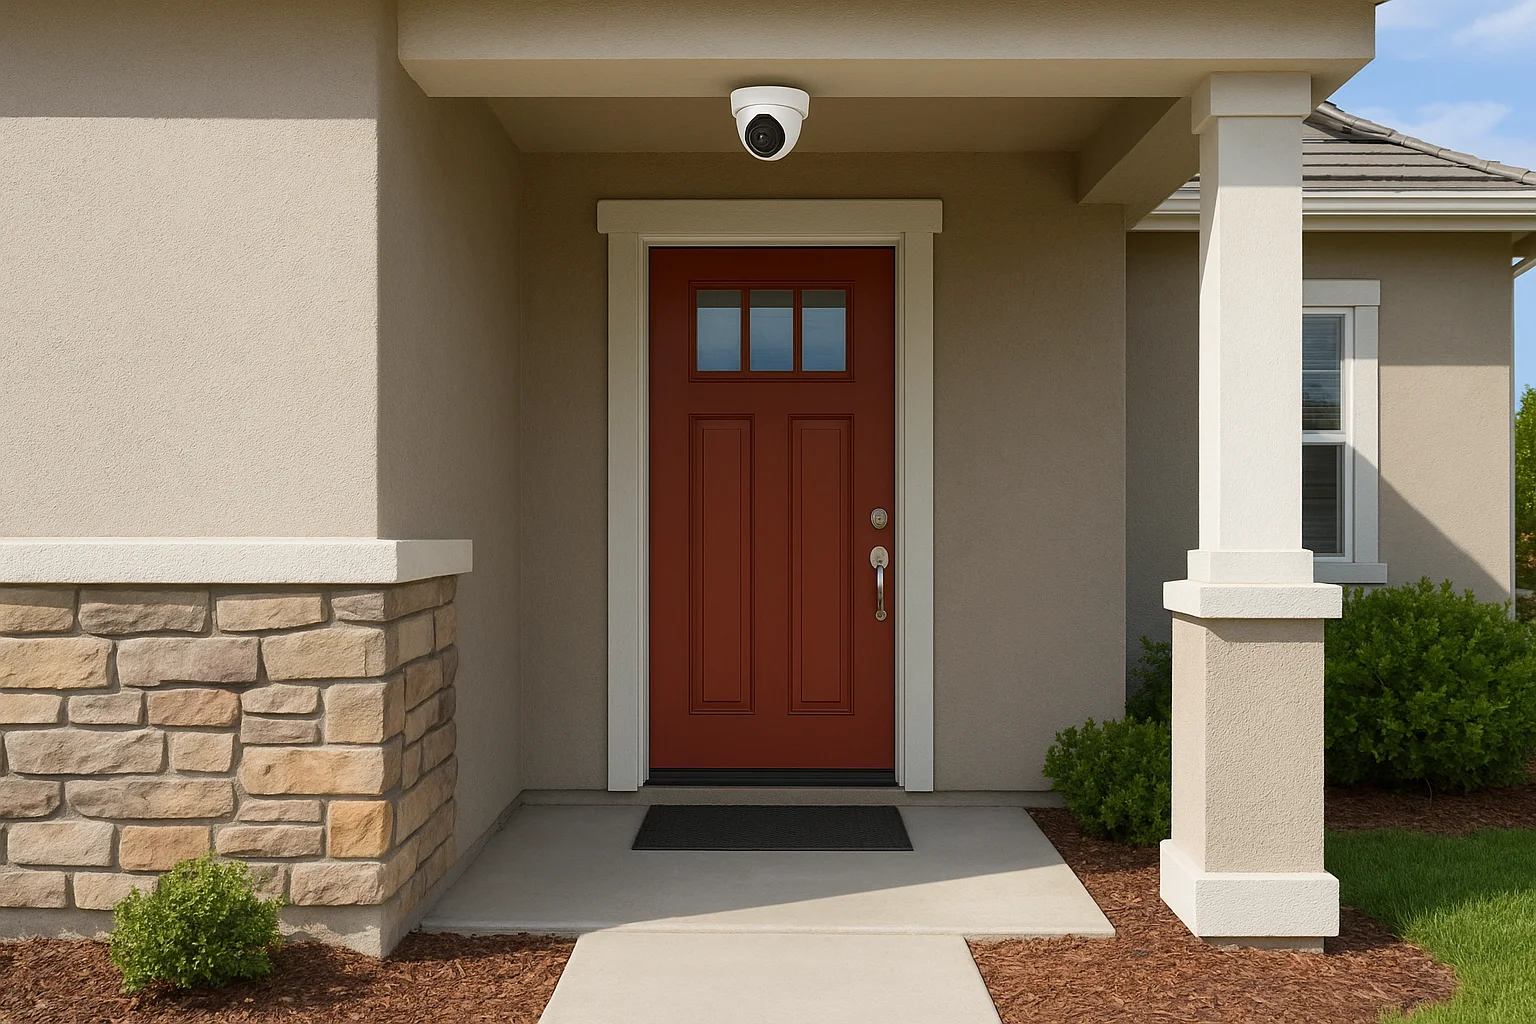
2. Place a camera at the front door and front approach
Your front door is the single most important camera location on any property. More than one-third of break-ins happen at the front door, and porch package theft is a consistent problem across Treasure Valley neighborhoods. Getting this camera positioned correctly gives your entire system a strong foundation before you cover anything else.
What to capture for faces and packages
A well-placed front door camera should capture clear facial detail and any packages left on or near your porch. Position it to cover the full width of your doorway plus the approach path leading up to it, so you see visitors before they reach the door, not just as they're standing at it.
- Frame the entire porch, not just the door panel
- Include the path from the sidewalk or driveway to the steps
- Capture at least 6 to 8 feet of depth in front of the threshold
Best mounting spots near the porch and eaves
The eave directly above your front door or a covered porch ceiling gives you the cleanest downward angle while keeping the camera sheltered from rain and direct sun. Mount it 7 to 9 feet high and tilt it slightly downward toward the door threshold and porch steps.
Mounting too high shifts your camera's view to the tops of heads, which makes facial identification nearly impossible in most situations.
How to avoid backlight from the street and sunrise
East and west-facing front doors face the biggest backlight challenge since sunrise and sunset can blow out footage entirely. If your door faces the sun during those hours, choose a camera with strong HDR capability to balance bright outdoor light against shaded porch areas.
Mistakes that cause missed motion alerts at the door
One of the most common errors in the best placement for outdoor security cameras is setting the motion zone too narrow. A tight zone focused only on the door itself misses anyone who approaches and then turns away. Widen your detection zone to cover the walkway and any steps leading up to the door.
3. Cover the back door, patio, and sliding glass doors
Back doors and sliding glass doors are consistently underprotected in standard camera setups, yet rear entry points account for a significant share of residential break-ins. Leaving your backyard uncovered creates a wide gap that experienced intruders look for specifically.
Why back doors need more coverage than you think
Your back door gets far less natural visibility than your front entry, which is exactly why it gets targeted. Intruders who case properties focus on rear access points because street-facing neighbors and passing vehicles can't see them working. Sliding glass doors add extra risk since their large frames are easier to force than solid doors, and they're usually shielded by fencing or landscaping.
Angles that see the handle, threshold, and yard approach
Position your back door camera 7 to 9 feet above the threshold and angle it to capture the handle, the doorway, and at least 10 to 15 feet of yard depth. A single camera with this framing gives you three things in one shot: who's approaching, who's at the door, and any movement in the immediate yard.
The best placement for outdoor security cameras at the rear of your home means covering the approach path, not just the door itself.
Lighting tips for patios and night activity
Back patios are often completely dark after sunset, so pair your camera with motion-activated lighting or choose a model with strong color-night-vision capability. Mount the camera above or beside your light fixture rather than below it to keep the light from washing out the lens.
Common blind spots around grills, posts, and furniture
Large furniture, grills, and structural posts block sightlines and give intruders places to move without triggering motion detection. A corner-mounted camera reduces the number of objects that break your coverage and lets one device cover more of the patio area.
4. Protect the garage, driveway, and vehicles
Your driveway and garage hold some of the most valuable assets on your property, from vehicles to stored equipment, yet most setups treat this zone as an afterthought. A single well-placed camera can cover your vehicle approach, your garage door, and a clear view of anyone who walks up your driveway, but only if you position it correctly from the start.
What you can realistically capture in a driveway
A standard wide-angle camera covers roughly 90 to 110 degrees horizontally, which is enough to frame a two-car driveway from a corner-mounted position above the garage. Mount it 8 to 10 feet high on the garage face or eave and angle it toward the street-side end of your driveway to capture both vehicle movement and foot traffic approaching your home.
Where to mount for vehicle coverage without huge glare
Headlight glare is one of the biggest image killers for driveway cameras at night. Position your camera slightly to the side of the direct vehicle path rather than straight on, and choose a model with wide dynamic range (WDR) to handle the contrast between bright headlights and a dark driveway.
Mounting your camera at an angle to the driveway rather than head-on reduces glare and gives you a better profile view of passing vehicles.
How to position for better license plate chances
A dedicated license plate angle requires a separate, tighter shot aimed low at the end of your driveway near the street. One wide camera and one narrower plate-capture camera together give you full coverage that no single device can match alone.
Power and network considerations for detached garages
Detached garages create real challenges for both power access and Wi-Fi signal. Running a dedicated electrical line or using a PoE camera with a direct network cable to your router gives you a far more reliable connection than stretching wireless signal across an open yard.
5. Watch side yards, gates, and narrow pass-throughs
Side yards are the most overlooked zones in most residential camera setups, yet they're the exact path intruders use to move from the street to your backyard without being seen. Finding the best placement for outdoor security cameras in these narrow corridors often requires a different mounting strategy than what works at your front or back door.
How intruders use side yards to stay hidden
A narrow side yard gives someone complete concealment from the street and from neighbors on either side. Most homeowners focus on the front and rear, which leaves a clear, unmonitored path running directly to the most vulnerable part of the home. Anyone walking your side yard at night reaches your backyard, patio doors, and electrical panels with zero camera exposure.
Side yards are the connective tissue between your front and rear coverage, and leaving them unmonitored creates a gap that undermines the rest of your system.
Corner placements that cover two walls at once
Mount your camera at the corner junction where your side yard meets the front or rear of the home, and you cover two angles with a single device. Position it 8 to 10 feet high and angle it diagonally so the frame captures the full length of the passage without pointing directly into a neighbor's yard.
How to pair cameras with gate access and smart locks
A camera works far better when your side gate is secured with a smart lock, since you get both visual confirmation and an access log when someone enters. Pairing the two systems lets you cross-reference video timestamps with entry events to build a complete record.
Landscaping fixes that improve camera performance
Tall hedges and overgrown shrubs along side yards block camera sightlines and give intruders natural cover. Trimming vegetation below your camera's field of view and adding low-profile motion lighting along the passage dramatically improves footage quality and acts as a deterrent on its own.
6. Cover ground-floor windows and basement access points
Ground-floor windows and basement entries give intruders a low-visibility route into your home that most camera systems completely ignore. While doors get the most attention in the best placement for outdoor security cameras, windows and crawl access points are the spots that experienced intruders fall back on when primary entries are too exposed.
Which windows matter most and why
Not every ground-floor window needs a dedicated camera, but windows that face isolated areas like side yards, back fences, or wooded sections deserve priority. These are the windows that receive the least natural surveillance from neighbors and passing traffic, which makes them far more attractive to someone casing your home.
Best placements for wells, window rows, and crawl access
Window wells and basement crawl entries sit below grade, which puts them completely outside the frame of most wall-mounted cameras. Position a camera 8 to 9 feet high on a corner or eave above these areas and angle it downward to capture movement at ground level without losing the surrounding yard context.
A downward angle on basement-level access points gives you both the point of entry and the approach path in a single frame.
How to reduce false alerts from trees and pets
Branches and shrubs near ground-floor windows trigger constant false motion alerts, which causes most homeowners to lower their sensitivity settings and miss real events. Trim vegetation back at least 3 to 4 feet from the camera's detection zone to clean up your alerts without sacrificing coverage.
When a second angle helps more than a wider lens
A wider lens stretches detail across a broader frame but reduces image resolution at the edges where you actually need it most. Adding a second camera at a tighter angle gives you sharper detail on a specific window or entry point than any single wide-angle device can provide alone.
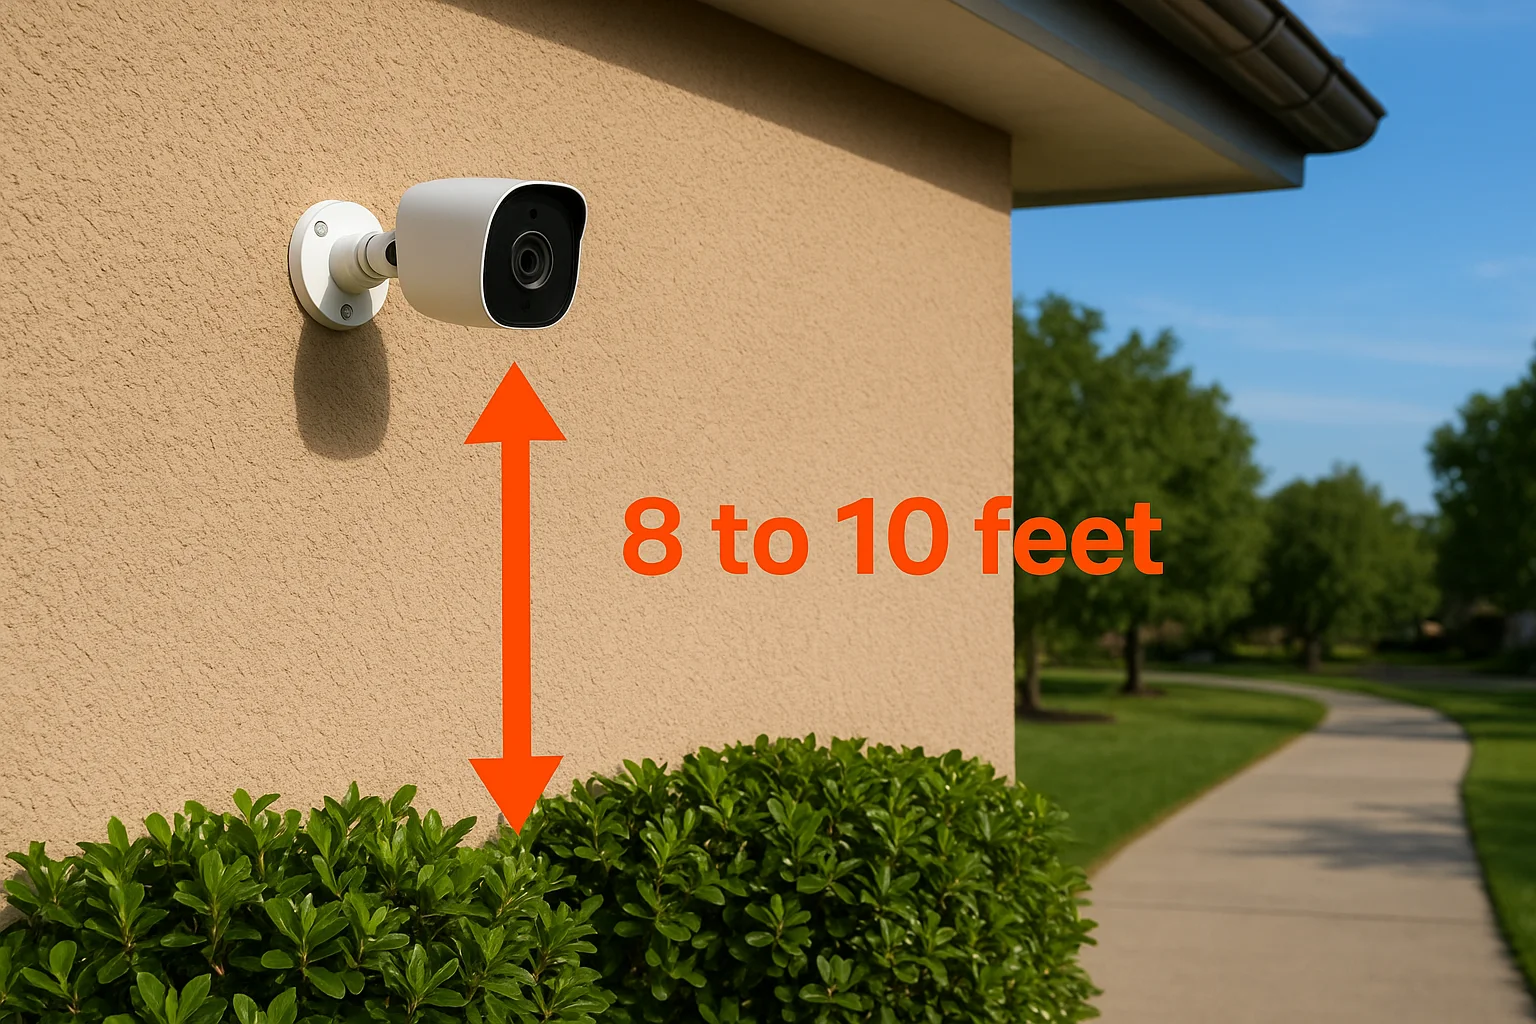
7. Mount cameras at the right height and angle
Getting the height and tilt angle right is where most DIY installs fall apart. You can place a camera in the perfect location and still get useless footage if the mounting position is off by a few feet or the lens points in the wrong direction.
The sweet spot for height and why it works
The ideal mounting height for most exterior cameras is 8 to 10 feet above the ground. At this range, you capture faces at a natural angle, cover enough ground to show approach paths, and keep the device high enough to discourage tampering. Mounting below 7 feet puts your camera within easy reach, while going above 12 feet pushes your viewing angle so steep that facial identification becomes nearly impossible.
How to tilt for facial detail instead of top-of-head views
Tilt your camera downward at roughly 15 to 30 degrees from horizontal, not straight down at the ground. This angle gives you a clean view of a person's face as they approach rather than a sharp view of the top of their head, which is far less useful for identification.
The goal of your tilt angle is to capture the area where a face appears in the frame, not just confirm that a person was present.
How to keep cameras out of reach without losing detail
Mounting above 10 feet protects your hardware from casual tampering, but you need to compensate by choosing a camera with higher resolution or optical zoom to maintain facial-level detail from that distance.
Quick tests to run before you drill and finalize
Before committing to a permanent mount, test your angle using a temporary bracket or adhesive mount and review the live feed from multiple positions. Walk the approach paths yourself and check that your face appears clearly in the frame at 10 to 15 feet out before you finalize the installation.
8. Avoid glare, add light, and respect privacy lines
Glare and poor lighting are two of the most preventable problems in any camera setup, yet they ruin more footage than bad placement does. Getting the best placement for outdoor security cameras also means accounting for light conditions at every hour of the day, including what happens when the sun changes angle or a neighbor's floodlight kicks on at 2 a.m.
Where sun and reflections ruin footage
East-facing and west-facing camera positions are the most vulnerable to direct sun during the morning and evening hours. Mounting a camera where it points directly into the rising or setting sun creates a washed-out frame that captures nothing useful. Shiny surfaces like metal siding, windows, and wet concrete amplify the problem by bouncing light directly into your lens, so avoid mounting cameras where those surfaces sit inside the field of view.
Choosing a camera with strong HDR performance reduces the damage from glare but does not replace smart positioning on your part.
Whether to mount above or below light fixtures
Mount your camera above your exterior light fixture, not below it. A camera mounted below a bright fixture points upward into the light source, which creates a blown-out background and silhouettes anyone walking under it. Positioning above the fixture lets the light illuminate the area in front of the camera rather than directly into the lens.
How to aim cameras to protect your property, not neighbors
Frame your camera to cover your property line and no further. Pointing a camera directly into a neighbor's yard, window, or entrance creates real friction and potential legal exposure.
Privacy basics and when to check local rules in Idaho
Idaho does not currently prohibit residential security cameras in outdoor public-facing areas, but pointing a camera where it consistently captures a neighbor's private space is a problem worth avoiding. Check your local Meridian or Boise city ordinances if you're unsure, and when in doubt, angle your cameras inward toward your own property.
Putting it all together
The best placement for outdoor security cameras is not about buying more equipment. It comes down to knowing where your gaps are before you mount anything. Front door, back door, driveway, side yards, windows, and height all work together as a system. Miss one zone and you hand someone a clear, unmonitored path through your property with no footage to show for it.
Treasure Valley Solutions has been designing and installing complete security camera systems across Meridian, Eagle, Nampa, and the greater Treasure Valley area since 2014. Our team walks your property, identifies your coverage gaps, and builds a custom layout that fits your specific home and lot. Every install is handled by trained, licensed technicians who test the full system before they leave. If you want a setup done right the first time, contact our team today to schedule your property walkthrough.