Upgrading your windows with motorized shades brings real convenience, closing blinds with a tap on your phone, scheduling them to adjust with the sun, or integrating them into your smart home system....
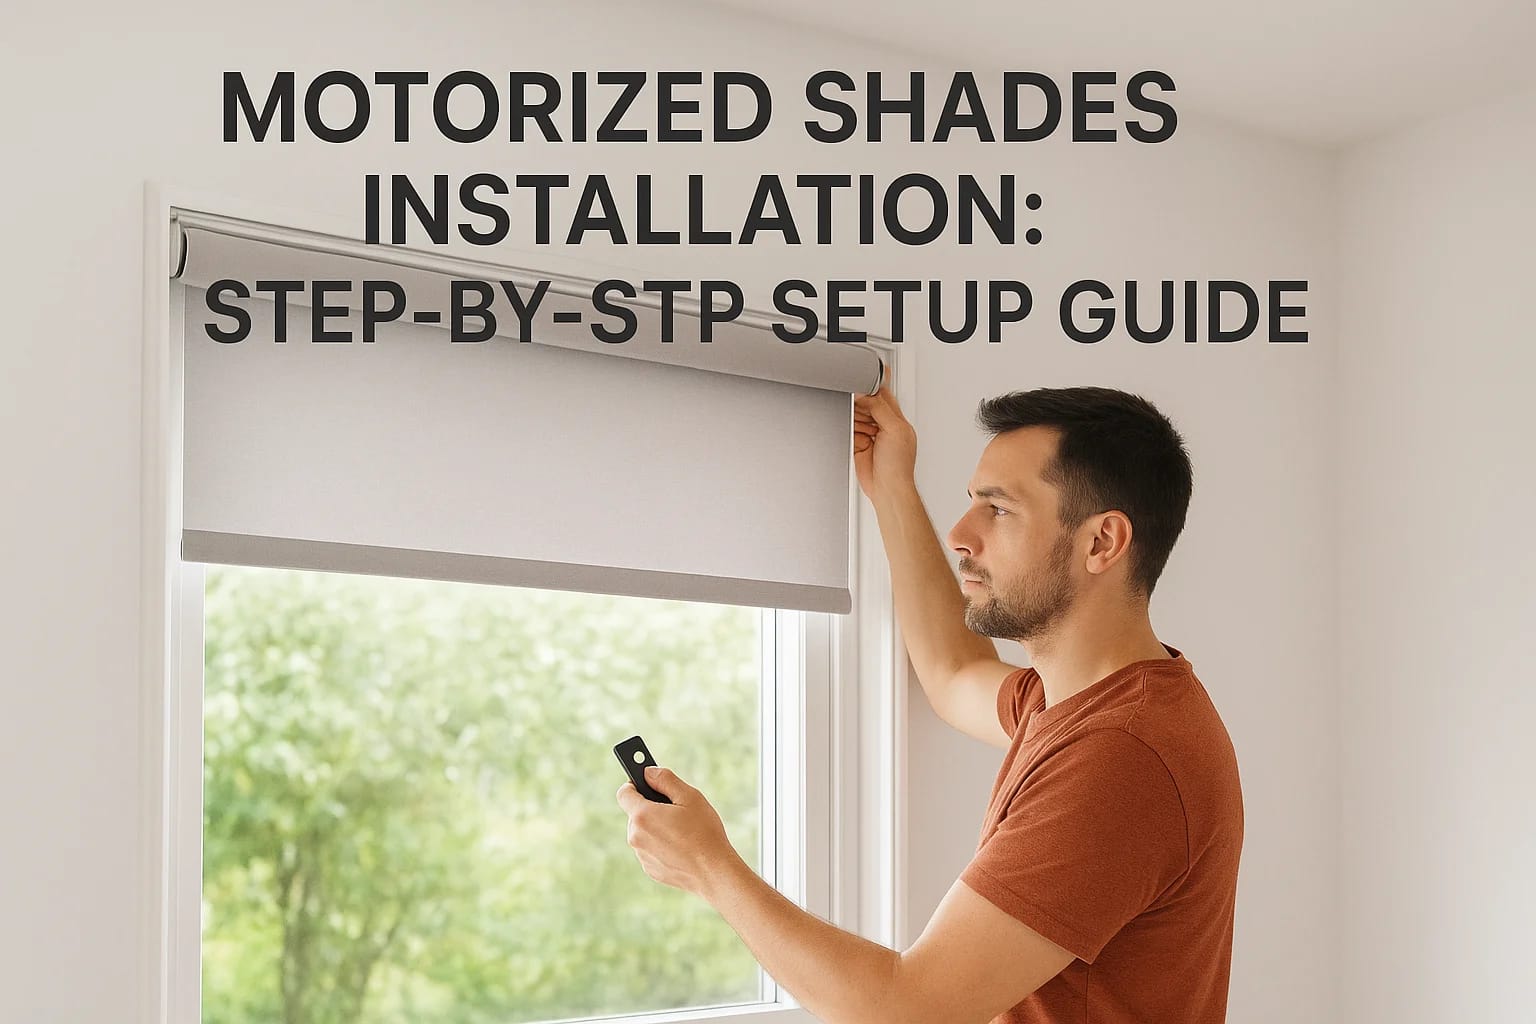
Motorized Shades Installation: Step-by-Step Setup Guide
Upgrading your windows with motorized shades brings real convenience, closing blinds with a tap on your phone, scheduling them to adjust with the sun, or integrating them into your smart home system. If you're ready to tackle motorized shades installation yourself, you'll find that most modern systems are designed with DIY-friendly mounting hardware and straightforward programming steps.
This guide walks you through the complete process, from unpacking your shades and preparing your window frames to wiring considerations and syncing everything with your preferred control method. We'll cover battery-powered and hardwired options, helping you choose the right approach based on your setup and comfort level with electrical work.
At Treasure Valley Solutions, we design and install smart shading systems throughout the Boise and Meridian area as part of our whole-home automation services. While many homeowners successfully install motorized shades on their own, we're also here when projects get complex, multiple windows, integration with lighting scenes, or hardwired installations that require professional expertise. Whether you complete this project yourself or decide you'd like a hand, the steps below will give you a clear understanding of what's involved.
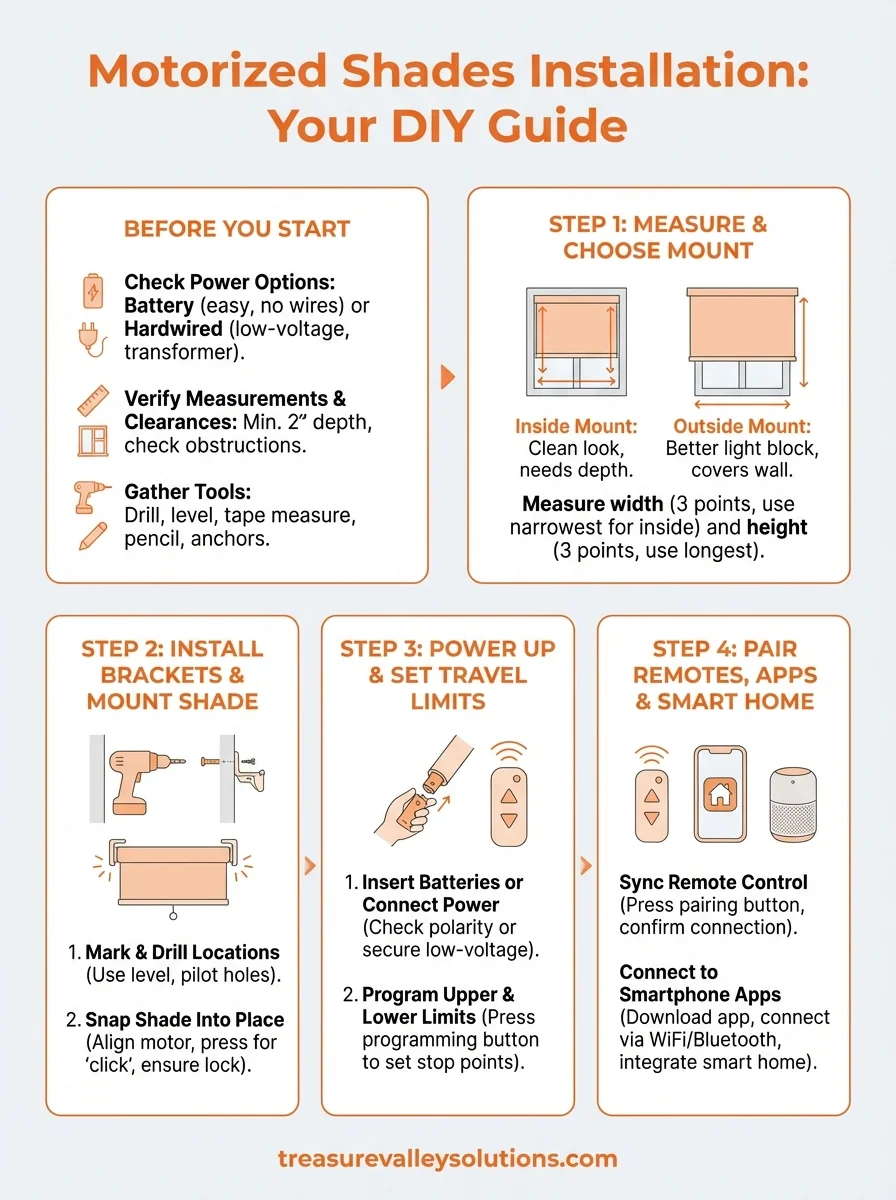
What to check before you start
Before you unpack your motorized shades, you need to verify a few key details about your windows and available power sources. Taking fifteen minutes to check these requirements saves you from discovering midway through installation that you're missing a critical component or that your window frame won't support the mounting brackets you planned to use. Most manufacturers provide specification sheets that list exact clearance needs and compatible mounting surfaces.
Check your power options
Battery-powered shades offer the easiest installation since you don't need to access electrical wiring or hire an electrician. You'll replace AA or rechargeable batteries every six to twelve months depending on how frequently you raise and lower the shades. Hardwired models require a low-voltage transformer (typically 12V or 24V) and running wire from the power source to each shade location. If you're not comfortable working with electrical connections, battery power is your safest choice for a straightforward motorized shades installation.
Most DIY motorized shades installation projects use battery power to avoid electrical work and permit requirements.
Verify window measurements and clearances
Measure the exact width and height of your window opening if you're doing an inside mount, or the area you want to cover for an outside mount. Your shades need at least two inches of depth in the window frame to accommodate the motor housing and rolled fabric. Check for obstructions like window cranks, locks, or trim pieces that could interfere with shade operation. Write down these measurements and compare them against your shade manufacturer's specifications before placing your order.
Gather your tools and hardware
You'll need a drill with appropriate bits, a level, measuring tape, pencil, and the mounting hardware included with your shades. Some installations require wall anchors if you're mounting into drywall rather than solid wood framing. Having everything ready before you start the installation prevents interruptions when you're halfway through mounting brackets.
Step 1. Measure and choose your mount
Your mounting method determines how the shade sits in relation to your window frame, affecting both appearance and light control. You'll choose between an inside mount (shade fits within the window frame) or an outside mount (shade covers the wall area around the window). This decision impacts your measurements and the final look of your motorized shades installation.
Inside mount vs. outside mount
Inside mounts create a clean, built-in appearance that works best when your window frames have adequate depth (minimum two to three inches) and are perfectly square. You'll get better light blocking with an outside mount since the shade extends beyond the window opening, covering gaps where light might leak through. Measure your window frame's depth before committing to an inside mount, as insufficient space will prevent proper motor housing clearance.
Taking accurate measurements
Measure the width at three points (top, middle, and bottom of the window opening) and use the narrowest measurement for inside mounts to ensure the shade fits without binding. For height, measure from the top of the opening to the sill in three places and record the longest measurement. Outside mounts require you to add three to four inches to each side of the window frame width and extend above and below the opening to maximize coverage.
Always round down your inside mount width measurements to avoid shades that won't fit in the opening.
Step 2. Install brackets and mount the shade
Securing your mounting brackets correctly prevents sagging and ensures smooth operation over the life of your motorized shades. You'll attach brackets to the window frame or wall depending on your mount type, then snap the shade assembly into these supports. This step requires precision since misaligned brackets cause the shade to hang crooked or bind during operation.
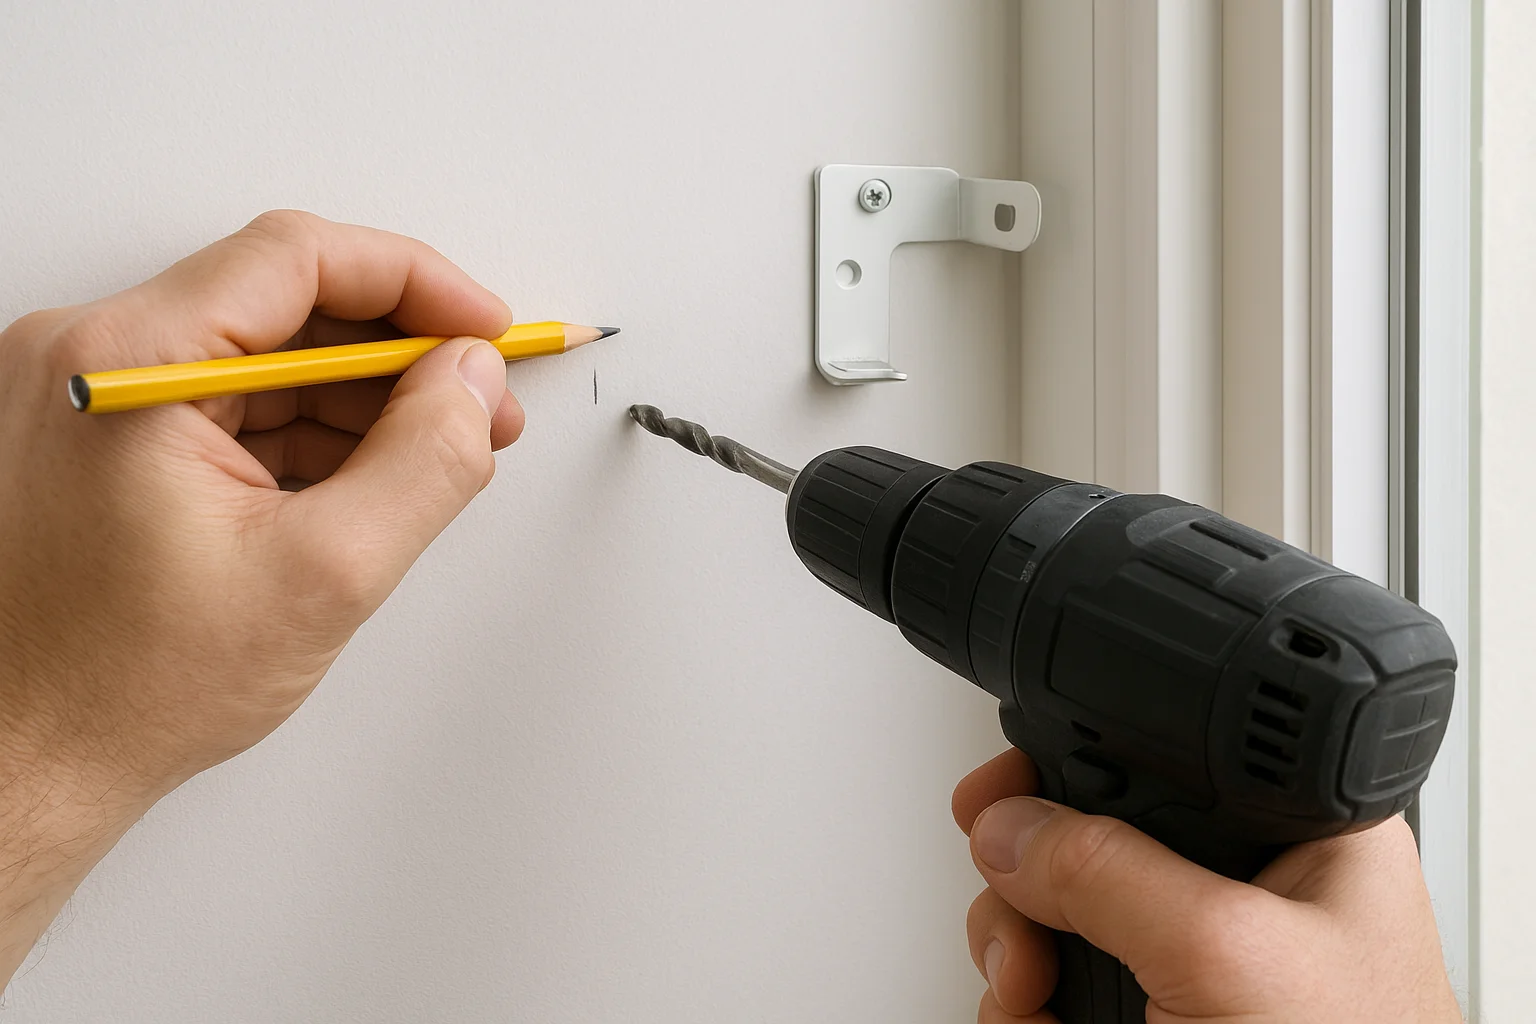
Mark and drill bracket locations
Place your brackets at the positions specified in your installation instructions, typically one to two inches from each end of the shade width. Hold each bracket against the mounting surface and mark the screw holes with a pencil. Use a level across both bracket marks to verify they're at the same height before drilling. Pre-drill pilot holes using a bit slightly smaller than your mounting screws to prevent wood splitting or drywall crumbling.
Snap the shade into place
Secure the brackets with the provided screws, checking that they're tight but not overtightened (which can strip the holes). Lift your motorized shade assembly and align the motor housing with one bracket, then press firmly until you hear a click. Rotate the opposite end of the shade into the second bracket using the same clicking motion. Gently tug downward on the shade to confirm both ends are locked securely.
Always test that brackets are firmly attached before hanging the shade to avoid damaging the motor assembly.
Step 3. Power up and set travel limits
Your motorized shade won't operate correctly until you establish the upper and lower travel limits that tell the motor where to stop. This programming step prevents the shade from rolling too far in either direction, which could damage the fabric or motor mechanism. You'll spend five to ten minutes per shade running through the limit-setting sequence using buttons on the motor housing or your remote control.
Insert batteries or connect power
Locate the battery compartment on the motor tube (usually accessible from one end after installation) and insert the required batteries according to the polarity markings. Fresh alkaline batteries provide the most reliable performance during your motorized shades installation and initial programming. If you're using a hardwired setup, verify that your low-voltage transformer is plugged in and the connection at the shade motor is secure before proceeding.
Program upper and lower limits
Press and hold the programming button on your motor or remote (consult your specific model's instructions for the exact sequence) until the shade jogs or beeps to indicate it's in programming mode. Manually adjust the shade to your desired fully raised position using the up button, then press the programming button again to save that upper limit. Lower the shade to your preferred closed position and repeat the save process to set the bottom limit.
Test your programmed limits by running the shade through several full cycles to confirm it stops exactly where you want.
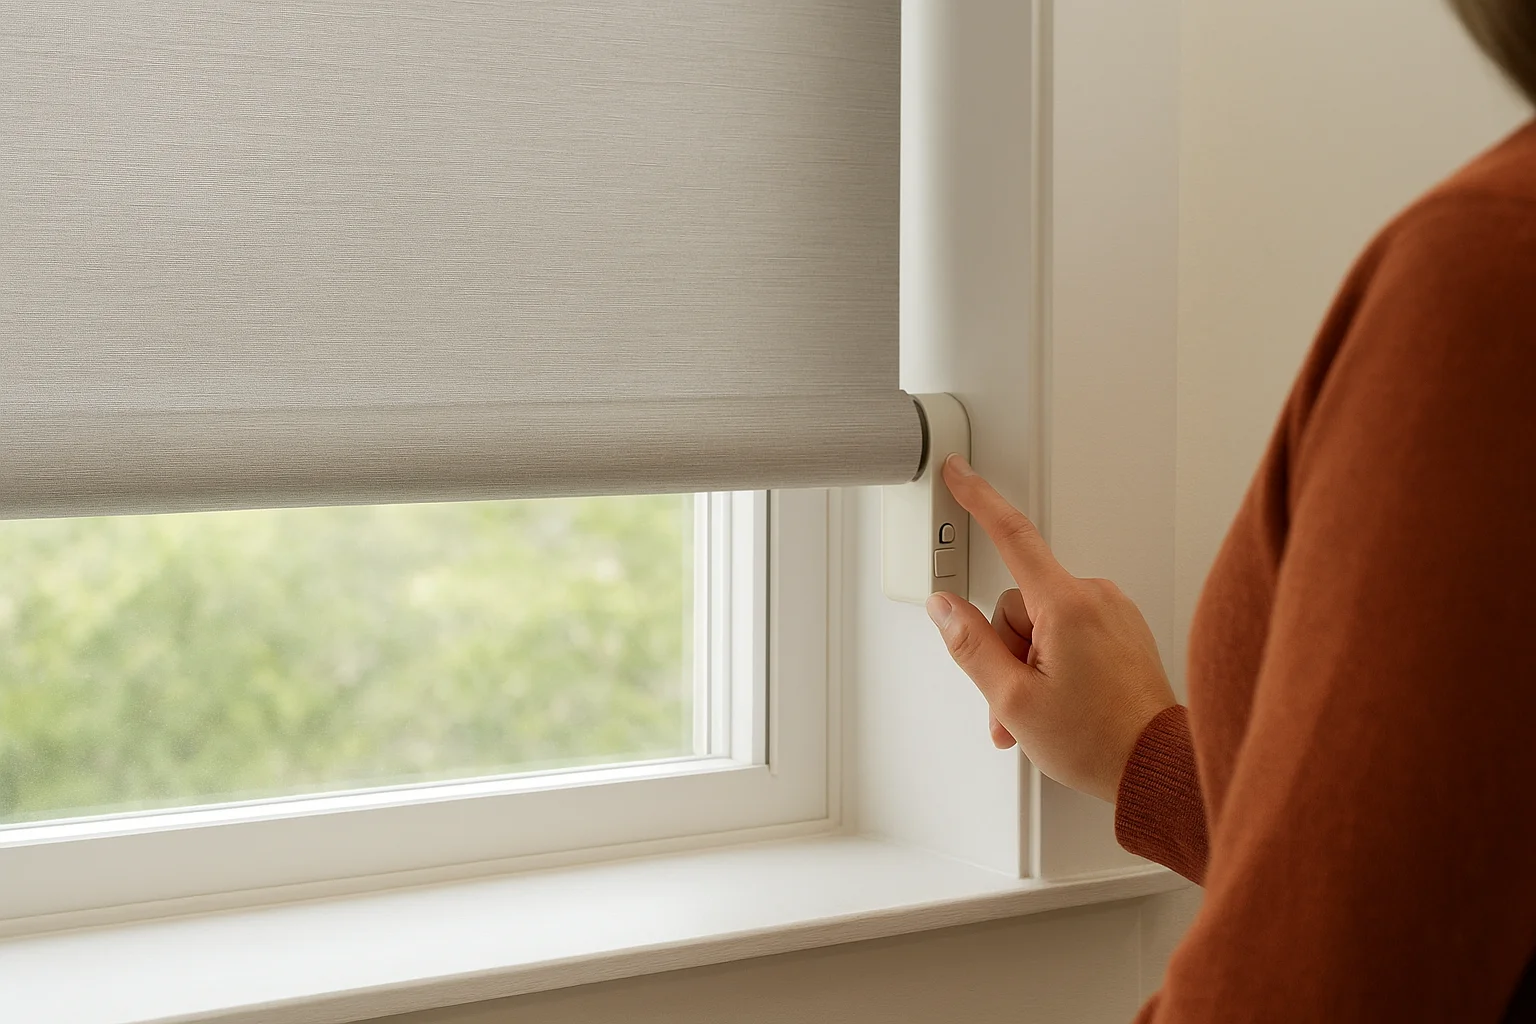
Step 4. Pair remotes, apps, and smart home
Connecting your shades to control devices transforms your motorized shades installation from basic up-down functionality into a fully integrated system. You'll pair handheld remotes, smartphone apps, or voice assistants depending on your shade manufacturer and personal preferences. Most modern motorized shades support multiple control methods simultaneously, allowing you to use a wall-mounted remote for quick adjustments while family members control the same shades from their phones.
Sync your remote control
Press and hold the pairing button on your remote (often located on the back or inside the battery compartment) until an LED indicator begins flashing. Within five seconds, tap the programming button on your shade motor to complete the connection. The shade will jog briefly to confirm successful pairing. Repeat this process for each additional remote you want to control the same shade, or assign different channel buttons on multi-channel remotes to operate separate shades independently.
Connect to smartphone apps
Download your manufacturer's app from the Apple App Store or Google Play Store and create an account if required. Follow the in-app instructions to add your shades, which typically involves putting the motor in pairing mode and selecting it from the app's device discovery screen. Most systems require your phone and shades to connect to the same WiFi network or Bluetooth hub for reliable operation, so verify your network credentials before starting.
Smart home integration usually requires completing the app setup first before linking to Alexa, Google Home, or HomeKit.
Ready to automate your windows
You now have the complete process for motorized shades installation, from mounting brackets to syncing your smart home controls. Following these steps gives you functional automated shading in a weekend project, though some homeowners prefer professional installation when dealing with multiple windows or hardwired power connections. Your shades will transform daily routines, blocking morning sun without leaving bed or closing all blinds simultaneously when you leave home.
If your project involves complex integration with lighting scenes, multiple rooms requiring consistent programming, or you'd simply rather have experienced installers handle the work, our team serves the Treasure Valley area with complete smart home solutions. We've completed hundreds of automated shading installations across Boise, Meridian, and surrounding communities, handling everything from simple battery-powered setups to whole-home systems integrated with voice control and scheduling. Contact us to discuss your motorized shade project and we'll design a system that fits your specific windows and control preferences.