
Your smart TV buffers during movie night. Video calls freeze at the worst moments. The kids complain about lag while gaming. These frustrations almost always trace back to one source: a poorly planned...
How To Set Up A Home Network: Router, Wi-Fi & Security Setup
Your smart TV buffers during movie night. Video calls freeze at the worst moments. The kids complain about lag while gaming. These frustrations almost always trace back to one source: a poorly planned home network. Learning how to set up a home network the right way solves these problems and creates the foundation for every connected device in your house.
A reliable network does more than deliver Wi-Fi to your phone. It supports security cameras, smart thermostats, streaming devices, and dozens of other technologies that modern households depend on daily. Get the setup wrong, and you'll deal with dead zones, dropped connections, and constant troubleshooting. Get it right, and everything just works.
At Treasure Valley Solutions, we design and install complete smart home systems throughout the Boise and Meridian area, and every project starts with solid network infrastructure. Whether you're tackling this yourself or want to understand what goes into a professional installation, this guide walks you through the entire process: choosing the right equipment, positioning your router and access points, configuring Wi-Fi settings, and locking down your network security. Let's build a network that actually keeps up with your household.
What a solid home network includes
Understanding the components of a reliable home network helps you make smart buying decisions and avoid expensive mistakes. A complete setup requires more than just plugging in a router and hoping for the best. You need the right hardware working together, proper positioning throughout your space, and security configurations that protect your entire household. These elements form the backbone of everything from basic web browsing to 4K streaming and smart home automation.
Core hardware you need
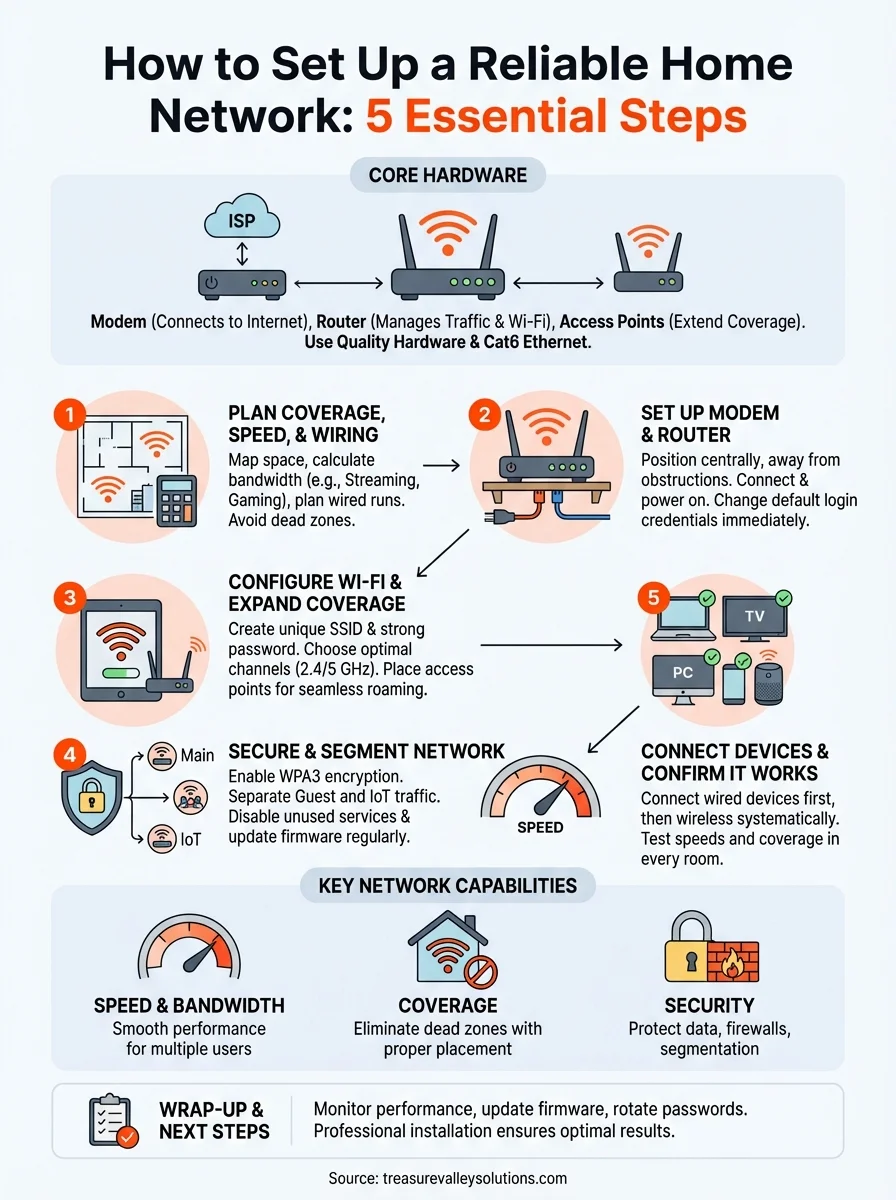
Your network runs on three main pieces of equipment: a modem, a router, and potentially one or more access points. The modem connects your home to your internet service provider and converts the incoming signal into data your devices can use. Your router manages traffic between all connected devices and creates the Wi-Fi network. Access points extend that Wi-Fi coverage into areas your router can't reach effectively.
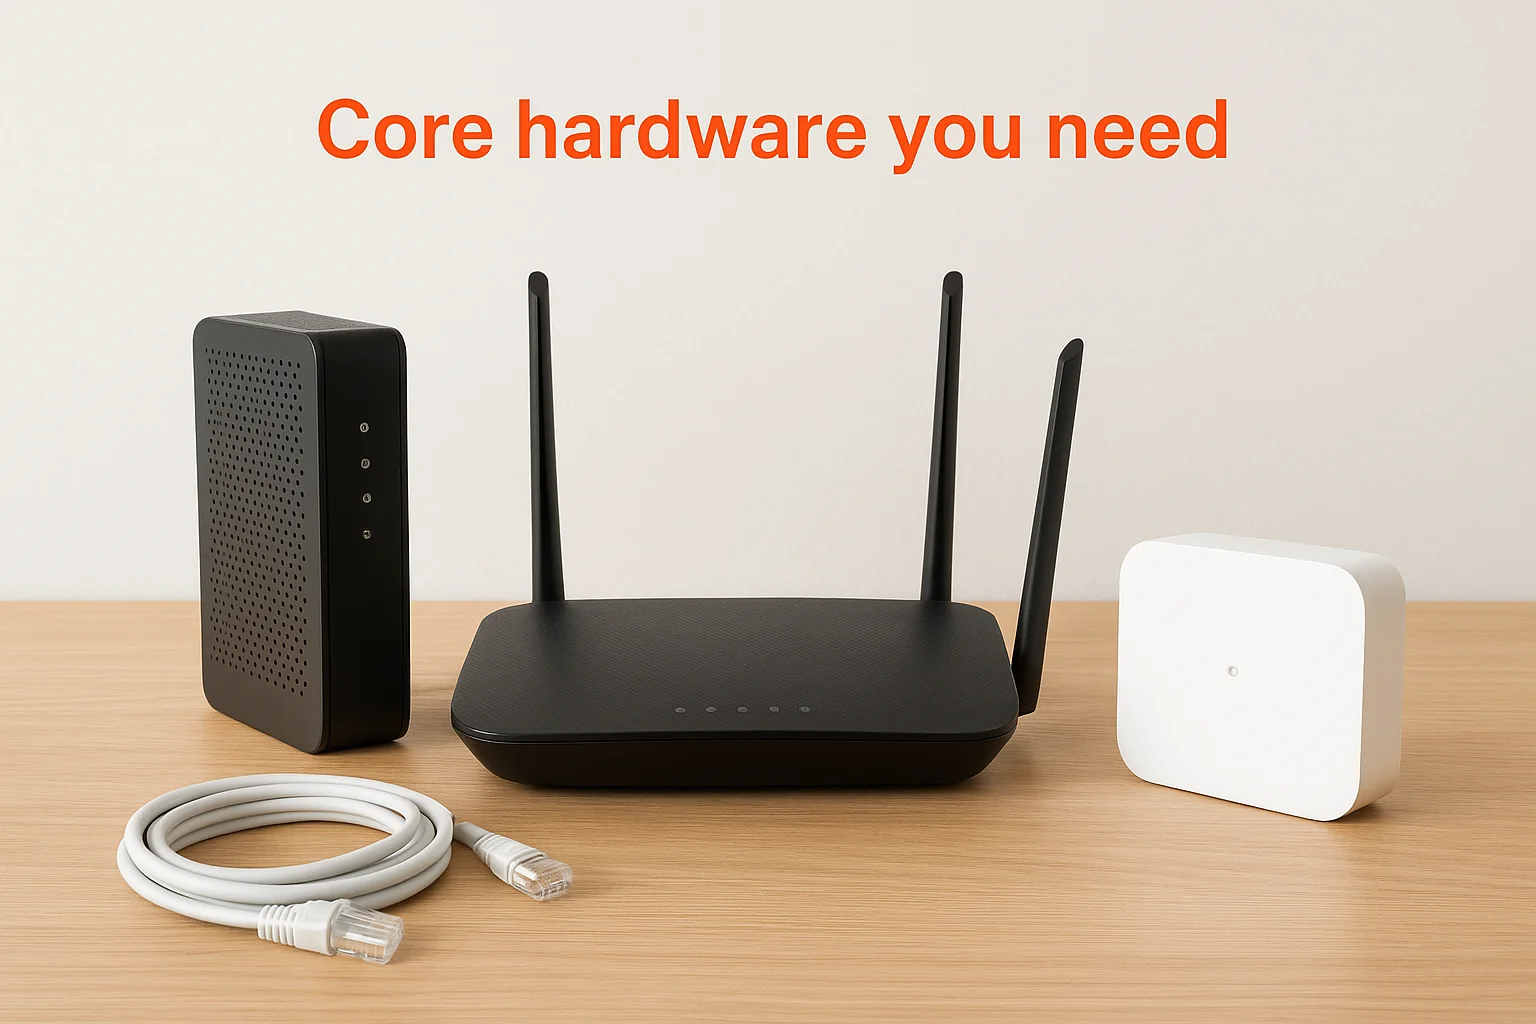
Many people use a combined modem-router unit from their ISP, but separating these devices gives you more control and better performance. A standalone router lets you upgrade without changing modems, and dedicated access points deliver stronger signals than mesh systems in larger homes. Ethernet cables also play a crucial role. Cat5e works for most homes, but Cat6 or Cat6a cables support faster speeds and reduce interference, especially for runs longer than 50 feet.
Strong network infrastructure means investing in quality hardware that matches your home's size and your household's usage patterns.
Network capabilities that matter
Speed and bandwidth determine how many devices can run simultaneously without slowdowns. Your internet plan provides a certain download and upload speed, measured in megabits per second (Mbps). A household with multiple people streaming video, gaming, and working from home needs at least 200-300 Mbps to maintain smooth performance. Your router's specifications should exceed your plan's speed to avoid bottlenecks.
Coverage reaches every corner of your home when you position hardware correctly and add access points where needed. Dead zones happen when walls, floors, and distance weaken the Wi-Fi signal. Identifying these problem areas before you start installation saves you from having to troubleshoot later. Walk through your entire home with your current network and note where the signal drops. These spots need wired access points or strategic router placement.
Security features protect your network from unauthorized access and cyber threats. Modern routers include firewalls, guest networks, and encryption options that keep your personal data safe. The setup process for how to set up a home network must include changing default passwords, enabling WPA3 encryption, and creating separate networks for IoT devices. Network segmentation isolates smart home devices from computers and phones, which limits damage if one device gets compromised. Regular firmware updates patch vulnerabilities that hackers exploit, so automated updates save you from remembering this critical maintenance task.
Step 1. Plan coverage, speed, and wiring
The planning phase determines whether your network performs reliably or creates ongoing headaches. You need to map your physical space, identify where devices will connect, and calculate the bandwidth your household actually requires. Rushing into equipment purchases before understanding your layout wastes money on hardware that doesn't match your needs. Taking time to plan now prevents you from ripping out cables or repositioning access points later.
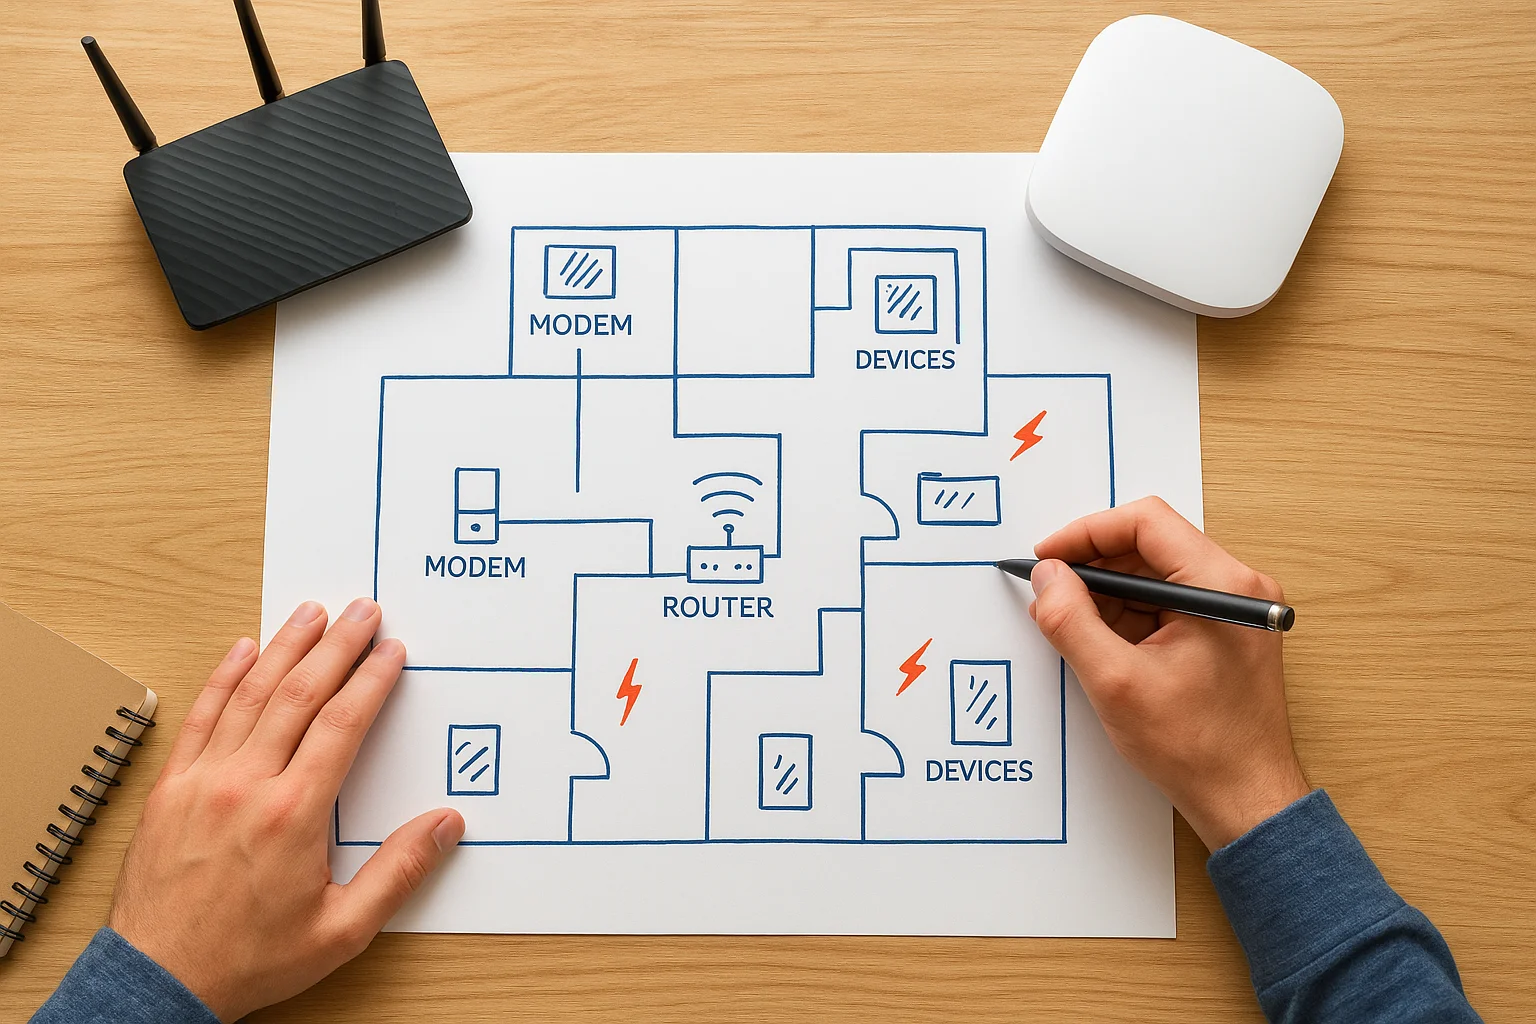
Map your space and device locations
Walk through every room and note the location of devices that need connectivity. Create a simple floor plan showing where your modem connection enters the house, where you'll place your router, and where stationary devices like smart TVs, gaming consoles, and desktop computers sit. Mark problem areas where you currently experience weak signals or dead zones. These spots need wired access points, not just stronger Wi-Fi.
Identify walls that contain plumbing, HVAC ducts, or metal studs, since these materials block wireless signals more than standard drywall. Brick and concrete cause even worse interference. Your map reveals the most efficient cable routes and shows you where to position access points for maximum coverage. This physical assessment forms the foundation of how to set up a home network that actually covers your entire space.
Calculate bandwidth requirements
Add up the simultaneous users and devices active during your household's peak usage times. Each 4K video stream consumes roughly 25 Mbps, HD streaming uses 5-8 Mbps, and video calls require 3-4 Mbps per person. Gaming typically needs 3-6 Mbps but demands low latency. Smart home devices use minimal bandwidth individually, but dozens of them add up.
Here's a quick calculation example for a busy household:
- 2 people streaming 4K video: 50 Mbps
- 1 person gaming: 6 Mbps
- 2 video calls: 8 Mbps
- 15 smart home devices: 5 Mbps
- General browsing and background usage: 20 Mbps
- Total requirement: roughly 89 Mbps
Adding 50% overhead to your calculated needs prevents slowdowns during peak usage and accounts for future device additions.
Plan ethernet cable runs
Identify which devices benefit from wired connections instead of Wi-Fi. Gaming PCs, work-from-home desktops, smart TVs, and access points all perform better with ethernet cables. Map the cable routes from your router location to these devices, measuring distances and noting where cables need to pass through walls or floors. Cat6 cable handles runs up to 328 feet and supports speeds beyond what most households need for the next decade.
Consider future expansion when planning runs. Pull extra cables to locations where you might add devices later, since fishing cables through finished walls costs far more than running them during initial setup. Label both ends of every cable clearly to simplify troubleshooting down the road.
Step 2. Set up your modem and router
Physical installation of your modem and router sets the stage for everything that follows in how to set up a home network. Equipment placement affects signal strength, coverage patterns, and the ease of running ethernet cables to other rooms. You want your hardware accessible for troubleshooting but positioned to deliver the strongest signal to the areas you use most. Most people shove their router into a closet or basement, which immediately cripples performance before the network even goes live.
Position your modem and router strategically
Place your modem where your internet service line enters your home, typically near a cable outlet or phone jack. Your router should sit in a central, elevated location with minimal obstructions. Avoid corners, closets, and metal cabinets that block wireless signals. Wall-mounting your router at eye level or higher delivers better coverage than tucking it behind furniture or placing it on the floor.
Keep the router away from microwave ovens, cordless phones, and baby monitors, which operate on similar frequencies and cause interference. Maintain at least three feet of clearance from these devices. Position the router's antennas perpendicular to each other if your model includes external antennas, with one vertical and one horizontal to maximize coverage across different device orientations.
Connect and power on equipment
Follow this sequence to bring your equipment online without configuration errors:
- Connect the coax cable (or phone line for DSL) from the wall outlet to your modem's input port
- Plug an ethernet cable from the modem's output port to your router's WAN or Internet port
- Power on the modem first and wait 2-3 minutes for it to establish the connection with your ISP
- Power on the router and wait another 2-3 minutes for it to complete its startup sequence
- Connect your computer to the router using ethernet or the default Wi-Fi network printed on the router label
The lights on both devices indicate connection status. Your modem's internet light should glow solid (not blinking) when the connection succeeds. Your router's power and internet lights should also show solid colors, though specific indicators vary by manufacturer.
Access router settings and change defaults
Open a web browser on your connected computer and type your router's IP address into the address bar. Common addresses include 192.168.1.1, 192.168.0.1, or 10.0.0.1. Check your router's label or manual for the exact address. Log in using the default credentials printed on the router, then immediately change both the username and password to something unique.
Leaving default login credentials active gives anyone on your network administrative access to your entire system, which exposes every connected device to potential attacks.
Navigate to the basic setup section and configure your time zone, which many security features require to function properly. Enable automatic firmware updates if your router supports this option, since manufacturers regularly patch security vulnerabilities.
Step 3. Configure Wi-Fi and expand coverage
Configuring your Wi-Fi network properly transforms how to set up a home network from a basic connection into a reliable system that serves every corner of your space. Your network name, password, and channel settings determine both performance and security. Most people never change the default settings, which leaves their network vulnerable and operating on crowded frequencies that cause slowdowns. This step requires accessing your router's wireless settings and making strategic choices about how your network broadcasts.
Create and optimize Wi-Fi settings
Navigate to your router's wireless settings page and create a unique network name (SSID) that doesn't reveal your address, name, or router model. Generic names like "Johnson Family Network" or "Linksys_5G" give attackers information they shouldn't have. Choose a strong password with at least 16 characters mixing uppercase, lowercase, numbers, and symbols. Avoid dictionary words, personal information, or predictable patterns.
Select the appropriate Wi-Fi channel to minimize interference from neighboring networks. Your router operates on either the 2.4 GHz or 5 GHz band, and each band contains multiple channels. Use channel 1, 6, or 11 for 2.4 GHz networks since these don't overlap with each other. For 5 GHz networks, higher channels (149-165) typically experience less congestion in residential areas. Most modern routers include an automatic channel selection feature, but manual selection often delivers better results in crowded neighborhoods.
Enable both 2.4 GHz and 5 GHz bands if your router supports dual-band operation. The 2.4 GHz band penetrates walls better and covers longer distances, making it ideal for smart home devices and outdoor cameras. The 5 GHz band offers faster speeds but shorter range, perfect for streaming and gaming in the same room as your router.
Position and configure access points
Install wired access points in areas where your router's signal weakens or disappears entirely. Run ethernet cables from your router to each access point location using the routes you planned earlier. Mount access points on ceilings or high on walls for optimal coverage patterns, keeping them away from metal objects and electrical interference.
Configure each access point with the same SSID and password as your main router so devices roam seamlessly between them. Set each access point to use different channels to prevent interference. Space access points 30-50 feet apart in homes with standard drywall construction, or closer in buildings with concrete or brick walls.
Proper access point placement eliminates dead zones without creating overlapping coverage that causes devices to stick to weak signals instead of switching to stronger ones.
Test coverage throughout your home
Walk through every room with your phone or laptop and verify signal strength using your device's Wi-Fi settings. Check upload and download speeds in each location using a speed test website. Your speeds should stay within 20-30% of your plan's maximum in all areas you consider critical. Adjust access point positions or add additional units where coverage falls short.
Step 4. Secure and segment your network
Security transforms your network from an open door into a protected system that keeps unauthorized users and malicious traffic out. Network segmentation adds another layer by isolating different types of devices from each other, so a compromised smart bulb can't access your laptop or financial data. This step in how to set up a home network requires careful attention to settings that most people ignore, yet these configurations protect everything connected to your system. Your router includes security features that remain disabled by default, waiting for you to activate them.
Enable strong encryption and authentication
Access your router's wireless security settings and select WPA3 encryption if your router supports it, or WPA2 if not. Avoid WPA, WEP, or open networks entirely since these older protocols expose your data to anyone nearby. Disable WPS (Wi-Fi Protected Setup) in your router's advanced wireless settings, even though it promises easy device connections. WPS contains known vulnerabilities that attackers exploit to bypass your password protection.
Change your router's administrative password to something completely different from your Wi-Fi password. Use a unique password for router access that you store securely, since this credential controls every aspect of your network. Navigate to the administration or management section and update both the username and password from their factory defaults.
Separate guest and IoT traffic
Create a dedicated guest network through your router's guest network settings. Configure this network with a different password and enable isolation features that prevent guest devices from communicating with your main network devices. Restrict guest network access to internet-only connectivity, blocking all local file sharing and printer access.

Set up a third network specifically for IoT devices like smart thermostats, security cameras, and connected appliances. Most routers support creating multiple SSIDs or VLANs for this purpose. Configure this IoT network with the following parameters:
- Separate SSID and password from main and guest networks
- Internet access enabled but local network access restricted
- Device-to-device communication disabled unless required
- Regular security monitoring through router logs
Isolating IoT devices on their own network prevents a hacked smart device from accessing computers, phones, and sensitive data on your primary network.
Disable unnecessary services and update firmware
Turn off remote management features unless you specifically need to access your router from outside your home network. Disable UPnP (Universal Plug and Play) in your router's advanced settings, since this convenience feature creates security holes that malware exploits. Enable automatic firmware updates if available, or set a monthly reminder to check for and install updates manually through your router's system or firmware section.
Review your router's firewall settings and confirm the firewall remains enabled. Most routers ship with firewalls active, but verify this setting and configure logging to track blocked connection attempts.
Step 5. Connect devices and confirm it all works
Connecting your devices in the right order prevents configuration conflicts and makes troubleshooting easier if problems arise. This final step in how to set up a home network validates that your planning, hardware setup, and security configurations work together properly. Start with wired connections before adding wireless devices, since ethernet-connected equipment establishes your baseline performance and helps identify whether issues stem from Wi-Fi coverage or other factors. Testing each device as you add it reveals problems immediately instead of forcing you to troubleshoot dozens of connections simultaneously.
Connect wired devices first
Plug ethernet cables into your router's LAN ports and connect them to devices like desktop computers, gaming consoles, smart TVs, and network-attached storage. Power on each device and verify it obtains an IP address automatically. Check your router's connected devices list through its web interface to confirm each wired device appears with the correct name and IP address.
Test download and upload speeds on wired devices using a speed test website. Your results should match or exceed your internet plan's advertised speeds, typically within 90-95% of the maximum. Document these baseline speeds since they establish what your network can deliver under ideal conditions. Run multiple tests at different times to account for ISP congestion.
Add wireless devices systematically
Connect your phone or laptop first to establish that your Wi-Fi broadcasts properly and authentication works. Join the network using the SSID and password you configured, then verify internet access by loading several websites. Add remaining wireless devices one at a time: tablets, laptops, smart speakers, and streaming devices on your main network. Place IoT devices on your dedicated IoT network to maintain the segmentation you created earlier.
Test connectivity for each device immediately after joining the network. Stream video on smart TVs, make voice calls on smart speakers, and verify mobile devices can access both local resources and internet content without delays.
Systematic device addition helps you identify which specific device causes problems rather than troubleshooting an entire network of connections simultaneously.
Run comprehensive connectivity tests
Walk through your home with a mobile device connected to Wi-Fi and confirm you maintain strong signal strength in every room. Open applications that require internet access in different locations to verify consistent performance. Check that devices properly roam between your router and access points without dropping connections as you move through your space.
Test your guest network isolation by connecting a device to the guest SSID and attempting to access shared folders or printers on your main network. These attempts should fail, confirming your segmentation works correctly. Verify IoT devices can reach the internet but cannot communicate with devices on your primary network unless specifically required.
Wrap-up and next steps
You now understand how to set up a home network that delivers reliable performance throughout your entire space. Following these five steps gives you control over your connectivity, security, and the foundation for every smart device you add to your household. Your network handles current demands and scales as your technology needs grow, whether that means adding more cameras, upgrading to faster internet speeds, or expanding into additional rooms.
Monitor your network performance regularly by checking device connection quality and running speed tests every few months. Update firmware when manufacturers release patches, rotate your Wi-Fi password annually, and review your connected devices list to remove equipment you no longer use. These maintenance tasks keep your network secure and performing at its best.
Professional installation eliminates guesswork and delivers results the first time. At Treasure Valley Solutions, we design and install complete network systems as part of our smart home integrations throughout Boise and Meridian. Contact our team to discuss your specific needs and get a network that supports everything your household demands.