Jobsite theft bleeds construction companies dry. Equipment vanishes overnight. Materials walk off before you notice. And by the time you realize copper wire or power tools are gone, the trail has gone...
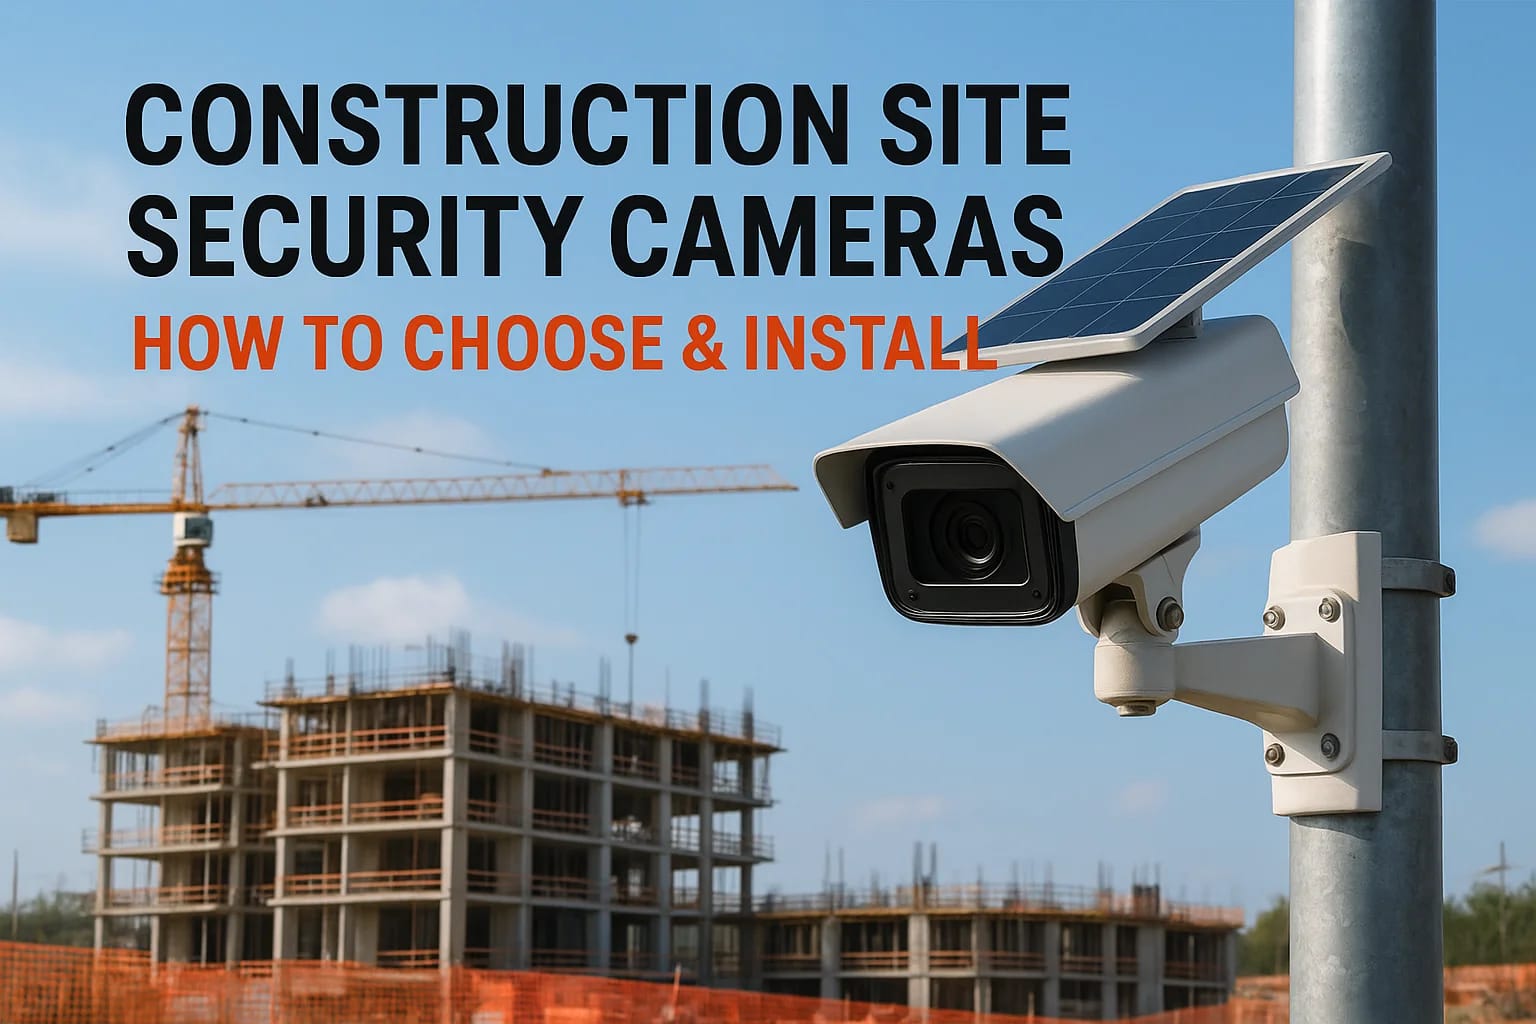
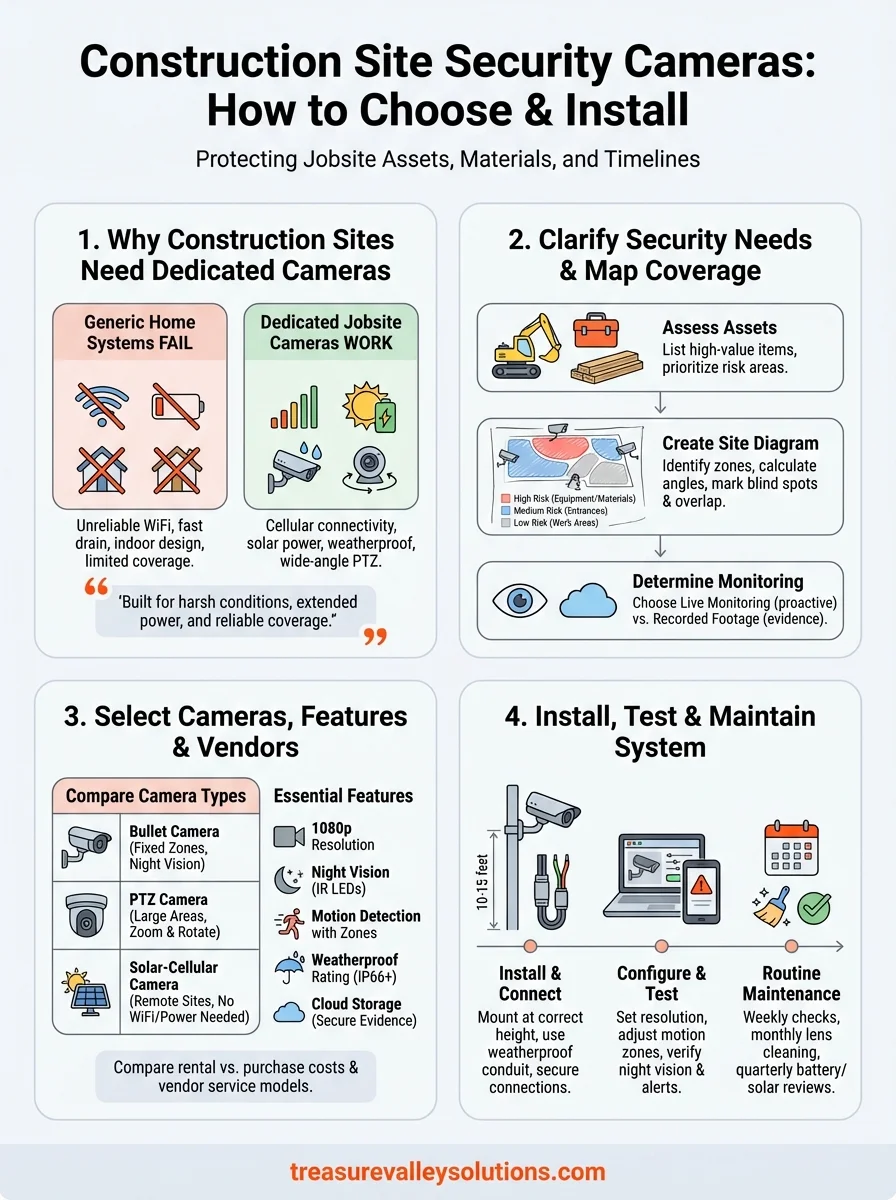
Construction Site Security Cameras: How to Choose & Install
Jobsite theft bleeds construction companies dry. Equipment vanishes overnight. Materials walk off before you notice. And by the time you realize copper wire or power tools are gone, the trail has gone cold. The National Equipment Register puts annual construction theft losses at $1 billion, with each stolen item averaging $30,000. Those numbers hit hard whether you manage a single site or coordinate a dozen projects.
Security cameras give you eyes on every corner of your jobsite when workers leave for the day. The right system records everything, sends alerts when motion is detected, and creates evidence you can hand to law enforcement. Some vendors offer cellular cameras that work without WiFi. Others provide solar power for remote locations. You can rent systems for short projects or buy permanent setups.
This guide walks you through choosing and installing construction site cameras from start to finish. You will learn how to assess your security needs, position cameras for maximum coverage, compare features from different vendors, and get your system running properly. By the end, you will know exactly what equipment to buy and how to protect your site.
Why construction sites need dedicated cameras
Generic home security cameras fail on construction sites for specific reasons. Standard residential systems need stable WiFi connections that most jobsites lack during the building phase. Battery-powered home cameras drain quickly when recording constant activity across large outdoor areas. You cannot rely on equipment designed for doorsteps and driveways when you need to monitor acres of property with constantly changing layouts.
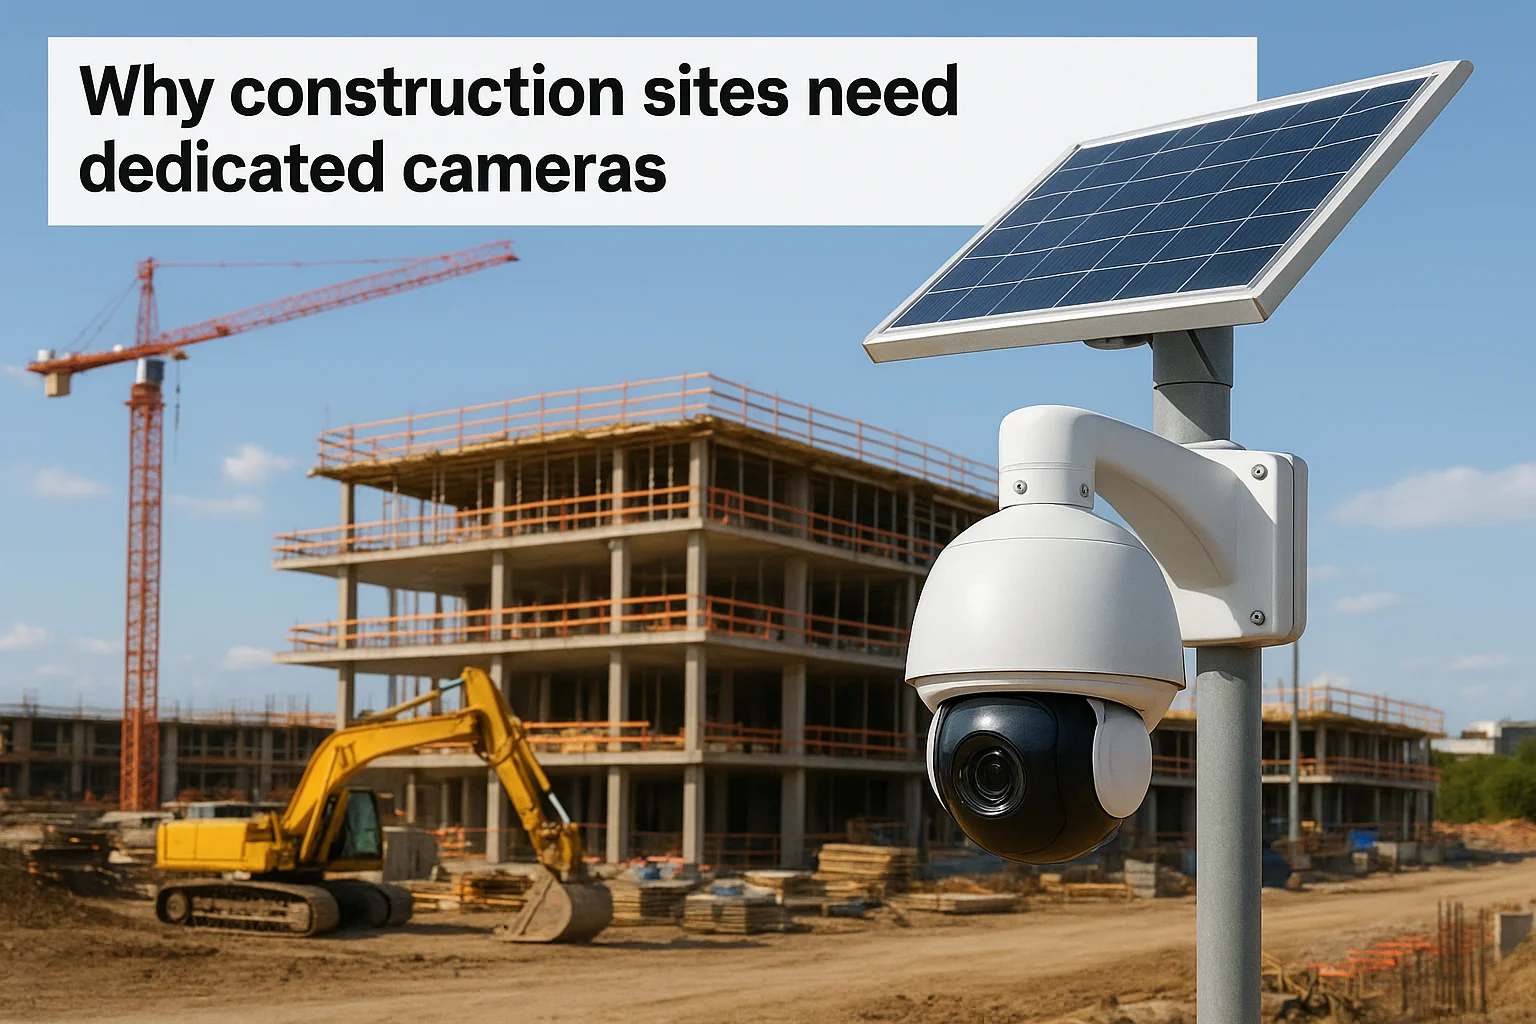
Construction site security cameras solve problems that generic systems ignore. Cellular connectivity keeps cameras running on remote sites without internet infrastructure. Solar panels power cameras for months without recharging or electrical hookups. Weatherproof housings withstand dust, mud, rain, and temperature swings that destroy consumer-grade equipment within weeks. Most importantly, wide-angle lenses and pan-tilt-zoom features let you cover equipment yards, material storage, site entrances, and perimeter fencing with fewer devices.
Dedicated jobsite cameras deliver the reliability and coverage that generic security systems cannot match in harsh construction environments.
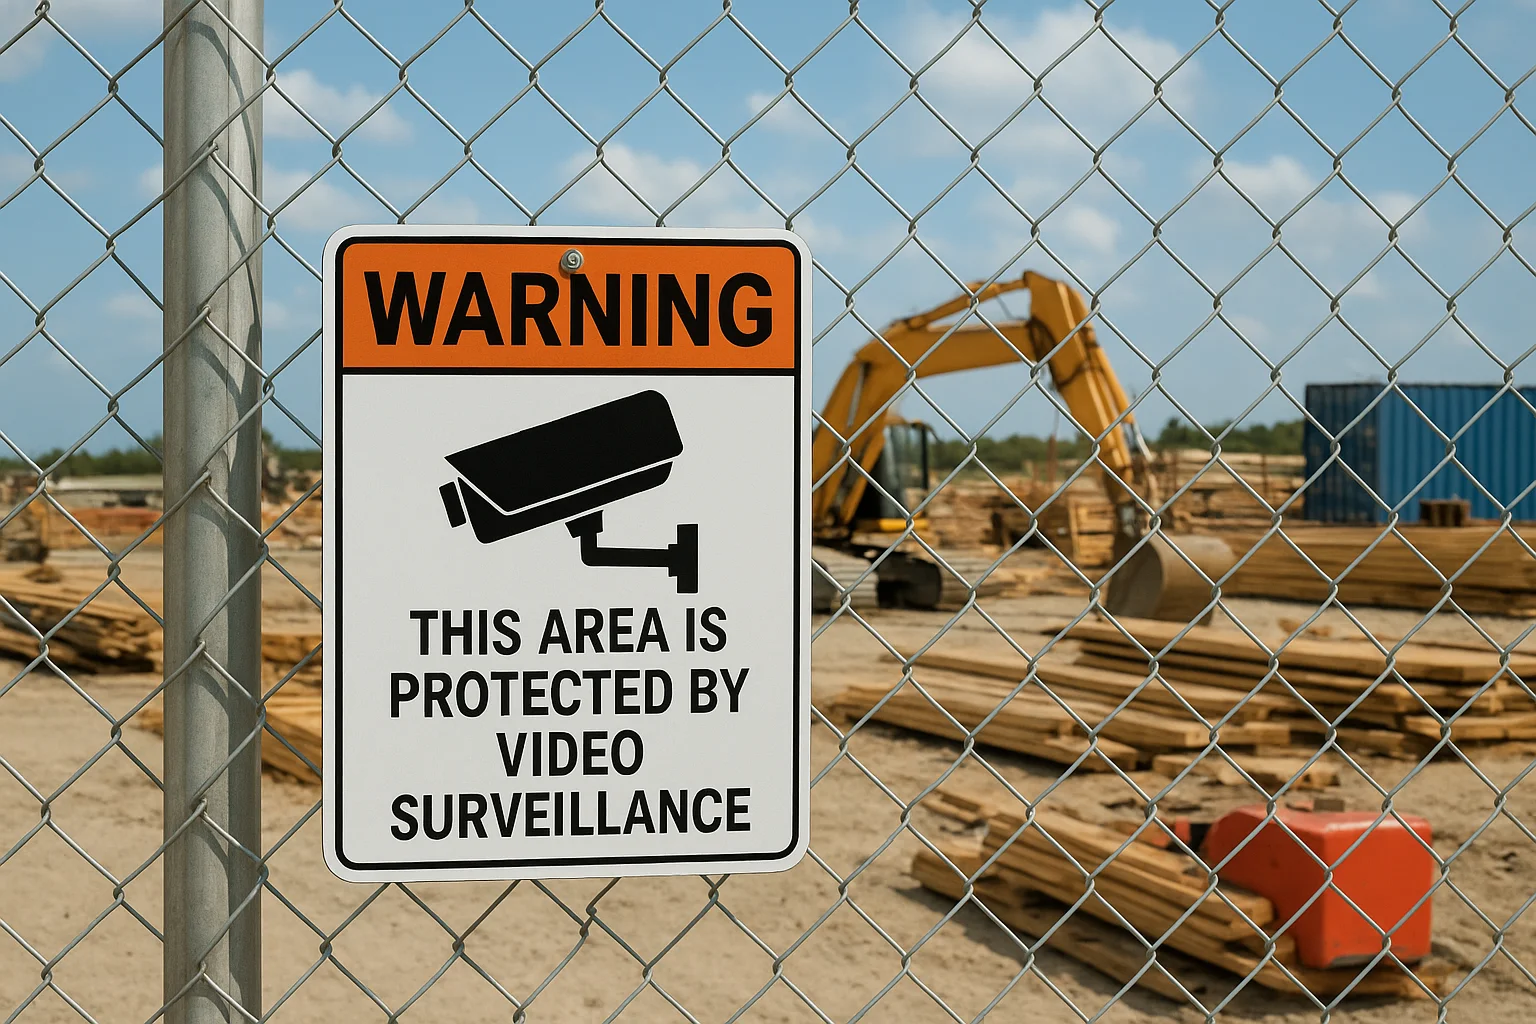
Real-time alerts notify you the moment someone enters a restricted zone after hours. Time-stamped recordings document who accessed the site and when. Insurance companies often require documented surveillance, and some providers reduce premiums when you install monitored camera systems. Law enforcement uses your footage to identify thieves and recover stolen equipment faster.
Step 1. Clarify your jobsite security needs
You cannot pick the right construction site security cameras without knowing what you need to protect and how you will monitor it. Start by listing every high-value asset on your jobsite: excavators, generators, copper wiring, lumber stacks, tools, and materials that thieves target most. Walk the perimeter and note vulnerable entry points where someone could slip through fencing or gates after hours. Different projects demand different levels of surveillance, and you waste money buying features you never use.
Assess what you need to protect
Document the dollar value of equipment and materials stored on site at any given time. Construction projects with $500,000 worth of machinery need more comprehensive coverage than a residential remodel with $15,000 in tools. Identify your highest-risk areas by asking where theft would hurt your timeline and budget most severely. Equipment yards typically require 24/7 recording, while staging areas might only need motion-triggered alerts.
Use this checklist to map your protection priorities:
- Heavy equipment (excavators, loaders, dozers) and vehicles
- Tool storage containers and job boxes
- Material stockpiles (copper, aluminum, lumber, fixtures)
- Site entrances, gates, and perimeter fencing
- Temporary offices and storage trailers
- Fuel tanks and generators
Determine monitoring requirements
Decide whether you need live monitoring or recorded footage for review after incidents occur. Live monitoring costs more but lets you stop theft in progress. Calculate how long you need to store recordings based on insurance requirements and local regulations. Most construction projects benefit from 30 to 90 days of stored footage.
Knowing exactly what you need to protect and how you will monitor it prevents overspending on unnecessary features and underspending on critical coverage.
Your monitoring approach depends on staffing and budget. Remote sites without on-site security personnel require cellular alerts that notify you immediately when cameras detect motion.
Step 2. Map camera locations and coverage zones
Draw a scaled diagram of your jobsite before you buy a single camera. This step prevents coverage gaps that thieves exploit and stops you from purchasing more cameras than necessary. Use graph paper, CAD software, or a simple hand-drawn sketch that shows your site's perimeter, buildings, equipment storage areas, material stockpiles, and access points. Mark dimensions in feet so you can calculate actual coverage later.
Create a site diagram with zones
Divide your jobsite into security zones based on risk levels and activity patterns. High-risk zones include equipment yards, tool storage, and material stockpiles that hold valuable assets. Medium-risk zones cover site entrances, parking areas, and perimeter sections. Low-risk zones typically include open work areas with minimal stored value. Label each zone on your diagram and assign priority numbers from 1 (highest risk) to 3 (lowest risk).
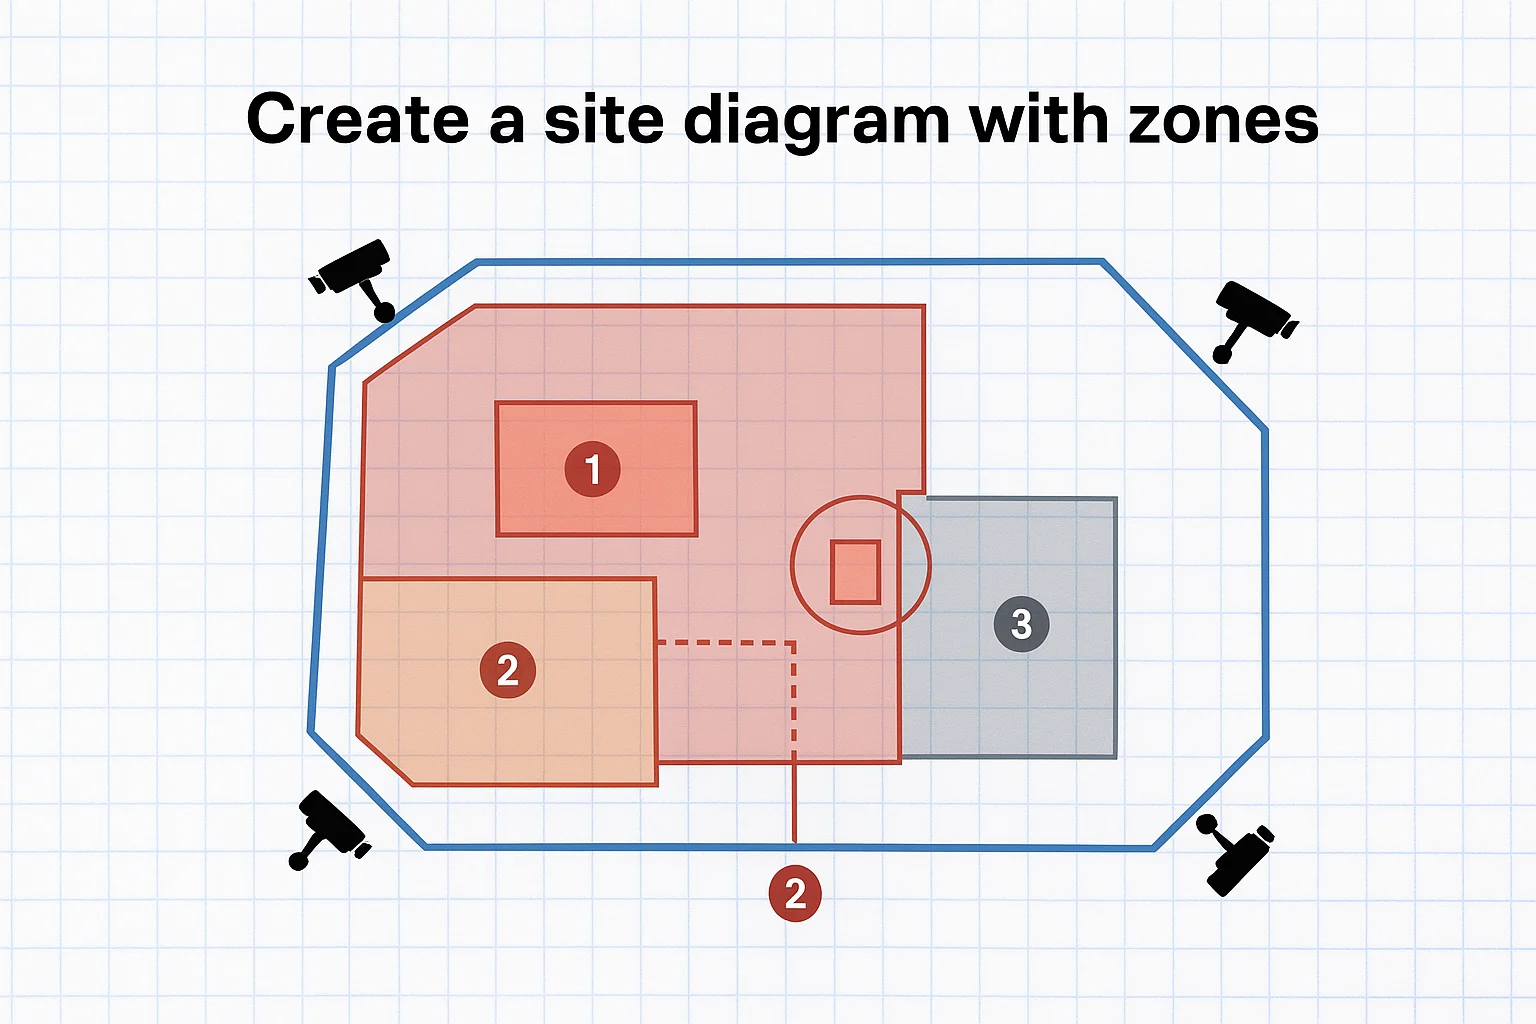
Follow these steps to map your zones:
- Mark all site entrances, gates, and fence openings in red
- Circle equipment storage and high-value material areas in red
- Outline perimeter sections in blue
- Shade work areas with minimal assets in gray
- Add lighting locations to identify areas needing night vision
Calculate camera angles and ranges
Most construction site security cameras cover between 90 and 110 degrees horizontally, with effective ranges from 30 to 100 feet depending on resolution and lens quality. Measure the distance from your proposed camera mounting points to the farthest objects you need to monitor clearly. Place a camera location marker on your diagram where mounting options exist, such as light poles, fence posts, temporary structures, or portable camera trailers.
Strategic camera placement with overlapping coverage eliminates blind spots where theft occurs most frequently.
Standard bullet cameras work best for monitoring specific zones like gates or equipment entrances from 30 to 60 feet away. Pan-tilt-zoom cameras cover larger areas and let you adjust viewing angles remotely, making them ideal for equipment yards and perimeter surveillance from a single mounting point.
Mark blind spots and overlap areas
Walk your site at different times of day to identify spots where shadows, structures, or terrain create visibility problems. Fencing corners, behind storage containers, and areas blocked by excavated earth typically become blind spots. Draw these problem areas on your diagram using dashed lines, then position cameras to eliminate coverage gaps. You want 10 to 20 percent overlap between adjacent camera fields of view to prevent thieves from finding unmonitored pathways.
Test your planned layout by standing at each camera location and verifying line-of-sight to your target zones. Adjust positions until every high-risk area appears in at least one camera's coverage zone. This physical walkthrough catches problems that paper planning misses.
Step 3. Select camera types, features, and vendors
Your site diagram and security priorities determine which camera types make sense for your project. Construction site security cameras come in dozens of configurations, and manufacturers market features you might never use. Focus on cameras built specifically for outdoor construction environments rather than adapting indoor or residential systems that fail under jobsite conditions. You need equipment that works reliably in extreme temperatures, handles dust and moisture, and operates without constant maintenance visits.
Compare camera types for jobsite conditions
Bullet cameras deliver the most reliable performance for monitoring specific zones like gates, equipment entrances, and material storage areas. Their cylindrical housing sheds water effectively, and most models include infrared LEDs for night vision up to 100 feet. Mount bullet cameras at heights of 10 to 15 feet to prevent tampering while maintaining clear facial recognition quality at ground level. These cameras typically cost $200 to $800 each depending on resolution and features.
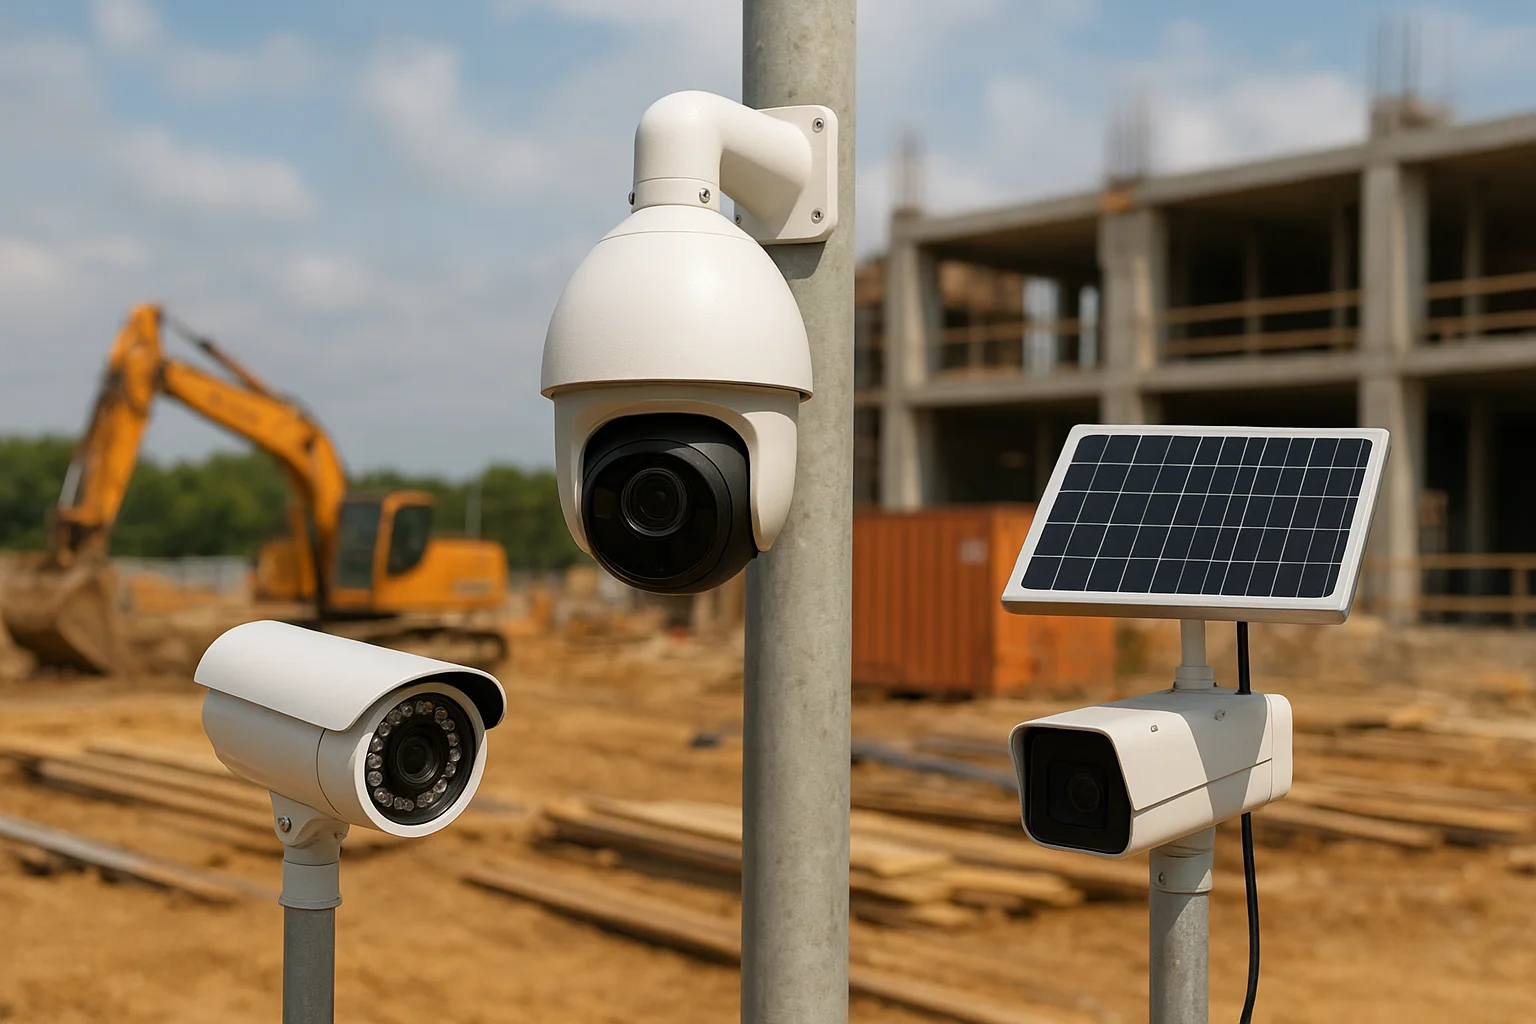
Pan-tilt-zoom (PTZ) cameras cover larger areas from a single mounting point by rotating horizontally and vertically while zooming in on activity. A single PTZ camera can replace three to four fixed bullet cameras in equipment yards or along long perimeter sections. PTZ systems cost $800 to $2,500 per camera but reduce installation expenses when you need wide coverage. The mechanical components require more maintenance than fixed cameras, making them better suited for longer projects exceeding six months.
Solar-powered cellular cameras solve connectivity problems on remote sites without electrical infrastructure or internet access. These units include built-in 4G LTE modems, rechargeable batteries, and solar panels that keep cameras running indefinitely. Expect to pay $300 to $600 per camera plus monthly cellular data fees ranging from $15 to $40. Battery life varies from 30 to 90 days on a full charge, and solar panels extend operation indefinitely in locations receiving four or more hours of daily sunlight.
Prioritize essential features first
Start with minimum resolution of 1080p (2MP) for any camera that needs to capture license plates or identify faces clearly. Higher resolutions like 4K provide better evidence but require more storage space and cellular bandwidth. Night vision capability ranks as the second most critical feature because most theft occurs after dark when sites sit empty. Infrared LEDs illuminate areas up to 100 feet, while more expensive models use color night vision with built-in spotlights.
Motion detection with customizable zones lets you receive alerts only when activity occurs in specific areas you designate. Set detection zones to exclude roads, sidewalks, or areas with routine traffic that trigger constant false alerts. Two-way audio adds another layer of deterrence by letting you speak warnings to intruders through the camera's speaker. Weatherproof ratings of IP66 or higher protect cameras from dust, rain, and temporary water submersion during storms.
Cellular connectivity eliminates dependence on unreliable jobsite WiFi and keeps cameras recording even when internet service fails.
Cloud storage removes the risk of losing evidence when someone steals or damages recording equipment. Most vendors charge $5 to $20 per camera monthly for 30 to 90 days of stored footage. Local storage using SD cards or network video recorders (NVRs) costs nothing ongoing but requires physical security for the recording device.
Evaluate vendors and pricing models
Compare rental versus purchase costs based on your project timeline. Renting makes financial sense for projects under six months, with typical costs of $150 to $400 per camera monthly including installation, monitoring, and removal. Purchasing cameras costs more upfront at $200 to $2,500 per unit plus installation fees of $100 to $300 per camera, but you own the equipment for future projects.
Major vendors provide different service models. Some companies handle installation, monitoring, and maintenance as bundled packages. Others sell cameras directly and leave installation to you. Request quotes from three vendors with your site diagram, camera locations, and feature requirements. Compare total cost of ownership including hardware, installation, monthly fees, and contract terms before committing.
Step 4. Install, test, and maintain your system
Professional installation ensures your cameras work correctly from day one and eliminates problems that waste weeks of troubleshooting. Mount cameras at heights between 10 and 15 feet to balance theft deterrence with clear facial recognition quality. You want intruders to see the cameras immediately while keeping lenses positioned to capture faces rather than the tops of heads. Rushed installations create blind spots, loose connections that fail during storms, and mounting angles that miss critical activity zones you need to monitor.
Mount cameras and run connections
Start with cameras covering your highest-priority zones from Step 2, then work outward to medium and low-risk areas. Use galvanized mounting brackets rated for outdoor use and capable of supporting at least twice the camera's weight. Secure brackets to metal poles, wooden posts, or concrete walls using lag bolts or concrete anchors rated for 100 pounds minimum pull strength. Aim camera lenses 5 to 10 degrees downward from horizontal to reduce glare from sunlight and headlights while maintaining coverage of ground-level activity.
For wired cameras, run network cables through weatherproof conduit to protect connections from damage by equipment, weather, and tampering. Use outdoor-rated Cat6 Ethernet cable for Power over Ethernet (PoE) systems that supply both data and power through a single connection. Label both ends of every cable with the camera's zone name and mounting location before connecting to your network video recorder or router. This labeling saves hours of troubleshooting when you need to identify specific cameras later.
Configure settings and verify coverage
Log into each camera's admin interface and change default usernames and passwords immediately to prevent unauthorized access. Set recording quality to 1080p or higher, enable motion detection zones that exclude areas with routine traffic, and configure alert notifications to your phone and email. Test motion detection by walking through each camera's coverage zone while watching the live feed from your monitoring device.
Testing cameras under actual jobsite conditions reveals problems that manufacturer specifications and installation checklists miss entirely.
Verify night vision performance after sunset by checking footage quality in the darkest areas of your site. Infrared LEDs should illuminate faces clearly at distances matching your coverage requirements from Step 2. Adjust camera angles and detection zones based on actual performance rather than theoretical coverage calculations. Walk your site perimeter at night and confirm that every high-risk zone shows clear, usable footage.
Schedule routine maintenance checks
Inspect cameras weekly during the first month to catch loose connections, obstructed views, or power issues before they compromise your security. Check mounting brackets for rust or loosening caused by vibration from nearby equipment or wind. Clean camera lenses monthly using microfiber cloths to remove dust, mud splatter, and construction residue that degrades image quality. Test alert notifications by triggering motion detection deliberately and confirming you receive notifications within 60 seconds.
Battery-powered and solar cameras need quarterly checks. Verify battery charge levels remain above 50 percent between charges, and clean solar panels to maintain charging efficiency. Review stored footage monthly to confirm your system captures usable evidence and adjust settings based on real-world performance. Document every maintenance visit with dates, actions taken, and problems discovered for warranty claims and insurance documentation.
Next steps for your jobsite
Your construction site security cameras work only as well as your planning and installation process. You now have a complete framework for choosing equipment, positioning cameras strategically, and maintaining reliable surveillance that protects your assets from theft and vandalism. Start by creating your site diagram and identifying high-risk zones before you contact vendors or purchase equipment. That preparation ensures you buy exactly what you need without wasting budget on unnecessary features that do not match your project requirements.
Construction projects demand specialized technology solutions that generic residential systems cannot deliver reliably under harsh jobsite conditions. If you manage multiple construction sites or need integrated security that connects with access control, lighting, and remote monitoring systems, professional installation eliminates the guesswork and potential failures that cost you time and money. Schedule a consultation with our builder program to discuss custom security solutions designed specifically for construction environments in the Treasure Valley area.