A poorly equipped conference room costs you more than you think. Missed audio during client calls, fumbling with cables before presentations, and displays that won't connect, these small frustrations...
Conference Room AV Installation: Step-by-Step Setup Guide
A poorly equipped conference room costs you more than you think. Missed audio during client calls, fumbling with cables before presentations, and displays that won't connect, these small frustrations add up to lost productivity and unprofessional impressions. Conference room AV installation done right eliminates these headaches and transforms your meeting space into a tool that actually works for your team. Whether you're upgrading an existing room or building out a new space, getting the setup right from the start saves time, money, and countless future problems.
This guide walks you through the entire process, from assessing your room's specific needs to selecting the right equipment and completing a professional installation. You'll learn what components matter most, how to plan for future scalability, and which common mistakes to avoid during setup. We've designed this as a practical resource you can reference whether you're coordinating with installers or evaluating what your space truly requires.
At Treasure Valley Solutions, we've installed AV systems in conference rooms across the Boise metro area since 2014. This guide reflects what we've learned from hundreds of commercial projects, practical knowledge that helps Idaho businesses build meeting spaces that perform reliably, day after day.
What a complete conference room AV install includes
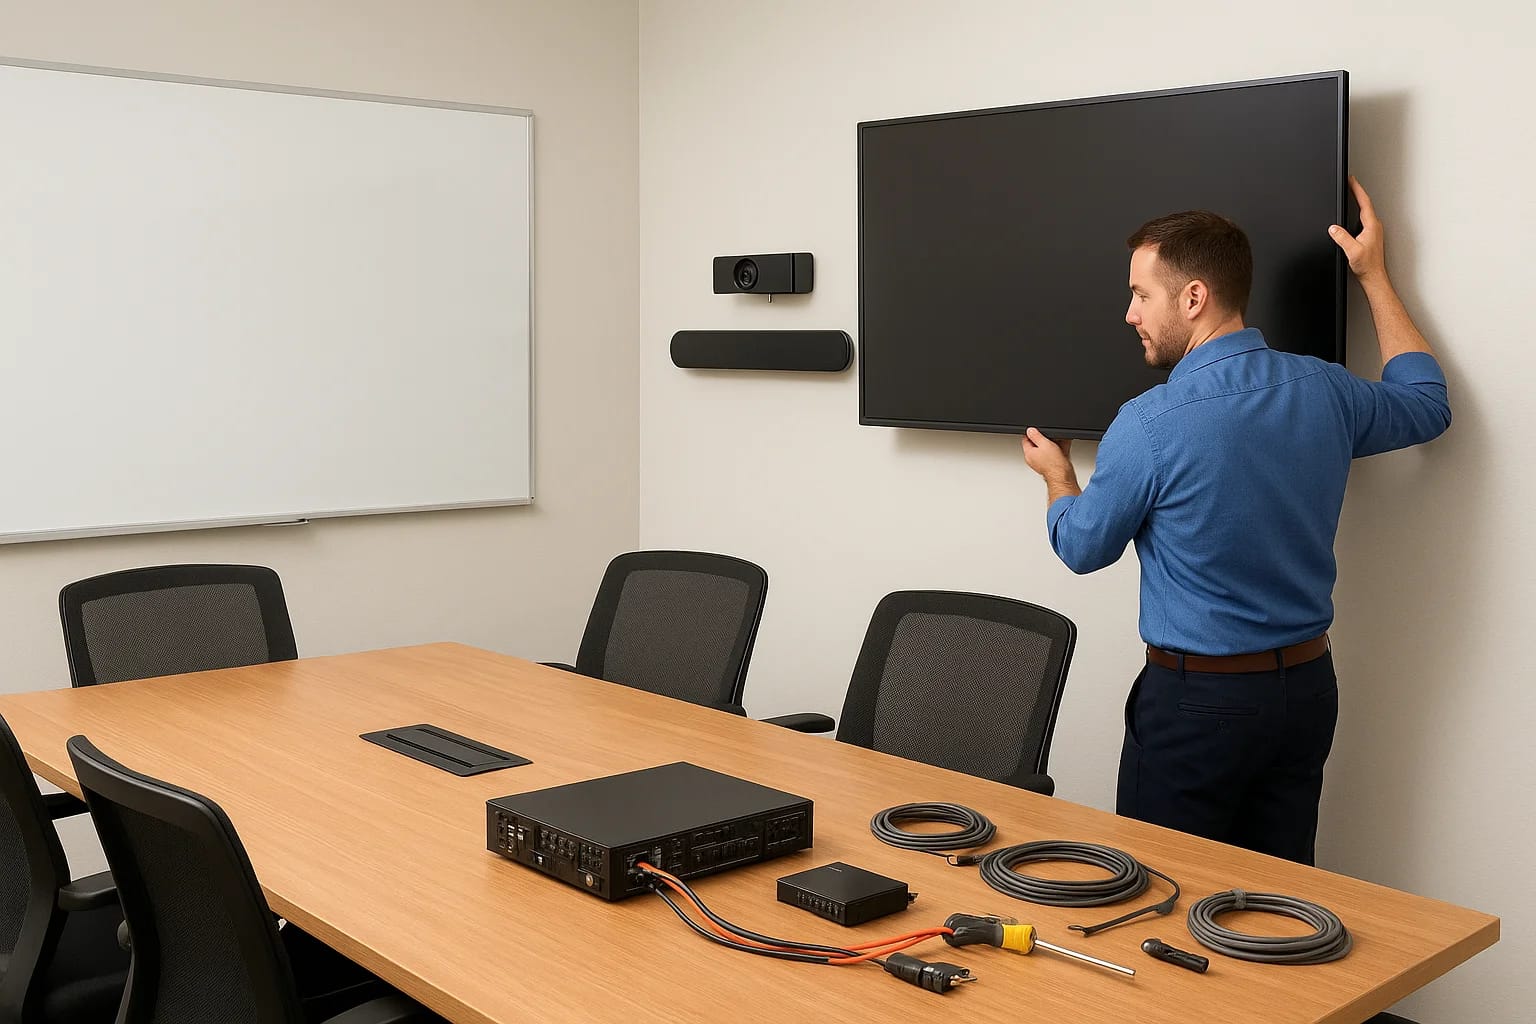
A complete conference room AV installation goes far beyond hanging a screen and plugging in a projector. You need integrated systems that work together seamlessly, from the moment someone walks into the room until they disconnect from the video call. Understanding every component before you start prevents budget surprises and ensures your room functions as intended from day one. Most installations fail because they skip crucial elements or treat the project as separate purchases rather than a coordinated system.
Display and presentation equipment
Your display serves as the visual centerpiece of any conference room, and you need to match it to your room size and seating arrangement. For spaces under 200 square feet, a 65 to 75-inch display typically provides adequate visibility for all participants. Larger boardrooms require 85-inch displays or multiple screens to ensure everyone sees content clearly from any seat. Interactive displays add touch functionality for collaborative work sessions, while projection systems work better in spaces where ambient light control isn't an issue.

Mount selection matters as much as the display itself. Fixed wall mounts work for dedicated conference rooms, while mobile stands offer flexibility in multipurpose spaces. You'll also need reliable input switching to handle laptops, tablets, and other devices without technical delays. HDMI connections remain the standard, but wireless presentation systems eliminate cable clutter and let participants share content from any location in the room.
Audio components
Clear audio determines whether your meetings succeed or fail, yet many installations treat it as an afterthought. Ceiling-mounted speakers provide even sound distribution without consuming table or floor space, while beamforming microphones capture voices accurately without picking up keyboard noise or HVAC hum. Standard conference rooms need at least two microphones to cover the full table, and larger spaces require arrays that automatically focus on active speakers.
Professional audio installations include DSP (digital signal processing) to eliminate echo, adjust volume automatically, and ensure remote participants hear everyone clearly without manual adjustments.
Soundbars offer an all-in-one solution for smaller rooms, combining speakers and microphones in a single unit. However, rooms larger than 300 square feet benefit from separate speaker and microphone systems that provide better coverage and audio quality. You also need proper acoustic treatment on walls and ceilings in reverberant spaces, otherwise even expensive equipment won't deliver clear sound.
Video conferencing hardware
Dedicated video conferencing cameras outperform laptop webcams in every scenario. Pan-tilt-zoom cameras let you frame the entire room or focus on specific speakers, while wide-angle fixed cameras work well in smaller spaces with consistent seating arrangements. Position cameras at eye level, centered on the display, so remote participants see natural perspectives rather than awkward angles looking up or down.
Auto-framing technology tracks participants and adjusts the view automatically, particularly valuable in rooms where attendance varies between meetings. You need sufficient network bandwidth to support high-definition video, typically 4 to 8 Mbps upload speed per room depending on your platform. Hardwired Ethernet connections eliminate the wireless dropouts that plague Wi-Fi-based systems during critical presentations.
Control systems and connectivity
Touch panels, wall-mounted controllers, or tablet interfaces give users one-tap control over the entire room. Your control system should power on displays, select input sources, adjust volume, and start video calls without requiring technical knowledge. Cable management systems built into conference tables provide clean access to HDMI, USB, and power connections where participants need them.
Room scheduling displays outside the door integrate with your calendar system to show availability and upcoming meetings. This prevents double-booking and helps teams find open spaces quickly. USB extenders bring computer connectivity to the table while keeping processing equipment in accessible racks or closets.
Infrastructure and support
Behind every successful conference room AV installation sits structured cabling, adequate power, and network infrastructure that support all components reliably. You need dedicated circuits for AV equipment, cable pathways that allow future upgrades, and network switches that prioritize video traffic. Proper rack mounting keeps equipment organized and serviceable, while environmental controls prevent overheating in equipment closets.
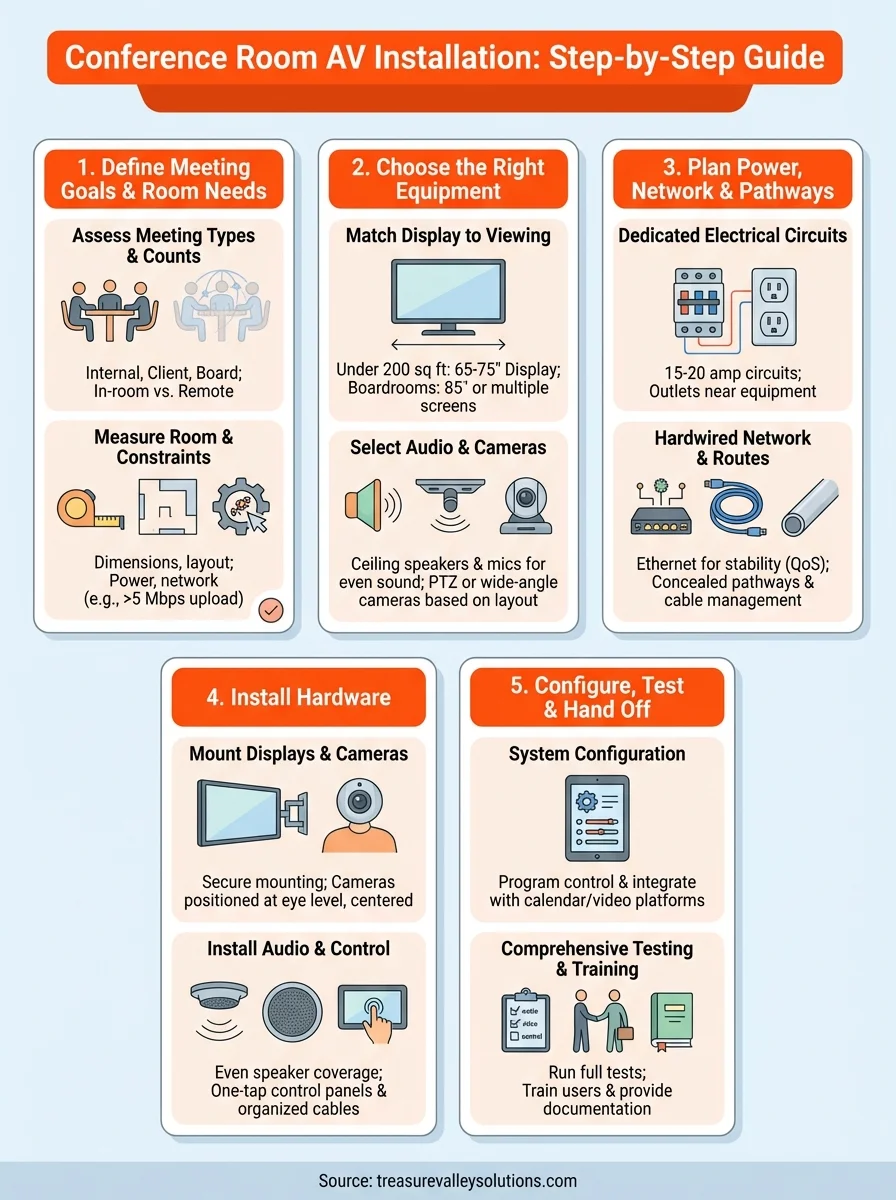
Step 1. Define meeting goals and room needs
Before you purchase any equipment or contact installers, you need a clear picture of how your team will actually use the space. Conference room AV installation projects fail when they optimize for the wrong meeting types or overlook critical usage patterns. You might assume every room needs identical capabilities, but a huddle space for quick team check-ins requires completely different equipment than a boardroom hosting client presentations. Spend time documenting your specific needs now to avoid expensive do-overs later.
Assess meeting types and participant counts
Start by identifying every meeting format your room will support. Internal team meetings typically need basic screen sharing and clear audio, while client presentations demand higher-quality displays and professional camera work. Training sessions benefit from interactive displays, and board meetings require recording capabilities for documentation purposes. List each meeting type your team runs weekly, then note how many people typically attend.
Count both in-room and remote participants separately because this ratio determines your equipment priorities. A room where six people meet while two join remotely needs different audio coverage than one where two people coordinate with twelve remote team members. Track these patterns for at least two weeks to capture realistic usage rather than ideal scenarios.
Measure room dimensions and layout
Physical measurements drive equipment selection more than any other factor. Measure your room's length, width, and ceiling height in feet, then note window locations, existing electrical outlets, and network jack positions. Photograph the space from multiple angles to reference during planning conversations with installers.
Room shape affects audio quality significantly. Rectangular rooms perform better than square ones, while rooms with odd angles create acoustic challenges that require additional treatment.
Document your seating arrangement and table configuration with actual dimensions. Note the distance from the farthest seat to where you'll mount the display, as this determines minimum screen size. Mark any permanent fixtures like columns or built-in cabinets that might obstruct sightlines or equipment placement.
Identify technical constraints and connectivity needs
Check your existing network infrastructure by locating Ethernet jacks and confirming their connection speed. Most video conferencing platforms require at least 5 Mbps upload speeds, so test your current bandwidth during peak usage hours. Document any IT policies that restrict certain devices or require specific security protocols.
Note power outlet locations and confirm your electrical panel has capacity for additional circuits if needed. Identify where equipment racks can go, considering both accessibility for maintenance and distance from presentation areas. List any integration requirements with existing systems like room scheduling displays or building automation.
Step 2. Choose the right equipment for the space
Equipment selection makes or breaks your conference room av installation, yet most buyers start with price rather than performance requirements. You need to match each component to your documented room specifications from Step 1, considering viewing angles, acoustic properties, and participant layouts. Generic equipment packages rarely fit specific spaces perfectly, and buying oversized components wastes budget while undersized gear frustrates users daily. Your goal is finding the right balance between capability and cost based on actual room dimensions and usage patterns.
Match display size to viewing distance
Calculate your minimum display size using the simple formula: viewing distance in feet divided by 1.5 equals diagonal screen size in inches. A room where the farthest seat sits 12 feet from the display needs at least an 80-inch screen for comfortable viewing. For collaborative work requiring detailed content like spreadsheets or CAD drawings, reduce the divisor to 1.2 for larger recommendations.
The most common display mistake is choosing based on available budget rather than required viewing distance, resulting in participants squinting at undersized screens during critical presentations.
Compare these display options based on your room size:
- Small rooms (up to 200 sq ft): 55 to 65-inch LED display
- Medium rooms (200 to 400 sq ft): 75 to 85-inch LED display or short-throw projector
- Large rooms (400+ sq ft): Dual displays, 85+ inch LED, or laser projector
- Boardrooms: Interactive touch display with annotation capability
Select audio components for room acoustics
Your room's acoustic properties determine microphone and speaker requirements more than room size alone. Hard surfaces like glass, concrete, or tile create echo that standard microphones amplify, while carpeted rooms with acoustic ceiling tiles need less processing. Test your space by clapping once and listening for reverb duration.
Microphone selection depends on table configuration and participant mobility. Ceiling-mounted beamforming arrays work best in rooms with consistent seating, capturing voices from fixed zones without tabletop clutter. Tabletop boundary microphones suit U-shaped or boardroom tables where participants sit close to the surface. Wireless microphones become necessary in training rooms where presenters move around frequently.
Pick cameras based on participant layout
Camera selection hinges on seating depth and width coverage in your specific room. Standard conference rooms with single-row seating around a table need 90 to 110-degree field-of-view cameras positioned at the display. Tiered seating or classroom-style arrangements require pan-tilt-zoom cameras that track speakers and adjust framing automatically.
Position matters as much as equipment choice. Mount cameras directly above or below the primary display at seated eye level, approximately 48 inches from the floor. Side-mounted cameras create awkward angles where participants appear to look away from remote attendees. For rooms hosting 12 or more in-person participants, dual cameras provide better coverage than a single wide-angle lens.
Step 3. Plan power, network, and cable pathways
Infrastructure planning determines whether your conference room av installation stays reliable or creates maintenance headaches for years. You need adequate power capacity, robust network connections, and organized cable routing before any equipment arrives. Skipping this step forces installers to run extension cords, rely on wireless connections prone to dropouts, and create visible cable messes that detract from your professional space. Proper infrastructure planning happens on paper first, documenting every power drop, network run, and cable pathway before drilling a single hole.
Map dedicated electrical circuits
Start by calculating total power requirements for all equipment you selected in Step 2. Add the wattage ratings from displays, projectors, amplifiers, and processors, then multiply by 1.25 to account for startup surge. Most conference room systems require 15 to 20 amp dedicated circuits, separate from general office outlets that power computers and task lighting.
Position electrical outlets within six feet of equipment locations to eliminate extension cords and power strips. Place outlets behind displays, near equipment racks, and at cable management points in conference tables. Install surge-protected circuits or add whole-system surge suppressors to protect expensive AV components from power spikes.
Design network connectivity
Hardwired Ethernet connections outperform Wi-Fi for video conferencing equipment every time. Run Cat6 or Cat6a cable to each display location, camera position, and equipment rack, providing gigabit speeds with headroom for future upgrades. Video conferencing systems need consistent bandwidth that wireless networks can't guarantee during high-traffic periods.
Network switches in AV equipment racks should support Quality of Service (QoS) settings that prioritize video traffic over standard data, preventing stuttering and freezing during critical video calls.
Create a network diagram showing each connection point and its purpose. Label cable runs at both ends so future technicians understand the system without tracing wires. Consider redundant network drops to primary equipment locations, providing backup connections if a cable fails.
Route cable pathways strategically
Plan concealed pathways through walls, ceilings, or floor channels before equipment installation begins. Conduit runs between equipment racks and display locations should accommodate current cables plus 50% extra capacity for future additions. Avoid running low-voltage AV cables parallel to electrical wiring for more than three feet, as this causes interference and hum in audio systems.

Document cable routing with measurements and photographs. Include pull points, junction boxes, and access panels in your plan. This documentation proves invaluable during troubleshooting or future upgrades when you need to understand the complete system layout.
Step 4. Install displays, audio, cameras, and control
Physical installation transforms your planning into a functional space, and this phase requires careful coordination between electrical work, mounting hardware, and cable management. You need to complete installations in the correct sequence, starting with infrastructure before moving to visible components. Rushing through mounting or skipping cable organization creates problems that become apparent during your first meeting when cables show, displays sit crooked, or components fail due to improper power or network connections. Professional conference room av installation follows a logical progression that prevents rework and ensures reliable long-term operation.
Mount displays and secure cables
Begin by locating wall studs and marking mounting points according to your plan from Step 3. Use a laser level to ensure displays hang perfectly horizontal, as even slight tilting becomes obvious during presentations. Secure mounting brackets to studs using lag bolts rated for your display weight, never drywall anchors alone. Run HDMI, power, and control cables through in-wall conduit before finalizing the display position, leaving slack at both ends for future adjustments.
Connect displays to their power circuits and test before closing walls or completing finish work. Verify that cable management systems concealed behind displays accommodate all current connections plus additional runs for future equipment.
Install audio components systematically
Mount ceiling speakers in positions that provide even coverage across all seating areas, maintaining symmetry for balanced sound distribution. Space speakers according to manufacturer specifications, typically 12 to 15 feet apart for conference rooms. Position microphones on the table centerline or mount ceiling arrays directly over primary seating locations to capture voices without picking up ambient noise.
Installation sequence matters critically: complete all speaker and microphone mounting before running cables to equipment racks, as this prevents cable length miscalculations that force reruns.
Wire audio components back to centralized DSP processors or amplifiers in equipment racks, labeling each cable at both termination points. Test microphone pickup patterns and speaker output before closing ceiling tiles or covering cable runs.
Position cameras and install control panels
Mount cameras at eye level centered on the primary display, ensuring participants look naturally toward remote attendees. Adjust pan-tilt-zoom cameras to cover the full seating area without clipping heads or capturing excessive dead space. Run USB or network cables to cameras using approved pathways, keeping video cables separated from power lines to prevent interference.
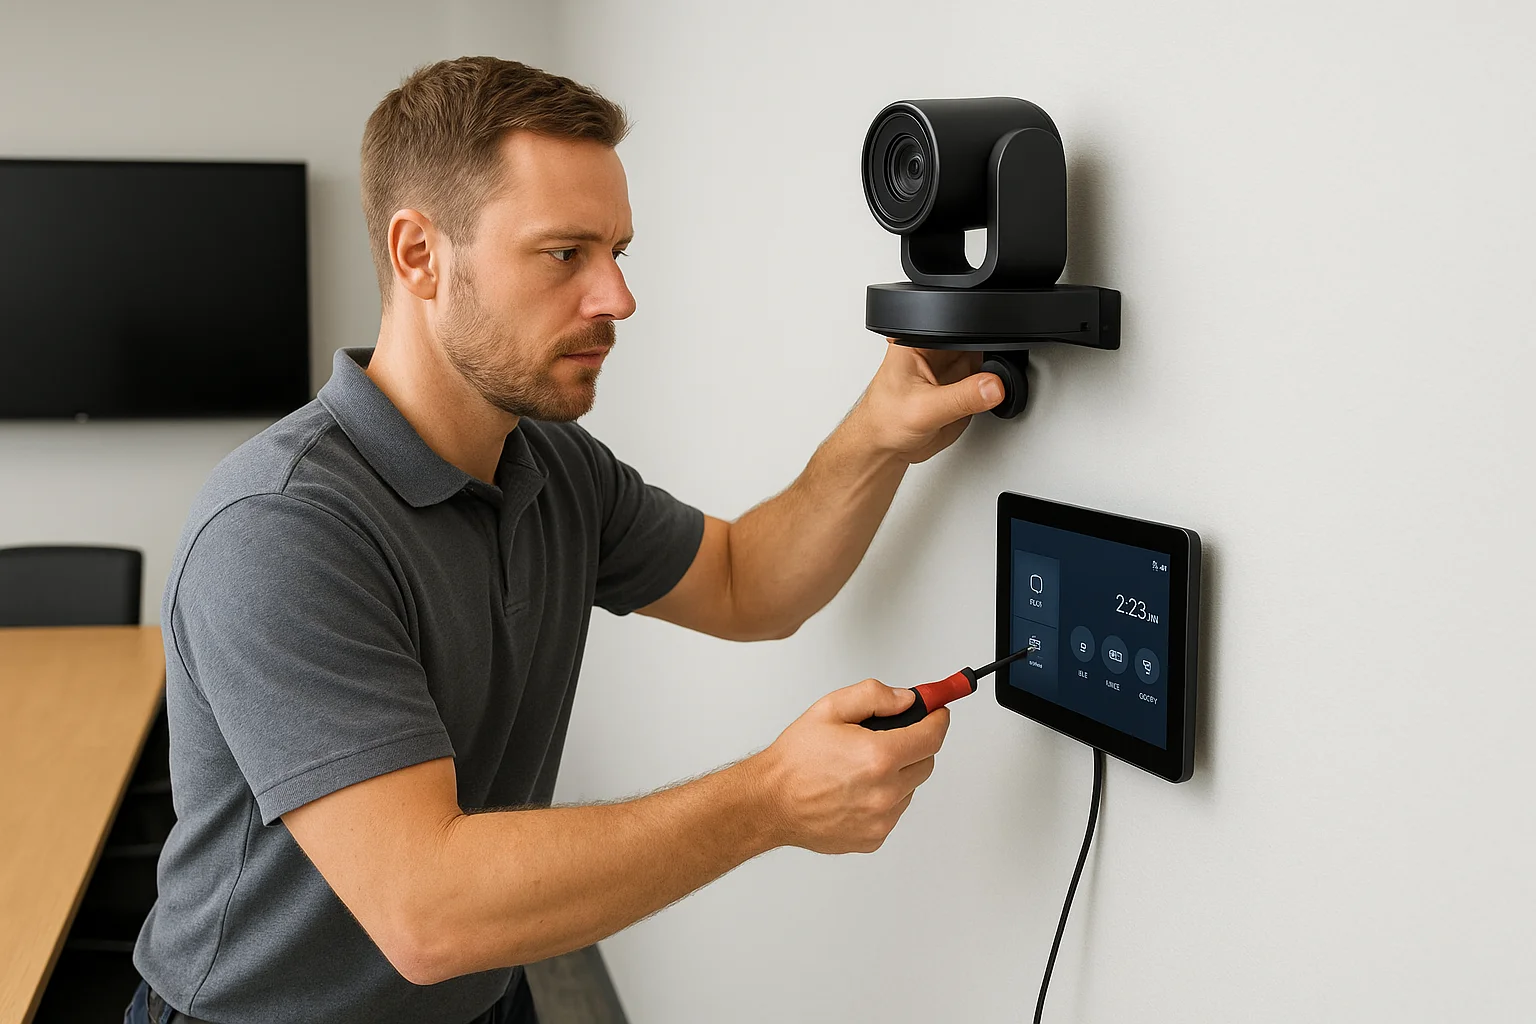
Install control panels within easy reach of meeting leaders, typically near the room entrance or at the head of the conference table. Mount tablets or touch panels securely, routing power and control cables through walls or furniture channels. Connect all control systems to the network and verify communication with displays, cameras, and audio processors before proceeding to testing.
Step 5. Configure, test, and hand off the room
Configuration and testing separate functional equipment from a reliable system that your team trusts. You've mounted hardware and connected cables, but nothing works together until you program control systems, calibrate audio levels, and verify every feature under real meeting conditions. This phase catches problems before your first important presentation, when a failed connection or unclear audio would damage your professional reputation. Take time to test thoroughly now rather than troubleshoot during client meetings later.
System configuration and integration
Start by programming your control system to execute every command users need. Configure one-touch buttons that power on displays, select input sources, adjust volume, and launch video conferencing platforms simultaneously. Set default volume levels based on room acoustics and microphone sensitivity, ensuring voices come through clearly without distortion or excessive echo.
Integrate your room with calendar systems like Microsoft Outlook or Google Calendar for automatic scheduling displays outside the door. Connect video conferencing hardware to your organization's preferred platforms, whether Zoom, Teams, or Webex. Save preset camera positions that frame common seating arrangements, eliminating manual adjustments before each meeting.
Professional conference room av installation includes DSP programming that automatically adjusts microphone gain, eliminates echo, and balances audio levels without manual intervention during meetings.
Configure network settings to prioritize video traffic through Quality of Service (QoS) rules on your switches. Test fail-over connections if you installed redundant network drops, verifying the system switches automatically when primary connections drop.
Run comprehensive system tests
Execute this testing checklist with at least two people, one in the room and one joining remotely:
- Display tests: Verify all input sources connect successfully, screen resolution displays correctly, and switching happens within three seconds
- Audio tests: Check microphone pickup from every seat, confirm speakers provide even coverage, test at normal and loud conversation volumes
- Video tests: Verify camera framing captures all participants, test pan-tilt-zoom functionality, confirm remote participants see clear images
- Control tests: Test every button on touch panels, verify wireless presentation systems connect reliably, ensure room scheduling displays update automatically
- Network tests: Run video calls during peak usage hours, measure actual bandwidth consumption, verify no dropouts occur
Document any issues immediately and resolve them before user training begins. Retest after adjustments to confirm fixes work correctly.
Train users and deliver documentation
Walk your team through complete meeting workflows from room entry to session end. Demonstrate how to start video calls, share content wirelessly, adjust camera framing, and troubleshoot common problems. Create quick-reference guides mounted near control panels showing step-by-step instructions for standard tasks.
Provide your IT team with technical documentation including network diagrams, equipment specifications, warranty information, and installer contact details. Schedule follow-up sessions two weeks after handoff to address questions that arise during actual use.
Wrap up and get the room meeting-ready
Your conference room av installation succeeds when every component works together seamlessly and your team trusts the system enough to use it without hesitation. You've defined your room requirements, selected appropriate equipment, planned infrastructure carefully, installed hardware correctly, and tested thoroughly under real conditions. These steps transform empty space into a productive meeting environment that supports both in-person collaboration and remote participation effectively.
Professional installation eliminates the guesswork and prevents costly mistakes that plague DIY projects. At Treasure Valley Solutions, we've completed hundreds of commercial AV installations across the Boise metro area since 2014, helping Idaho businesses create conference rooms that work reliably every day. Whether you need a simple huddle space or a complex boardroom system, we handle every phase from design through ongoing support. Contact our team to discuss your conference room project and receive a detailed quote based on your specific space and requirements.